Let's Bead A Flower Vase This Time
Hello, my dearest DIY friends, it's been a while since I shared my beadwork. Life has been like a whirlwind over here, in a good way, don't worry. And I'm happy to share this latest work of mine with you today; please come along, and I hope you love it.
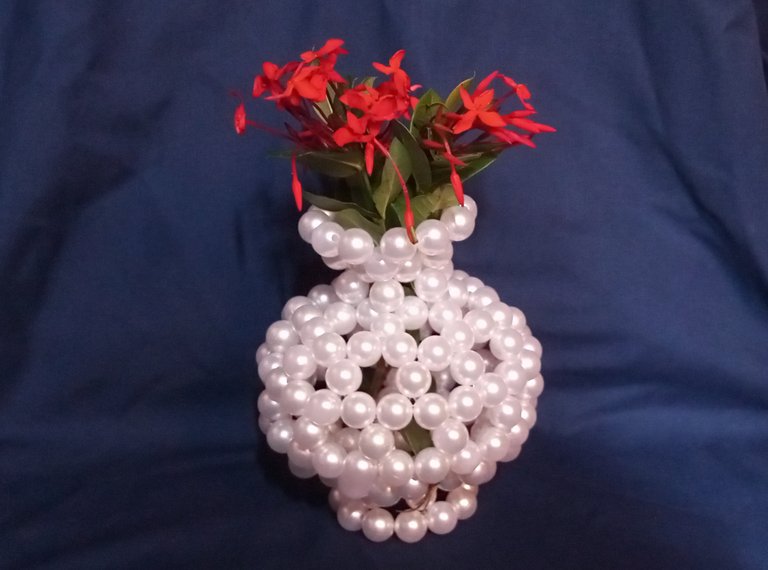
A client of mine needed a white pearl flower vase, and here is the step-by-step of the whole process.
Materials used: I used 178 pieces of size 14 white pearl beads, 0.6 fishing line, and a pair of scissors.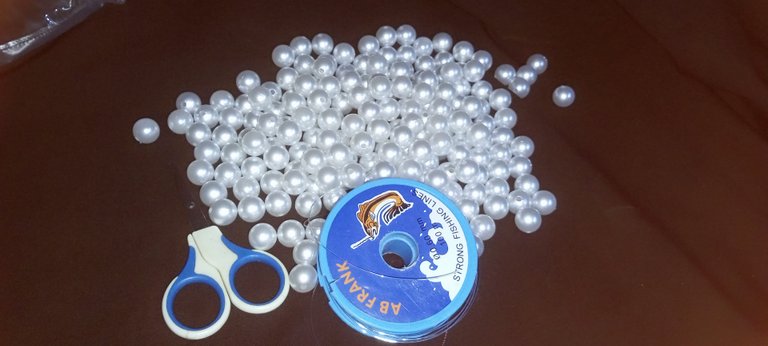
Step 1:
I started by putting 6 beads on a 200 cm fishing line, tying the knots, and pushing the knots inside one of the beads to make the work neat. 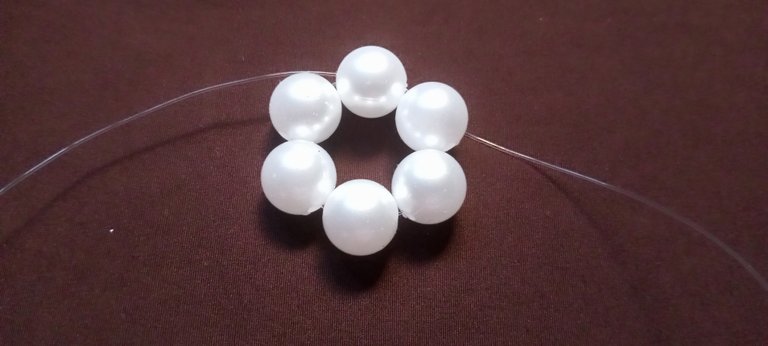
Step 2:
I put 4 beads on my left fishing line and then crossed both sides with a fourth bead.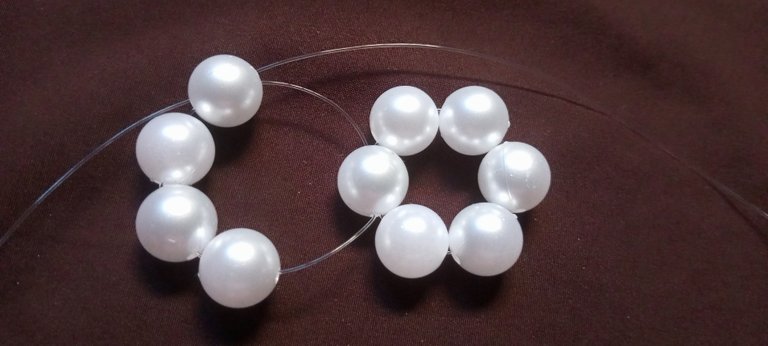
Step 3:
I continue to let my right fishing line through the next bead, then add three beads until I get to the last bead on this line.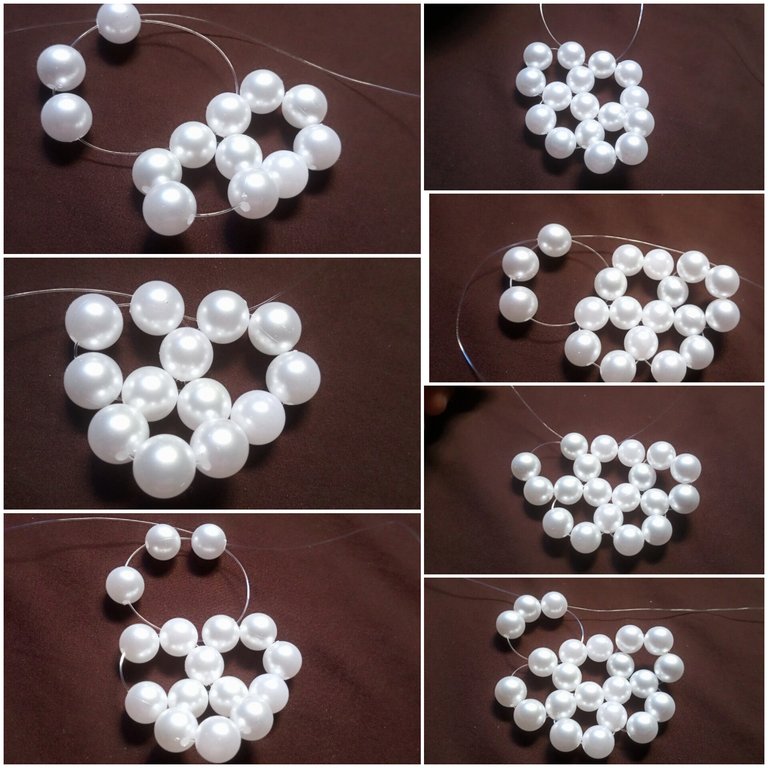
Step 4:
This is the last step on this line. I let my right fishing line through the next two beads and then put one bead in my left fishing line and tied the knots. To secure the work, I had to tie knots at the end of each line.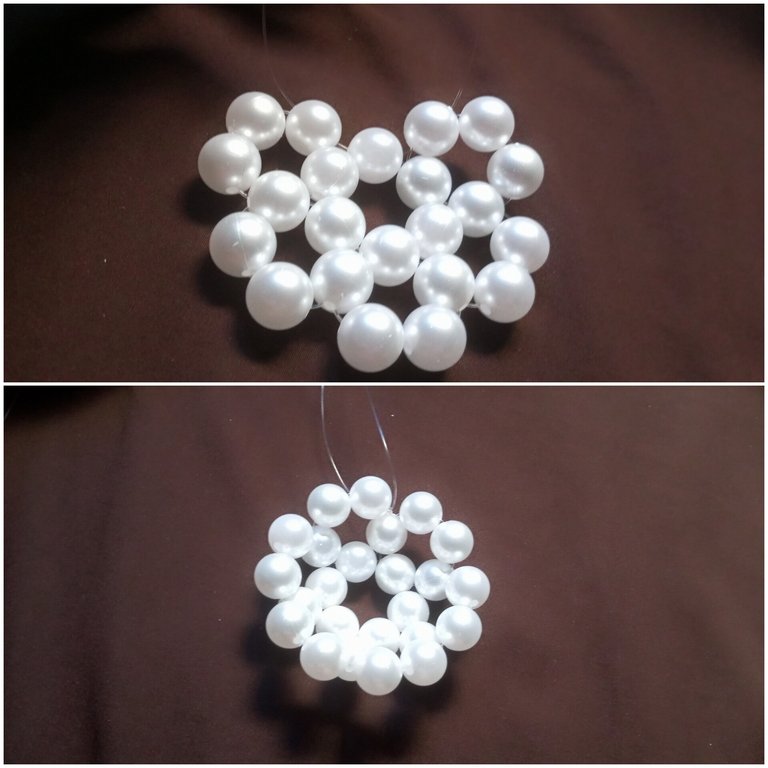
Step 5:
I let my two fishing lines crisscross one of the first six beads. Then put four beads on the left fishing line and cross both sides with the fourth bead.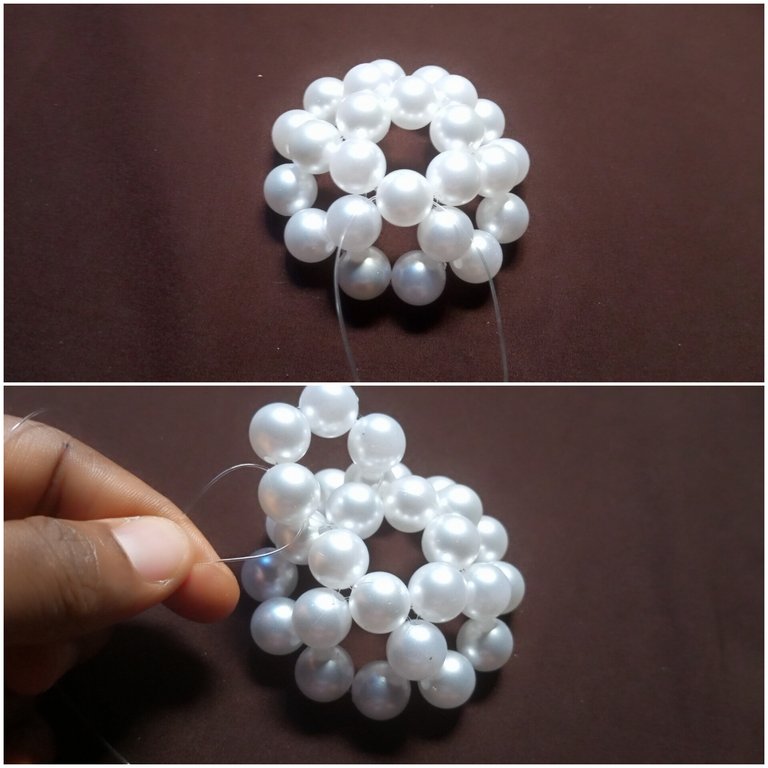
Step 6:
I passed my right fishing line through the next bead, put three beads on the left fishing line, and crossed both sides with the third fishing line.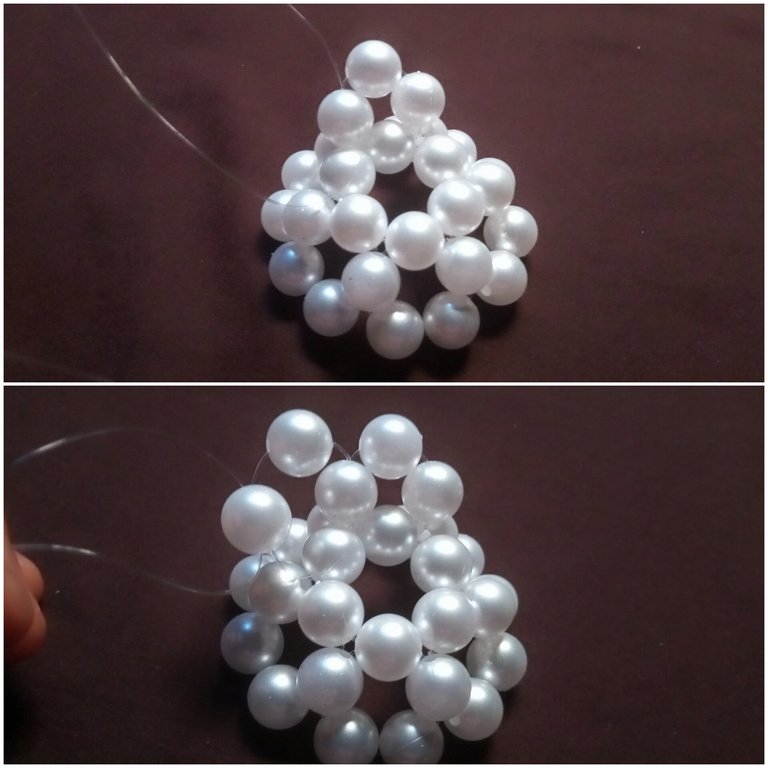
Step 7:
I repeated step 6 above twice, and on the next step, I let my right fishing line through the next two beads, put one bead on the left fishing line, and then tied knots to secure the work.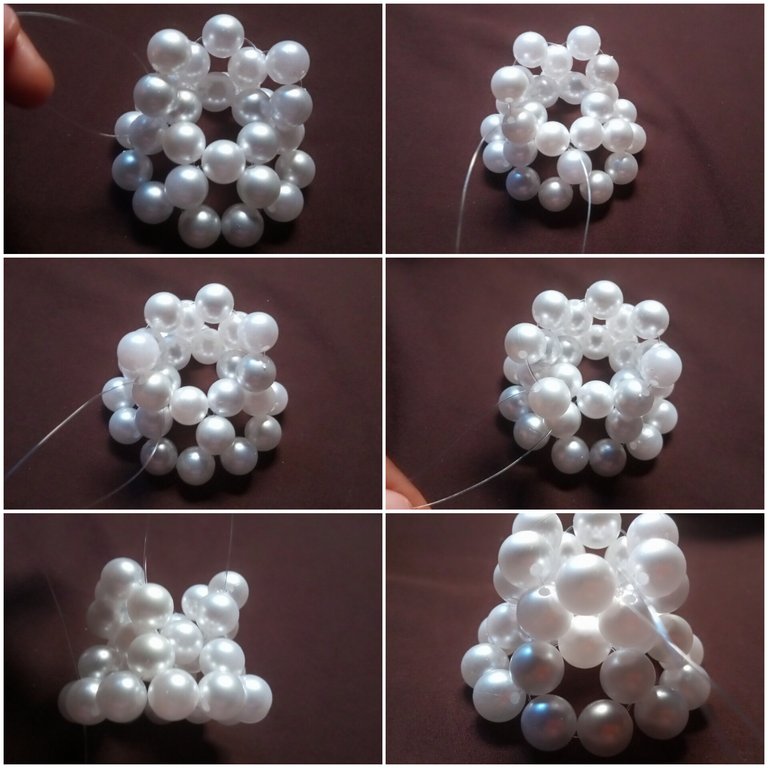
Step 8:
Before I start any step, I always make sure to pull the knots inside the closest bead to avoid them being visible. Then I went ahead to add five beads on the left fishing line and then crossed both lines with the fifth bead.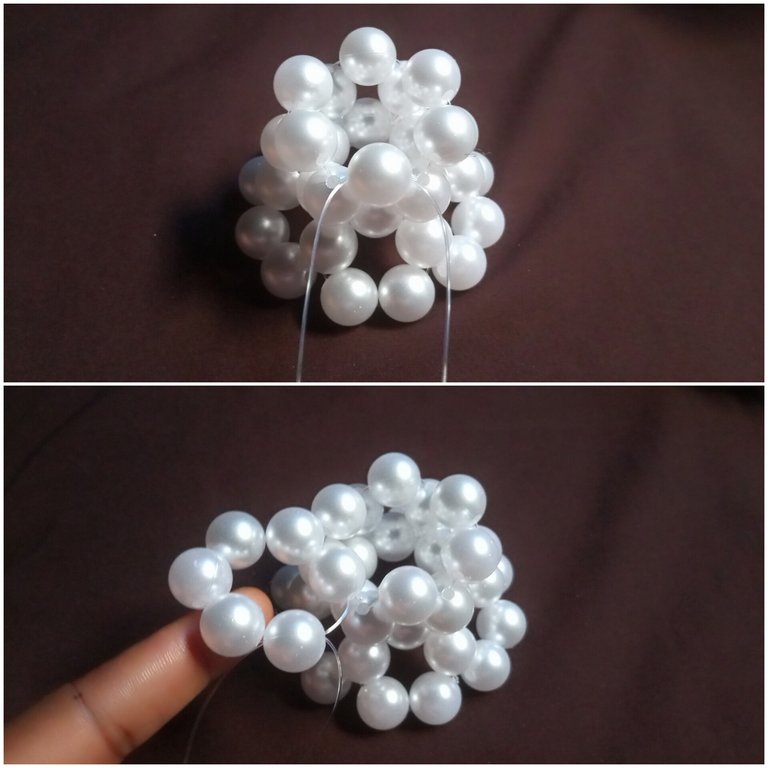
Step 9:
I continue to add four beads except for the last one, where I added three beads.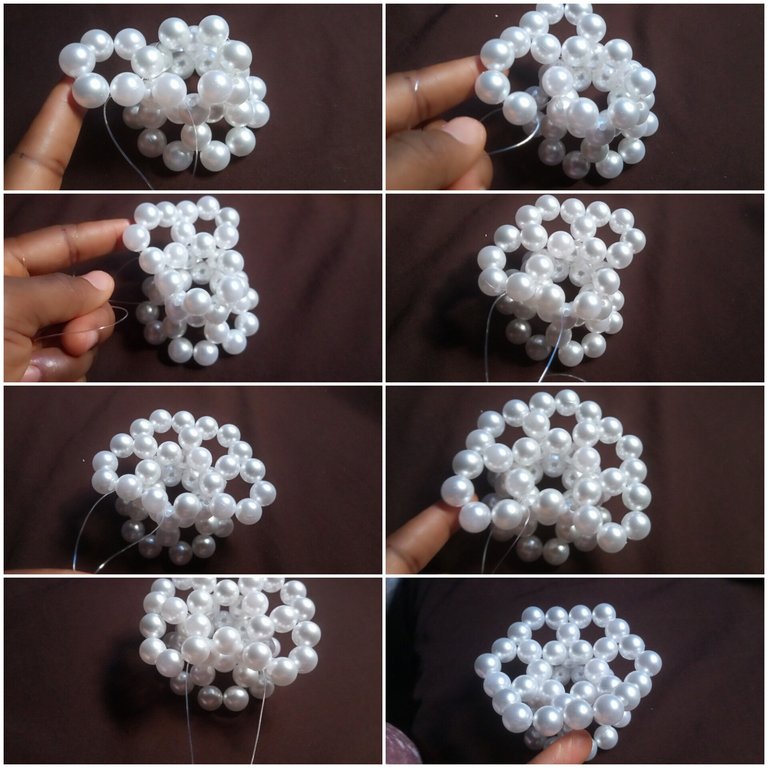
Step 10:
I passed my right fishing line through the next bead, put four beads on the right fishing line, and crossed both sides with the fourth bead.
Step 11:
I passed my right fishing line through the next bead, put three beads on the left fishing line, and crossed both sides with the third bead.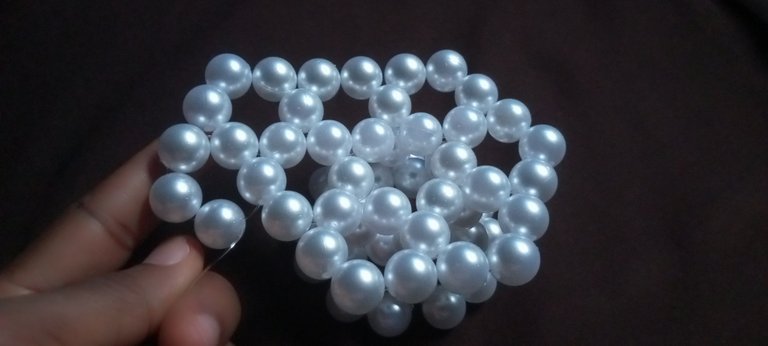
Step 12:
I passed my right fishing line through the next two beads, put three beads on the left fishing line, and crossed both sides with the third bead.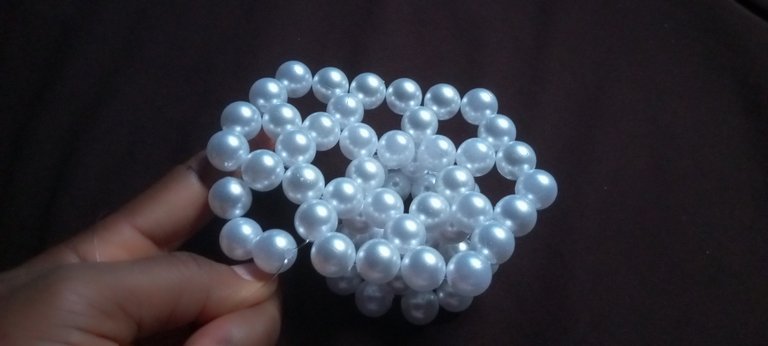
Step 13:
I passed my right fishing line through the next bead, put three beads on the left fishing line, and crossed both sides with the third bead.
Step 14:
I passed my right fishing line through the next two beads, put three beads on the left side, and crossed both sides with the third bead.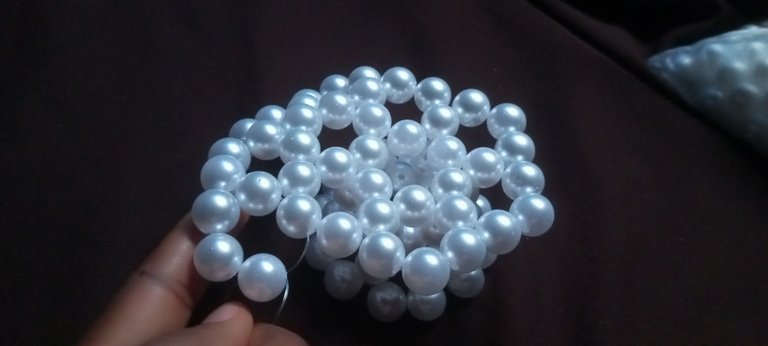
Step 15:
I passed my right fishing line through the next bead, put three beads on the left fishing line, and crossed both sides with the third bead.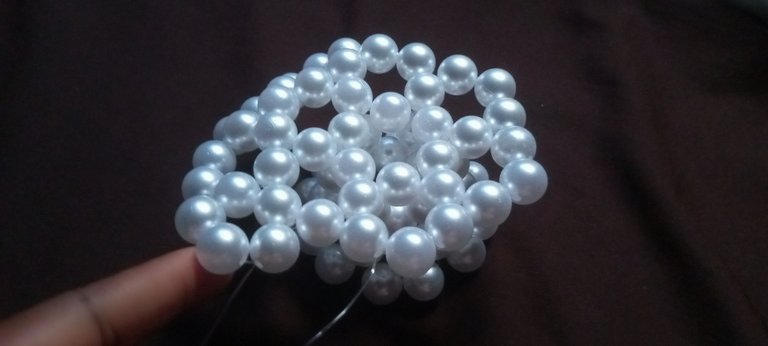
Step 16:
I passed my right fishing line through the next two beads, put three beads on the left fishing line, and crossed both sides with the third bead.
Step 17:
I passed my right fishing line through the next bead, put three beads on the left fishing line, and crossed both sides with the third bead.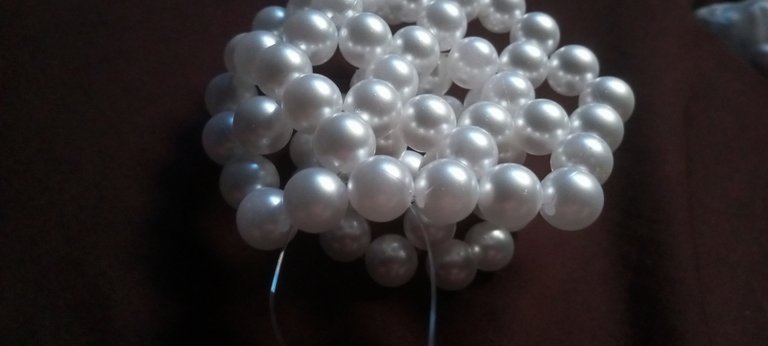
Step 18:
To finish up with this line, I passed my right fishing line through the next two beads, put two beads on the left fishing line, and tied the knots.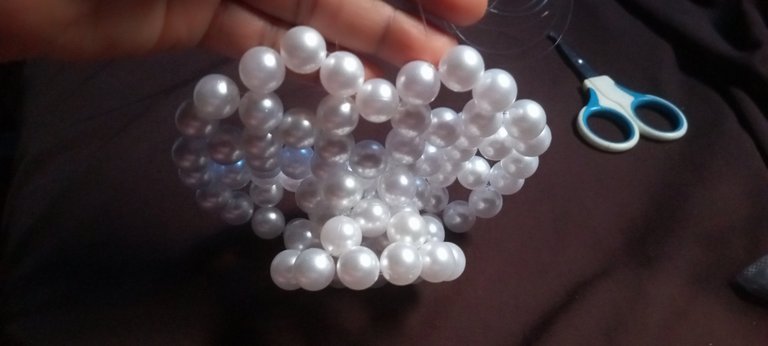
Step 19:
To start a new row, I put my right fishing line through the next bead, put four beads on the left fishing line, and crossed both sides with the fourth bead.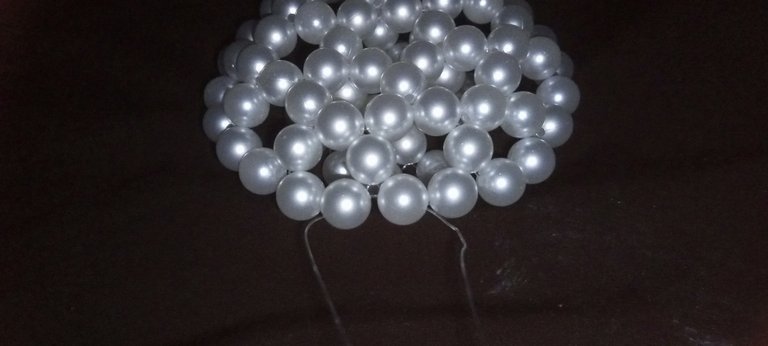
Step 20:
I passed my right fishing line through the next two beads, put three beads on the left fishing line, and crossed both sides with the third bead.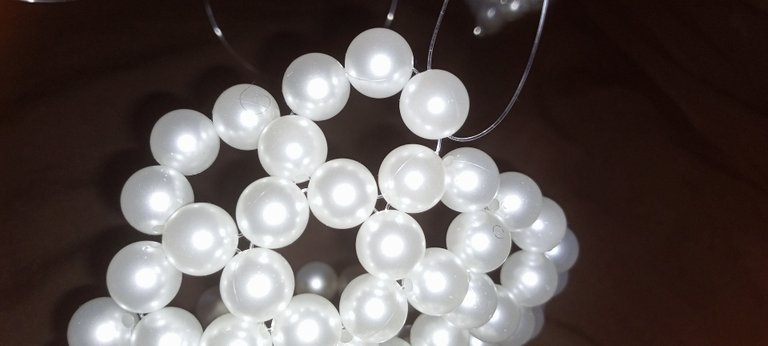
Step 21:
I passed my right fishing line through the next two beads, put three beads on the left fishing line, and crossed both sides with the third bead.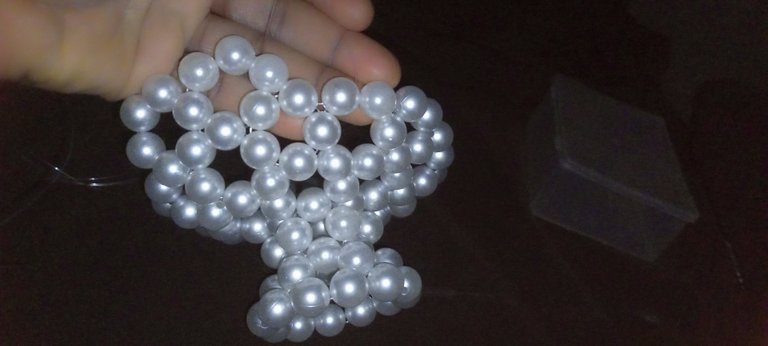
Step 22:
I continue to repeat step 22 above until at last I get to the three beads on the row.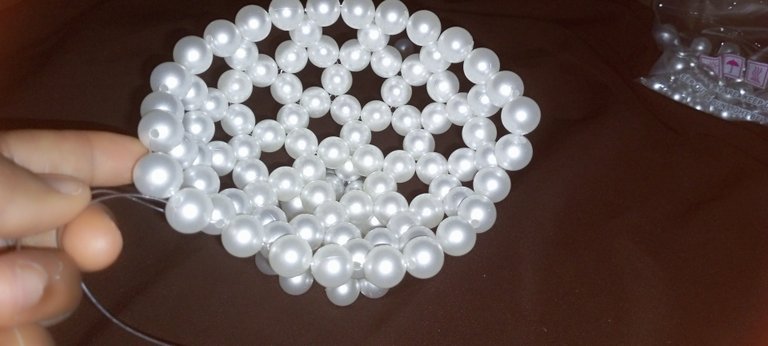
Step 23:
I passed my right fishing line through the next three beads, put two beads on the left fishing line, and tied the knots.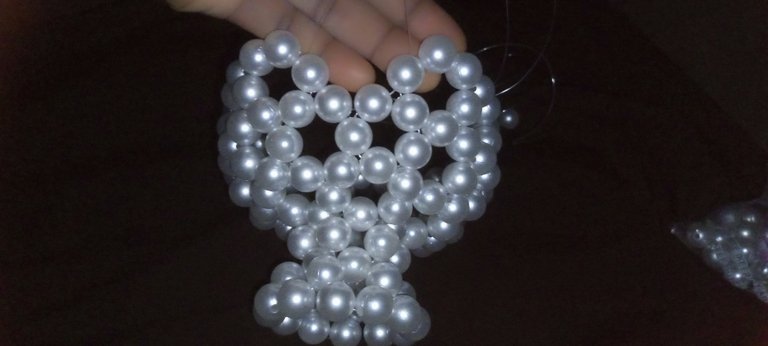
Step 24:
I make sure the knot is well hidden in the closest bead. I pass my right fishing line through the next bead, put three beads on the left fishing line, and cross both sides with the third bead. Again I passed my right fishing line through the next two beads, put two beads on the left fishing line, and crossed both sides with the second bead.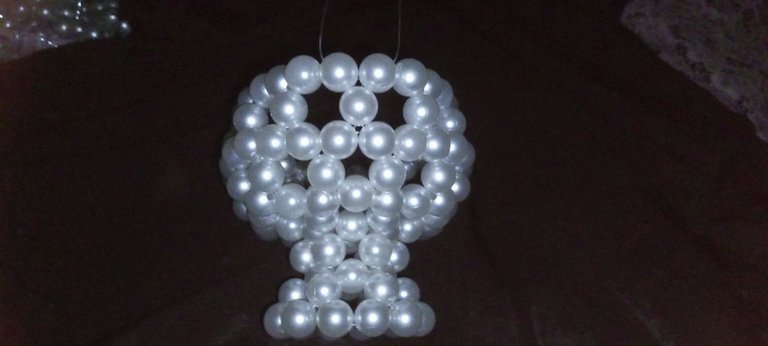
Step 25:
I again passed my right fishing line through the next two beads, put three beads on the left fishing line, and crossed both sides with the third bead.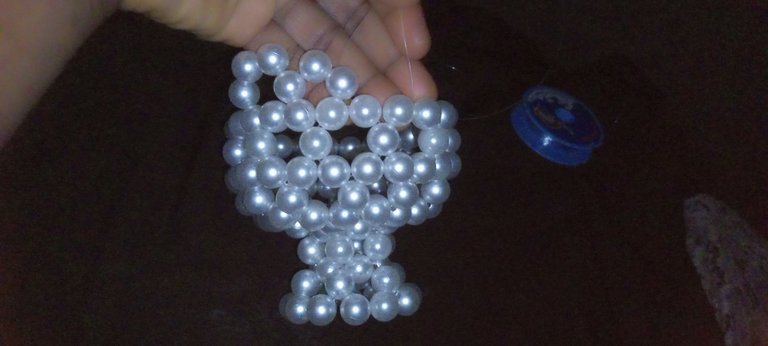
Step 26:
I continued to repeat step 25 above until I got to the last part of the row, where I passed my right fishing line through the next three beads, put one bead on the left fishing line, and tied the knots.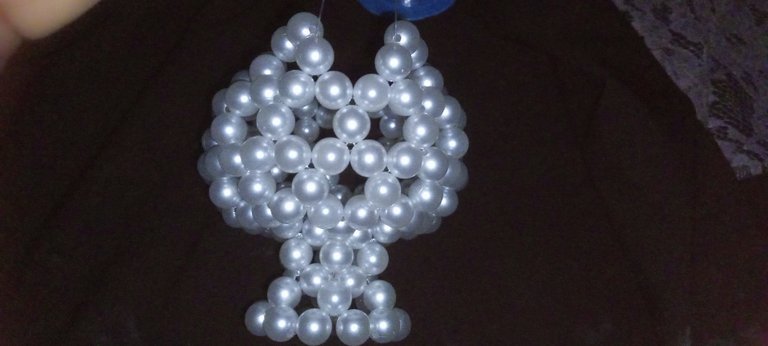

Step 27:
To start a new row, I passed my right fishing line through the next two beads, put three beads on the left fishing line, and crossed both sides with the third bead.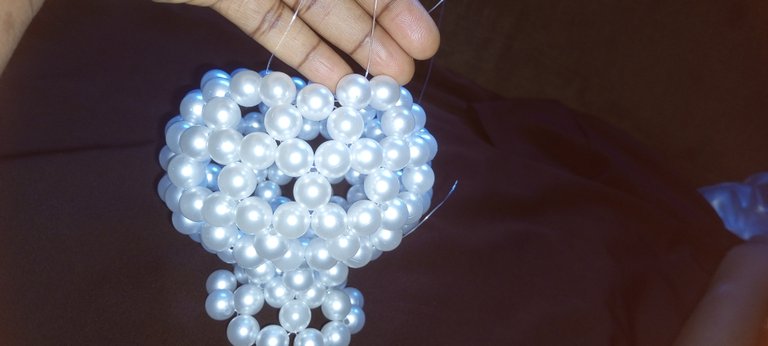

Step 28:
I passed my right fishing line through the next three beads, put two beads on the left fishing line, and crossed both sides with the second bead.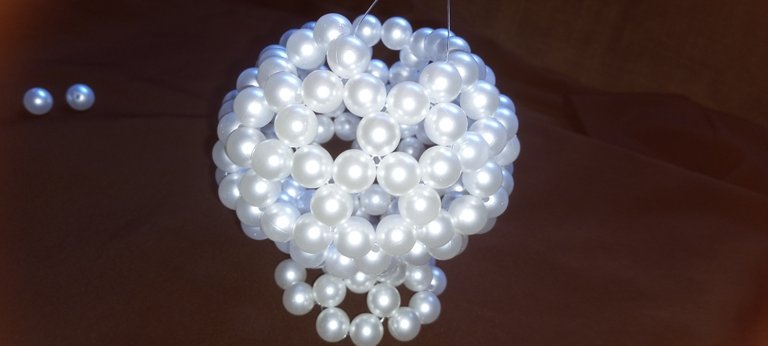
Step 29:
I passed my right fishing line through the next three beads, put two beads on the left fishing line, and crossed both sides with the second bead.
Step 30:
I passed my right fishing line through the next three beads, put two beads on the left fishing line, and crossed both sides with the second bead.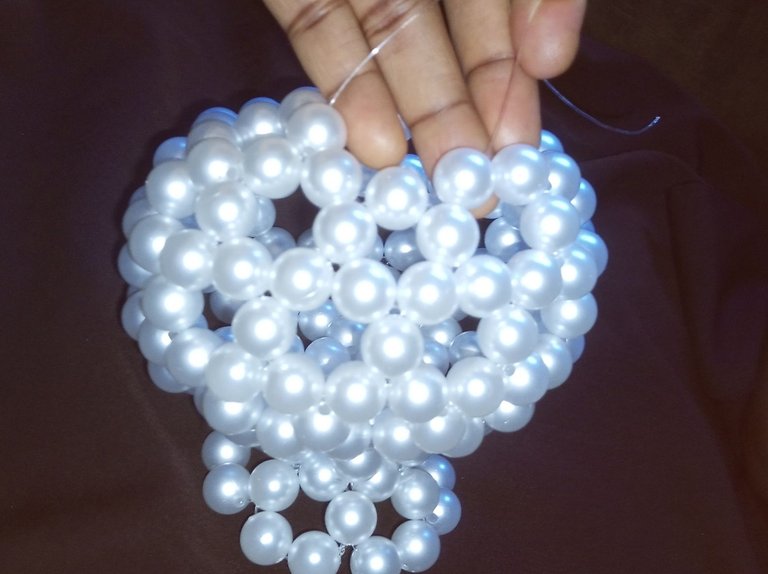
Step 31:
I passed my right fishing line through the next three beads, put two beads on the left fishing line, and crossed both sides with the second bead.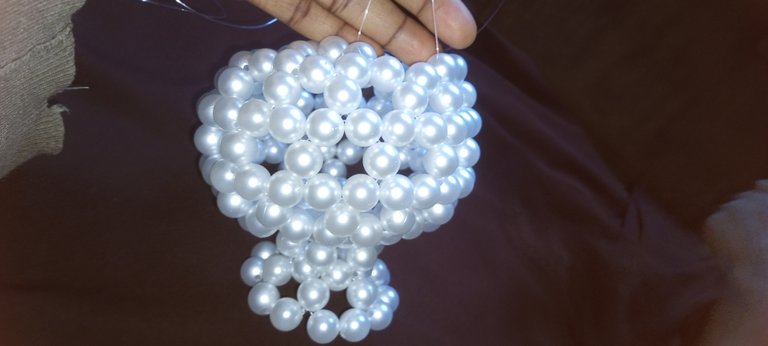
Step 32:
To end this row, I passed my right fishing line through the next three beads, put one bead on the left fishing line, and tied the knots.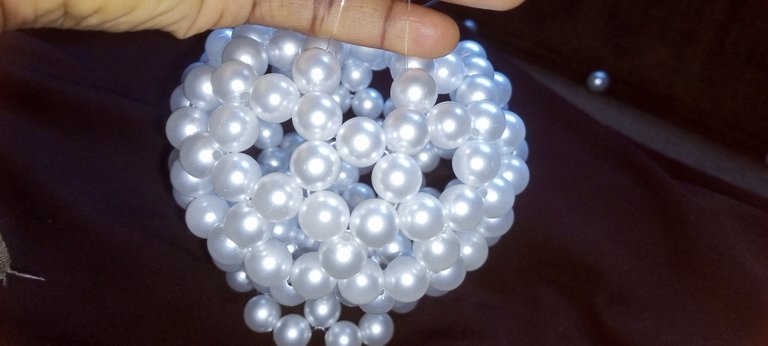

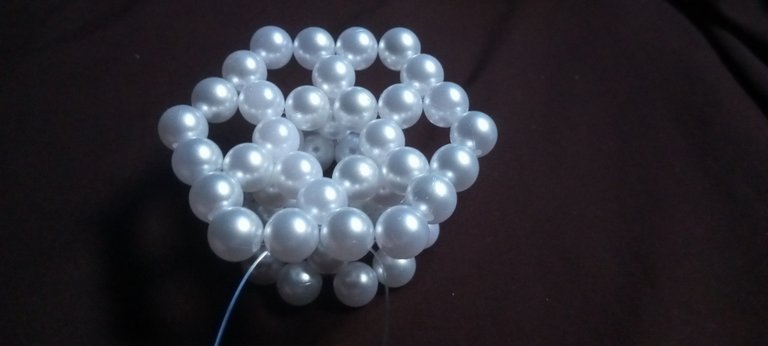
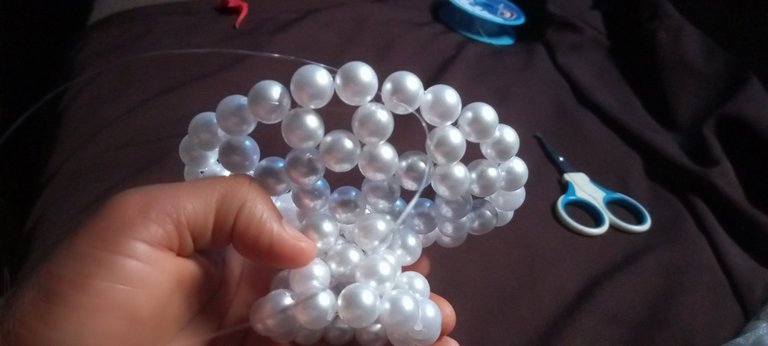
This is how it's looking. I will just go ahead and create the bottom of the vase.

Step 33:
I positioned both my fishing lines on one of the six beads at the top.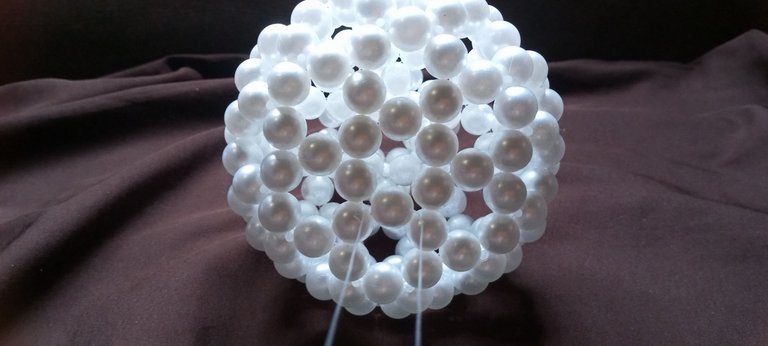
Step 34:
I added four beads to the left fishing line and crossed both sides with the fourth bead.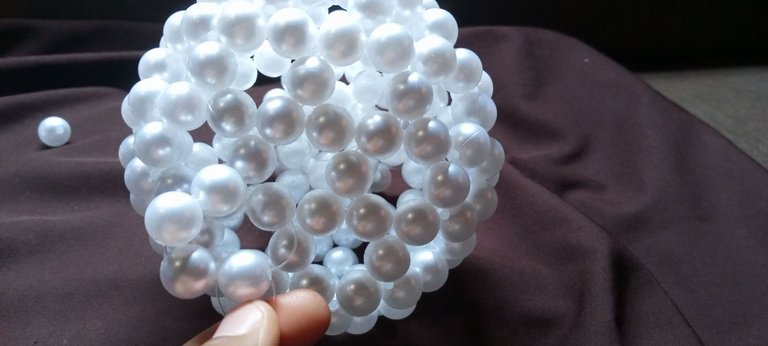
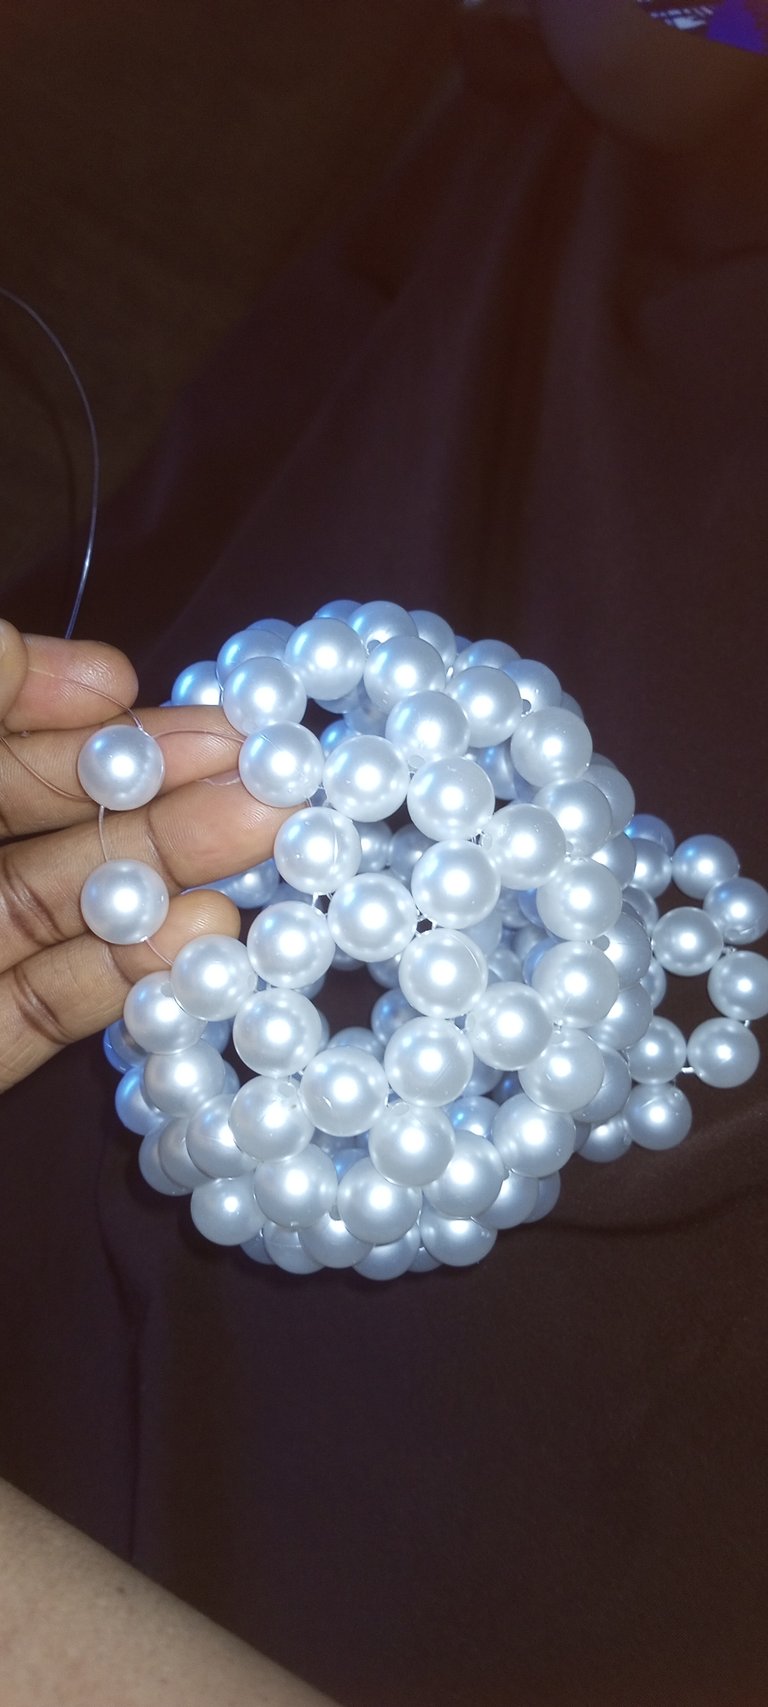
Step 35:
I passed the right fishing line through the next bead. 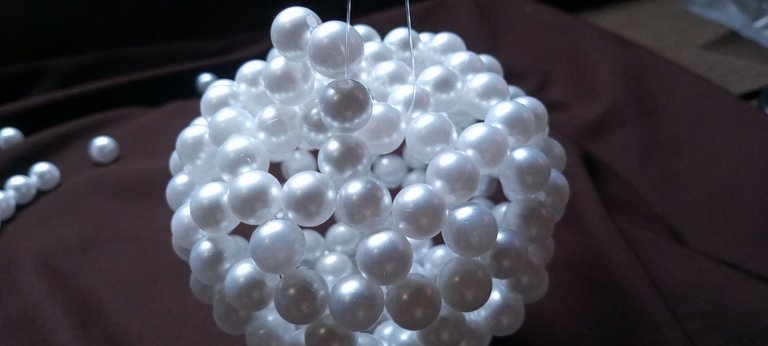
Step 36:
I added three beads on the left fishing line and crossed both sides with the third bead.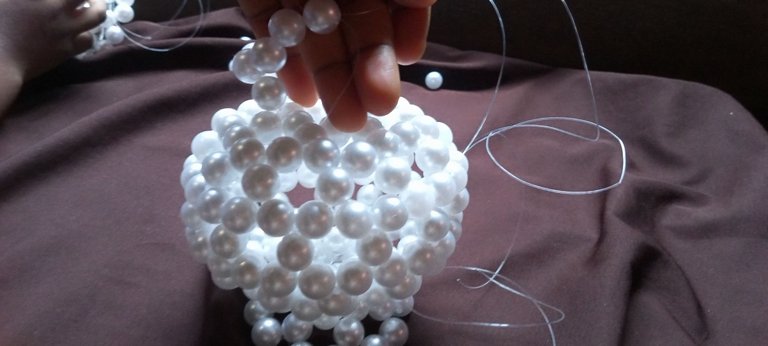
Step:37
I passed my right fishing line through the two next beads. 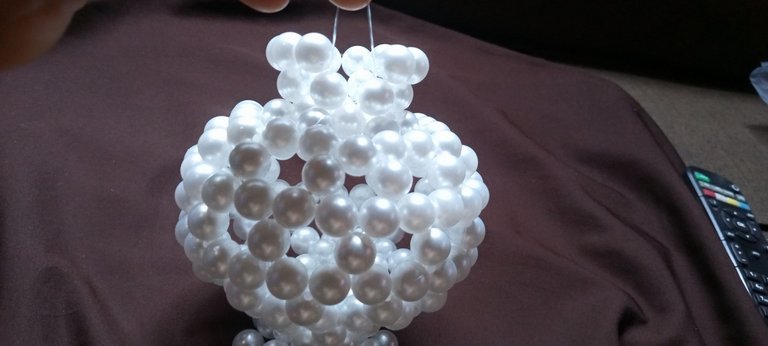
Step 38:
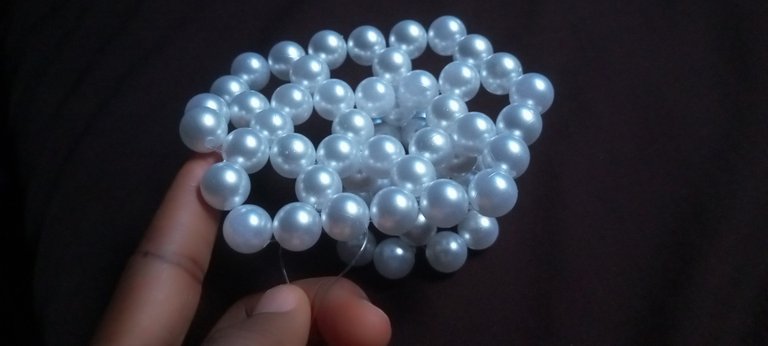
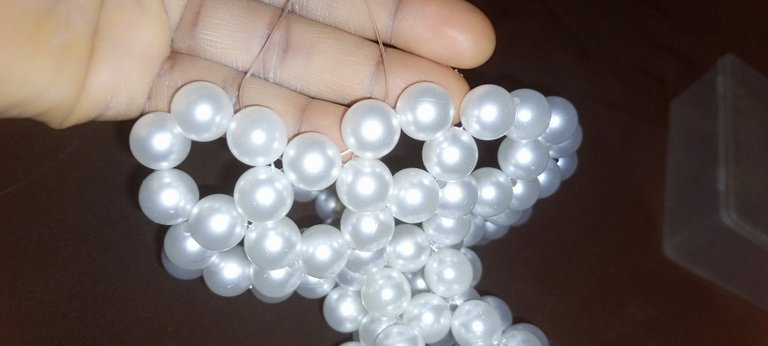
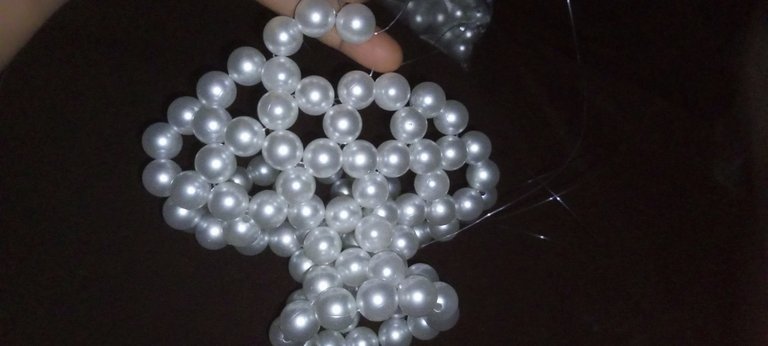
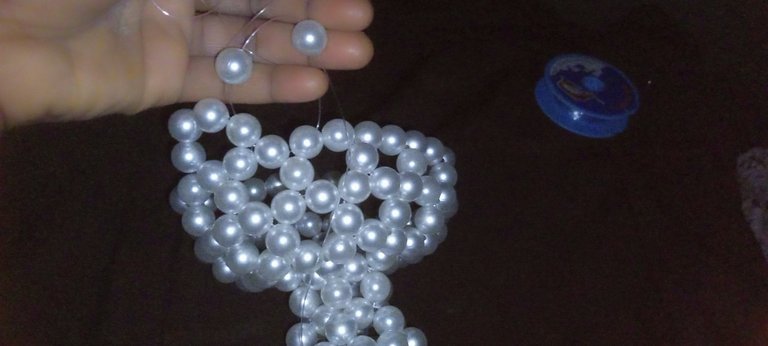
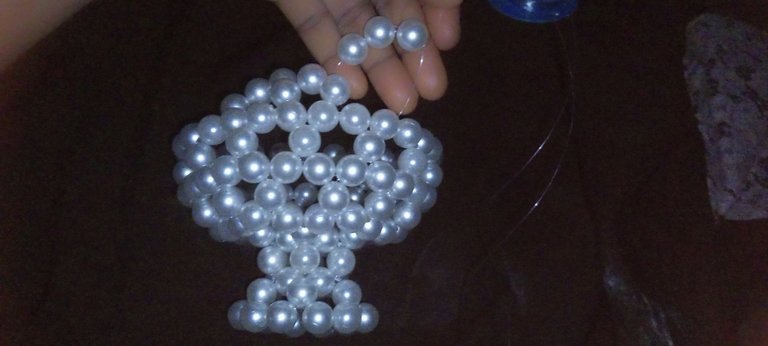
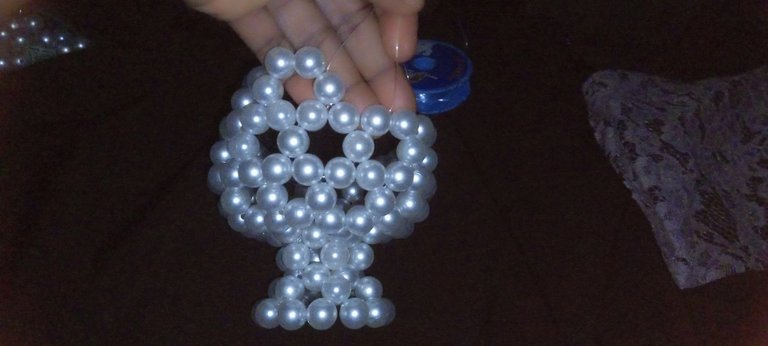
I added two beads on the left fishing line and then tied the knots. I passed my fishing lines around this row one more time, tied the knots, and trimmed off the excess fishing lines.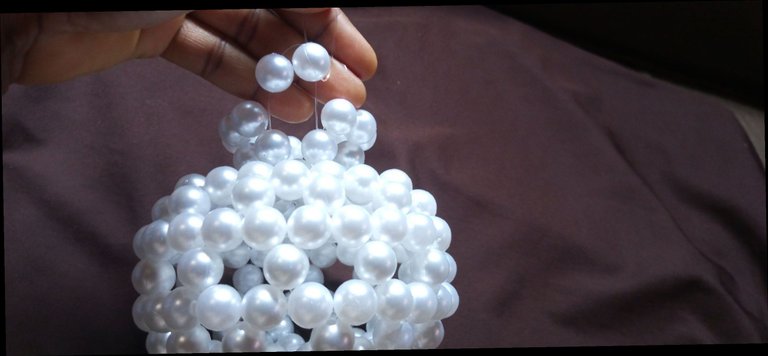 Here is the final look. What do you think?
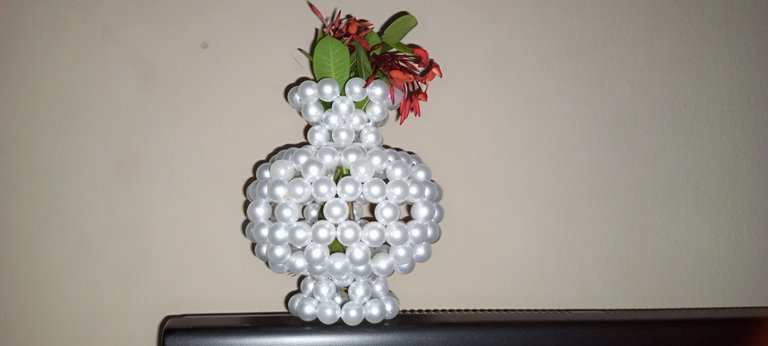
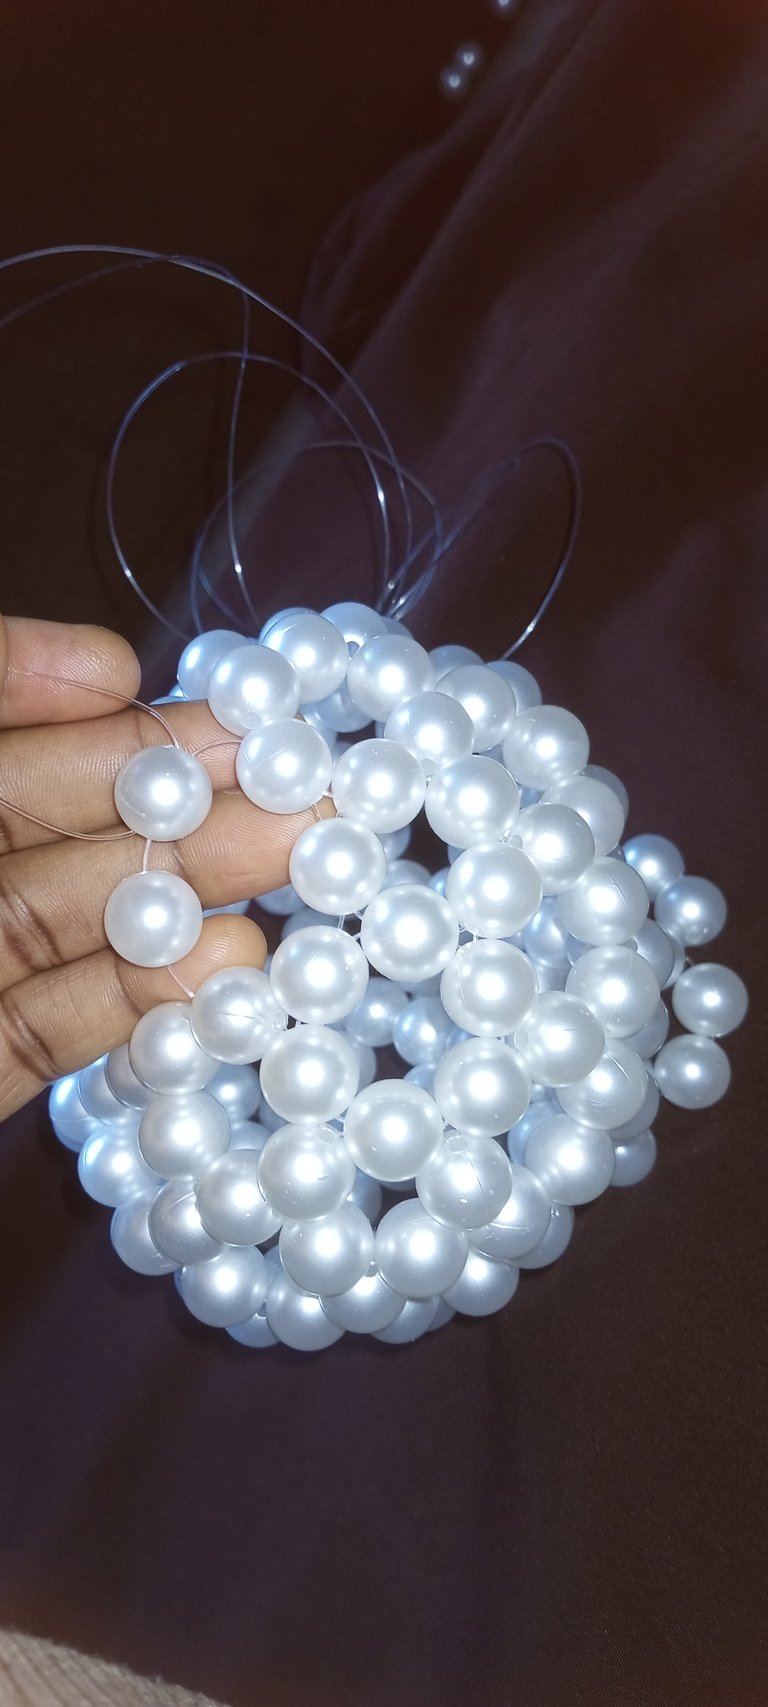
Just before making the bottom of the vase, I think it's cute as well.

The end🥰
Thank you very much for your time and support, all images were taken by me @funshee❣️🙏
It's so cute and beautiful. I like the white big pearls that you used, I am so sure your client would be happy and satisfied 👍
She will be picking it up by tomorrow, I feel she will love it.
Thank you 🥰🙏
I am so confident that she will 🤗
Yes, it is so cute and beautiful. Love it. Thank you for your feedback!
selected by @rezoanulvibes
Omg Funshee..... The end eventually,i love how detailed your steps are too, it’s giving masterclass fr 😭. And those white pearls? So elegant, so clean. I could literally see it in a boutique window or as a wedding table centerpiece. Thanks for sharing, weldone 🤗🌹
Thank you very much 🙏🥰, white pearl always comes out great with anything.
It is shining and charming. It looks great. Thank you for your feedback!
selected by @rezoanulvibes
Your flower vase is so incredible
And the white colour makes it more outstanding
Thanks Praise love, white pearls are always outstanding.
You did a great job here, is so lovely
Thank you very much 🥰🙏
So detailed and beautiful as always❤️
Thank you Sis ❣️🙏
que lindo, muy decorativo!
how cute, very decorative!
Gracias mi Amiga
We are glad that you were able to make this beautiful flower vase despite your busy schedule. We love your vase, well done and keep up the good work.
selected by @ibbtammy
Thank you so much, I'm glad I could come through with this.
I loved the process and the result! The flower vase is beautiful! The customer must be completely satisfied! Thank you for sharing your talent with us!
Thank you very much, she will be picking it up by tomorrow, I can tell she will love it.
Fantastic!
!HUG
¡LOH
!DIY
!HOPE
!INDEED
!ALIVE
The final result is great. It looks amazing. Thank you for your comment.
selected by @rezoanulvibes
Undoubtedly!
I'm the one who's grateful for the opportunity to appreciate talents like these!
Best regards!
You make this look so easy Funshee. It's really beautiful 🤍
Smile, this particular one is not hard.
Thank you very much 🙏😊
You are most welcome.
Your work is very beautiful, ideal for decorating any space or for giving as a gift.
Heart, you made some mistakes in the layout, and the symbols are visible. You should edit and arrange them so those details don't show in your beautiful post. Best regards.
!discovery 25
Aww, thank you very much.
I will search out the mistake and make the correction. I do appreciate you pointing it out.
This post was shared and voted inside the discord by the curators team of discovery-it
Join our Community and follow our Curation Trail
Discovery-it is also a Witness, vote for us here
Delegate to us for passive income. Check our 80% fee-back Program
Thank you very much for your support 🙏😊
Wow what a beauty, this is a very original piece, I love it.
Thank you very much 🥰🙏
Congratulations @funshee! You have completed the following achievement on the Hive blockchain And have been rewarded with New badge(s)
Your next target is to reach 120000 upvotes.
You can view your badges on your board and compare yourself to others in the Ranking
If you no longer want to receive notifications, reply to this comment with the word
STOP@funshee, I paid out 0.273 HIVE and 0.060 HBD to reward 11 comments in this discussion thread.