Easy Braiding Craft
I learned to do a very simplified version of Japanese kumihimo braiding. This craft is simple enough for children in elementary school, yet also relaxing and satisfying for adults.
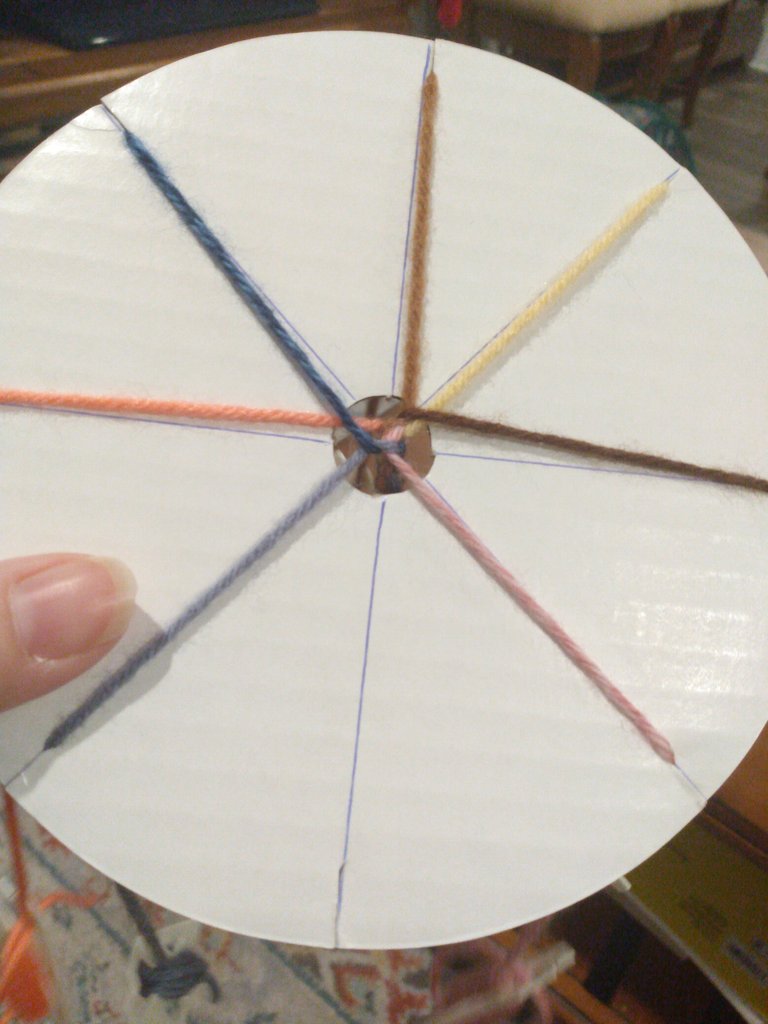
The loom is a cardboard circle with a center circle opening. 8 notches are cut at even intervals around the circumference.

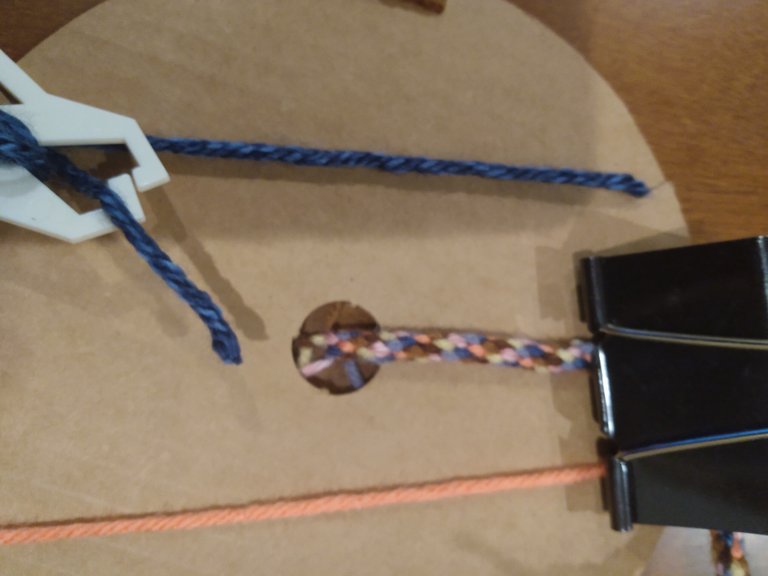
Lengths of yarn about a meter long are placed in 7 of the notches and brought down through the center hole. The ends are pulled through the hole just enough to tie a knot to hold all the ends together. I then attach a large clip to the knot. This acts as a weight to hold the braid straight as it grows.
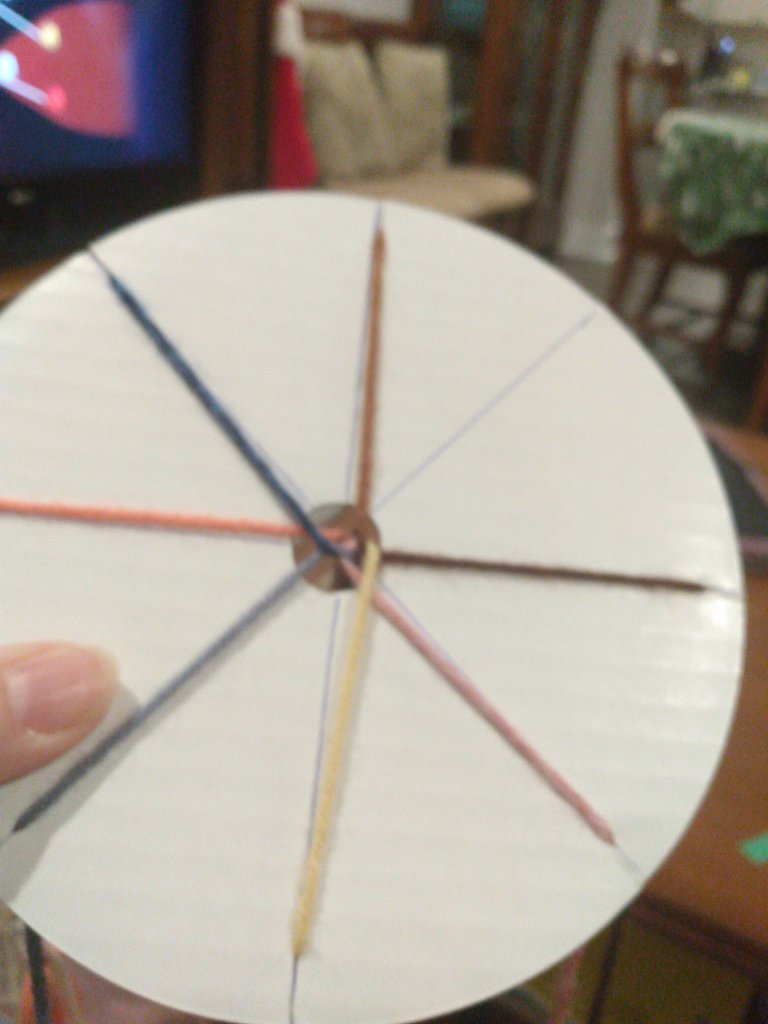
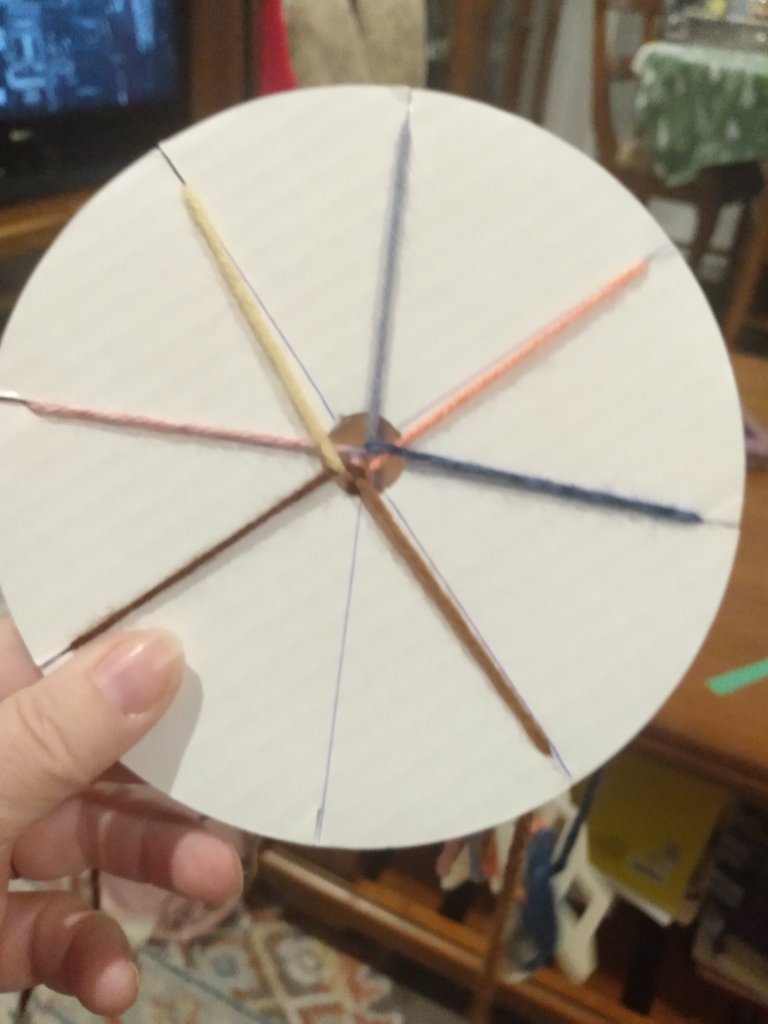
Beginning with the empty notch pointing toward me, I count up 3 notches counterclockwise. That thread then gets moved to the empty notch.


The loom is rotated so the empty slot faces me again. The process repeats, always counting up 3 counterclockwise. ( The same could be done by always going clockwise, or by using a number other than 3. There are so many patterns possible, but this is what I do to keep it easy for a class of children.)

As the braid grows, it comes down through the center opening.

To make a longer braid, wind the threads onto bobbins to keep them neat.

I hope you enjoy this simple craft as much as I do. One of my granddaughters really finds it calming and enjoys being productive. Eventually I will teach her to knit, too.
!BBH
@asgharali! @fiberfrau likes your content! so I just sent 1 BBH to your account on behalf of @fiberfrau. (5/20)
(html comment removed: )
)
How you did this seems margical
Nice one and thanks for sharing.
You are very welcome. !BBH
@praiselove! @fiberfrau likes your content! so I just sent 1 BBH to your account on behalf of @fiberfrau. (7/20)
(html comment removed: )
)
How beautiful, looks very entertaining and easy to do :)
Thanks for sharing your project. Have a nice evening 💕
Thank you. !BBH
@lauramica! @fiberfrau likes your content! so I just sent 1 BBH to your account on behalf of @fiberfrau. (1/20)
(html comment removed: )
)
Congratulations @fiberfrau! You have completed the following achievement on the Hive blockchain And have been rewarded with New badge(s)
Your next target is to reach 38000 upvotes.
You can view your badges on your board and compare yourself to others in the Ranking
If you no longer want to receive notifications, reply to this comment with the word
STOPCheck out our last posts:
!BBH
Dear @fiberfrau
Your support for our previous proposal has been much appreciated!
May we ask you to renew your support for our NEW proposal (https://peakd.com/me/proposals/331) ?
Your help will be much appreciated. Thank you!
!HBIT
Success! @fiberfrau(2/1) You mined .9 HBIT and the user you replied to received .1 HBIT on your behalf. You can receive 100% of the HBIT by replying to one of your own posts or comments. When you mine HBIT, you're also playing the Wusang: Isle of Blaq game. 🏴☠️
Sorry, but you didn't find a bonus treasure token today. Try again tomorrow...they're out there! You can see your random number generated in the Discord server, #hbit-wusang-log channel. | tools | wallet | discord | community | daily <><
There is a treasure chest of bitcoin sats hidden in Wusang: Isle of Blaq. Happy treasure hunting! 😃
Check for bonus treasure tokens by entering your username at a block explorer explorer A, explorer B, or take a look at your wallet. Read about Hivebits (HBIT) or read the story of Wusang: Isle of Blaq.
@hivebuzz! @fiberfrau likes your content! so I just sent 1 BBH to your account on behalf of @fiberfrau. (1/20)
(html comment removed: )
)
!HBIT
Success! @fiberfrau(2/1) You mined .9 HBIT and the user you replied to received .1 HBIT on your behalf. You can receive 100% of the HBIT by replying to one of your own posts or comments. When you mine HBIT, you're also playing the Wusang: Isle of Blaq game. 🏴☠️
Sorry, but you didn't find a bonus treasure token today. Try again tomorrow...they're out there! You can see your random number generated in the Discord server, #hbit-wusang-log channel. | tools | wallet | discord | community | daily <><
There is a treasure chest of bitcoin sats hidden in Wusang: Isle of Blaq. Happy treasure hunting! 😃
Check for bonus treasure tokens by entering your username at a block explorer explorer A, explorer B, or take a look at your wallet. Read about Hivebits (HBIT) or read the story of Wusang: Isle of Blaq.