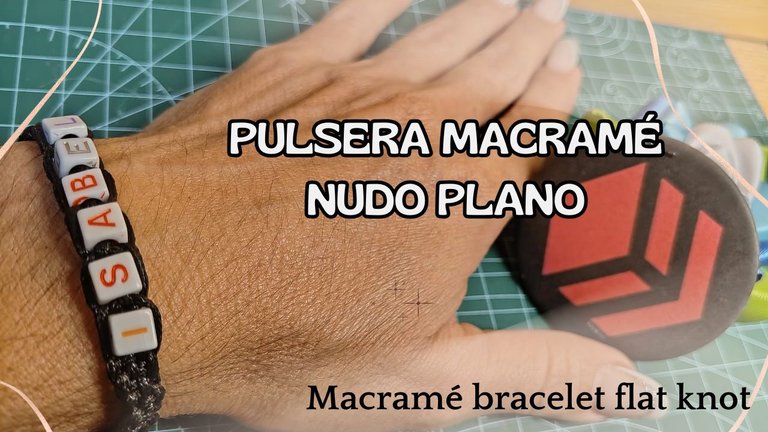
Pulsera macramé nudo plano / Macramé bracelet flat knot (Esp/Eng)

[Esp]
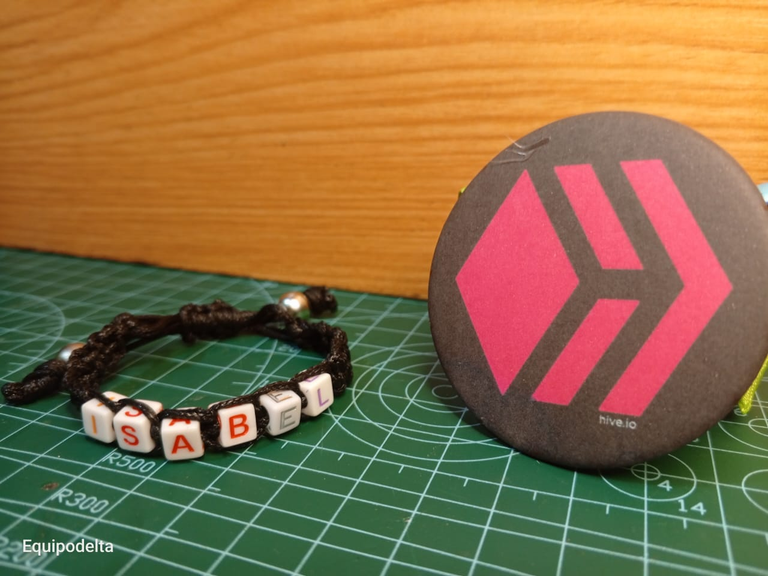
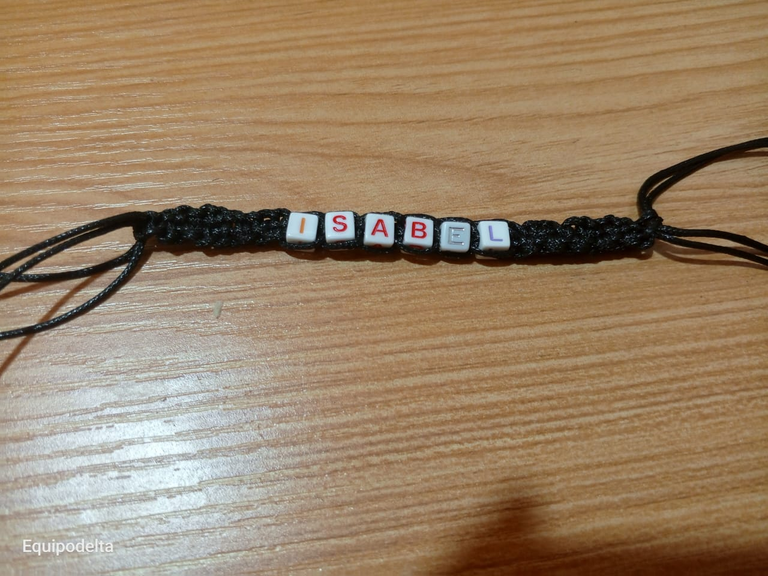
Hace mucho que estoy buscando cuentas de letras pero no consigo, en las tiendas solo hay cuentas de números y esto es algo muy extraño. Las que le puse a mi pulsera hoy las tengo de hace un tiempo, se la había puesto a una pulsera color rosa pero se manchó toda sin remedio, no quería botar las cuentas, así que decidí hacerme otra pulsera con un material más resistente y de color negro, el cordón piel de serpiente es excelente por su durabilidad y es fácil de trabajar.
El estilo de nudo que presento hoy tiene variación, te iré contando mediante el paso a paso.
! [English version]
I only have number beads in the shops and this is something very strange. The ones I put on my bracelet today I have them from a while ago, I had put them on a pink bracelet but it got all stained without remedy, I didn't want to throw the beads away, so I decided to make another bracelet with a more resistant material and in black, the snakeskin cord is excellent for its durability and it is easy to work with.
The style of knot that I present today has a variation, I will tell you step by step.

| Spanish | English | |
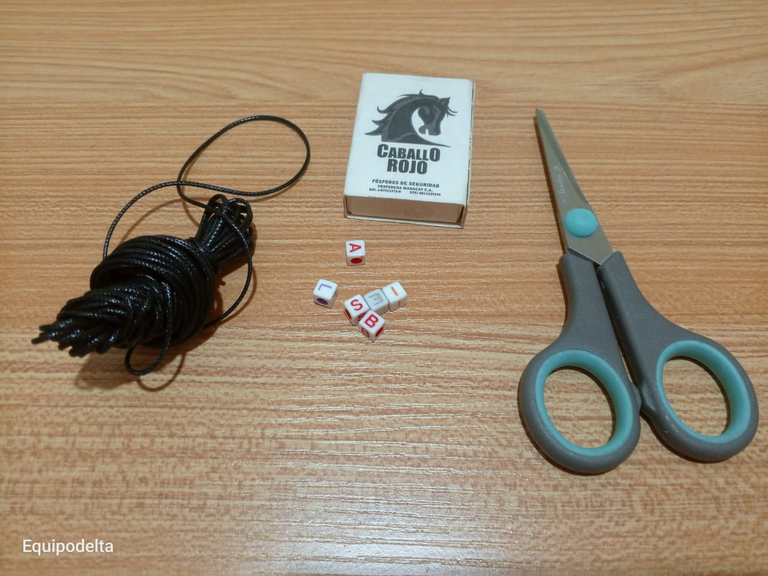
| Cordón piel de serpiente color negro | Black snakeskin cord | |
| Accesorios para decorar | Accessories to decorate | |
| Tijera | Scissors | |
| Fósforos o Yesquero | Matches or Tinder |

Paso a paso / Step by Step

Step 1️⃣/ Paso 1️⃣
 |  | |
 |  |
[Esp]
Uso fósforos para quemar las puntas del cordón y para los empates debido a que he tenido muchos inconvenientes y accidentes con los yesqueros, creo que los están fabricando de muy mala calidad, tengan cuidado pues uno me explotó en la mano, afortunadamente no pasó nada qué lamentar.
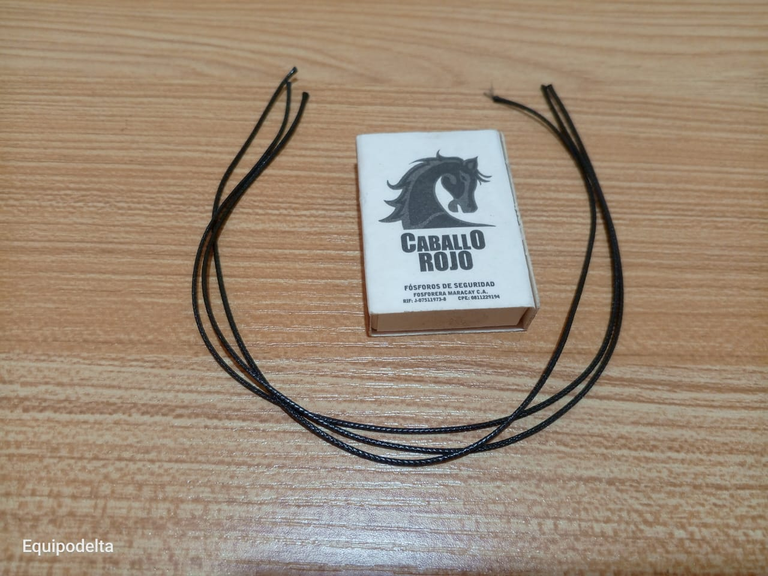
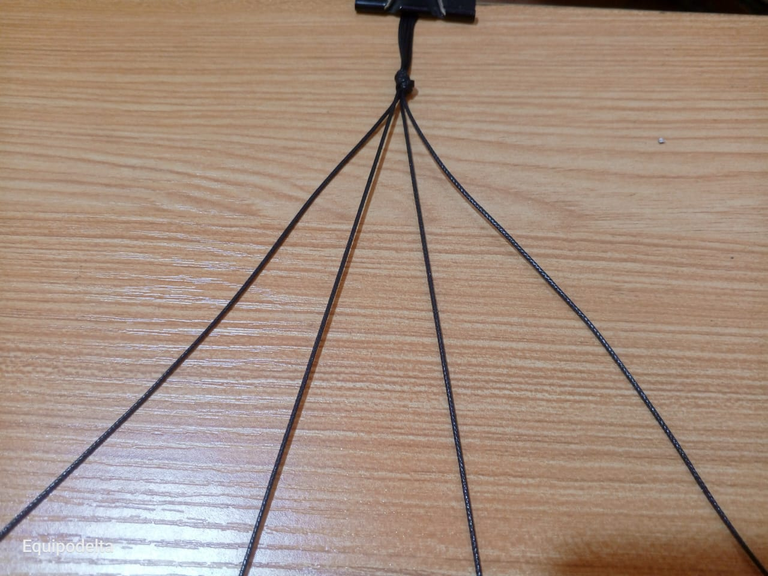
Corta 4 tiras de cordón suficientemente largas para que trabajes cómodamente.
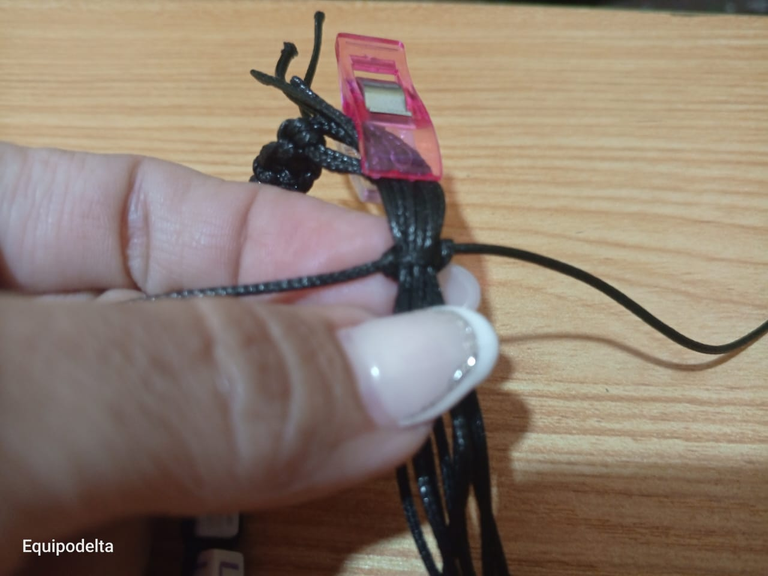
Estoy usando unas pinzas de sostener telas, funcionan excelente para sostenerlos cordones y puedo trabajar muy bien. Realiza un nudo sencillo solo para que no se muevan los cordones, mas adelante hay que desanudarlo, yo trabajo de esta forma, se me hace más cómodo.
Separa dos piezas centrales que fijas en la mesa y las dos de cada lado que son los cordones que vamos a tejer.
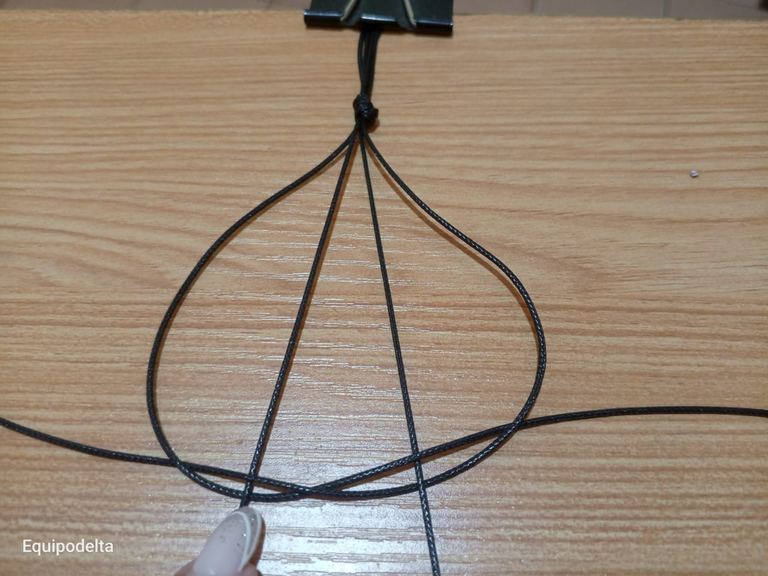
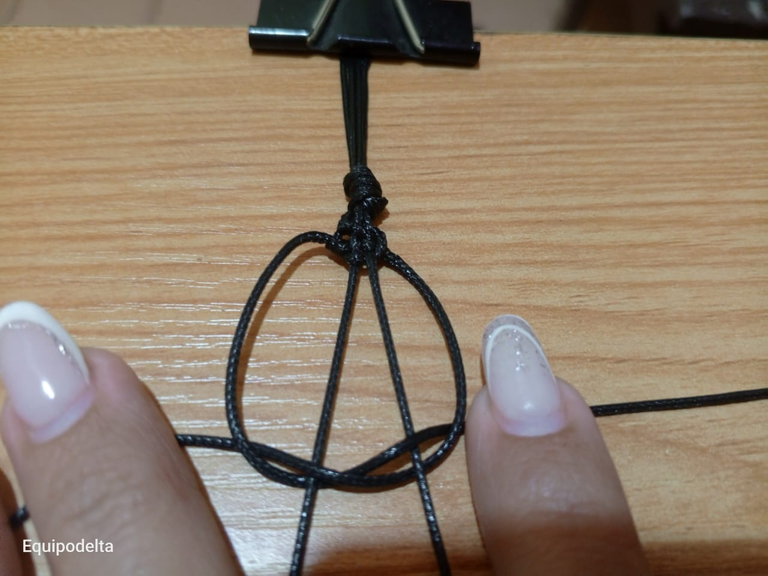
El nudo es sencillo: El cordón izquierdo pasa por debajo del cordón siguiente y por encima del cordón siguiente, luego el cordón de la derecha pasa por debajo del cordón siguiente y por encima del cordón siguiente. Luego para fijar el nudo lo introduces por la abertura que dejaste de cada lado, aprieta haciendo el nudo.
En el paso siguiente debes invertir la posición, es decir, si comenzaste colocando por debajo el cordón de la derecha, pues ahora debes empezar colocándolo por encima del cordón siguiente y luego por debajo del siguiente,e s solo invertir, mira la imagen.
Estos pasos los repites al menos unas 11 veces más dependiendo del grosos de tu muñeca.
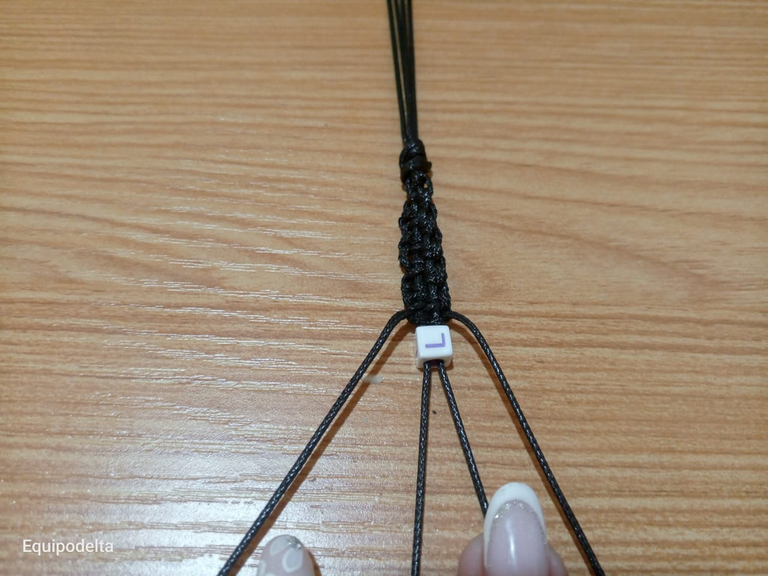
Introduce la última letra de tu nombre por los cordones centrales.
! [English version]
I use matches to burn the ends of the cord and for the ties because I have had many inconveniences and accidents with the plasterers, I think they are making them of very poor quality, be careful because one exploded in my hand, fortunately nothing to regret.
-Cut 4 strips of cord long enough for you to work comfortably.
-I'm using a pair of fabric holding pliers, they work great for holding the cords and I can work very well. Make a simple knot just to keep the cords from moving, later you have to untie it, I work this way, I find it more comfortable.
-Separate two central pieces that you fix on the table and the two on each side that are the cords that we are going to weave.
-The knot is simple: The left cord goes under the next cord and over the next cord, then the right cord goes under the next cord and over the next cord. Then to fix the knot you insert it through the opening you left on each side, tighten it making the knot.
-In the next step you must invert the position, that is to say, if you started placing the right cord underneath, now you must start placing it above the next cord and then underneath the next one, just invert it, see the image.
-Repeat these steps at least 11 more times depending on the size of your wrist.
-Insert the last letter of your name through the central cords.

Step 2️⃣/ paso 2️⃣
 |  |  |
 |  |
[Esp]
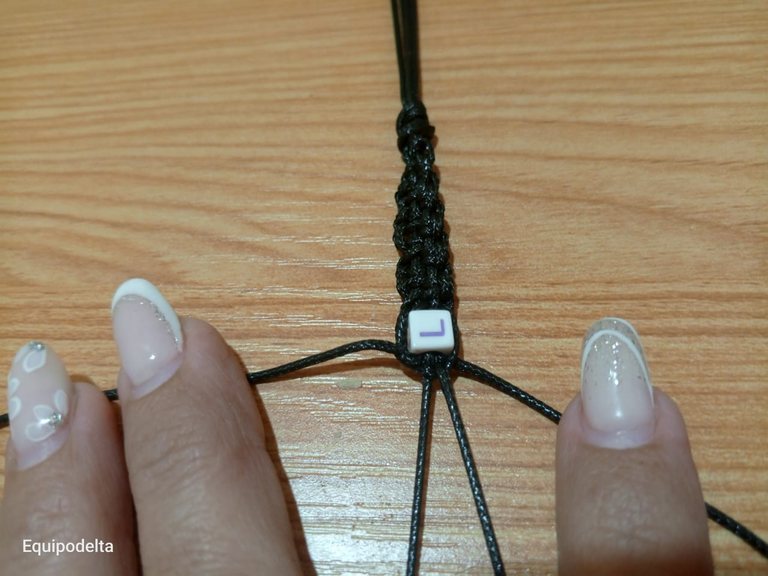
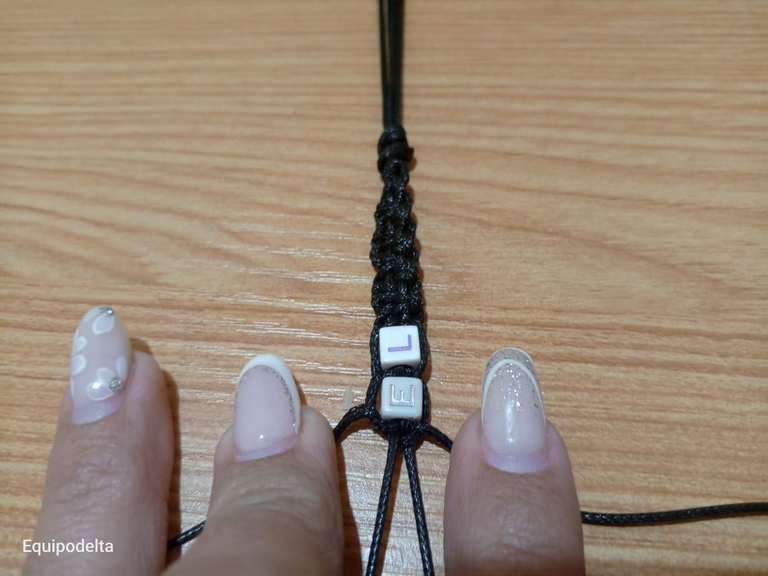
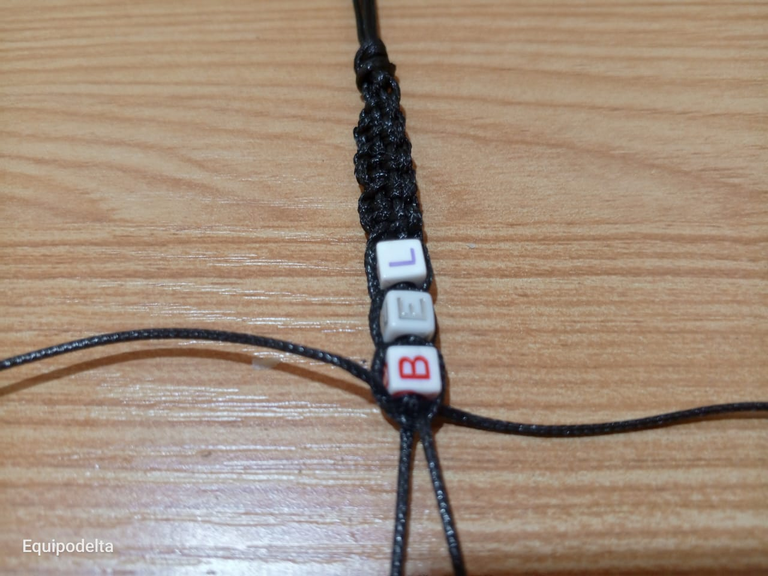
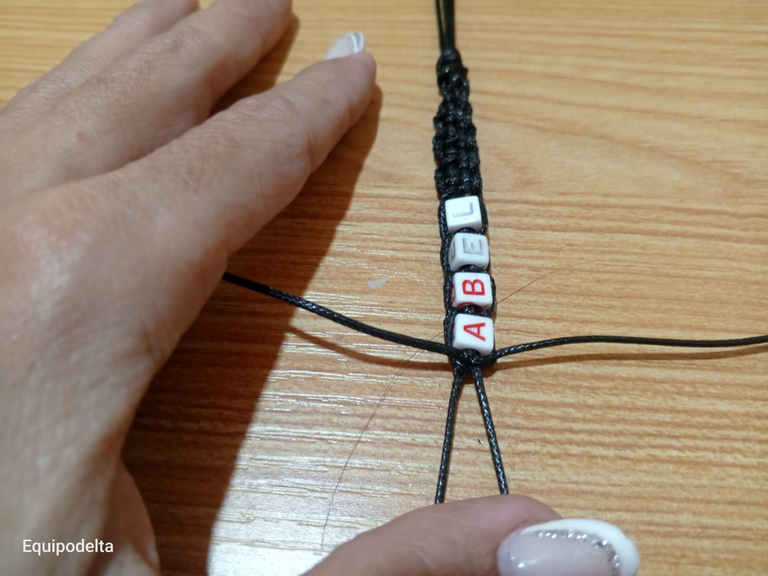
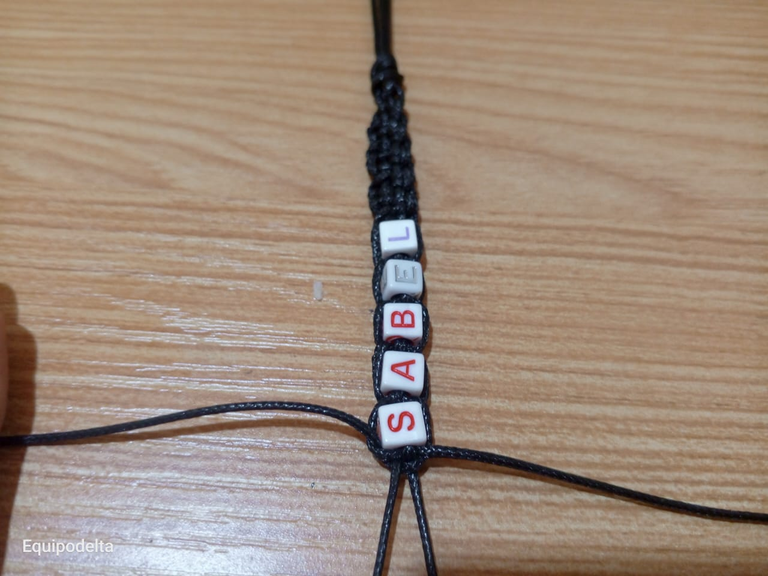
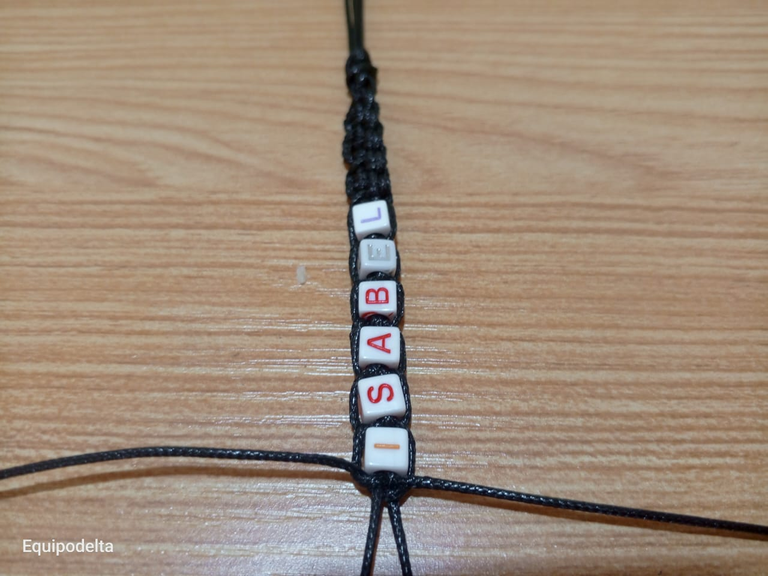
Para fijar las letras solo debes realizar el mismo nudo y continuar con los mismos pasos anteriores.
Introduce la siguiente letras y vuelves a fijarla con el mismo nudo.
Repite os pasos anteriores con el resto de las letras.
Es importante que empieces siempre por la última letra del nombre para que no te quede al revés cuando te pongas la pulsera.
! [English version]
-To fix the letters you only have to tie the same knot and continue with the same steps as above.
-Insert the next letter and fix it again with the same knot.
-Repeat the previous steps with the rest of the letters.
It is important that you always start with the last letter of the name so that you don't get it backwards when you put the bracelet on.

Step 3️⃣/ paso 3️⃣

 |  | |
 |  |
[Esp]
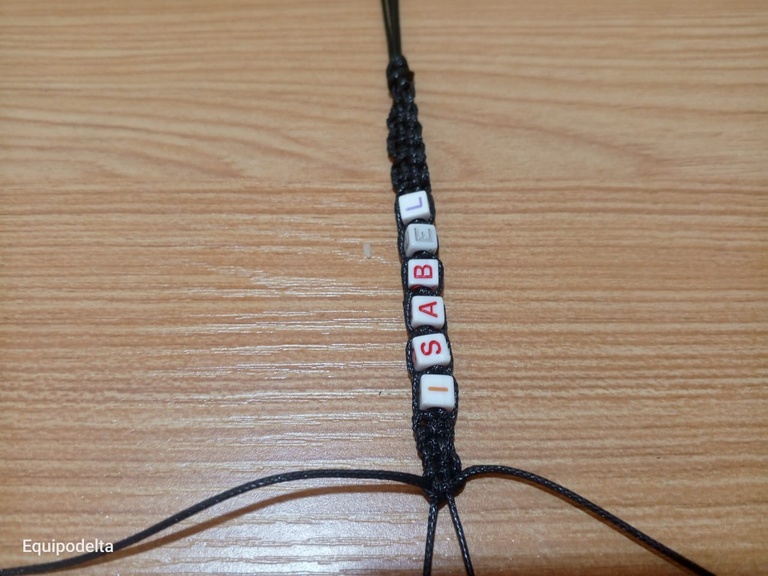
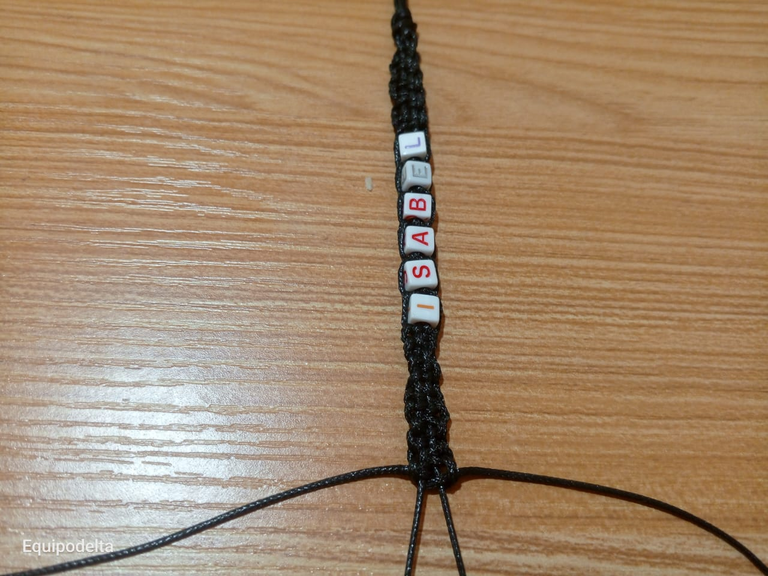
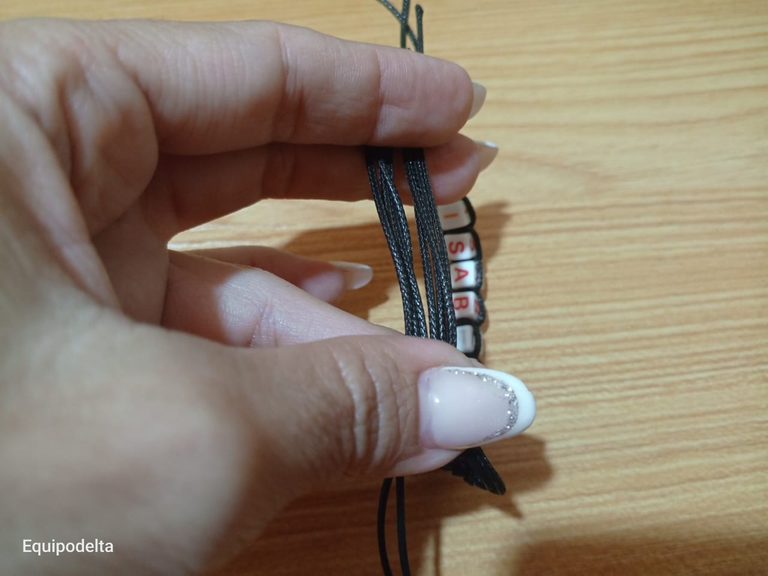
La cantidad de nudos o repeticiones que hiciste antes de las letras, deberás hacer la misma cantidad del otro lado de las letras, por lo cual, si hiciste 11 repeticiones o nudos, deberás hacer 11 repeticiones mas. al acabar, desata el nudo y organiza los cordones como la imagen.
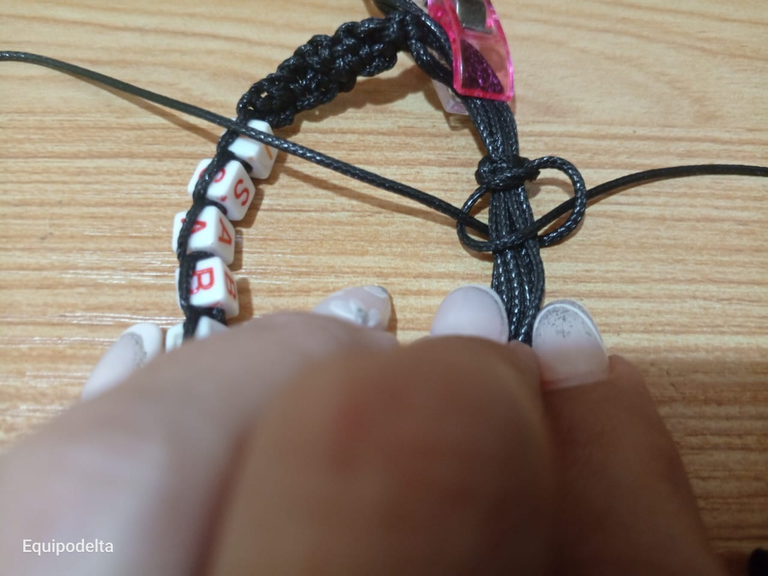
Toma un cordón largo y anuda haciendo el mismo nudo que la pulsera, esto funcionará como broche ajustable.
! [English version]
The amount of knots or repetitions you did before the letters, you should do the same amount on the other side of the letters, so if you did 11 repetitions or knots, you should do 11 more repetitions. When you finish, untie the knot and arrange the cords as in the picture.
Take a long cord and knot it in the same knot as the bracelet, this will work as an adjustable clasp.

Step 4️⃣/ paso 4️⃣

 |  | |
 |  |

[Esp]
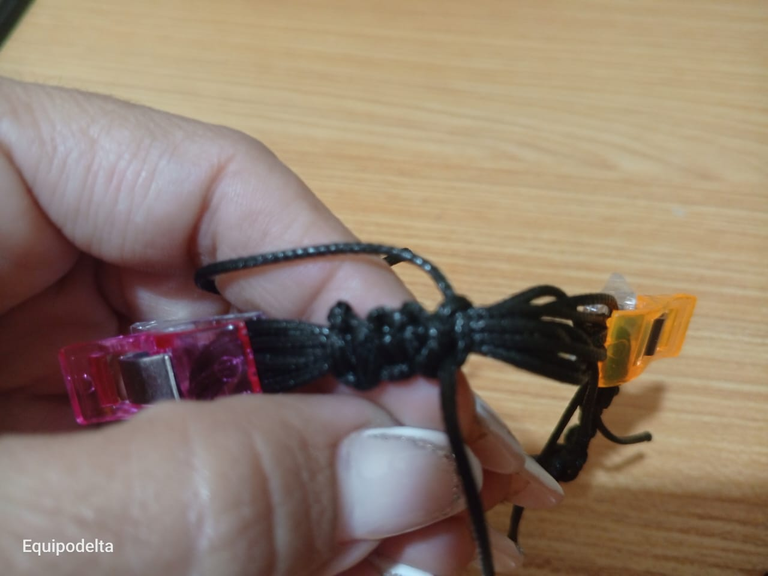
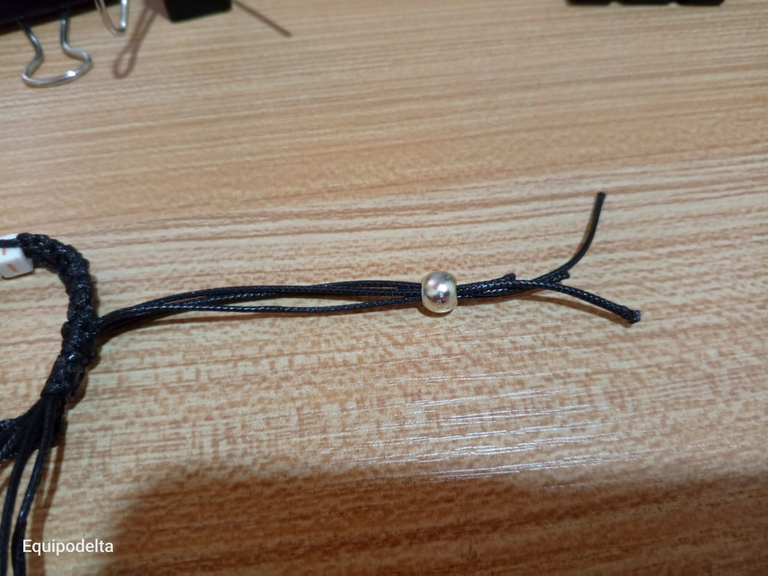
Para el nudo ajustable solo necesitas hacer 5 repeticiones.
Al terminar, corta el excedente y quema la punta para que no se suelte.
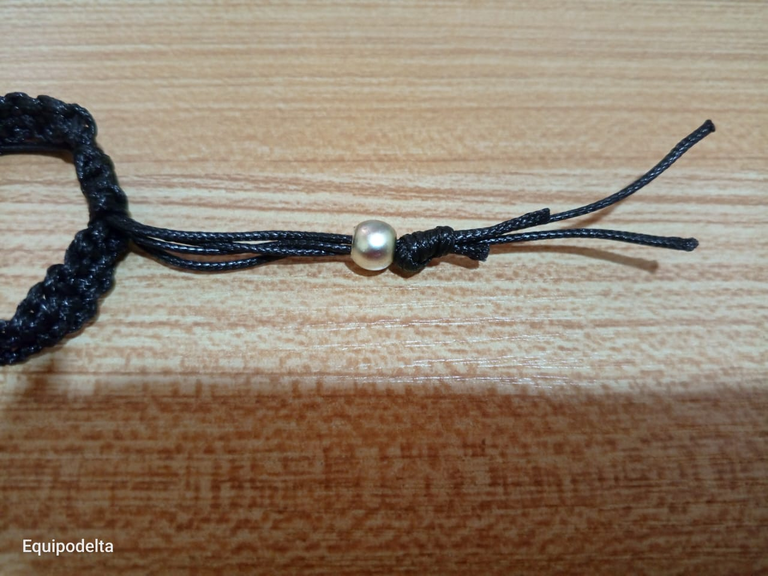
Introduce los cordones de un lado por el centro de una perla, anuda al final y luego quemas para pegar.
Repite el paso anterior con el otro extremo.
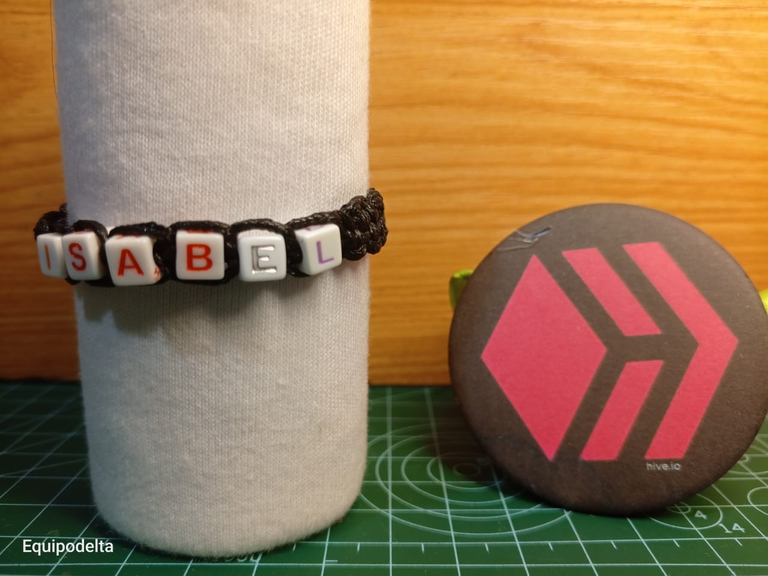
Espero te guste, la pulsera tiene mi nombre.
! [English version]
For the adjustable knot you only need to do 5 repetitions.
When finished, cut off the excess and burn the end so that it doesn't come loose.
Insert the cords on one side through the centre of a bead, knot at the end and then burn to glue.
Repeat the previous step with the other end.
I hope you like it, the bracelet has my name on it.


Créditos / Credits




💜💜💜


![]() 👉
👉  👉
👉  👉
👉  👉
👉 
Here / Bríndame un café

Bendiciones!! El tejido plano es ideal para cualquier tipo de pulsera, además, el hilo que usaste es maravilloso ya que brinda un estilo delicado y elegante.
El brillo del hilo es genial.
Éxito en todo
A mí me encanta ver los tuyos, son realmente perfectos <3
Muchas gracias por tan amables palabras. Que tengas un bendecido día.
Yo hice ese tejido con yute pero se me desarma, la piel de serpiente me parece un material más práctico
No te preocupes Miguel, a mi me pasa igual pero no dejo de intentarlo, porque algún día esos nudos me van a quedar todos bien prolijos. Me ha ido mejor con este material, el cordón que usaba antes era muy grueso.
The result of the handicraft creation is quite good. Good afternoon and greetings to all of us today.
Quiero aprender esta tecnica, baje unos tutoriales. No se ve fácil pero es un reto para mi
Un abrazo amiga @equipodelta
Igual yo mi reina, quiero aprender otros tipos de nudos.
Hola amiga, una gran idea para hacer pulseras personalidas, el hilo se ve genial, me gusta el resultado.
Feliz fin de semana! 😍🌸
Hola amiga, he buscado las letritas y pues, no consigo por aqui.
¡Felicitaciones!
Estás participando para optar a la mención especial que se efectuará el domingo 26 de enero del 2025 a las 8:00 pm (hora de Venezuela), gracias a la cual el autor del artículo seleccionado recibirá la cantidad de 1 HIVE transferida a su cuenta.
¡También has recibido 1 ENTROKEN! El token del PROYECTO ENTROPÍA impulsado por la plataforma Steem-Engine.
1. Invierte en el PROYECTO ENTROPÍA y recibe ganancias semanalmente. Entra aquí para más información.
2. Contáctanos en Discord: https://discord.gg/hkCjFeb
3. Suscríbete a nuestra COMUNIDAD y apoya al trail de @Entropia y así podrás ganar recompensas de curación de forma automática. Entra aquí para más información sobre nuestro trail.
4. Visita nuestro canal de Youtube.
Atentamente
El equipo de curación del PROYECTO ENTROPÍA
@equipodelta, saludos linda, espectacular trabajo, bello y duradero, que pràctico, felicitaciones reina
Gracias mi corazón <3
Congratulations @equipodelta! You have completed the following achievement on the Hive blockchain And have been rewarded with New badge(s)
Your next target is to reach 52000 upvotes.
You can view your badges on your board and compare yourself to others in the Ranking
If you no longer want to receive notifications, reply to this comment with the word
STOPHello equipodelta!
It's nice to let you know that your article won 🥈 place.
Your post is among the best articles voted 7 days ago by the @hive-lu | King Lucoin Curator by keithtaylor
You and your curator receive 0.0038 Lu (Lucoin) investment token and a 7.38% share of the reward from Daily Report 553. Additionally, you can also receive a unique LUSILVER token for taking 2nd place. All you need to do is reblog this report of the day with your winnings.
Buy Lu on the Hive-Engine exchange | World of Lu created by @szejq
STOPor to resume write a wordSTART