DIY: Sublimación: estuches, sachets, tarot / Sublimation: cases, sachets, tarot cards (Esp/Eng)


[Esp]
Saludos querida comunidad.
Sigo con mis prácticas, cada vez me quedan mejor, he corregido muchas de mis fallas al sublimar. Esta vez me quedó perfecta la sublimación y aquí os cuento cómo fue.
Siempre soñé con imprimir mis diseños en franelas y objetos, aunque ya lo había hecho, cada vez que lo hago es como si fuera la primera vez porque siento la misma emoción. Hoy sublimé mi diseño.
He realizado un vídeo con mucho amor, por si gustas ver.
Te cuento el paso a paso desde el sublimado hasta cómo hacer la bolsita o estuche.
! [English version]
Greetings dear community.
I continue with my practices, each time I get better, I have corrected many of my failures to sublimate. This time my sublimation was perfect and here I tell you how it was.
I always dreamed of printing my designs on flannels and objects, although I had already done it, every time I do it is as if it were the first time because I feel the same emotion. Today I sublimated my design.
I have made a video with a lot of love, if you like to see it.
I tell you the step by step from the sublimation to how to make the bag or case.
https://www.youtube.com/shorts/quNNymijpVE

Materiales / Materials

| Spanish | English | |
| Cordón cola de ratón | Mouse tail cord | |
| Tela seda | Tela seda | |
| Tijera, hilo | Scissors, thread | |
| Maquina de coser | Sewing machine | |
| Equipo para sublimar | Sublimation equipment | |
| Imágenes e impresiones | Images and prints |
Paso a paso / Step by Step
Step 1️⃣/ Paso 1️⃣
 |  |  |
 |  |
[Esp]
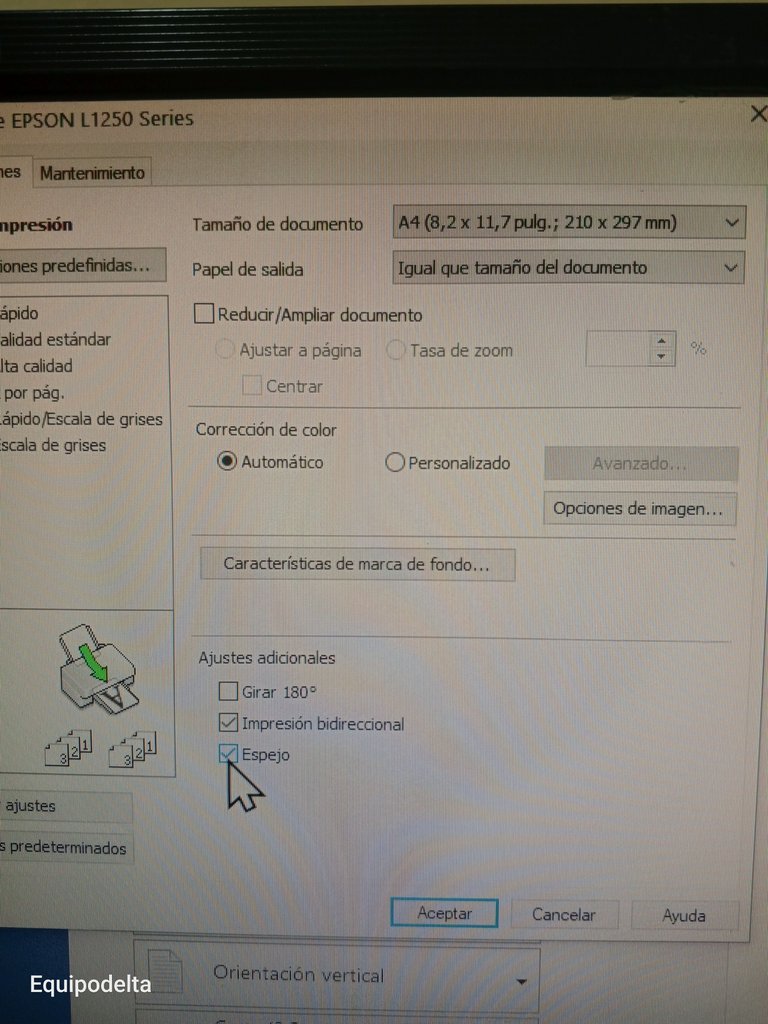
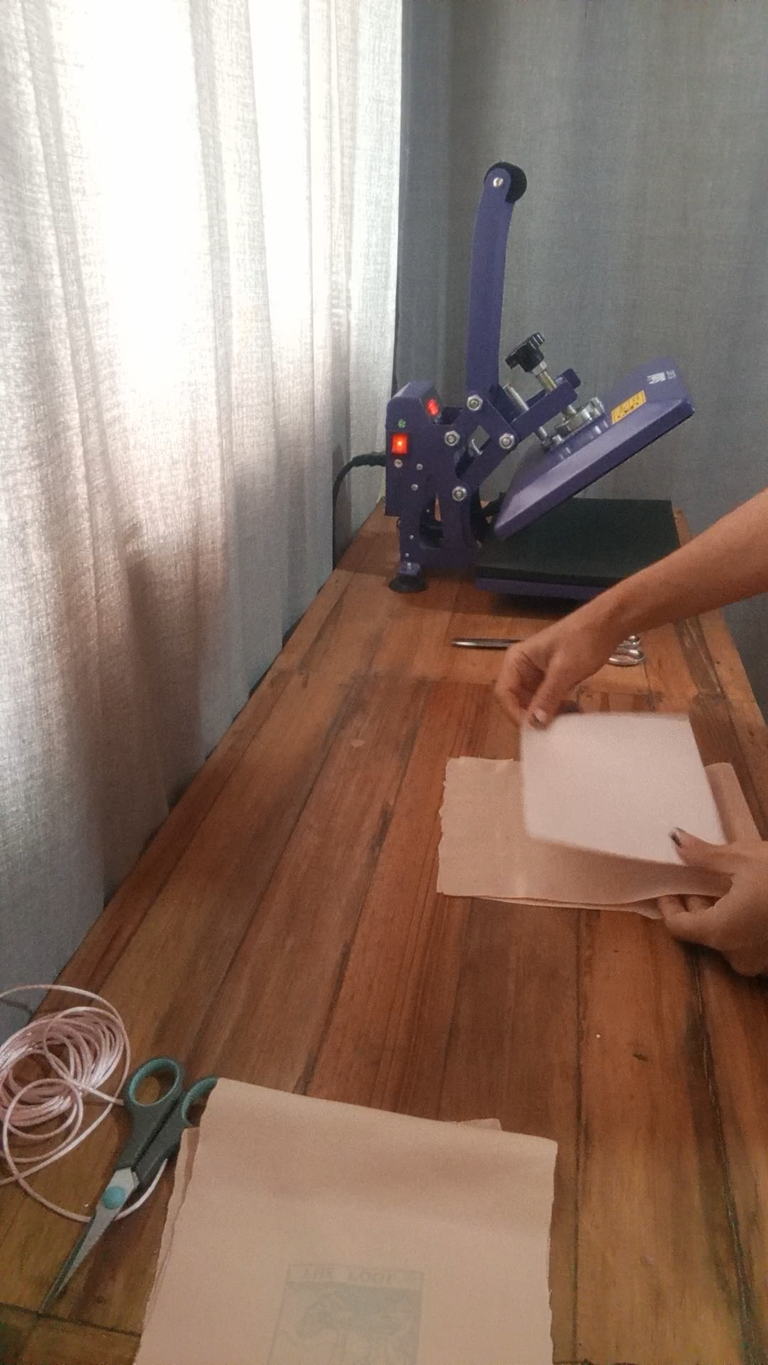
Cuando voy a sublimar, aprovecho el papel e imprimo algunos diseños más para tenerlos guardados. El papel para sublimar es algo costoso.
Configura tu impresora. El tamaño del papel por lo general es A4, coloca la calidad alta y marca la opción espejo.
Una vez sale la impresión, este papel es de secado rápido, podemos esperar unos segundos por seguridad y recortamos bien por la orilla.
Uno de mis errores era dejar margen, esto hace que queden marcas en la tela.
! [English version]
When I go to sublimate, I take advantage of the paper and print a few more designs to keep in storage. Sublimation paper is expensive.
Set up your printer. The paper size is usually A4, set the quality to high and check the mirror option.
Once the print comes out, this paper is fast drying, we can wait a few seconds for security and cut well along the edge.
One of my mistakes was to leave a margin, this makes marks on the fabric.
Step 2️⃣/ paso 2️⃣
 |  |  |
 |  |
[Esp]
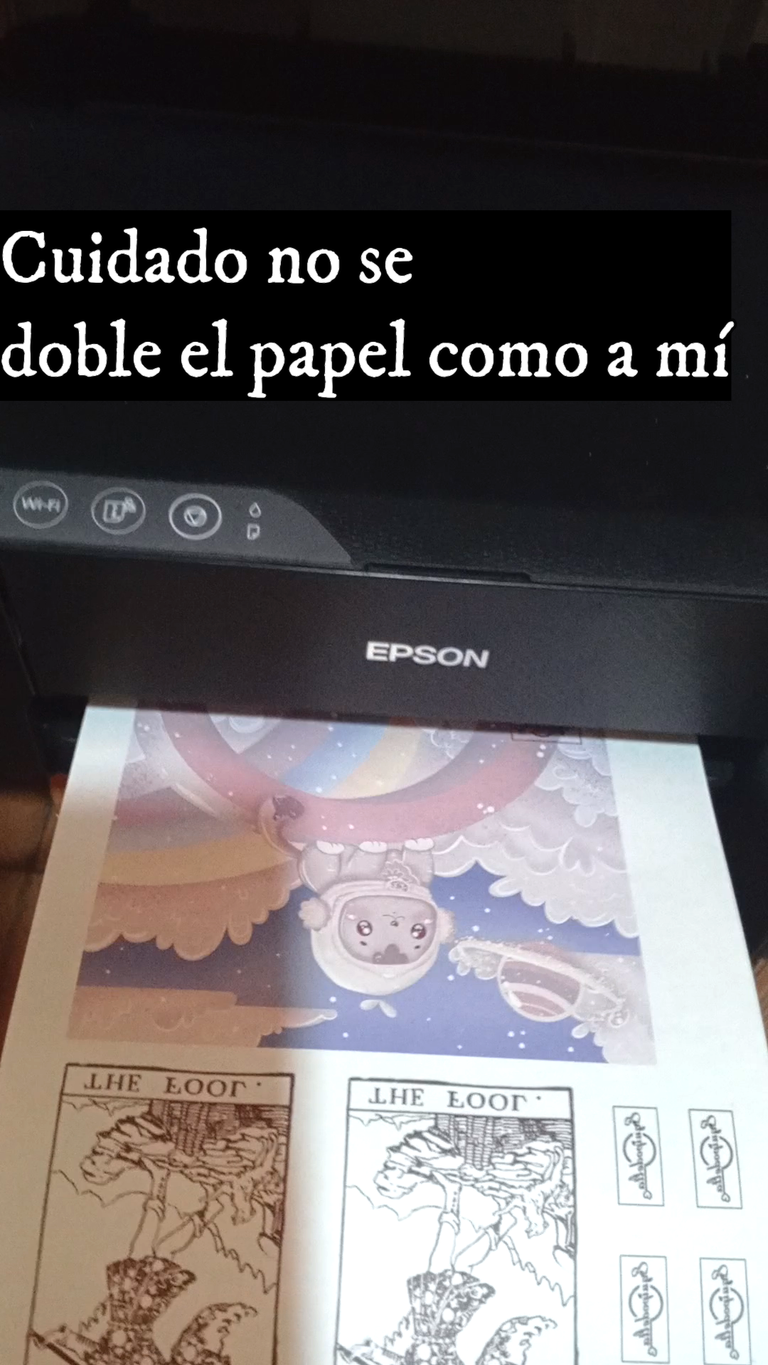
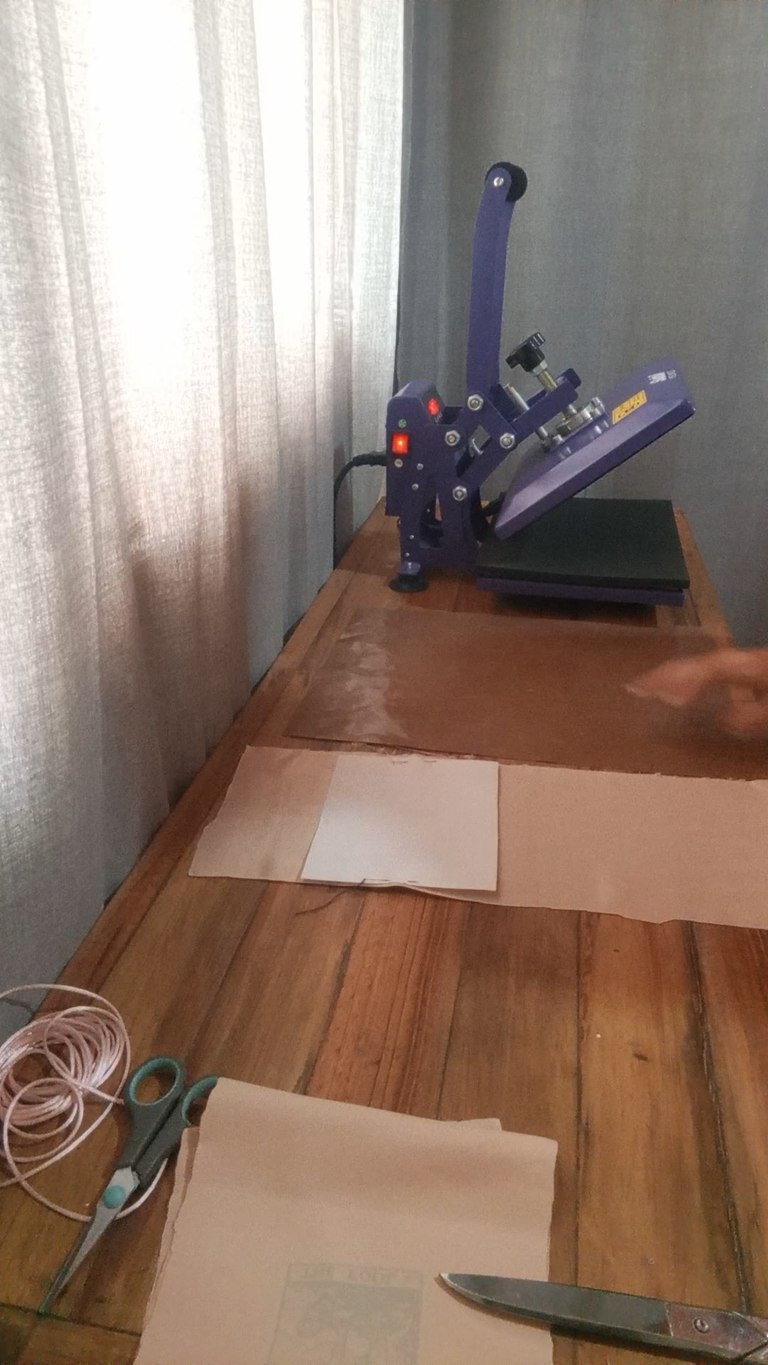
Corta un trozo de tela con las medidas de 30 centímetros de largo por 15 centímetros de ancho.
Coloca el diseño en la tela y sugiero que lo fijes con cinta térmica, pues este es una de los problemas que tenía al mancharse la sublimación, ya que al subir la plancha el diseño se mueve y se vuelve a remarcar dejando una sombra llamada "ghosting" por las orillas.
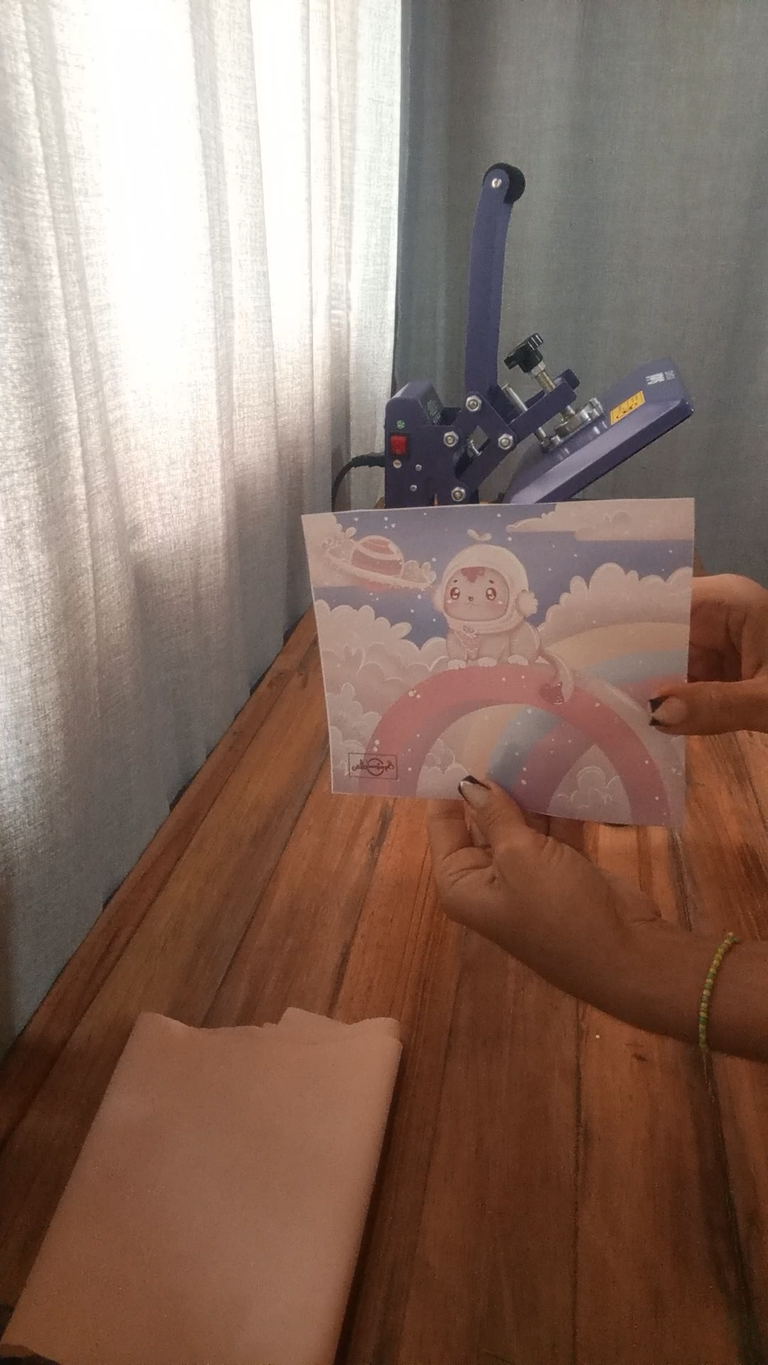
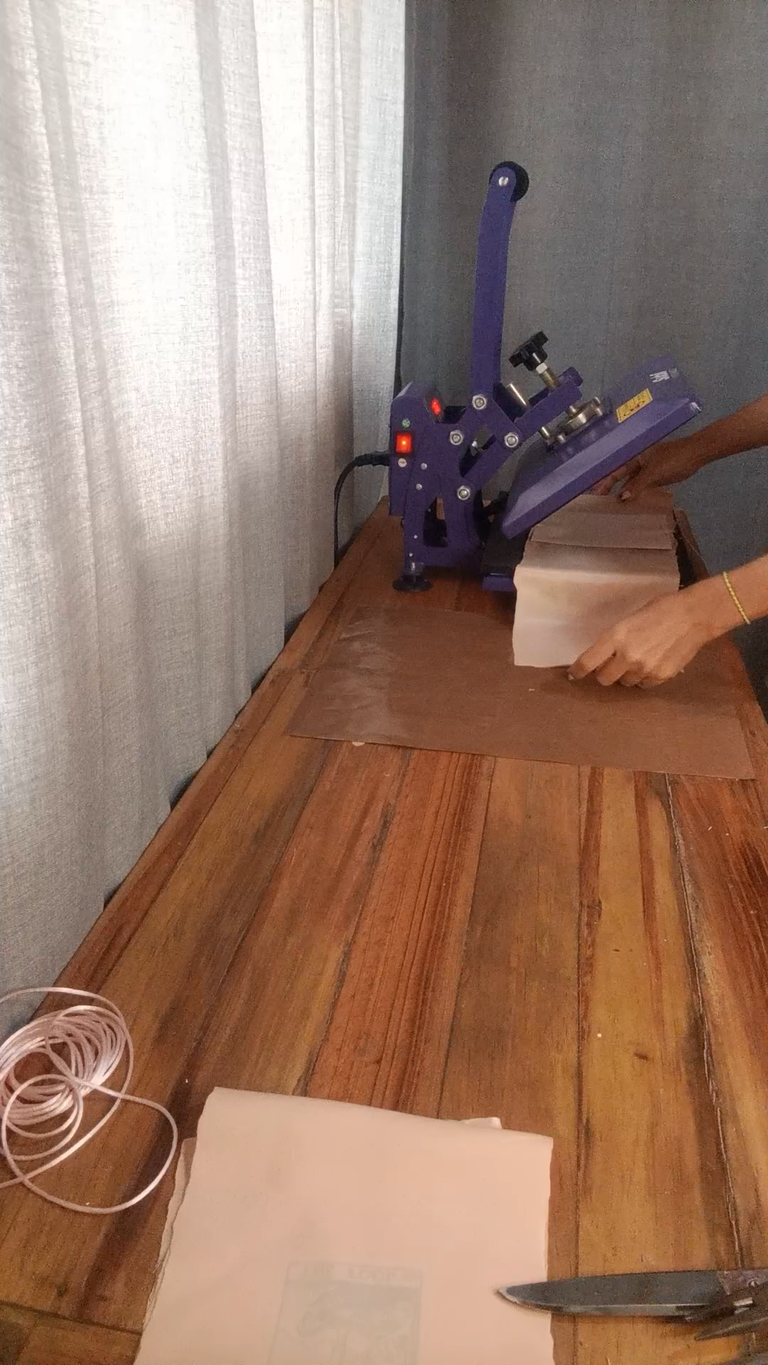
Calienta la plancha, para este tipo de tela delgada y fina sugiero colocar la plancha a 320°F.
Coloca con cuidado la tela sobre la plancha y luego la lámina de teflón, baja la manilla por un período de 50 segundos.
Abre la plancha y con cuidado retira la tela, recuerda que todo está muy caliente, realiza esto con mucho cuidado no quemarte.
Retira el papel de la tela con mucho cuidado, es mejor dejarlo enfriar.
! [English version]
Cut a piece of fabric measuring 30 centimeters long by 15 centimeters wide.
Place the design on the fabric and I suggest that you fix it with heat tape, as this is one of the problems I had when the sublimation was stained, because when the iron goes up the design moves and is remarked again leaving a shadow called "ghosting" along the edges.
Heat the iron, for this type of thin and fine fabric I suggest setting the iron to 320°F.
Carefully place the fabric on the iron and then the Teflon sheet, lower the handle for a period of 50 seconds.
Open the iron and carefully remove the fabric, remember that everything is very hot, do this carefully so as not to burn yourself.
Remove the paper from the fabric very carefully, it is better to let it cool down.
Step 3️⃣/ paso 3️⃣
 |  |

[Esp]
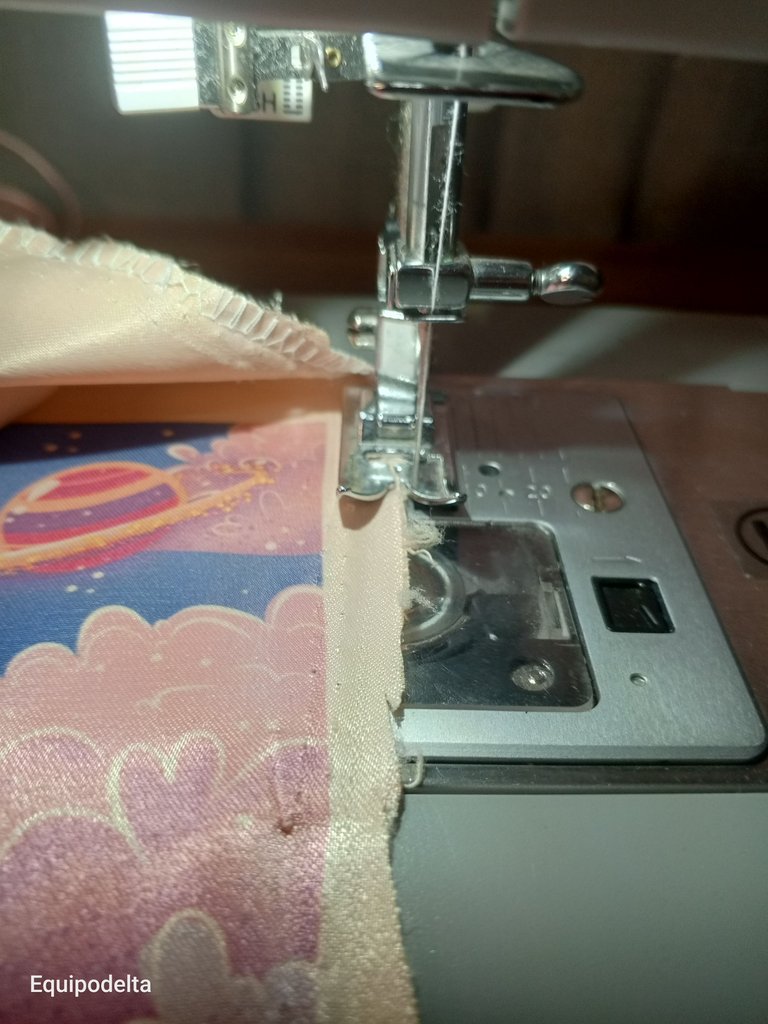
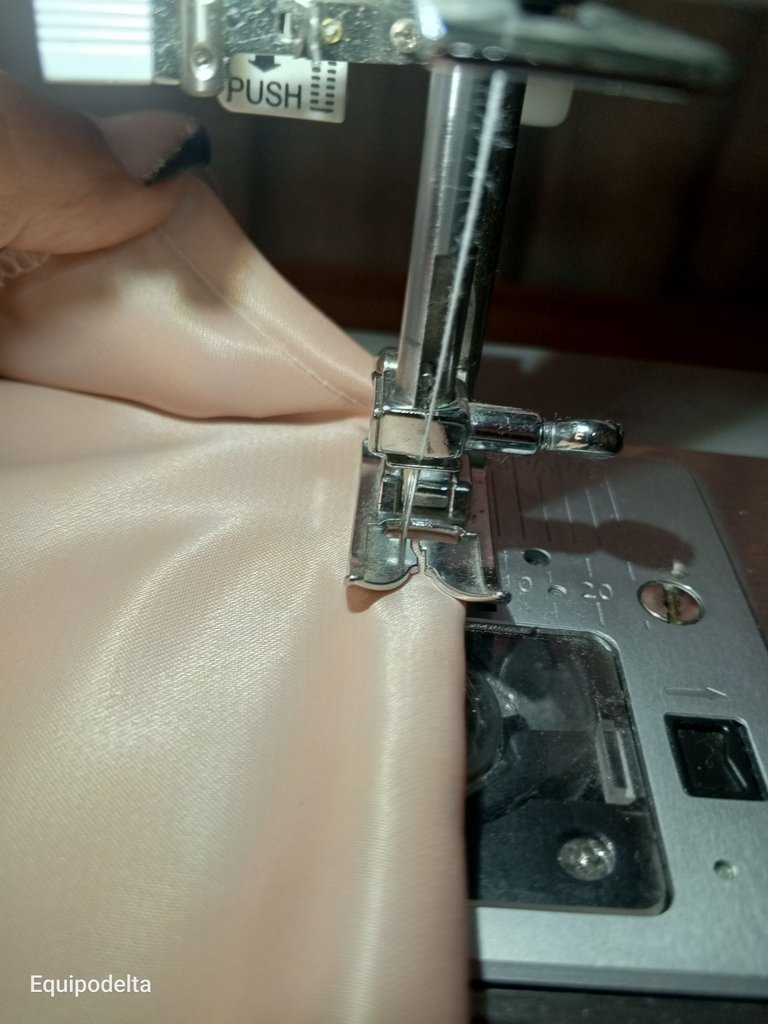
Cose zig zag por todos los bordes.
Step 4️⃣/ paso 4️⃣
 |  | |
 |  |

[Esp]
Realiza un dobladillo en cada lado de la parte superior.
Cierra con una recta los laterales y voltea.
! [English version]
Make a hem on each side of the top.
Close the sides with a straight stitch and turn over.
Step 5️⃣/ paso 5️⃣
 |  | |
 |  |
[Esp]
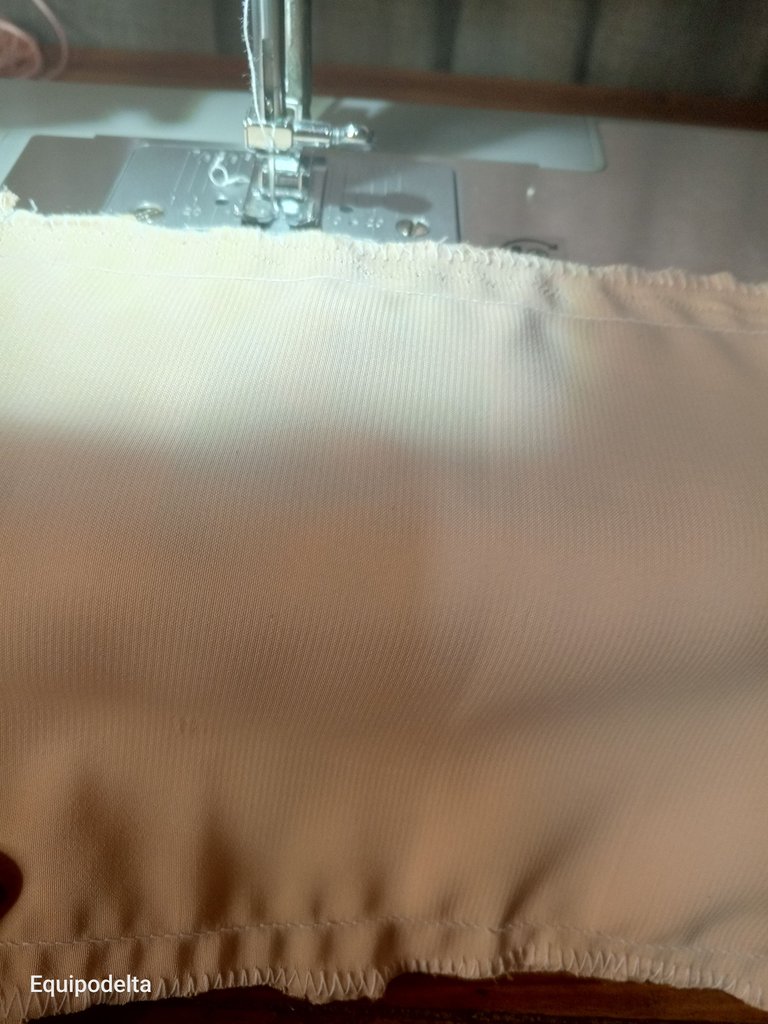
Dobla la tela hacia a dentro unos 2.5 centímetros.
Cose con dos rectas, una por la orilla del dobladillo y la otra la separación de la pata con la orilla de la tela. Esto es para que pueda pasar el cordón.
Realiza dos pequeñas aberturas de cada lado.
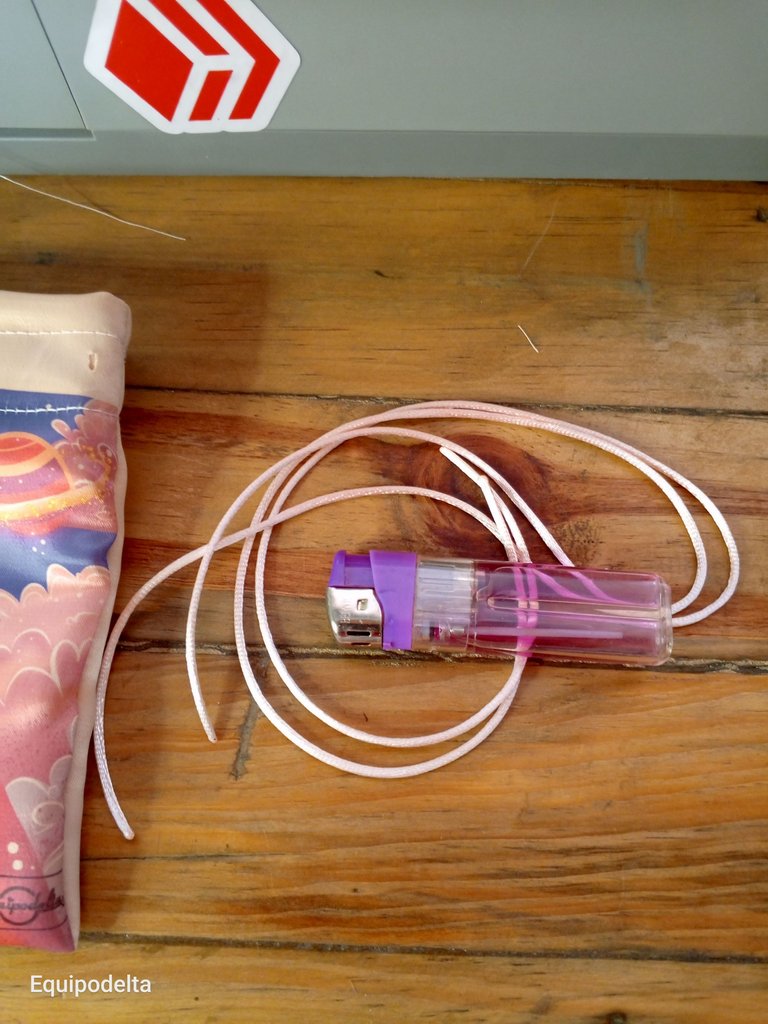
Corta dos trozos de cordón de 30 centímetros de largo y quema las puntas con un yesquero.
! [English version]
Fold the fabric inward about 2.5 centimeters.
Sew two straight stitches, one along the edge of the hem and the other along the separation between the leg and the edge of the fabric. This is so that the cord can pass through.
Make two small slits on each side.
Cut two pieces of cord 30 centimeters long and burn the ends with a tinderbox.
Step 6️⃣/ paso 6️⃣
 |  |  |
 |  |  |

[Esp]
Pasa el cordón por uno de los orificios de los laterales, debes sacarlo por el otro orificio del mismo lado, ahora únelos con un nudo.
Repite el paso anterior con el otro cordón del otro lado.
Ya con ello podemos abrir y cerra la bolsita fácilmente y nuestro trabajo está hecho.
Espero que les guste.
! [English version]
Pass the cord through one of the holes on the sides, take it out through the other hole on the same side, now join them with a knot.
Repeat the previous step with the other cord on the other side.
Now we can open and close the bag easily and our job is done.
I hope you like it.


Créditos / Credits


💜💜💜
![]() 👉
👉  👉
👉 ![]() 👉
👉 ![]() 👉
👉 
Here / Bríndame un café

This is really so cute…
Every time you feel the same emotion while doing it shows that how much you love it and this also shows in your work 😍
I love to share not only my progress but also my failures, we learn from everything. I'm glad you like this project. There will be more to come down the road.
Very true 😃
This will be very useful for storing make up or anything else when traveling. You are so great, you can create it yourself and even make the printing adorable.
Yes, I feel proud, it is something that since I started drawing I dreamed of being able to do it but the economy was very tough and the materials and tools were not available, now almost everyone can have them and it is wonderful to be able to do it.
I also used to love drawing, but now I hardly ever do it because I'm so busy.
Glad to hear you can now do many activities without having to worry about anything anymore.
Hello, @equipodelta, good morning.
What beautiful work! I loved that you commented on all these details when printing, and those mistakes so we wouldn't make them.
I admire the work you do. Thank you so much for sharing all these details.
Have a beautiful day.
Hola mi reina ya verás mis siguientes trabajos espero que te gusten <3
Bello diseño de impresión y bolsito, te felicito, 😊👍
Gracias Lismar, me alegra te guste.
We applaud your consistency and creativity. Keep practicing, keep making those mistakes and keep learning. You are on the right path. Well done and thanks for sharing.
selected by @ibbtammy
Thank you very much community. Little by little I am solving some problems that lower the quality, I am learning.
You've been curated by @amazingdrinks! Delegations welcome!
Ey! Thanks so much.
Quedé fascinada con tu técnica. No había visto algo asi, pero veo que se requiere de mucha pericia. Te quedó increíble.
Todavía lo estoy perfeccionando, porque realmente no era tan facil como pensé. Ahi voy.
Sublimar es un trabajo laborioso, se necesita paciencia y mucha práctica para realizar esos diseños tan espectaculares, te quedó perfecto, me encanta esa técnica de la sublimación en tiempos como este hacia muchos souvenirs para los colegios, jajaja, de veras me gustó mucho, como siempre me agrado bastante saludarte @equipodelta 🌹🤗
Hola reina, si lo es, ni hablar lo que calienta la planch ay el cuarto es un horno, ese calor me deja las manos doliendo por dias. Todavía no he ofrecido servicios en esos lugares, quiero corregir muchas fallas.
Gracias por visitarme querida. Te mando un abrazo
Hola linda, como te dije el trabajo es laborioso pero después los resultados nos dan satisfacción, tu sabes que como manualista y artesana siempre buscamos innovación y cuando la sublimación apareció hasta me compré un equipo y bautizos, cumpleaños, matrimonios fiestas que necesitarán un recuerdo tuvo su taza, vaso, franela, llaveros etc 🤣🤣🤣🤣 siempre me es muy grato saludarte un abrazo con mucho cariño 🌹
Y vas ganando en experticio en cuanto a esta muy bella y original práctica de imprimación. Te felicito, amiga mía
Poco a poco reina, poco a poco, paciencia, practica y disciplina.
Esa es la fórmula
¡Bellisimo! sin palabras. gracias por compartir.
Un abrazo amiga @equipodelta
gracias amiga querida <3