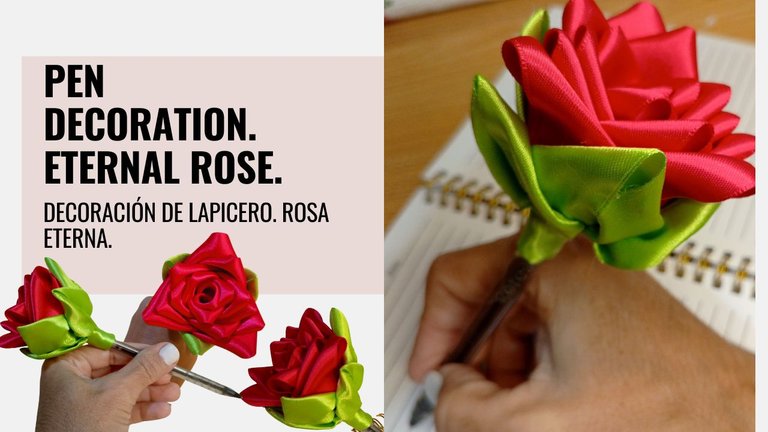
DIY: Pen decoration. Eternal rose. / Decoración de lapicero. Rosa eterna. (Esp/Eng)

[Esp]
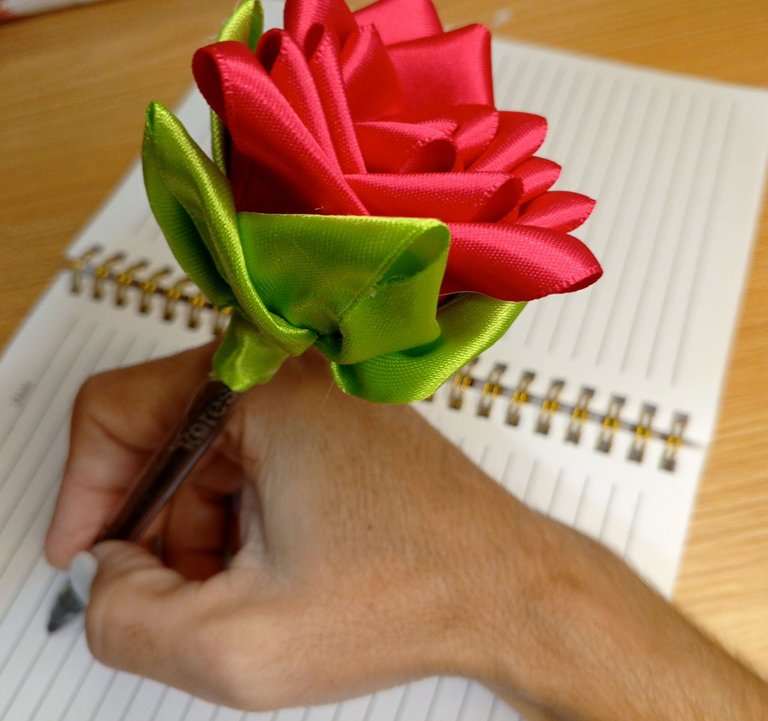
¡Hola comunidad DIY!
En mi país estamos pronto de regreso a clases, me pareció oportuno hacer una decoración de un lapicero como detalle para regalar a una de las enfermeras que siempre me ha atendido bien en mis terapias, ella está haciendo un post grado y le gusta mis manualidades.
He intentado hacer esta flor antes, pero se me hacía realmente muy difícil, al fin encontré una forma muy sencilla y a prueba de fallos, si yo puedo hacerlo tú también. Es fácil y ahora que aprendí a hacerlas, seguro que haré más proyectos con estas rosas a futuro.
Te invito a sorprender a tus seres queridos con un detalle así, para cualquier ocasión, lo que lo hará más especial es que lo hiciste tú mismo, también es muy bueno como idea de emprendimiento.
! [English version]
Hello DIY community!
In my country we are soon back to school, it seemed appropriate to make a decoration of a pencil as a detail to give to one of the nurses who has always taken good care of me in my therapies, she is doing a post degree and likes my crafts.
I have tried to make this flower before, but it was really very difficult, finally I found a very simple and fail proof way, if I can do it you can do it too. It's easy and now that I learned how to make them, I'm sure I will make more projects with these roses in the future.
I invite you to surprise your loved ones with a detail like this, for any occasion, what will make it more special is that you did it yourself, it is also very good as an entrepreneurial idea.
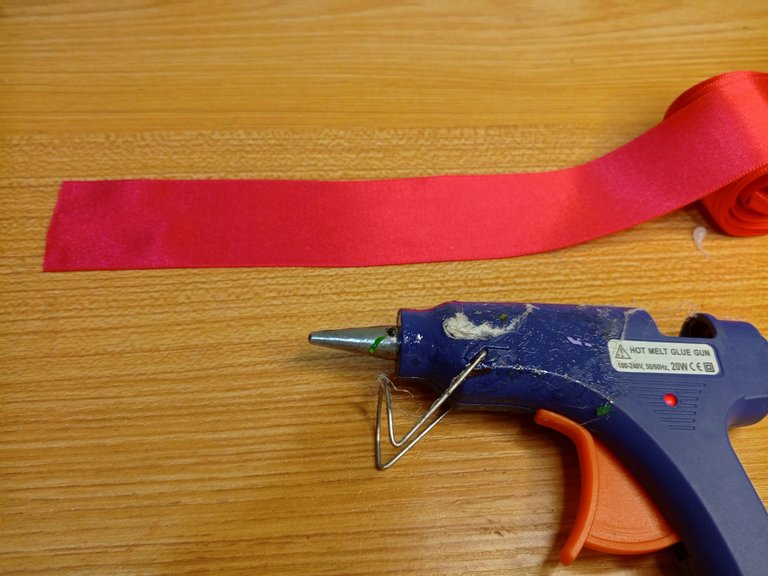
Materiales / Materials

| Spanish | English | |
| Cinta de raso color fucsia y verde N°9 | Fuchsia and green satin ribbon N°9 | |
| Lapicero | Pen | |
| Tijera | Scissors | |
| Pistola de silicón | Silicone gun | |
| Yesquero | Tinder |
Paso a paso / Step by Step
Step 1️⃣/ Paso 1️⃣
 |  | |
 |  |
[Esp]
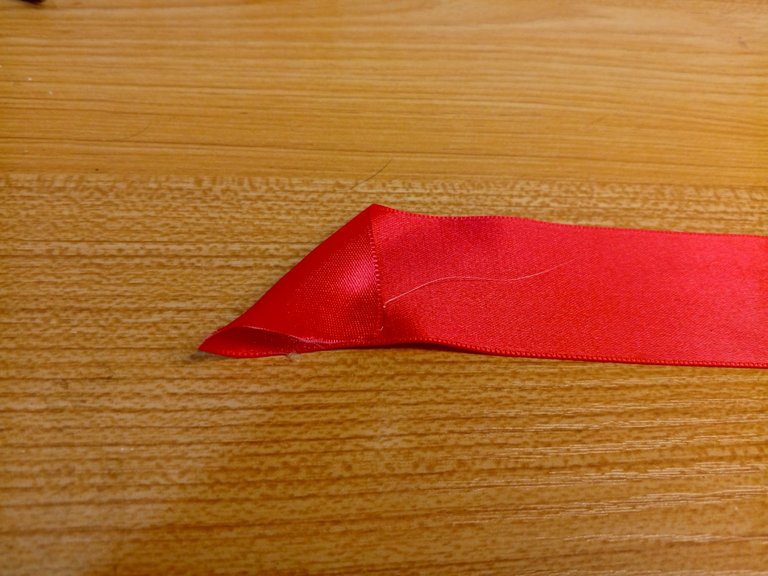
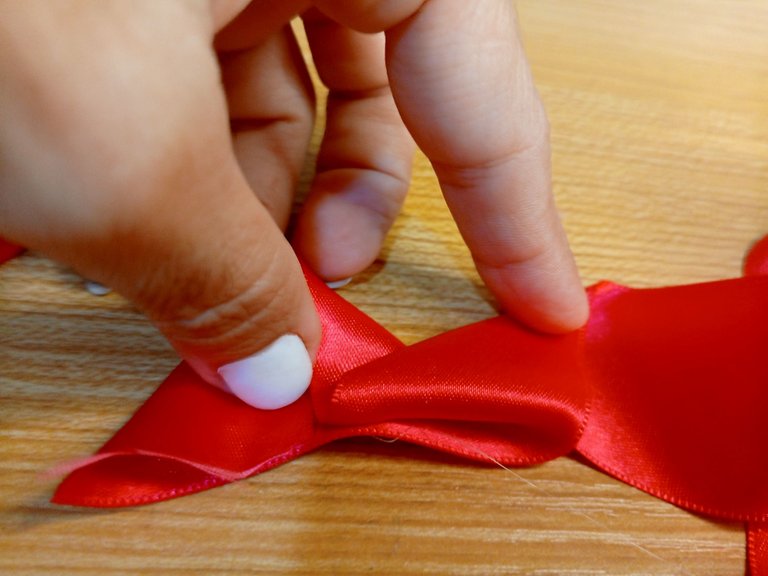
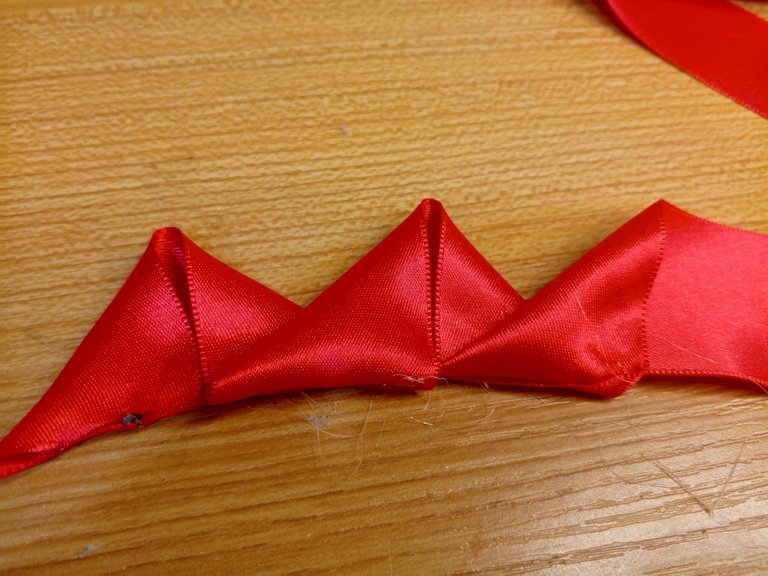
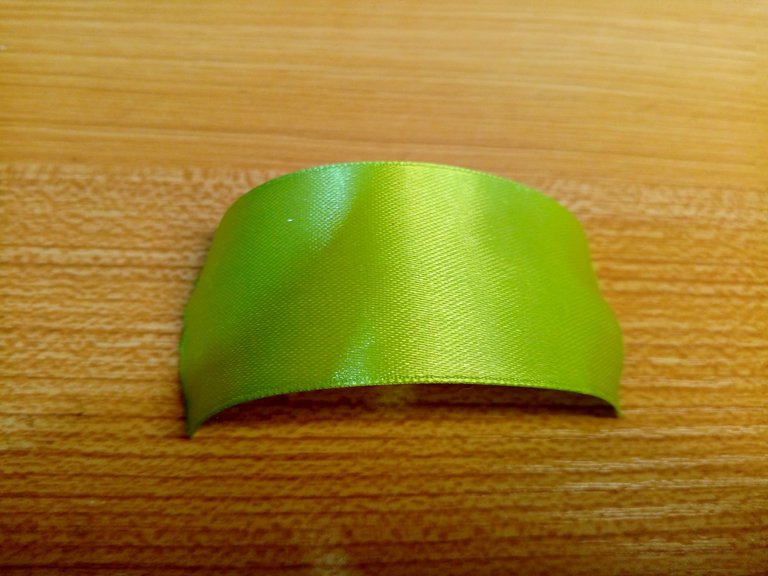
Toma la cinta de raso color fucsia, con el yesquero quema la punta del comienzo para evitar que se deshilache.
Dobla diagonal formando un triángulo, coloca un punto de silicón caliente para fijar.
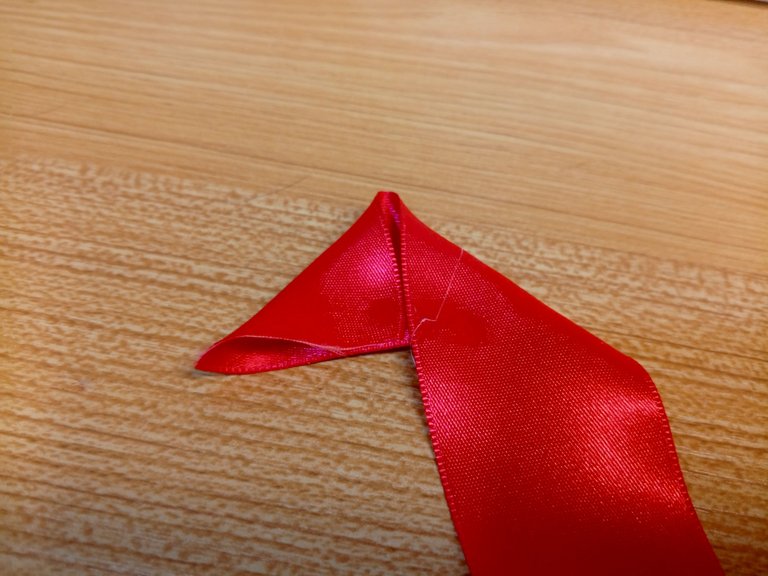
Ahora dobla diagonal hacia abajo la cinta para formar un triángulo más grande y coloca un punto de silicón caliente para fijar.
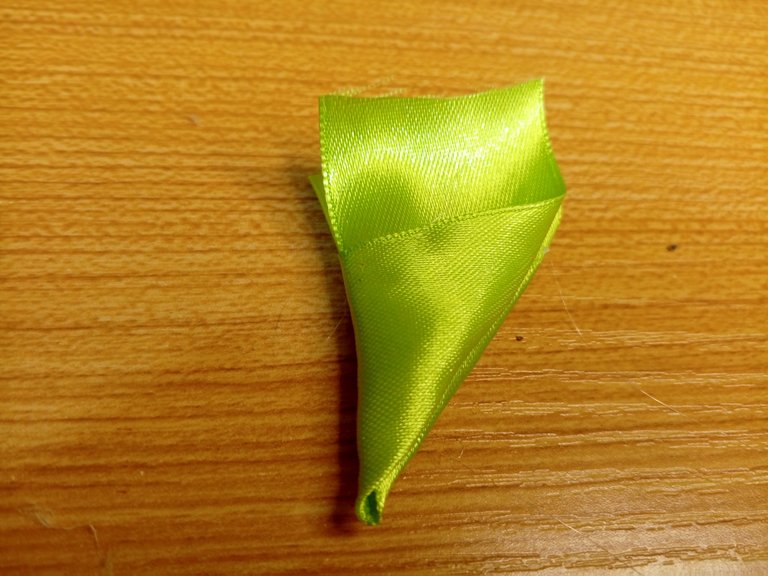
Puedes hacer el siguiente pétalo en dos formas, la primera es doblando la cinta hacia adentro y colocando silicón caliente en la parte interna para formar el siguiente triángulo pequeño.
! [English version]
Take the fuchsia colored satin ribbon, with the tinder burn the tip of the beginning to prevent it from fraying.
Fold diagonally forming a triangle, place a dot of hot silicone to fix.
Now fold diagonally down the ribbon to form a larger triangle and place a dot of hot silicone to fix.
You can make the next petal in two ways, the first is by folding the ribbon inward and placing hot silicone on the inside to form the next small triangle.
Step 2️⃣/ paso 2️⃣
 |  | |
 |  |
[Esp]
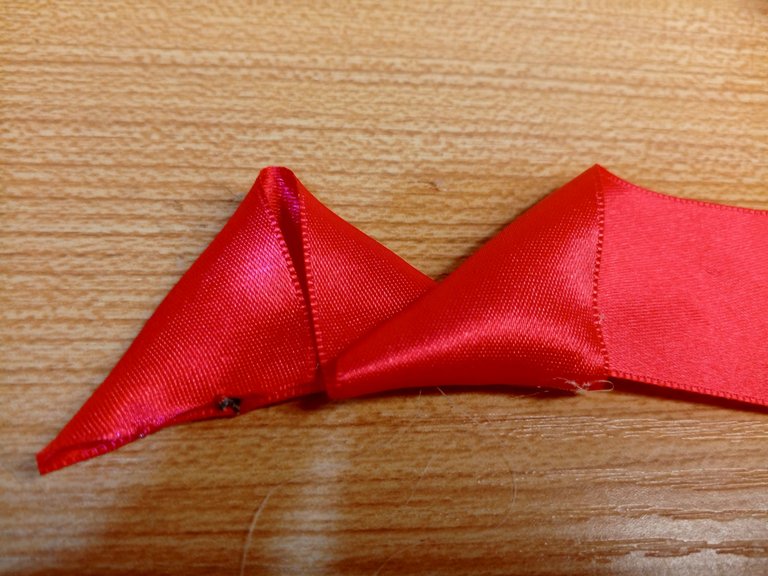
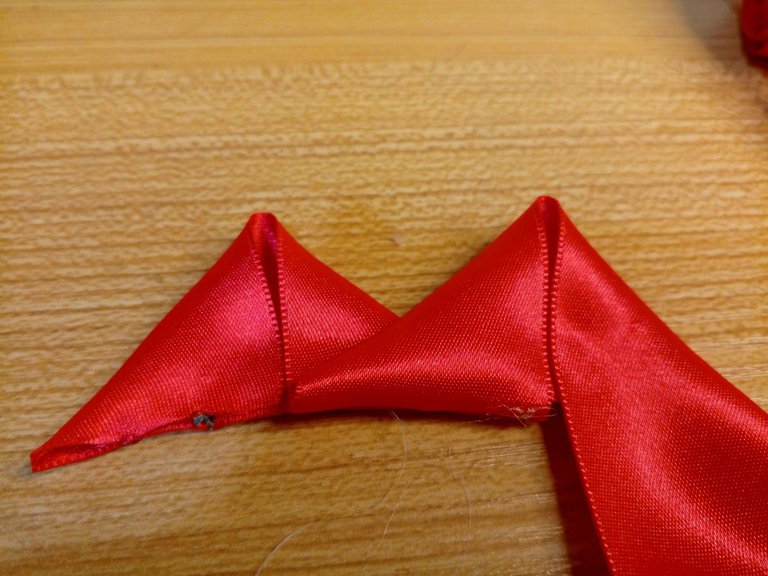
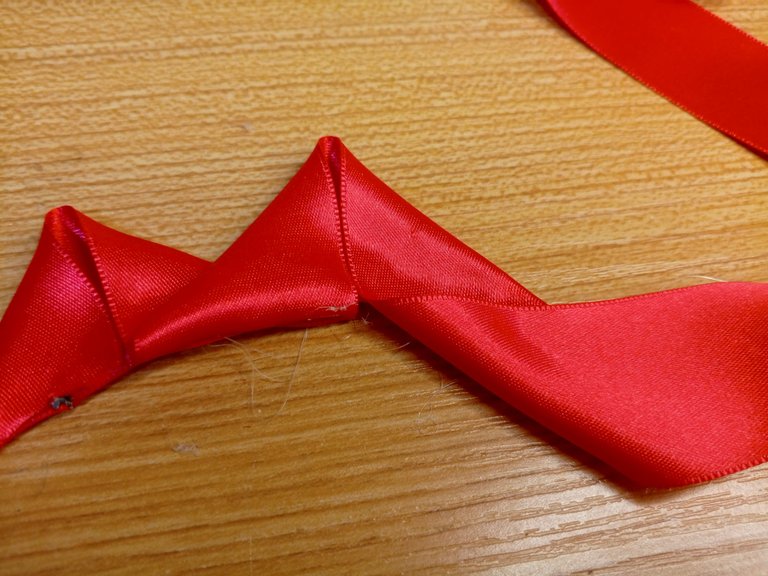
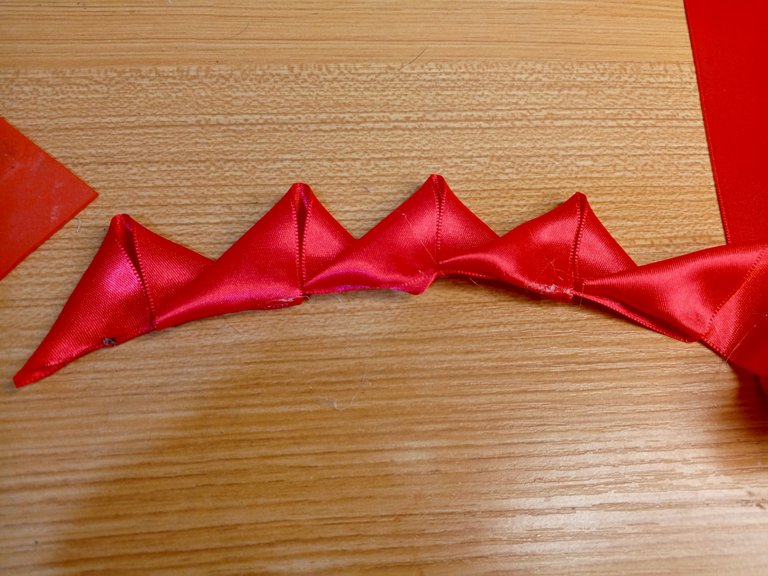
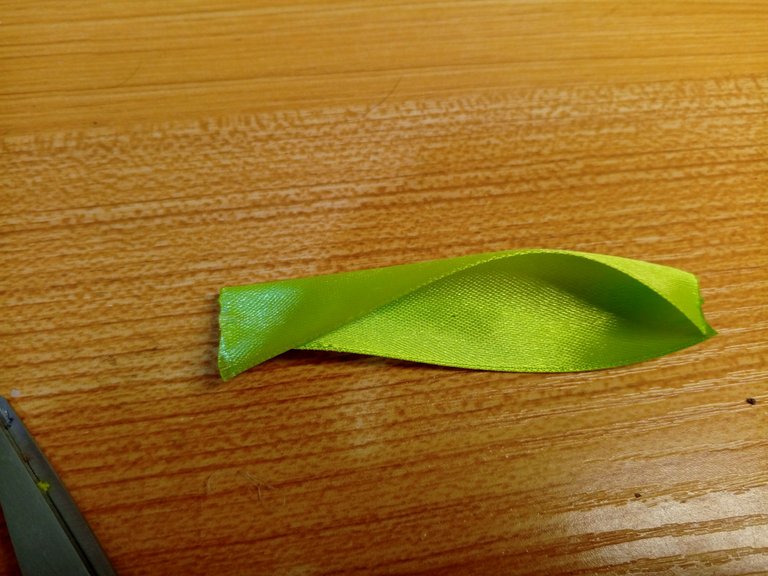
Dobla hacia abajo la cinta y fija con silicón caliente.
La siguiente forma que puedes hacer los pétalos es volviendo a doblar en diagonal la cinta que quedó abajo, fija con silicón caliente.
Ahora dobla hacia arriba y coloca pegamento por la parte trasera.
Estos pasos los repetirás la cantidad de pétalos que sean necesarios para tu decoración, en mi caso hice 15 pétalos seguidos.
! [English version]
Fold down the ribbon and fix with hot silicone.
The next way you can make the petals is by folding the ribbon diagonally back down and fix with hot silicone.
Now fold it up and put glue on the back side.
Repeat these steps as many petals as necessary for your decoration, in my case I made 15 petals in a row.
Step 3️⃣/ paso 3️⃣
 |  |  |
 |  |
[Esp]
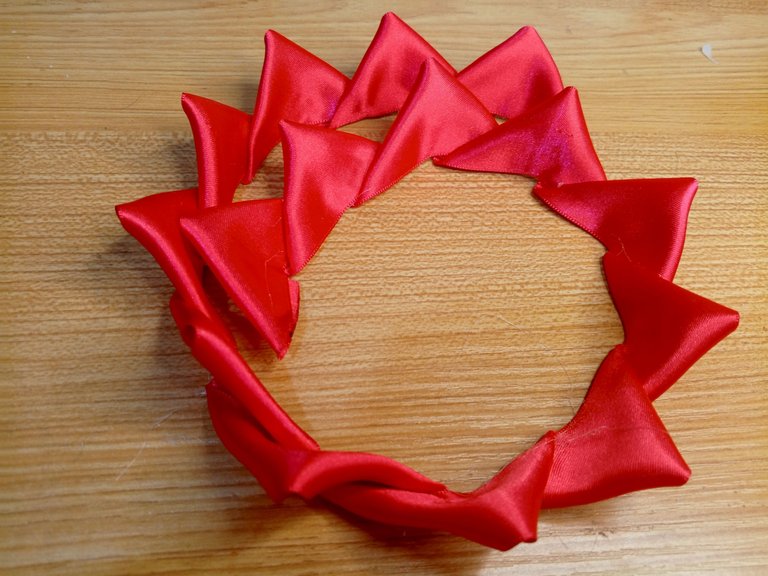
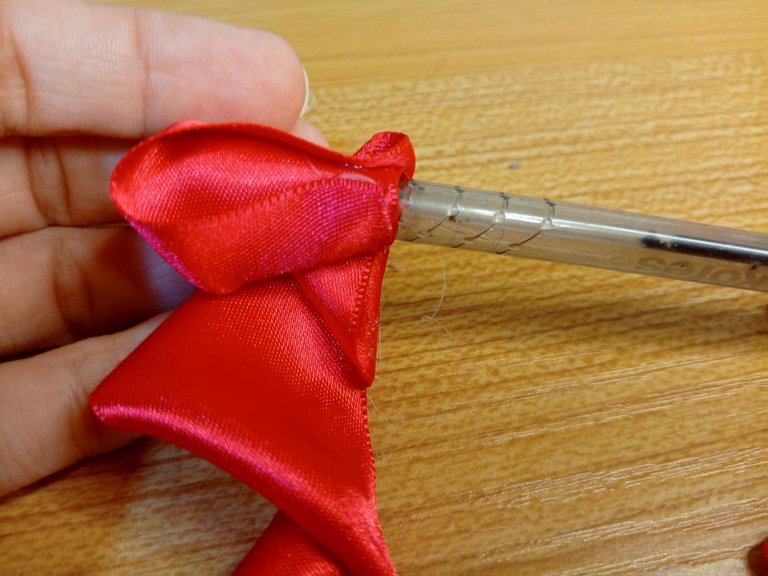
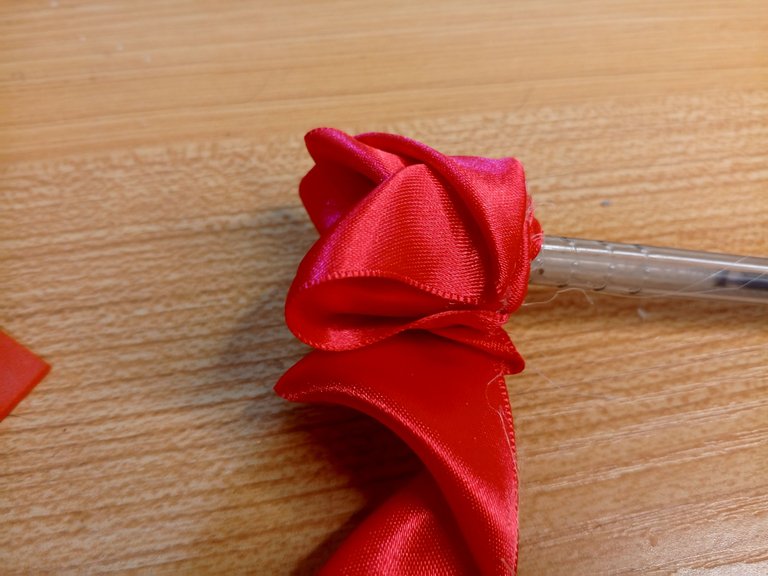
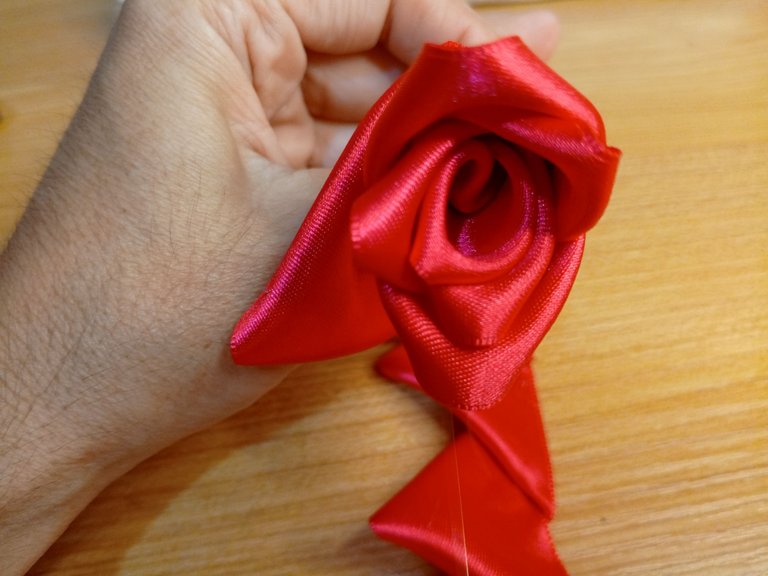
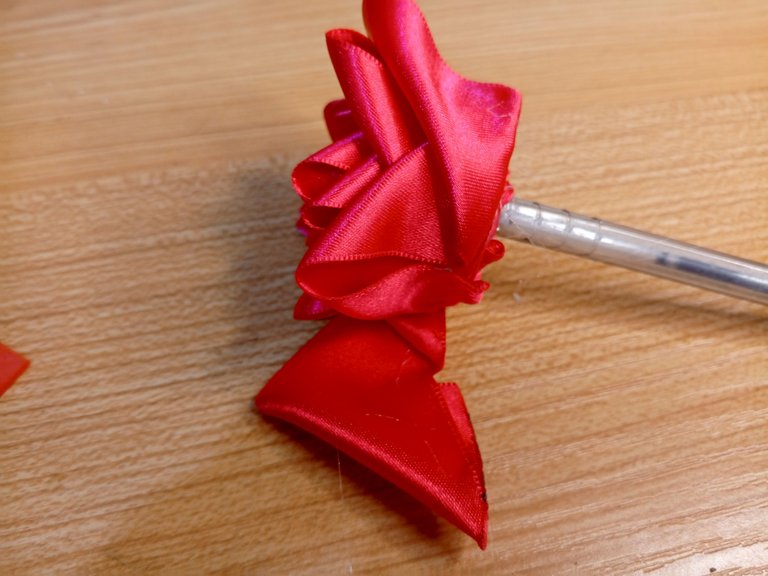
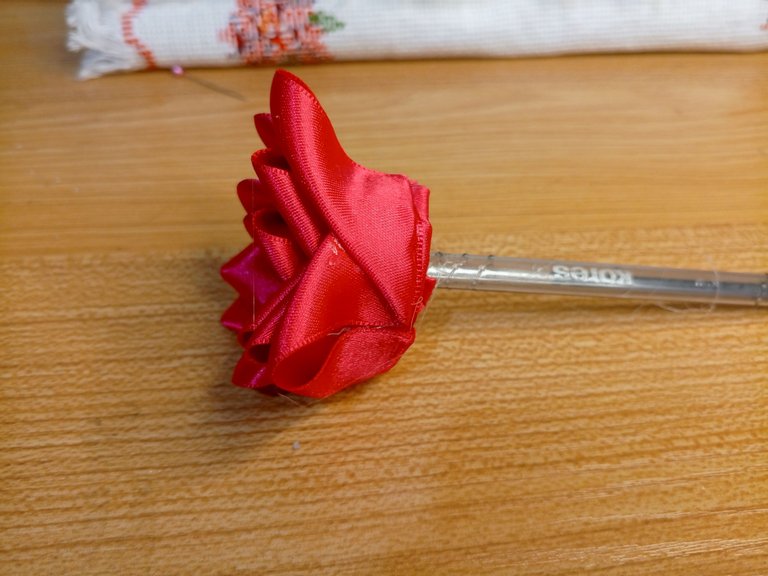
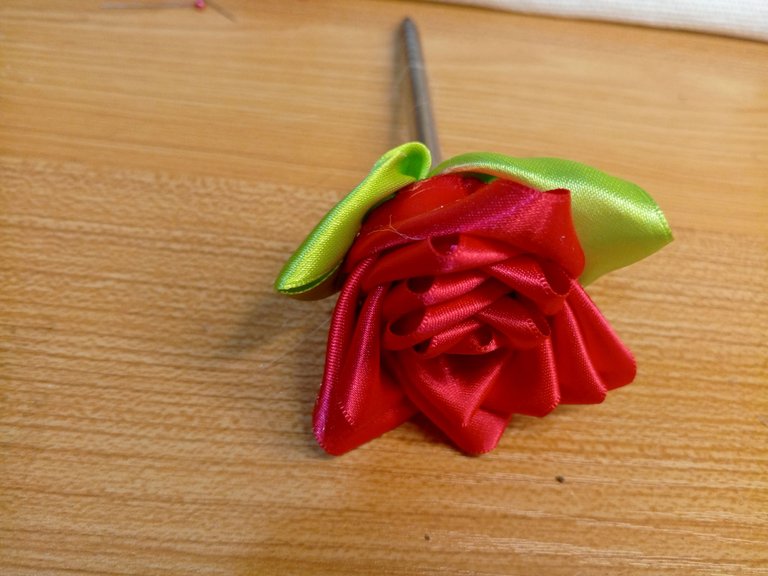
Coloca pegamento por la parte interna del primer pétalo e introduce el lapicero, comienza a enrollar poco a poco los pétalos al lapicero.
En la medida que vas enrollando debes aplicar pegamento en la parte inferior de la cinta para que no se suelte.
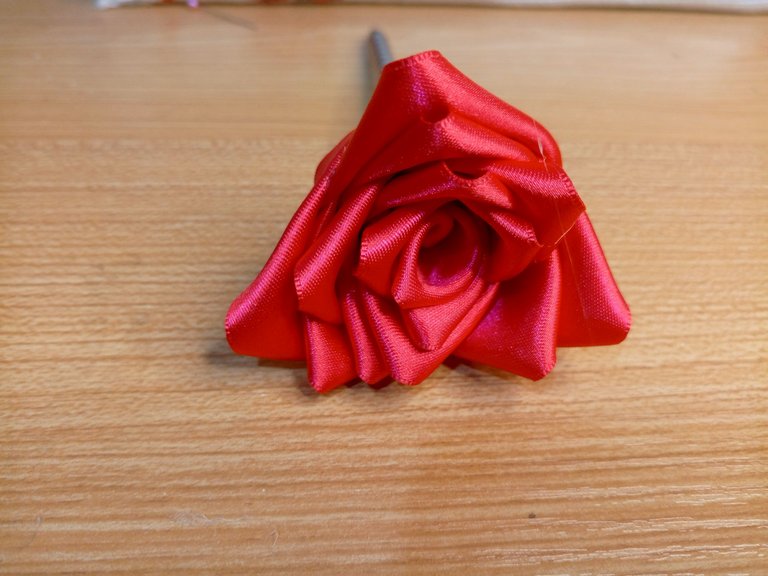
Cuando termines toda la cinta, recuerda quemar el extremo de la otra punta con ayuda del yesquero para que no se deshilache. Ya con esto hemos culminado la primera parte de la rosa.
! [English version]
Place glue on the inside of the first petal and insert the pencil, start rolling the petals to the pencil little by little.
As you roll it up, apply glue to the bottom of the ribbon so that it does not come loose.
When you finish all the ribbon, remember to burn the end of the other end with the help of the tinder so that it does not fray. With this we have finished the first part of the rose.
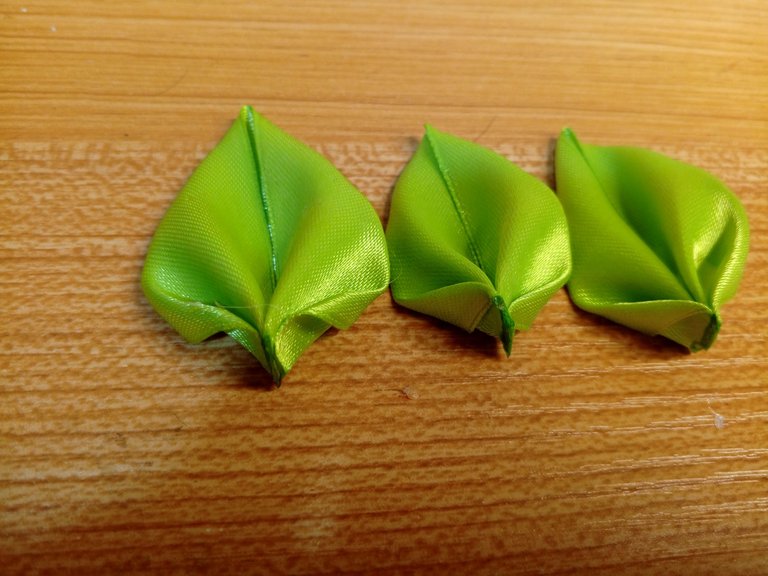
Step 4️⃣/ paso 4️⃣
 |  | |
 |  |
[Esp]
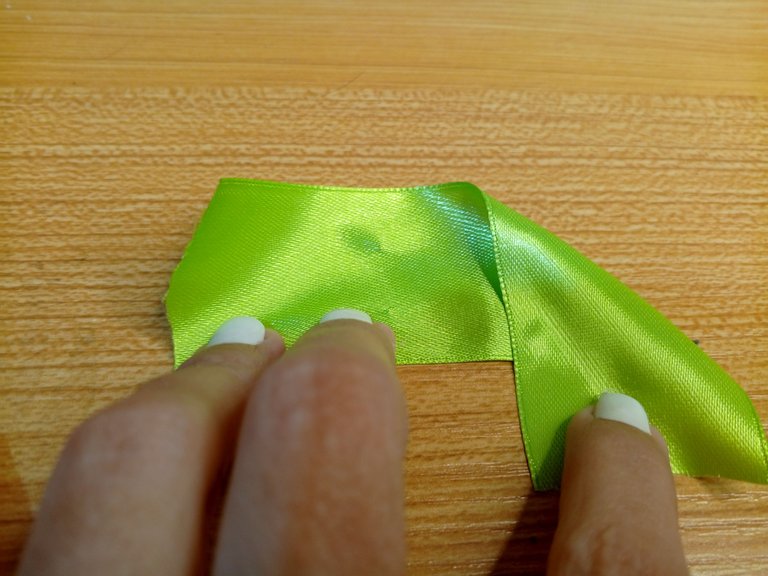
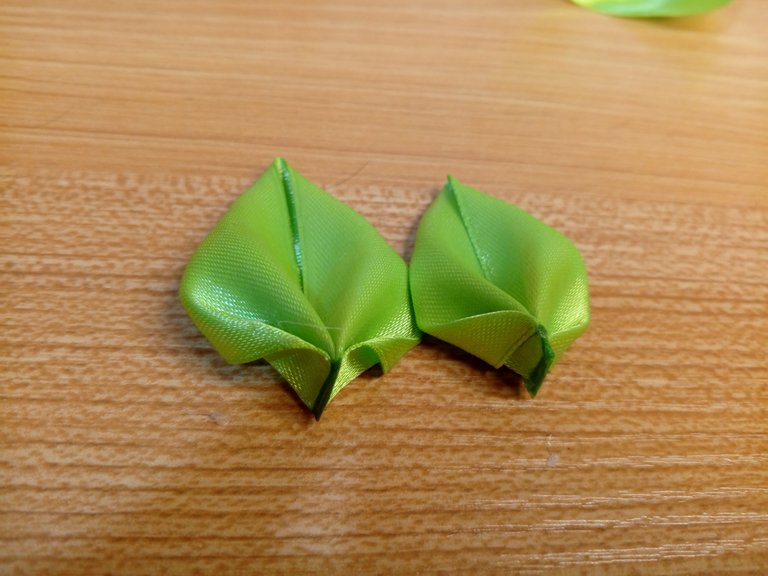
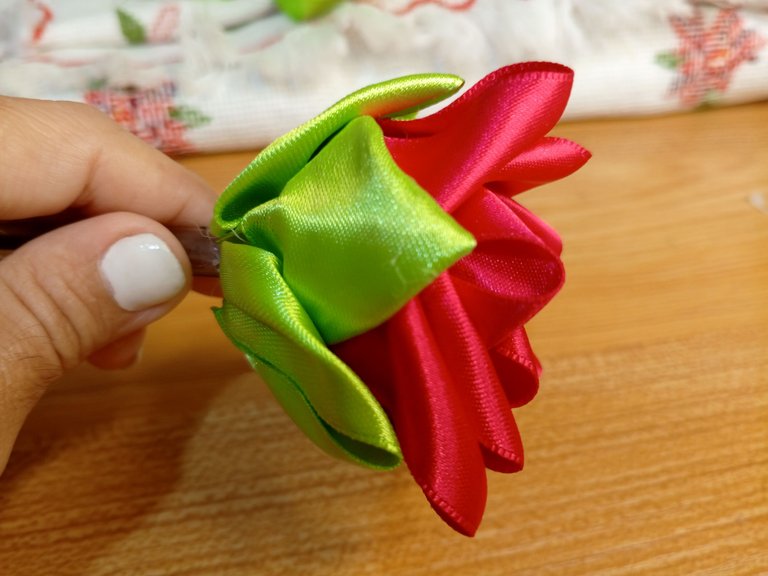
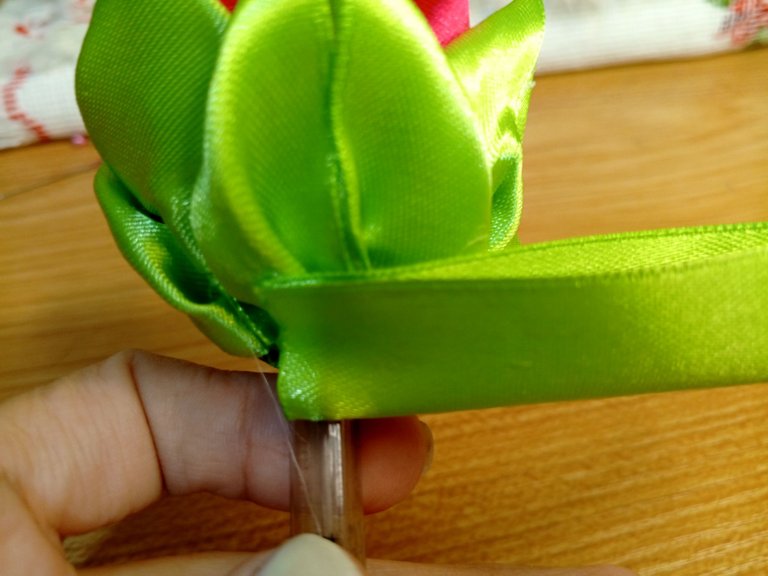
Haremos 6 hojas o depende de cuántas necesites para cubrir la rosa.
Toma la cinta verde, corta trozos de 8 centímetros, corta 6 piezas.
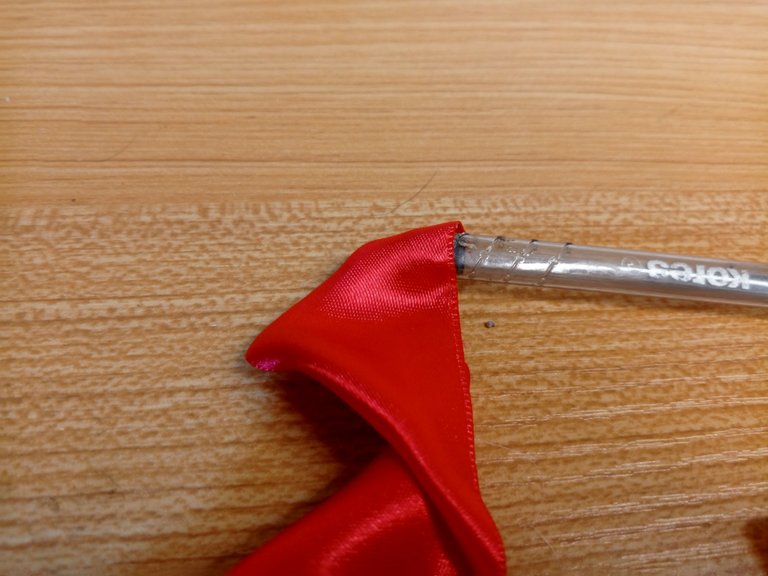
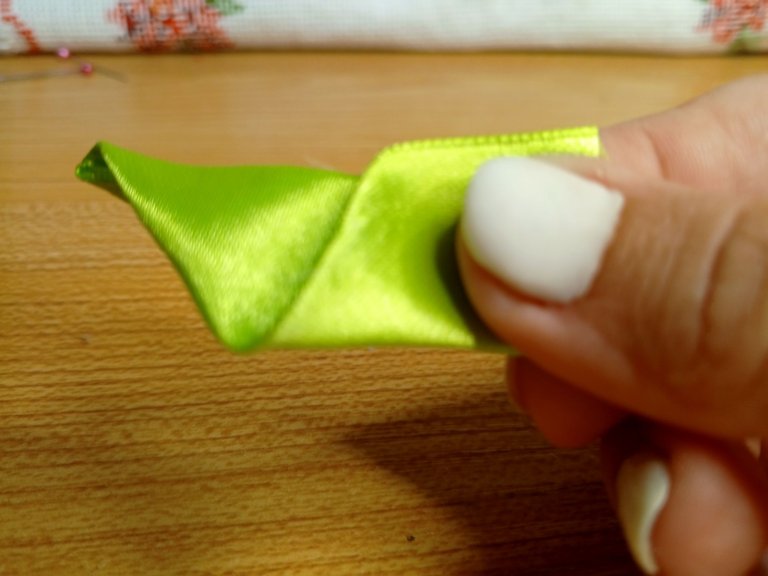
Toma uno de los trozos, dobla una de las puntas en forma de triángulo a la pieza central, debe quedar una parte sobrante, coloca un poco de pegamento para fijar.
Ahora dobla la siguiente punta tal como la anterior, coloca un punto de pegamento para fijar.
Ahora dobla la pieza hacia adentro sin aplicar pegamento.
! [English version]
We will make 6 leaves or it depends on how many you need to cover the rose.
Take the green ribbon, cut pieces of 8 centimeters, cut 6 pieces.
Take one of the pieces, fold one of the ends in the shape of a triangle to the central piece, there should be a part left over, place a little glue to fix.
Now fold the next point just like the previous one, place a dot of glue to fix.
Now fold the piece inward without applying glue.
Step 5️⃣/ paso 5️⃣
 |  | |
 |  |
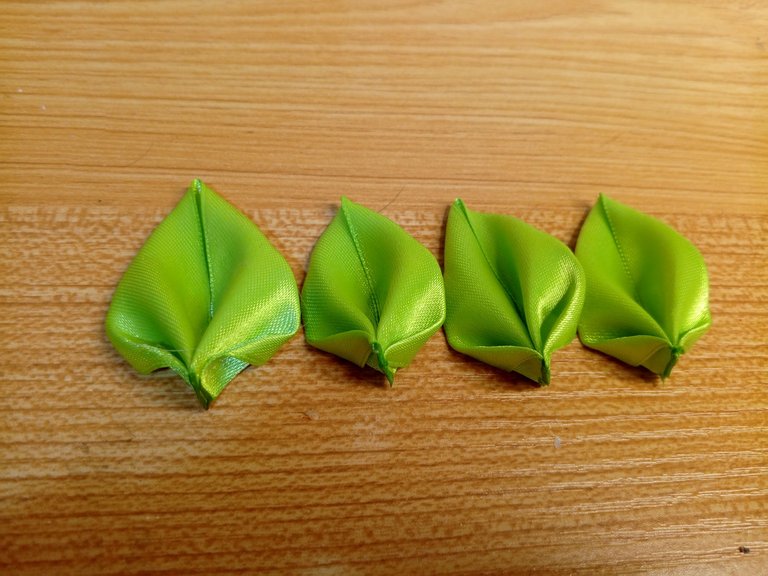
[Esp]
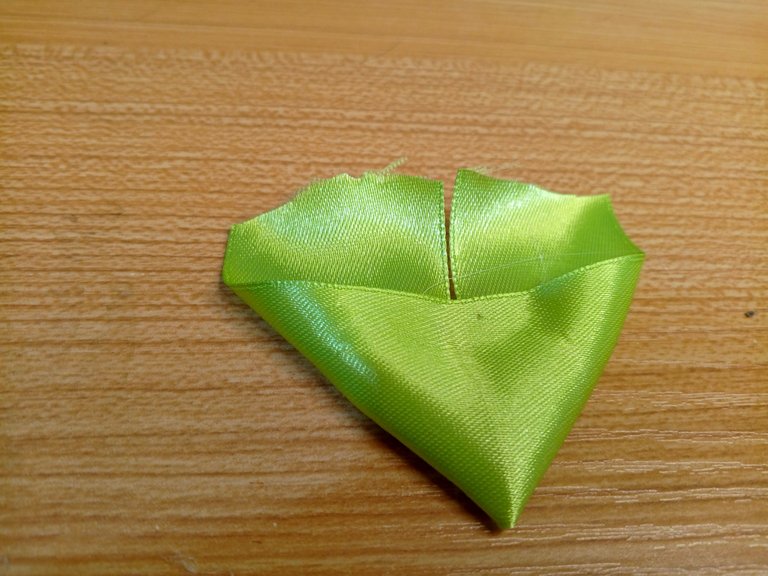
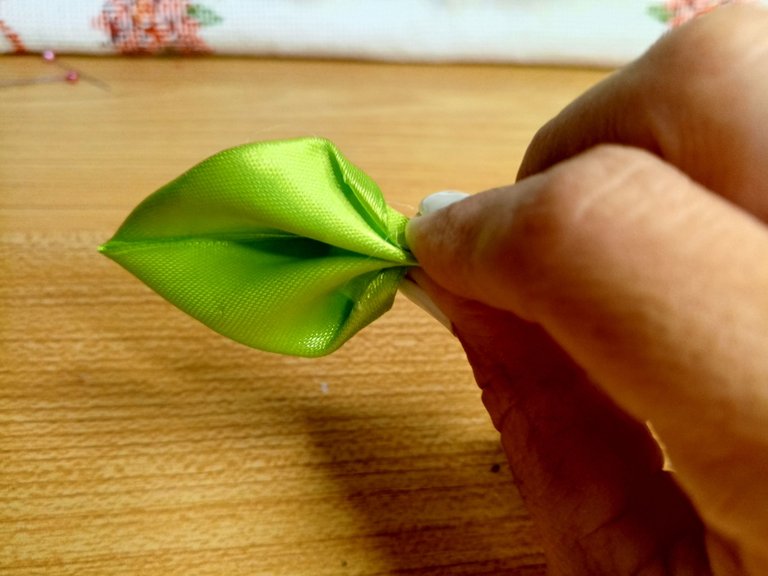
Esta parte es similar a cuando hacíamos un avión de papel, dobla una de las puntas hacia afuera dejando una sección sobresaliente, repite este paso del otro lado, no apliques pegamento usa tus dedos para mantenerlo fijo.
Dobla las puntas sobresalientes hacia afuera y ahora para fijarlo quema el borde con el yesquero, con cuidado de no quemarte aprieta con ello quedó pegado.
Este paso lo repetirás con el resto de las hojas.
! [English version]
This part is similar to when we made a paper airplane, fold one of the ends outwards leaving a protruding section, repeat this step on the other side, do not apply glue use your fingers to keep it fixed.
Fold the protruding ends outwards and now to fix it, burn the edge with the tinder, being careful not to burn yourself, press with it and it will be glued.
Repeat this step with the rest of the leaves.
Step 6️⃣/ paso 6️⃣
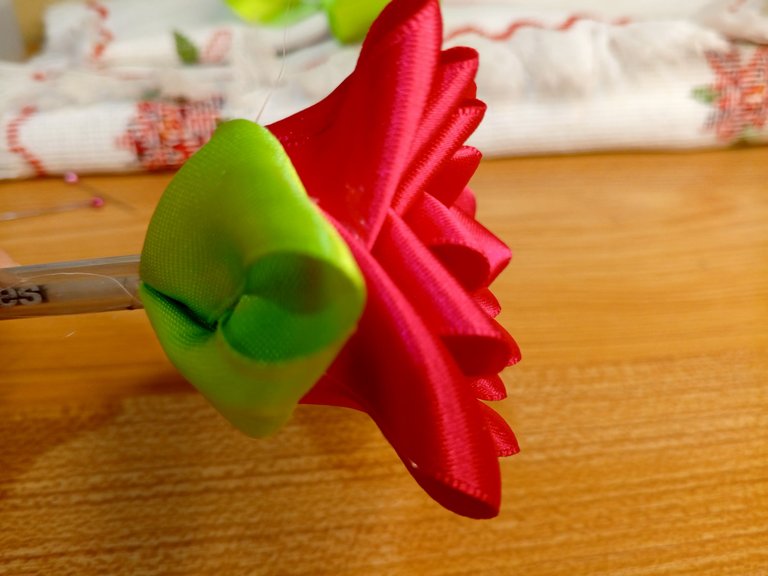 | 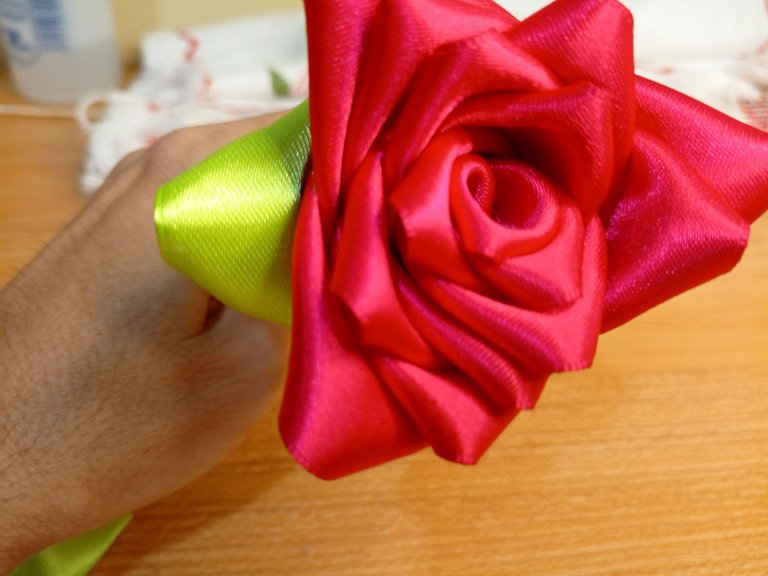 |  |
 |  |  |
 |  |  |
[Esp]
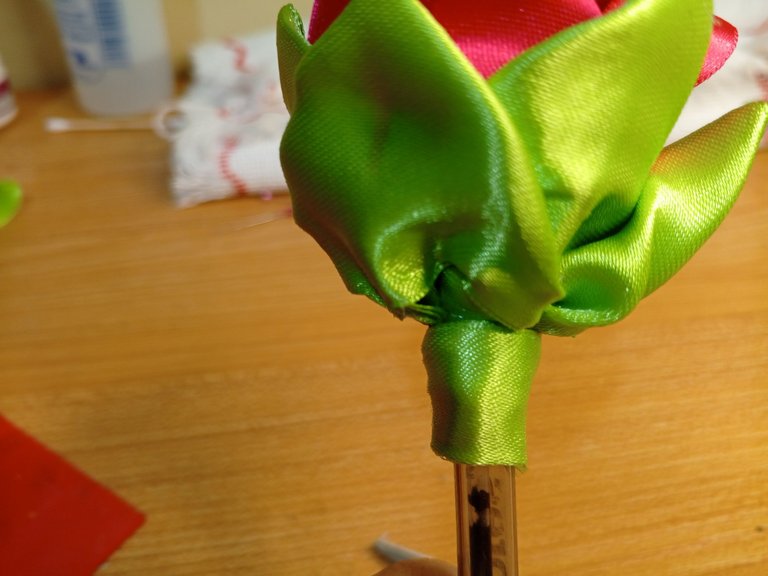
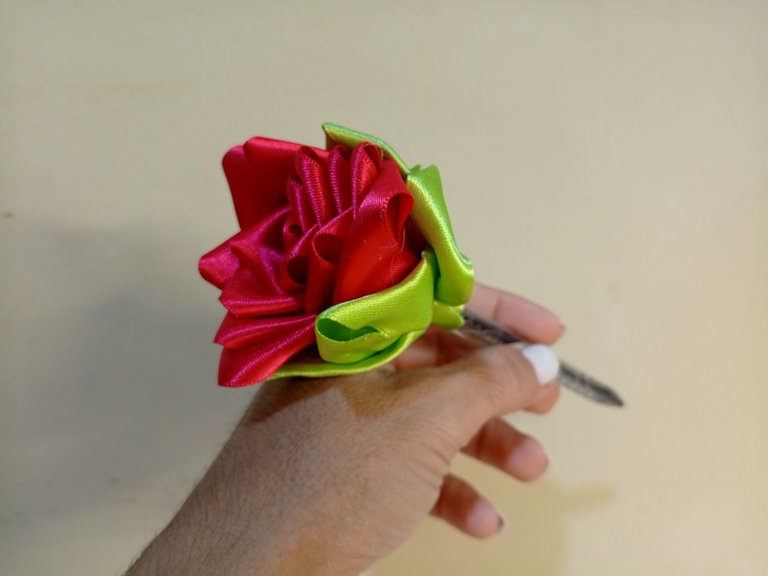
Ve pegando hoja por hoja debajo de la rosa, fijándolo con silicón caliente a la base del bolígrafo y luego a la rosa.
Este paso lo repetirás con las hojas restantes.
Toma un trozo de cinta color verde (3 Centímetros) quema ambos extremos con el yesquero.
Dobla la pieza por la mitad.
Ahora usa el trozo de cinta para forrar la rosa y el bolígrafo.
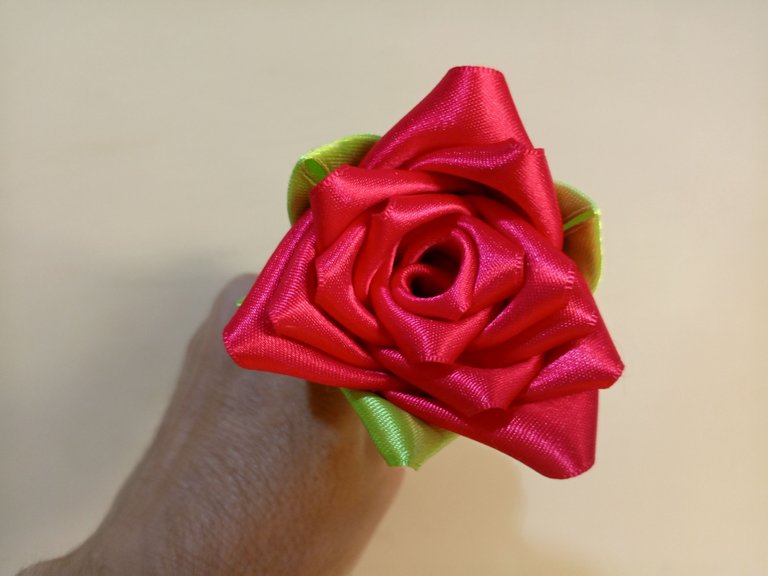
Con ello hemos culminado este lindo proyecto.
Espero que te guste.
! [English version]
Glue one leaf at a time under the rose, attaching it with hot silicone to the base of the pen and then to the rose.
Repeat this step with the remaining leaves.
Take a piece of green ribbon (3 centimeters) and burn both ends with the tinder.
Fold the piece in half.
Now use the piece of ribbon to line the rose and the pen.
This is the end of this cute project.
I hope you like it.

Créditos / Credits


💜💜💜
![]() 👉
👉  👉
👉 ![]() 👉
👉 ![]() 👉
👉 
Here / Bríndame un café

¡Un trabajo espectacular! ¡Qué bonito quedó!
Gracias querido Ylich. Me hizo muy feliz <3
Amiga, Me encantó su trabajo.
Ahora que está cerca el día de las secretarias sería un muy bonito regalo.
Ya tengo unos cuantos pedidos, debo comprar material <3
Que bueno amiga! Que sigan las bendiciones.
Good afternoon and greetings of prosperity, always be healthy and enjoy the artistic creations that you show every day.
Hello, I hope you have a happy weekend.
Such beautiful decoration, your nurse would be so happy to receive a gift this beautiful from you. Good job friend and thanks for sharing.
Yes, she was very happy and I felt proud because she presented them to all her classmates, I think I will make her a bouquet now.
Quedó hermosa, gracias por el tutorial 😉 saludos!
Hola Marile, espero que te sea de utilidad, creo que esta técnica podemos aplicarla en otros materiales.
¿Hay algo que esta mujer no sepa hacer? jajaja esta muy hermosa 😍 aunque tuviste dificultades para lograrlo, lo lograste y eso es lo que vale, la lapicera se ve coqueta jeje ❤️
Jajaj! Ay mi querido y bello Buhito., la admiración es mutua, cuando veo tus creaciones y tus blog, pienso igual. Me encanta la versatilidad y la alegría que compartes, hasta cuando estás haciendo maldades. Muchas gracias por visitarme, aqui tengo unas lindas flores amarillas para ti.
Quedo muy bonito, llamaría mucho la atención, tener un lapicero asi, con esa linda decoración, seguro quedará encantada, un gran detalle.
Hola Ikigai, jajaj si llama la atención, cuando mi enfermera se lo pone en el bolsillo le queda aun más hermoso.
Uy qué lindo no me provocará usarlo si llego a hacerme uno así porque es muy lindo que me encantará tenerlo solo de adorno😍está precioso y el tono del rojo que usaste en la cinta también,lindo trabajo me ha encantado ✨🌹
HOliii! Yo ahora quiero hacer un ramo <3
Congratulations @equipodelta! You have completed the following achievement on the Hive blockchain And have been rewarded with New badge(s)
Your next target is to reach 18500 replies.
You can view your badges on your board and compare yourself to others in the Ranking
If you no longer want to receive notifications, reply to this comment with the word
STOPWow this is really beautiful
I'm glad you like it
Congratulations, your post has been curated by @dsc-r2cornell. You can use the tag #R2cornell. Also, find us on Discord
Felicitaciones, su publicación ha sido votada por @ dsc-r2cornell. Puedes usar el tag #R2cornell. También, nos puedes encontrar en Discord
Qué bonito y qué elaborado :) las rosas rojas son de mis favoritas 🥰 ¡Felicidades!