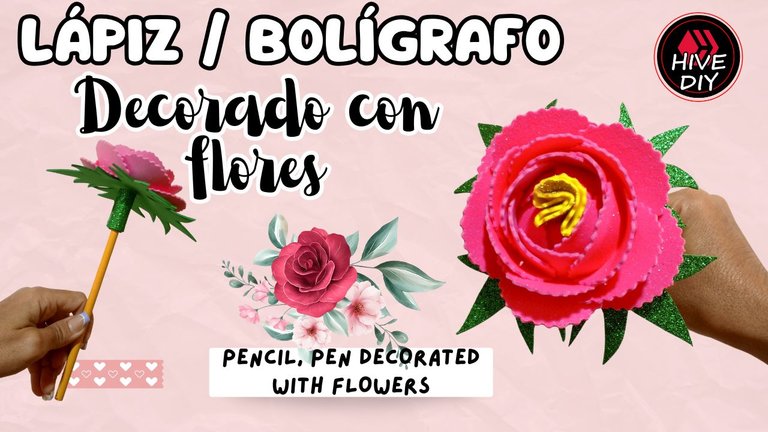
DIY: Lápiz, bolígrafo decorado con flores / Pencil, pen decorated with flowers (Esp/Eng)

[Esp]
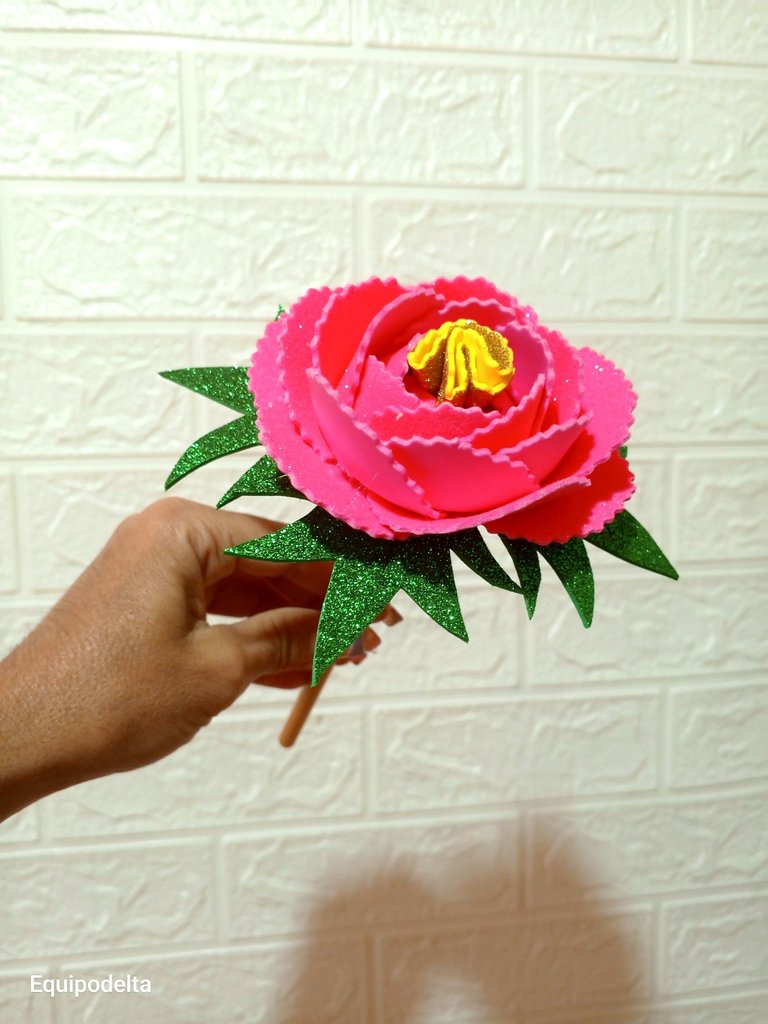
Me encantan los lápices y lapiceros decorados, hoy te muestro una forma muy bonita con foami, un material muy amigable y económico para las manualidades.
Estos lápices podemos hacerlo como obsequios para exposiciones o eventos escolares de nuestros hijos, a los docentes les encanta, he regalado varios. También es una buena idea de emprendimiento.
Este tipo de flor es fácil de hacer y podemos usarla para otras decoraciones. Te muestro el paso a paso explicado y he grabado mi proceso en video con una edición muy bonita para tu disfrute. Espero que te guste.
! [English version]
I love decorated pencils and pens, today I show you a very nice way with foami, a very friendly and economical material for crafts.
These pencils can be made as gifts for exhibitions or school events for our children, teachers love them, I have given several. It is also a good idea for entrepreneurship.
This type of flower is easy to make and we can use it for other decorations. I show you the step by step explained and I have recorded my process in video with a very nice edition for your enjoyment. I hope you like it.
https://www.youtube.com/shorts/tAvHwnE6yV0

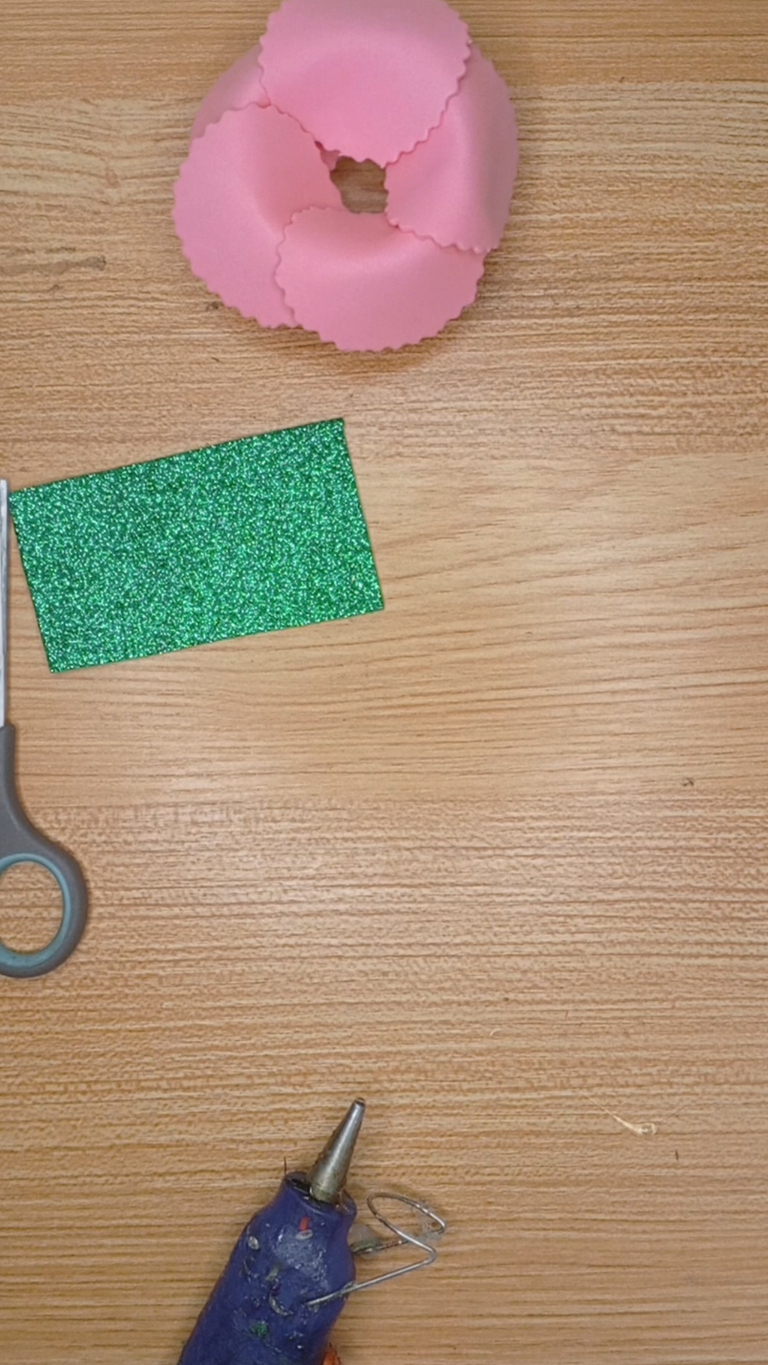
Materiales / Materials
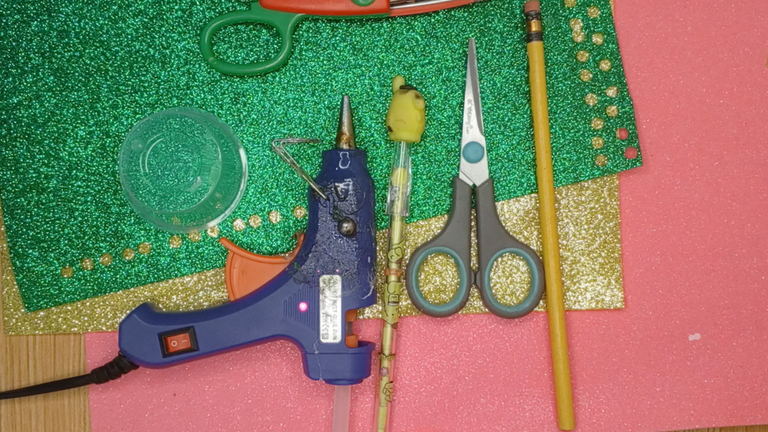
| Spanish | English | |
| Foami escarchado: Rosado, amarillo, verde | Frosted Foami: Pink, yellow, green | |
| Envase de plástico pequeño, lápiz | Small plastic container, pencil | |
| Tijera normal y tijera de formas | Normal scissors and shape scissors | |
| Pistola de silicón caliente | Silicone hot gun |
Paso a paso / Step by Step
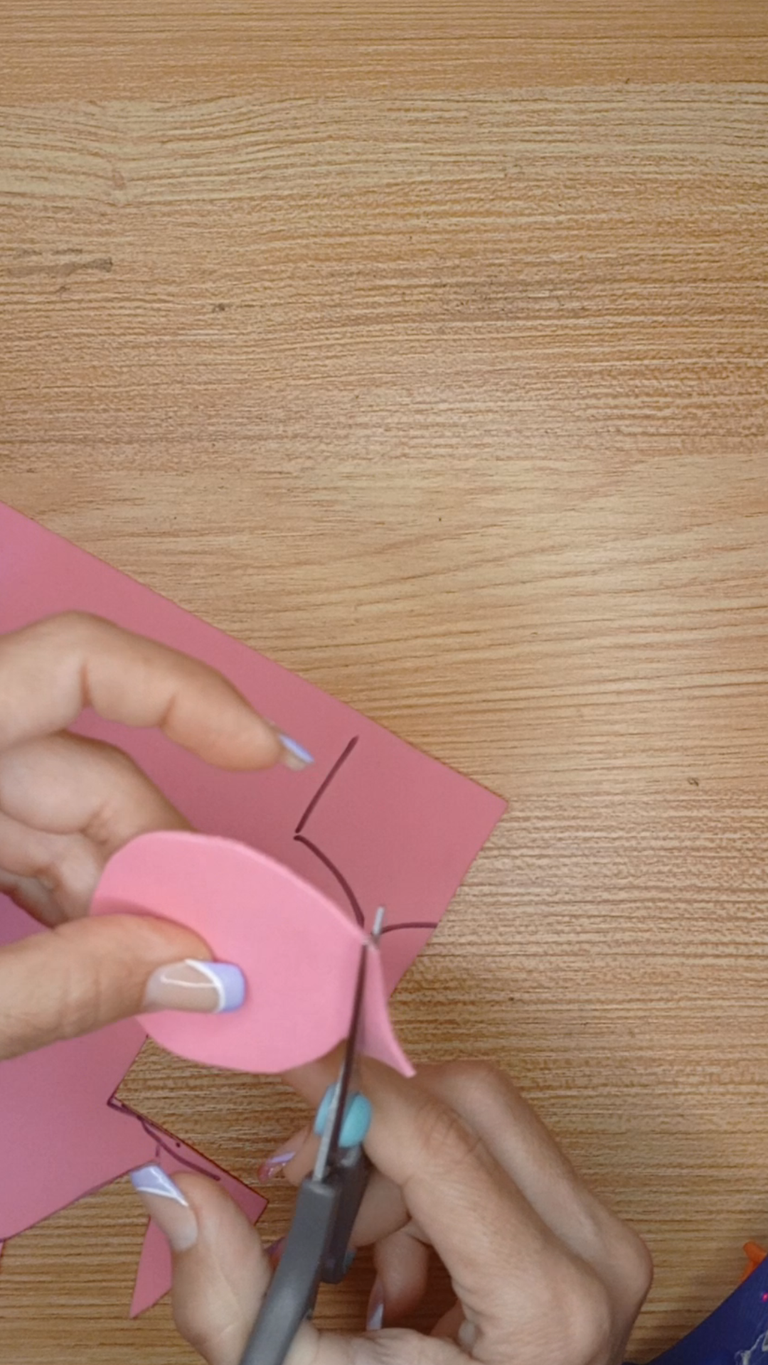
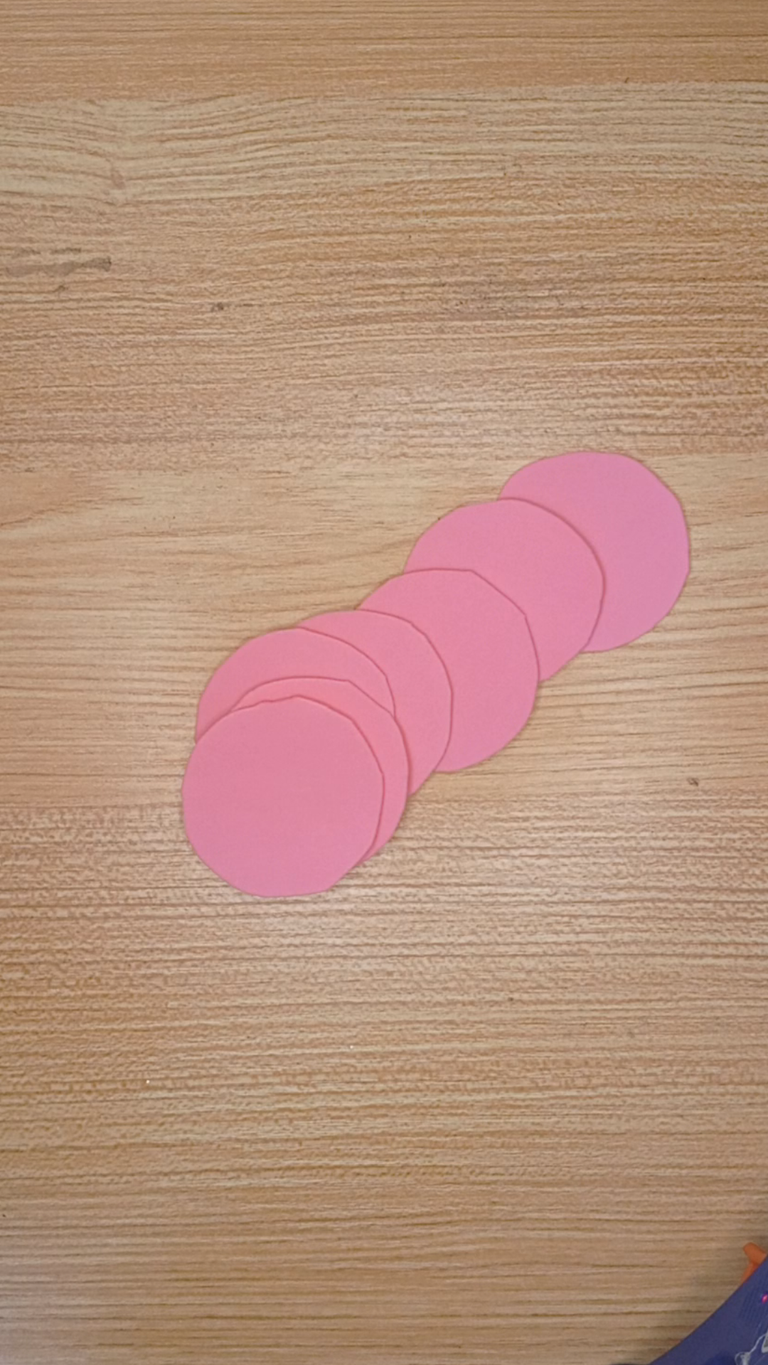
Step 1️⃣/ Paso 1️⃣

 |  |  |  |
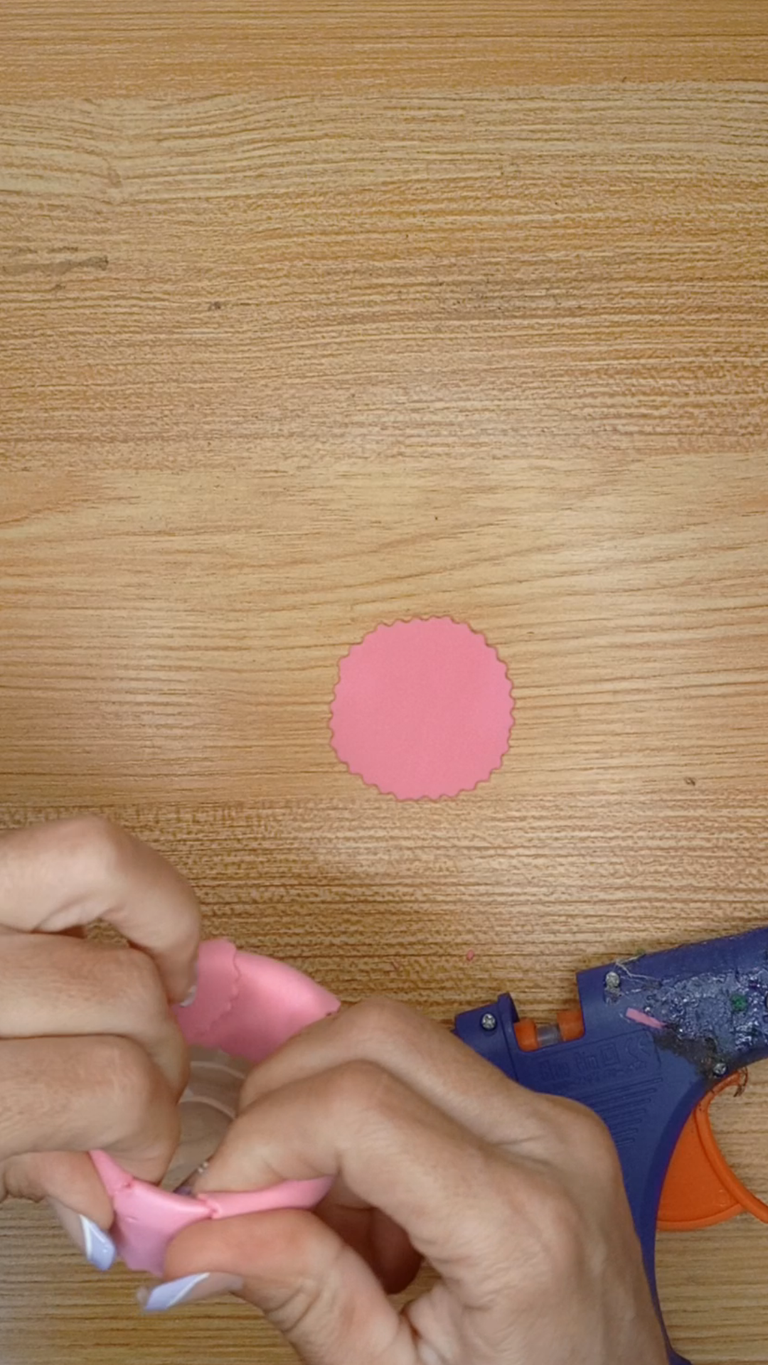
[Esp]
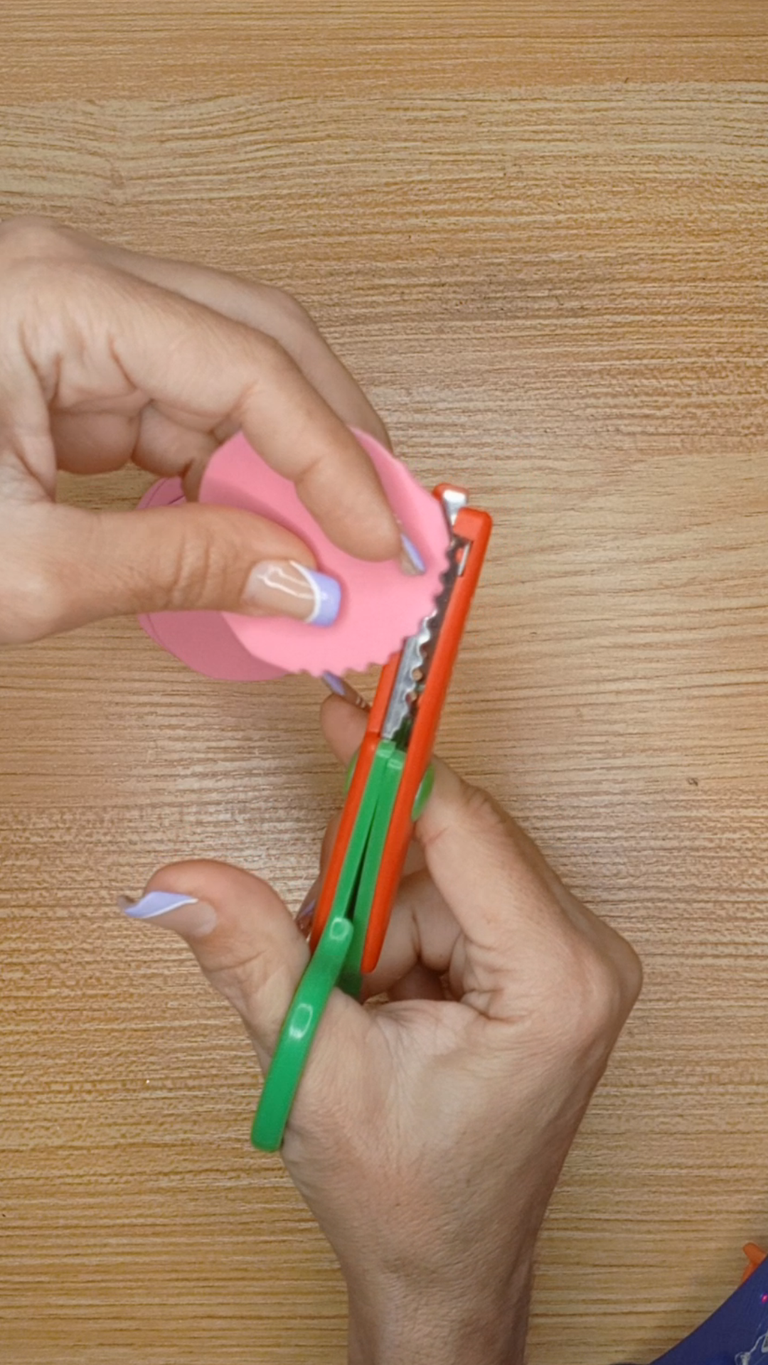
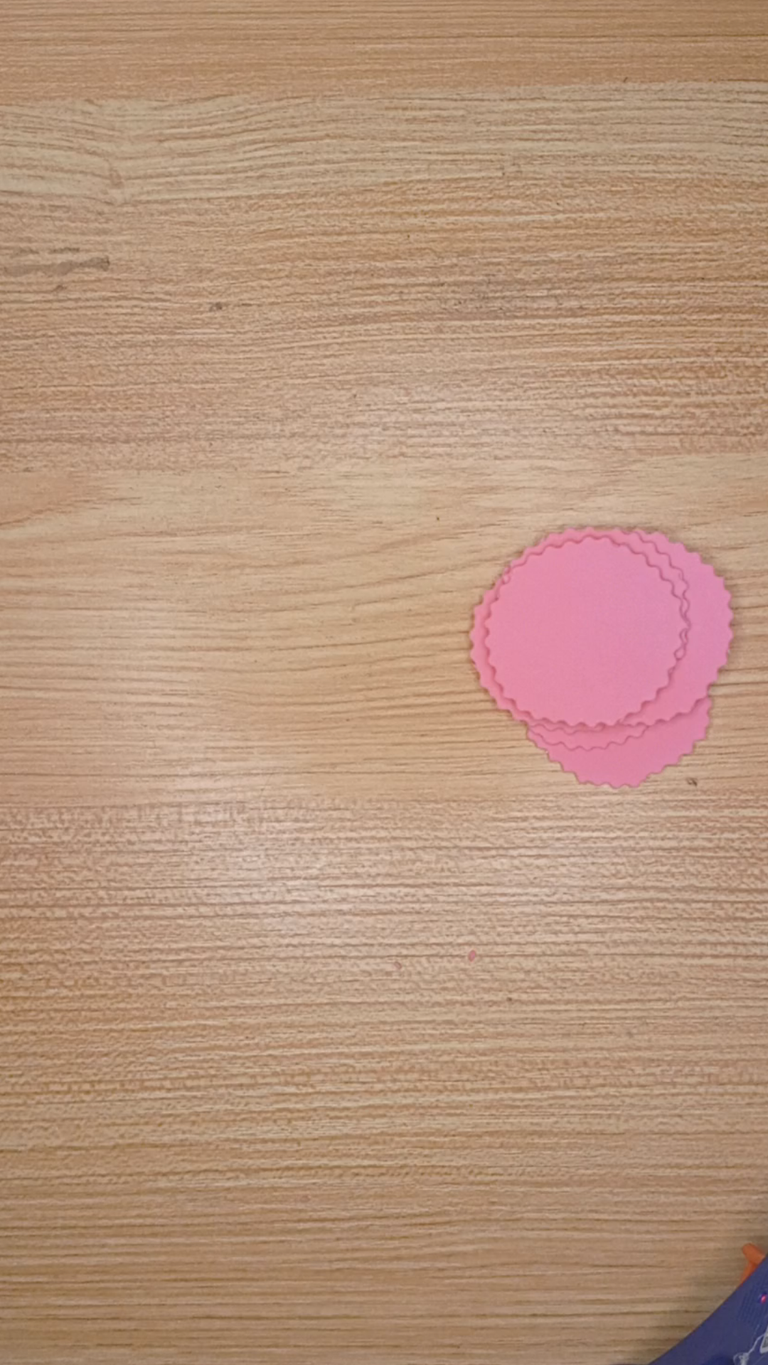
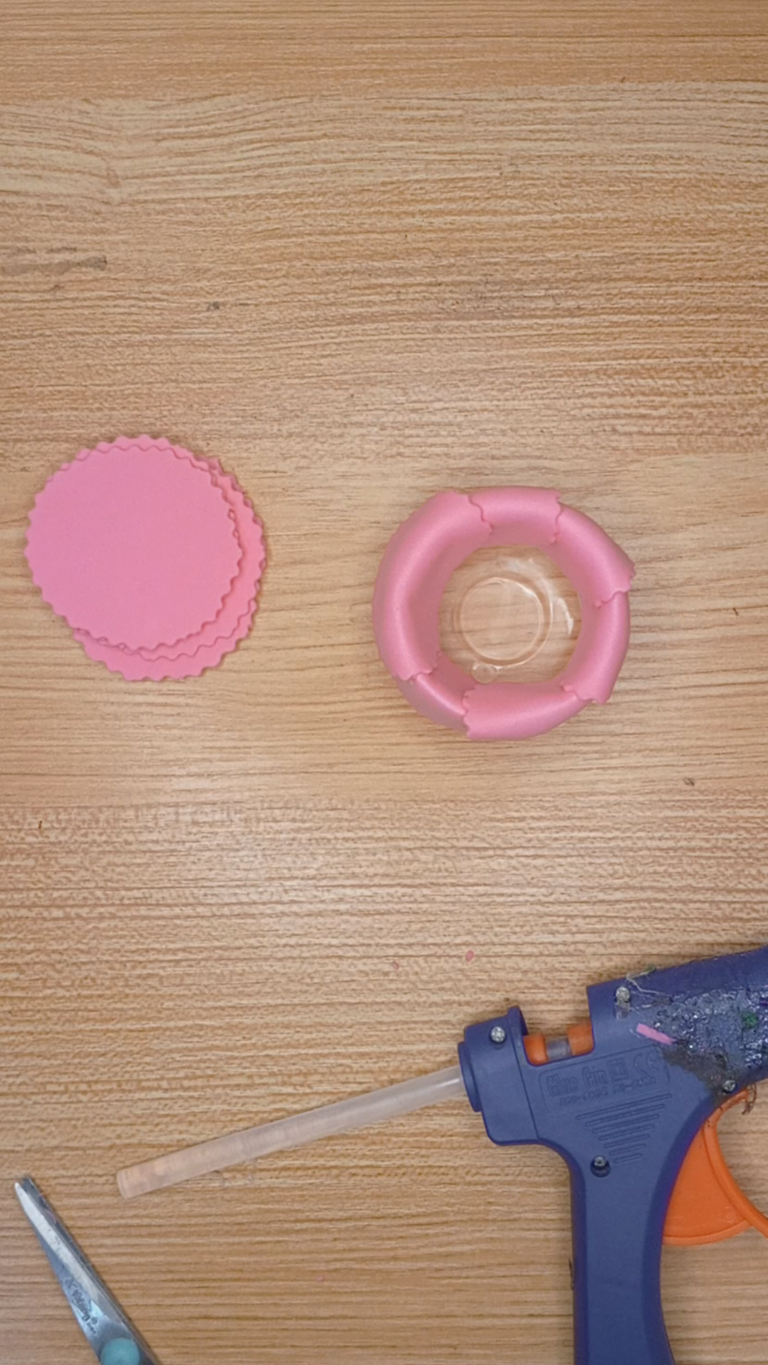
Realiza una marca en el foami rosado, marca el número de círculos que necesites para formar la flor.
Recorta la flor en círculo por la guía.
Recorta los bordes con la tijera de formas.
! [English version]
Make a mark on the pink foami, mark the number of circles you need to form the flower.
Cut out the flower in a circle along the guide.
Trim the edges with the shape scissors.
Step 2️⃣/ paso 2️⃣
 |  | 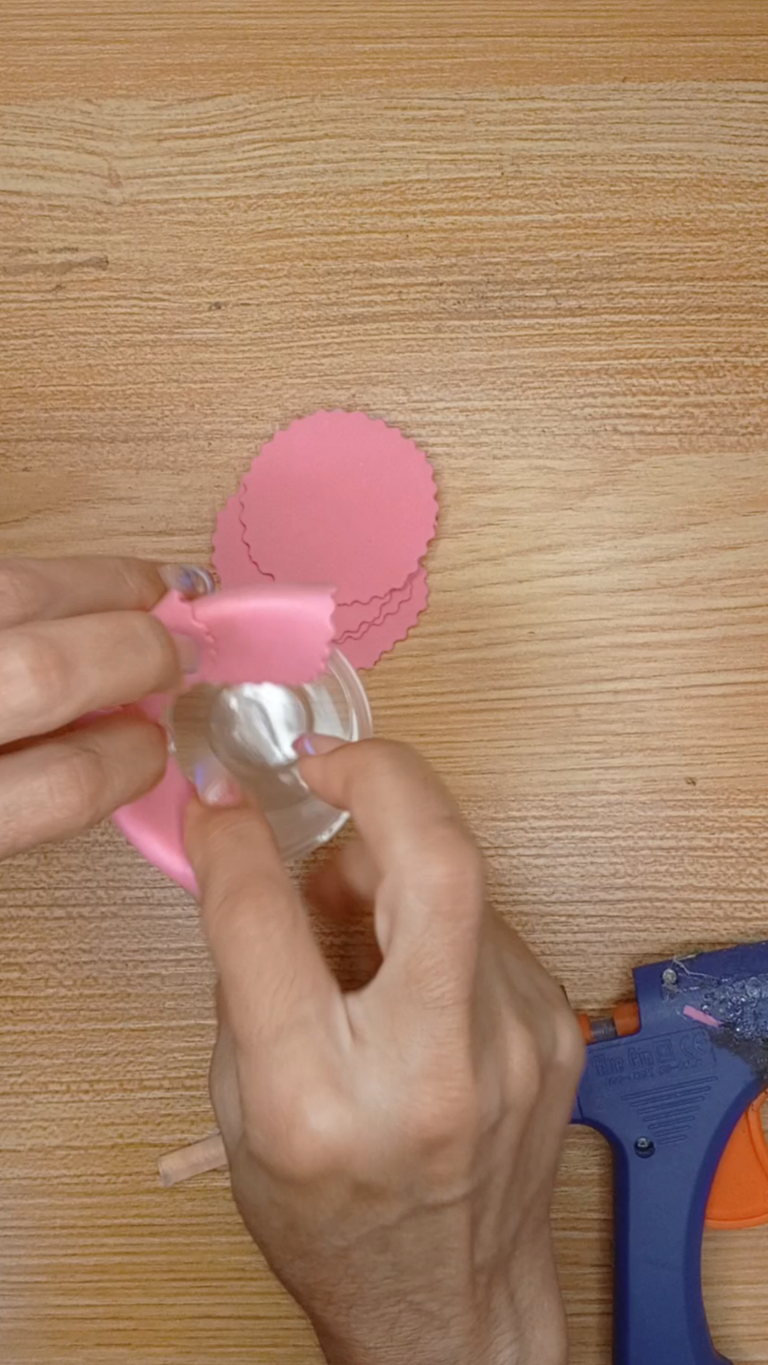 |  |
[Esp]
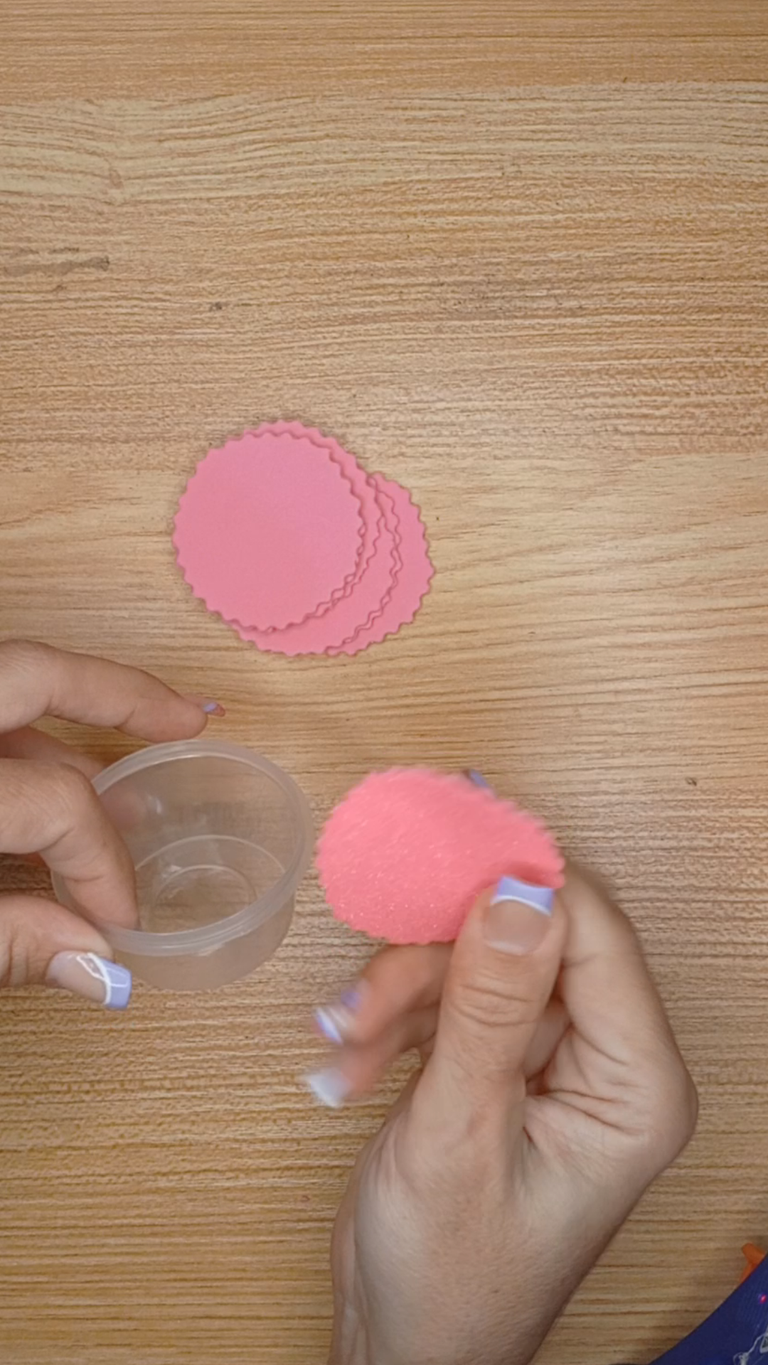
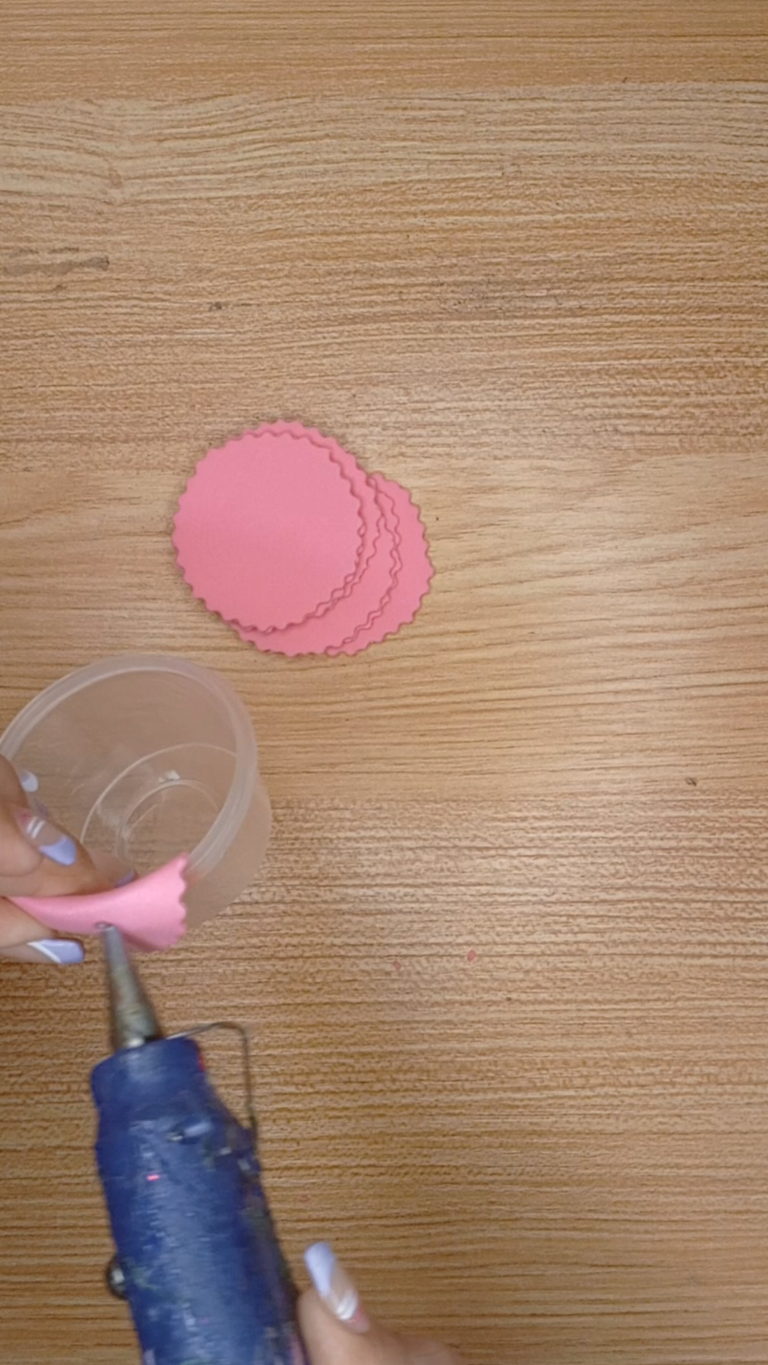
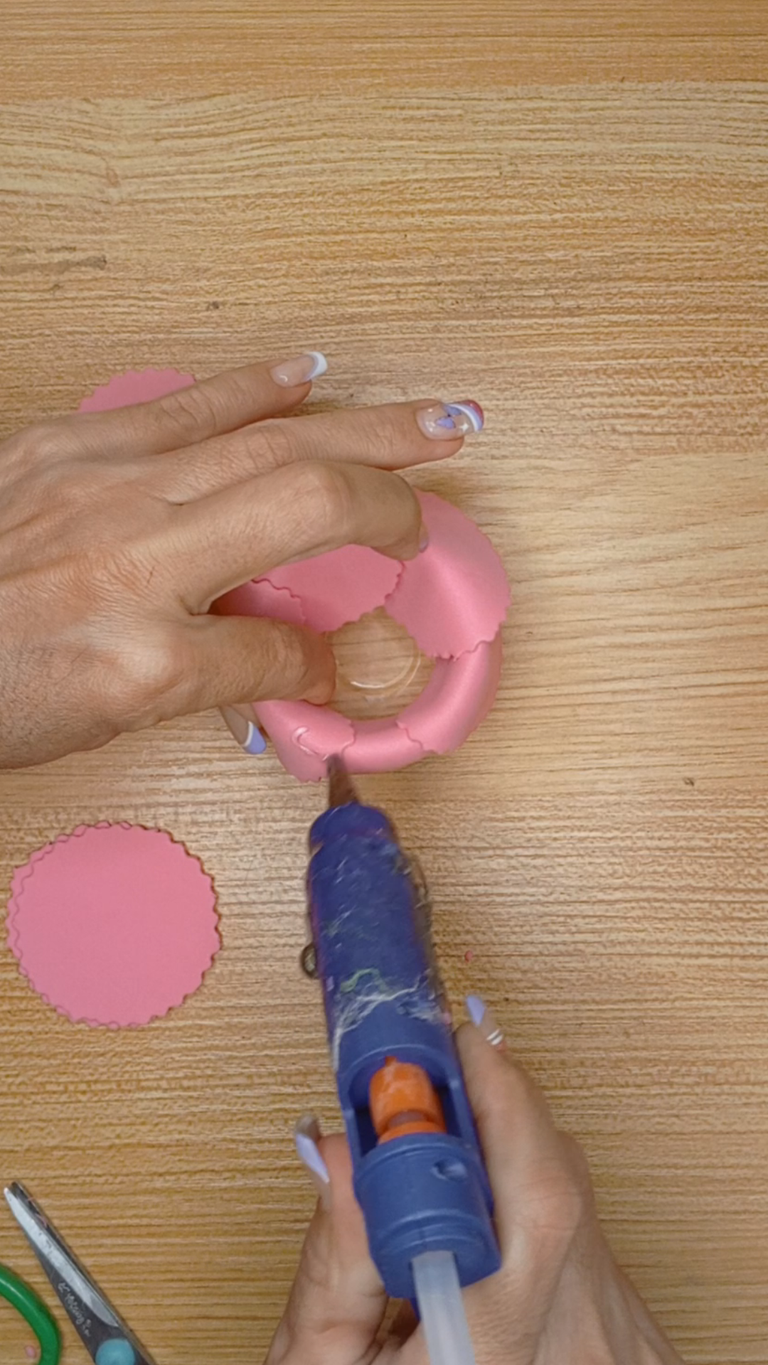
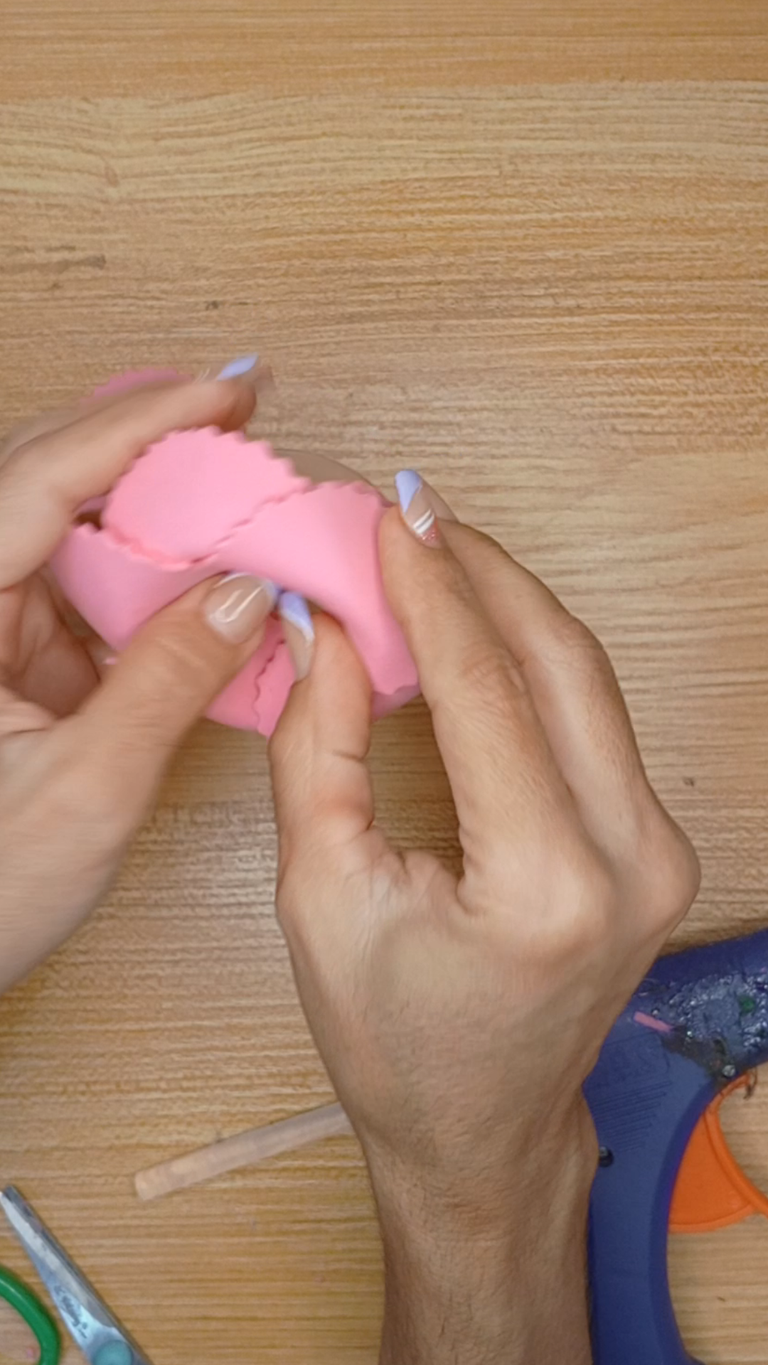
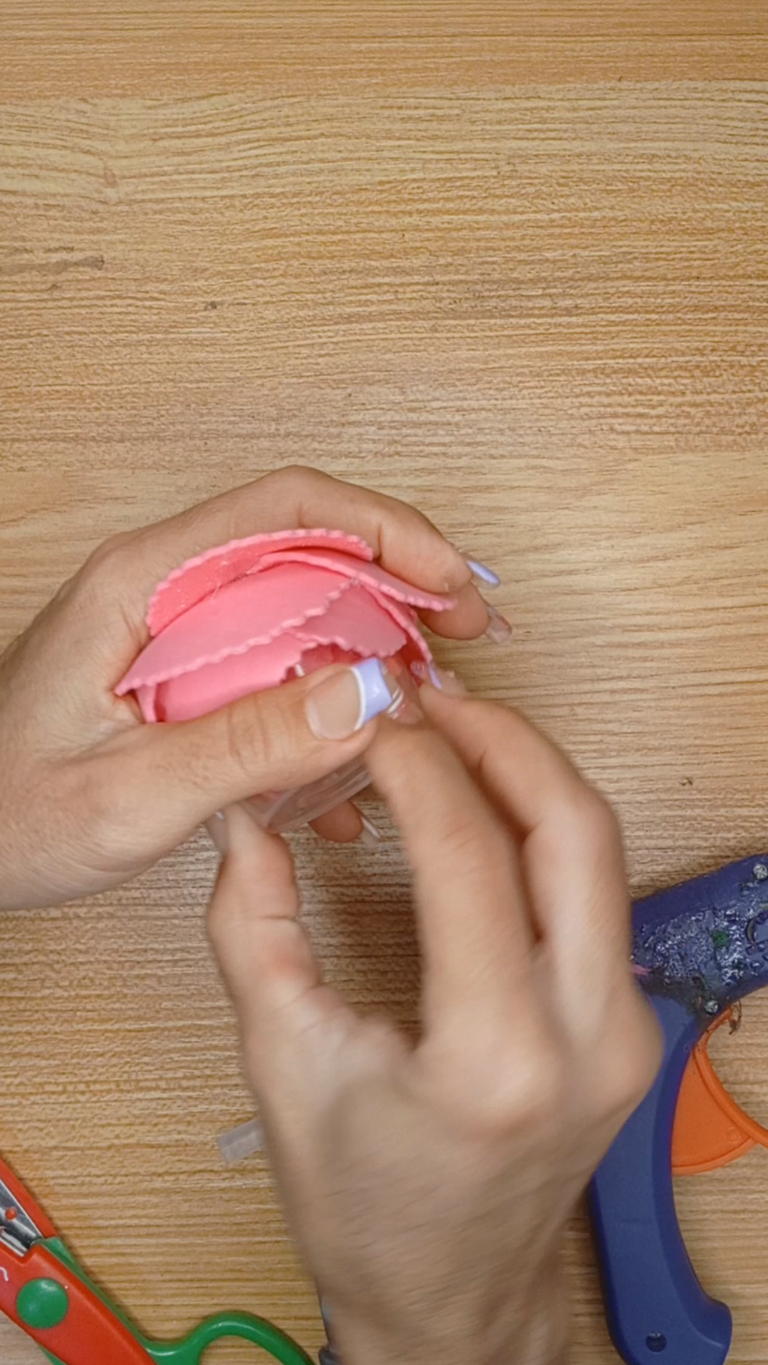
Una Vez recortado las formas, toma el recipiente y comienza a pegar los pétalos al rededor como indica la imagen, sin colocar pega en el recipiente, solo en una esquina del cada pétalo hasta cubrir todo el borde.
! [English version]
Once the shapes are cut out, take the container and start gluing the petals all around as shown in the image, without placing glue on the container, just on one corner of each petal until the entire edge is covered.
Step 3️⃣/ paso 3️⃣
 |  |  |  |
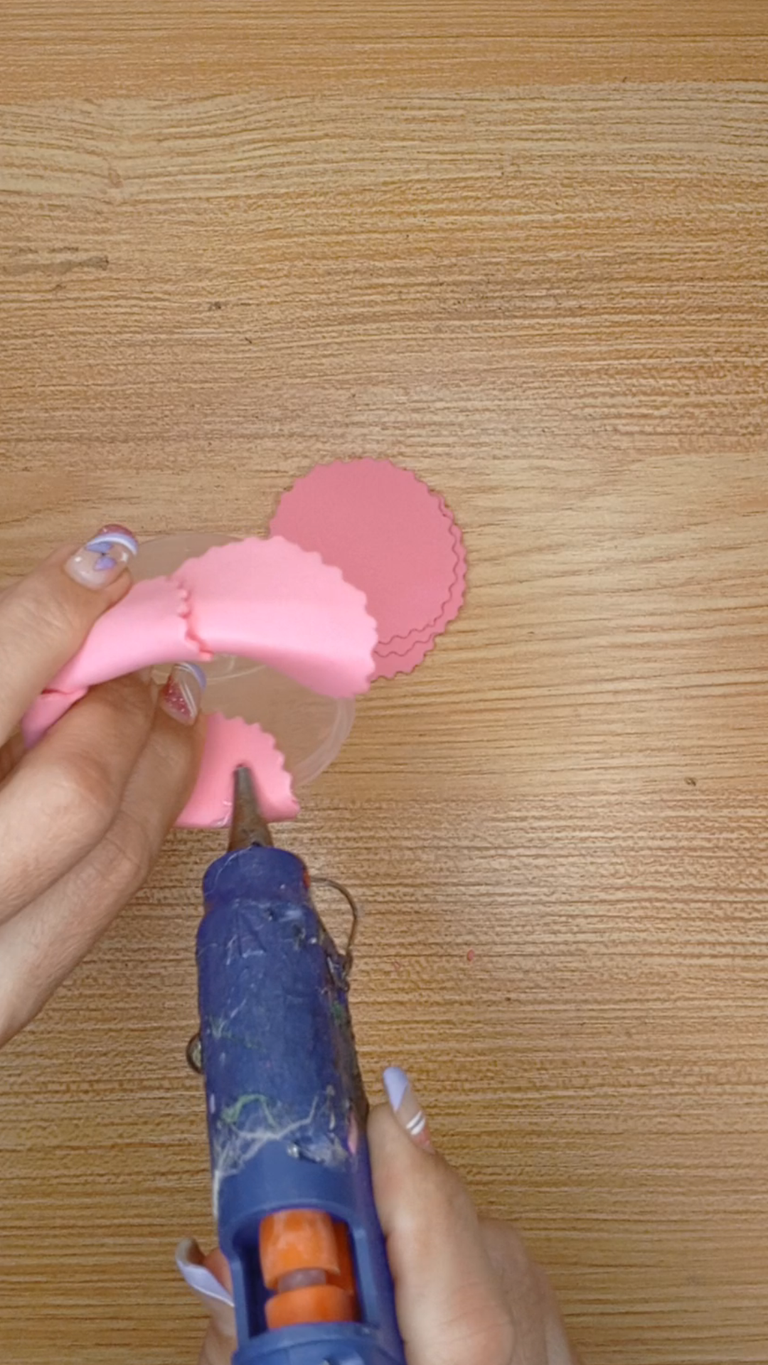
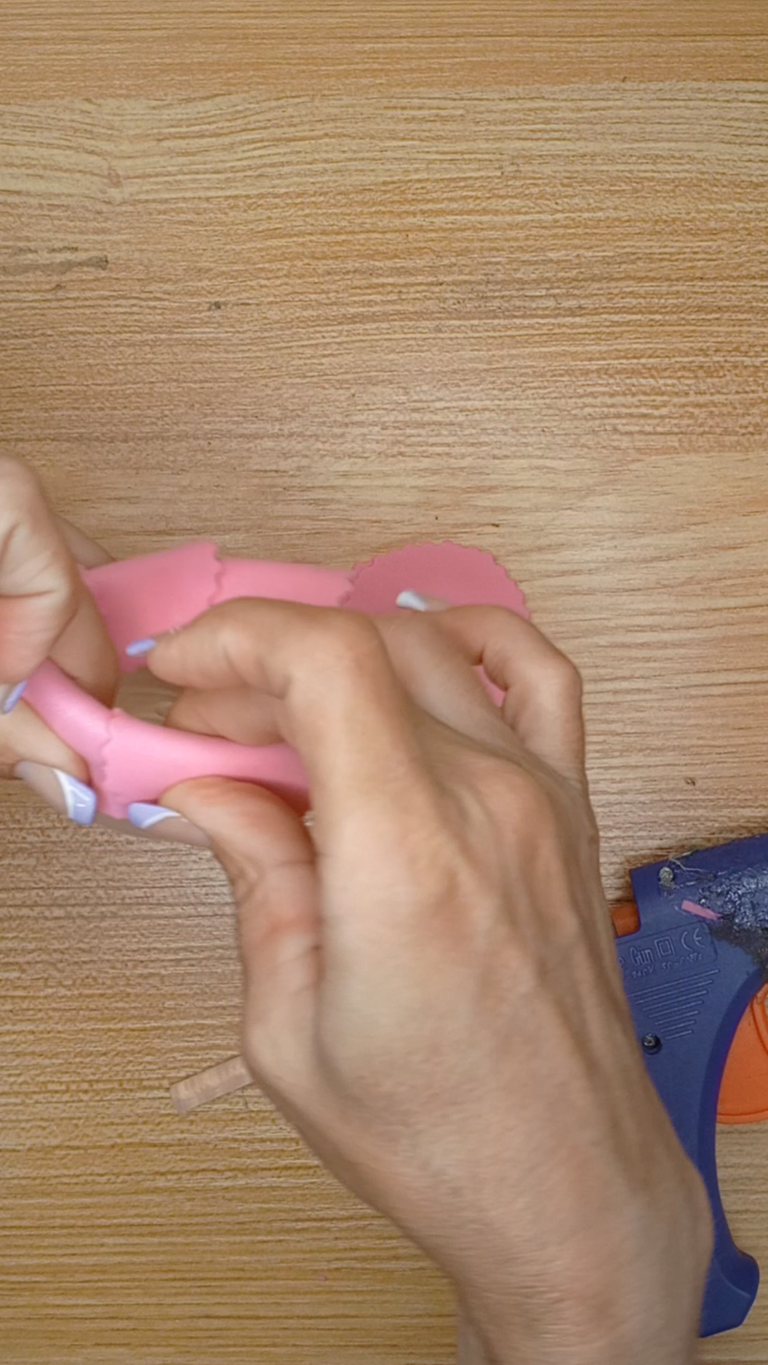
[Esp]
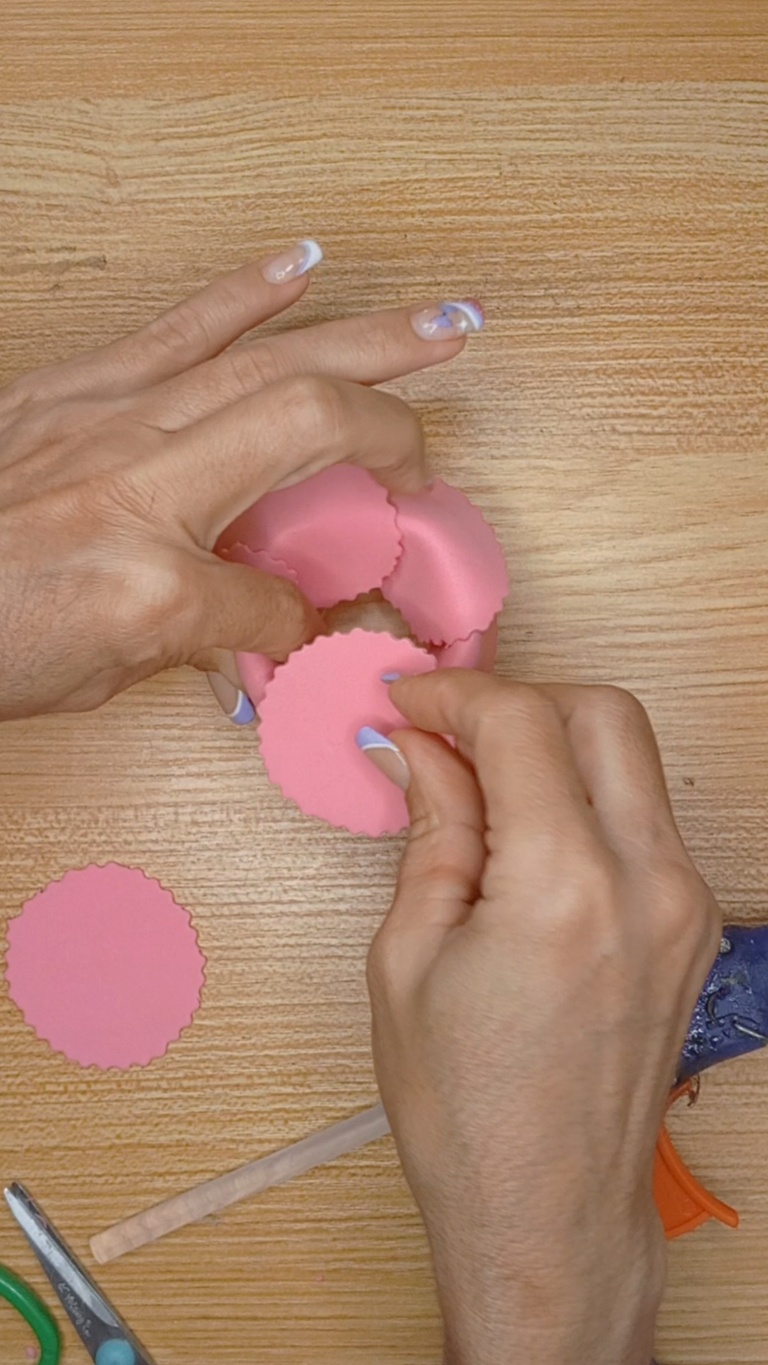
Una vez cubres la primera vuelta, realiza la segunda vuelta intercalando los pétalos.
! [English version]
Once you have covered the first round, make the second round by interleaving the petals.
Step 4️⃣/ paso 4️⃣
 |  |  |  |
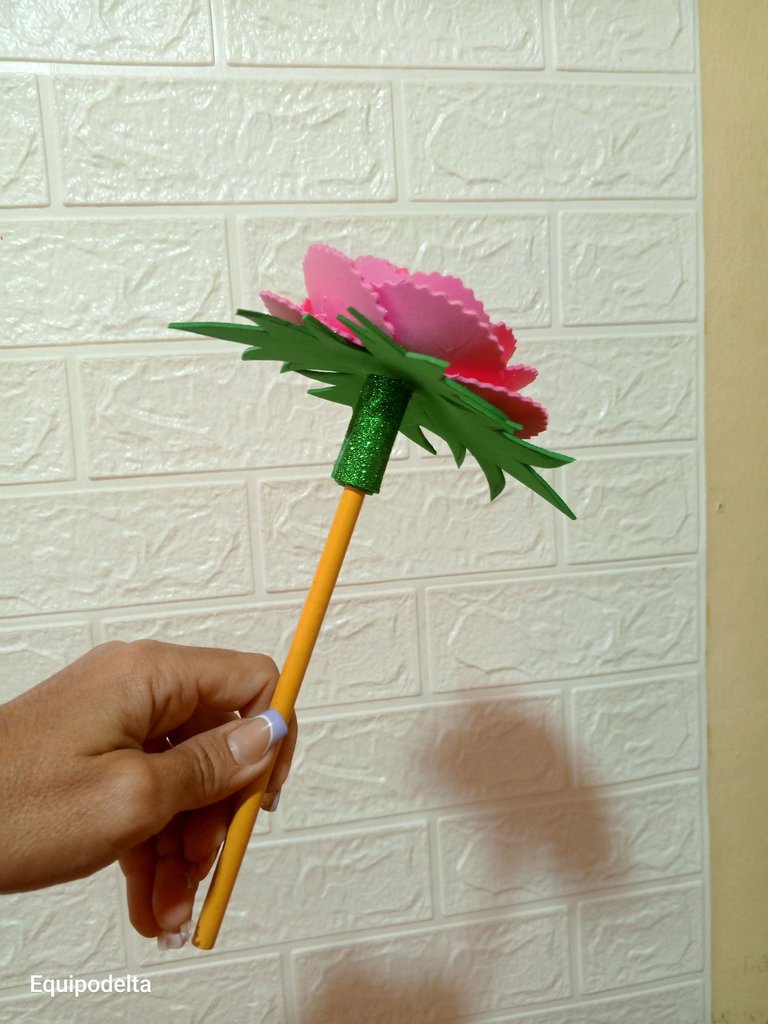
[Esp]
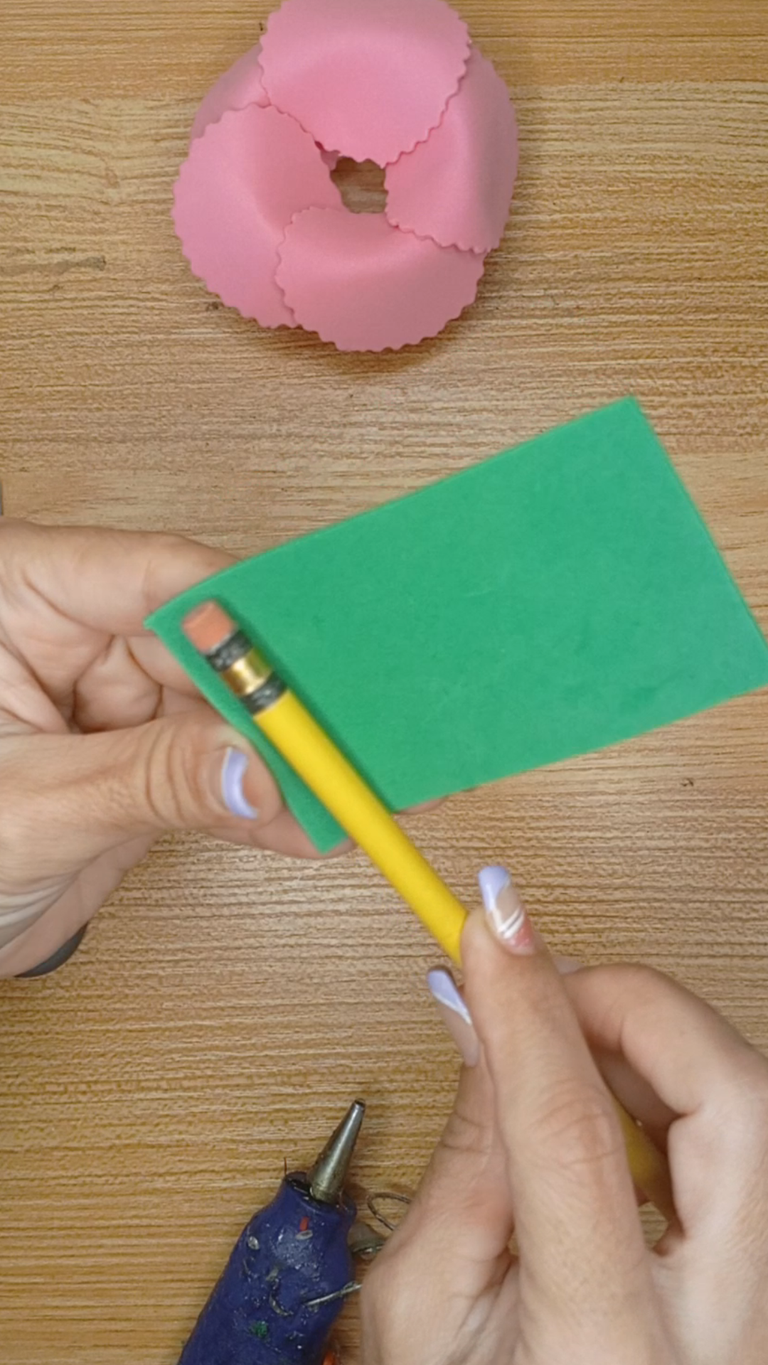
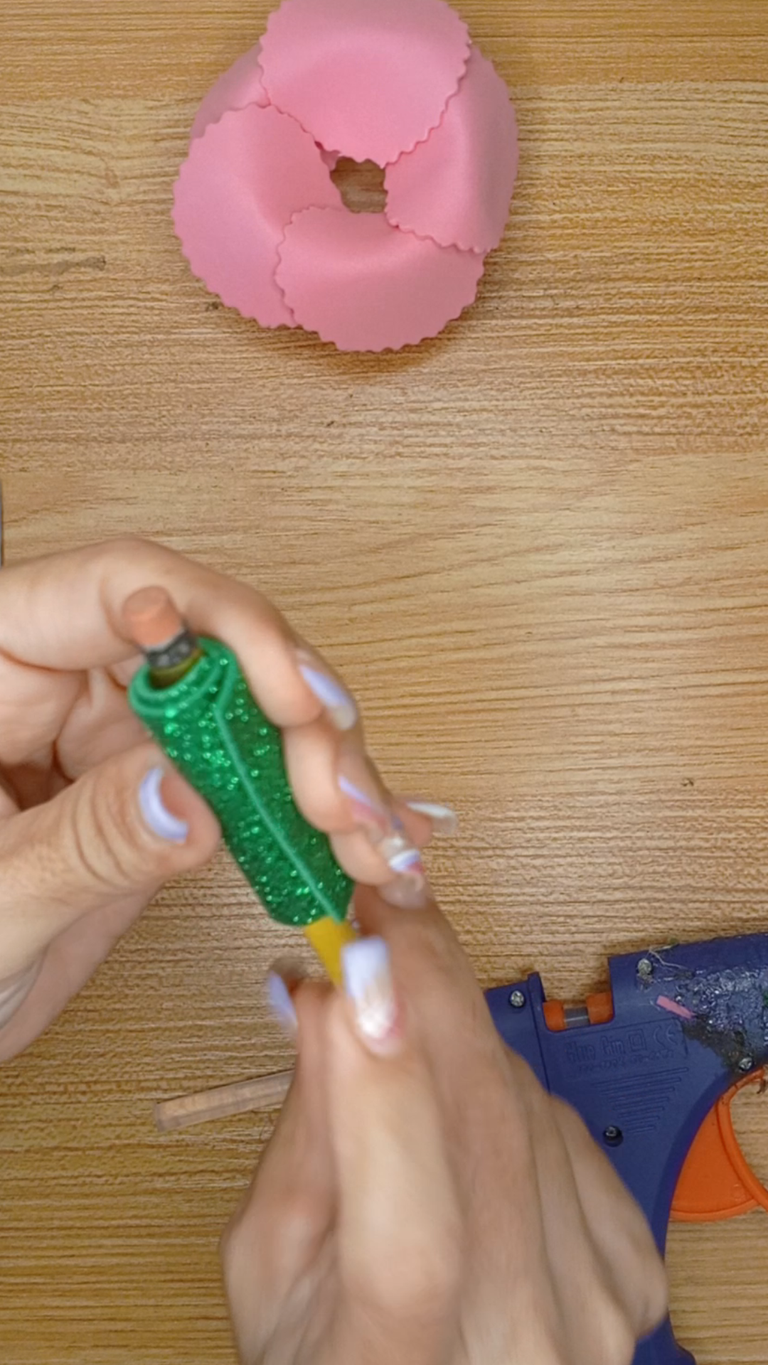
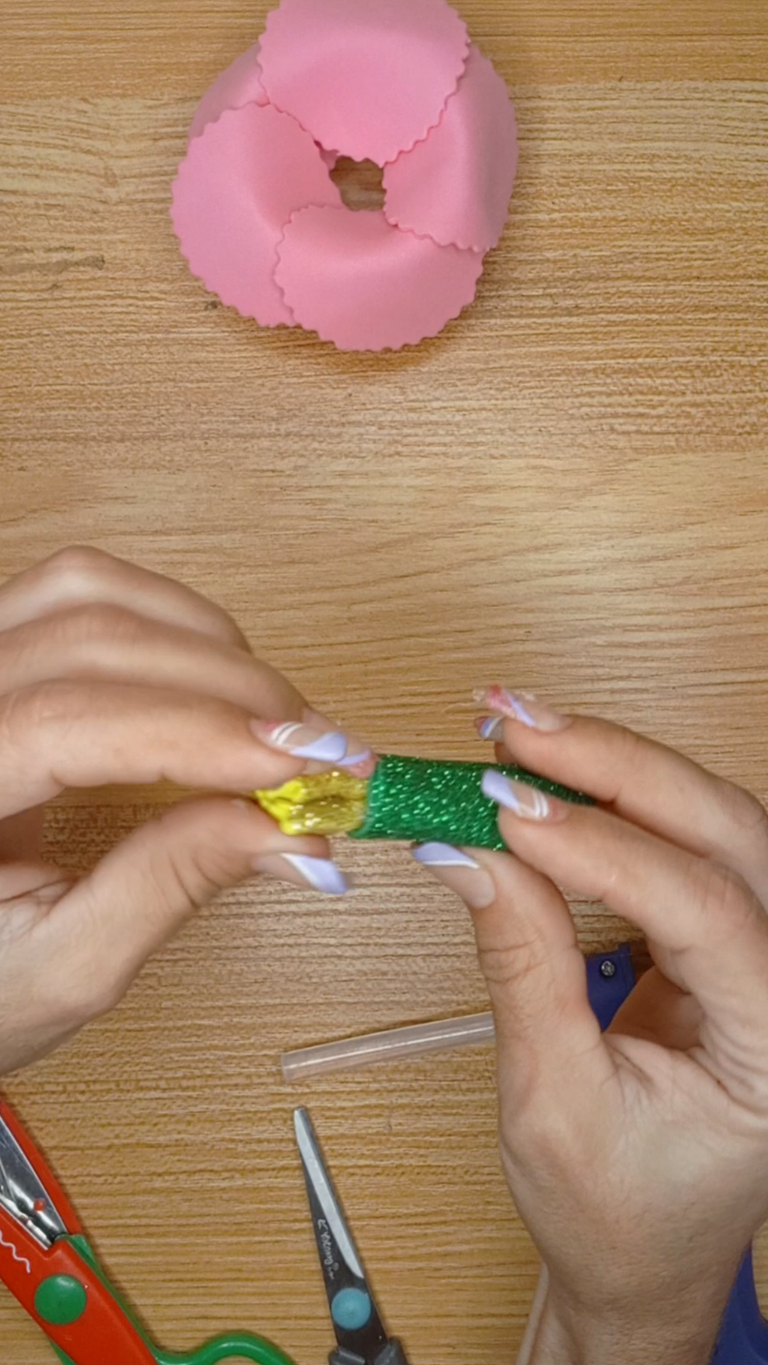
Recorta un rectángulo de foami escarchado verde, enrolla en el lápiz y aplica un poco de pegamento solo en un extremo. Luego retira el lápiz.
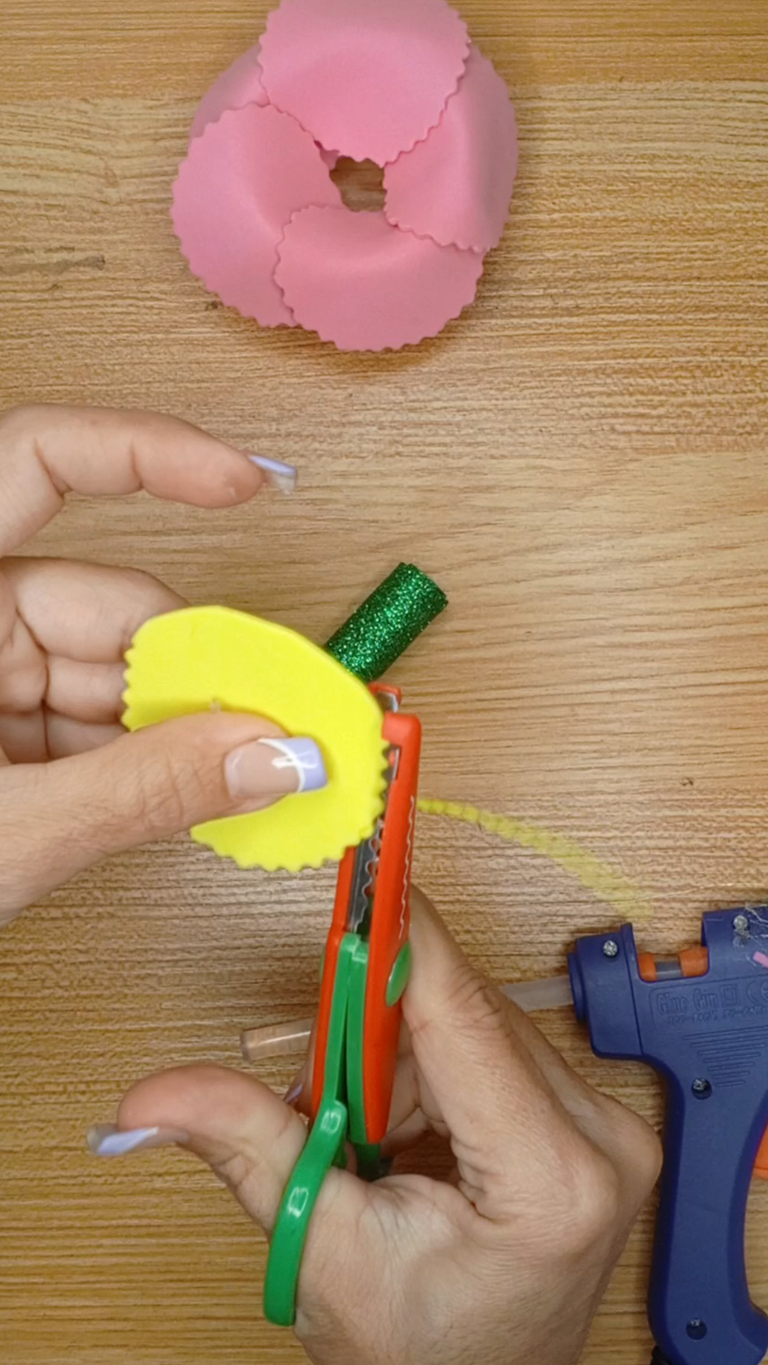
Recorta un círculo de foami amarillo para hacer los pistilos.
! [English version]
Cut out a rectangle of green frosted foami, roll it in the pencil and apply a little glue to one end only. Then remove the pencil.
Cut out a circle of yellow foami to make the pistils.
Step 5️⃣/ paso 5️⃣
 |  |  |  |
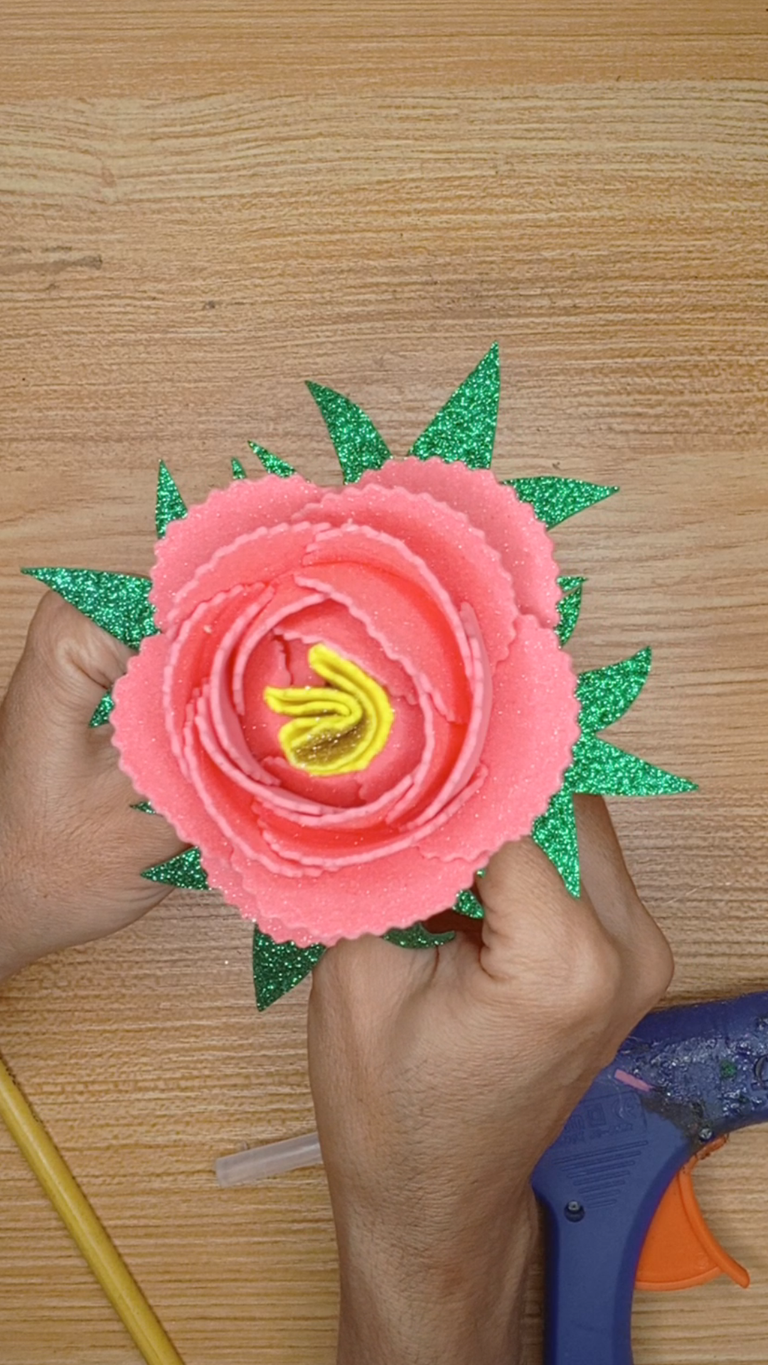
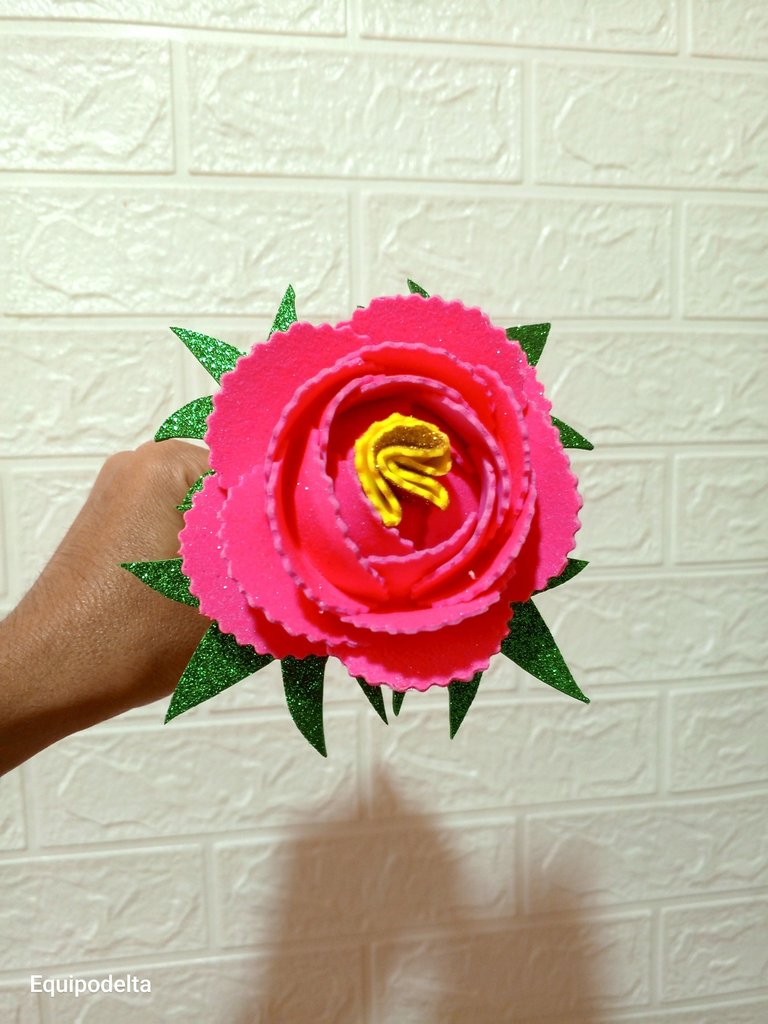
[Esp]
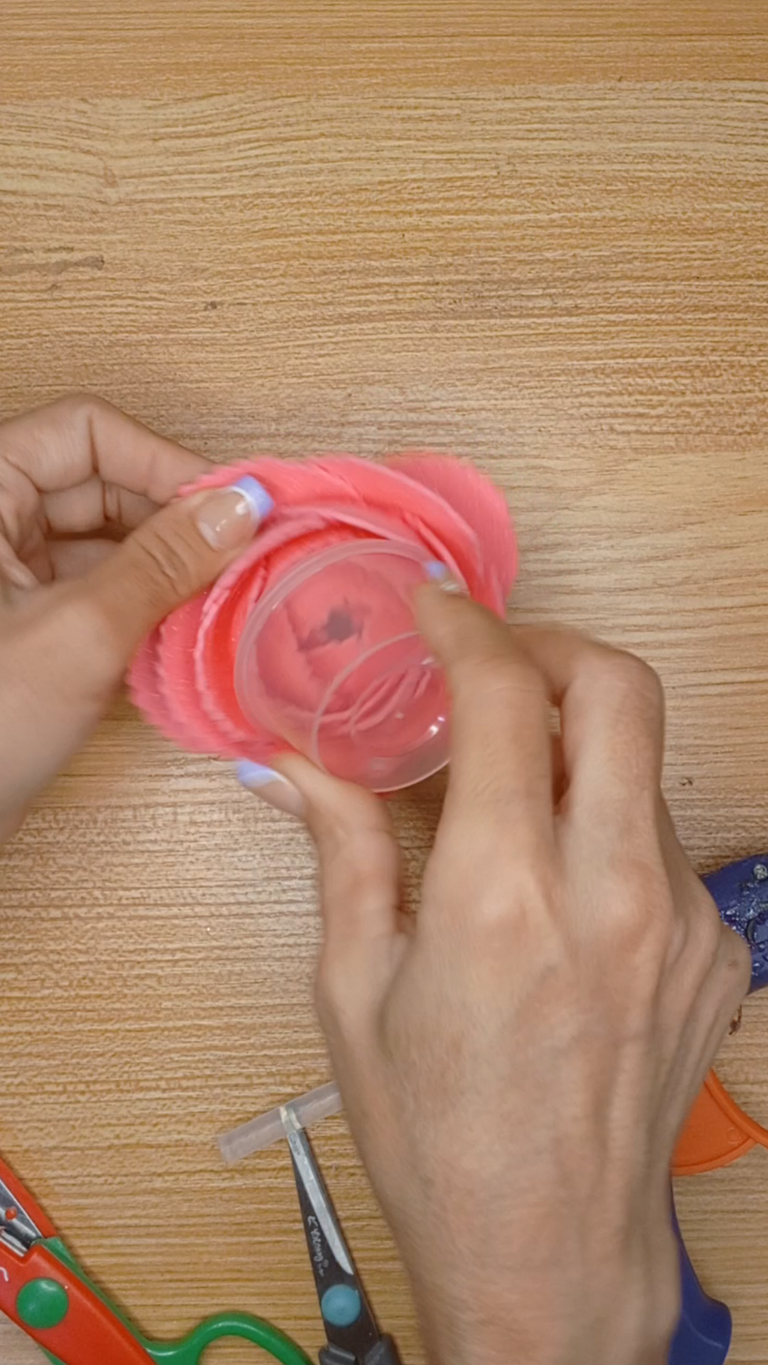
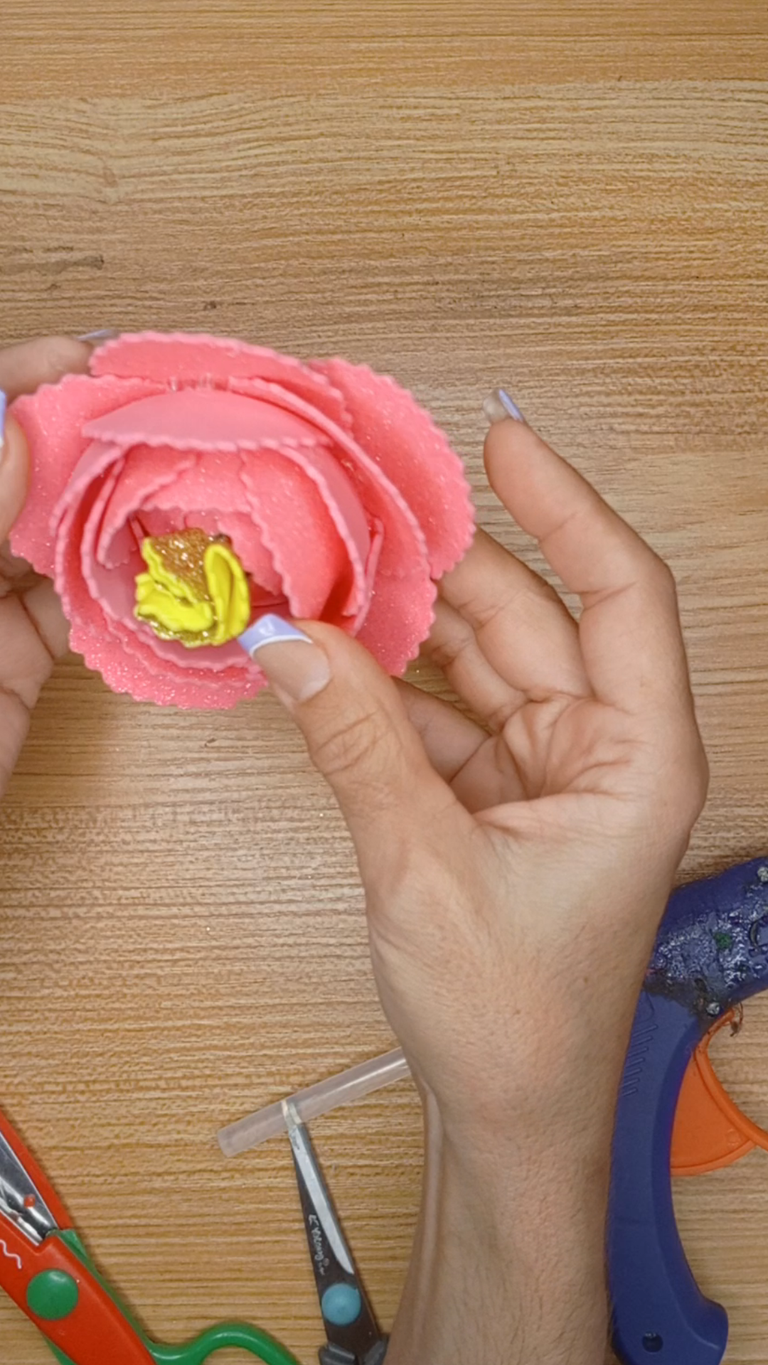
Recorta al rededor del circulo de foami con la tijera de formas. Realiza un bollito y pégalo en el rollito de foami. Saca la flor del envase con mucho cuidado. Introduce el rollito por el centro y aplica un poco de pegamento para que quede fijo.
! [English version]
Cut around the foami circle with the shape scissors. Make a small ball and glue it on the foami roll. Carefully remove the flower from the container. Insert the roll in the center and apply a little glue to hold it in place.
Step 6️⃣/ paso 6️⃣
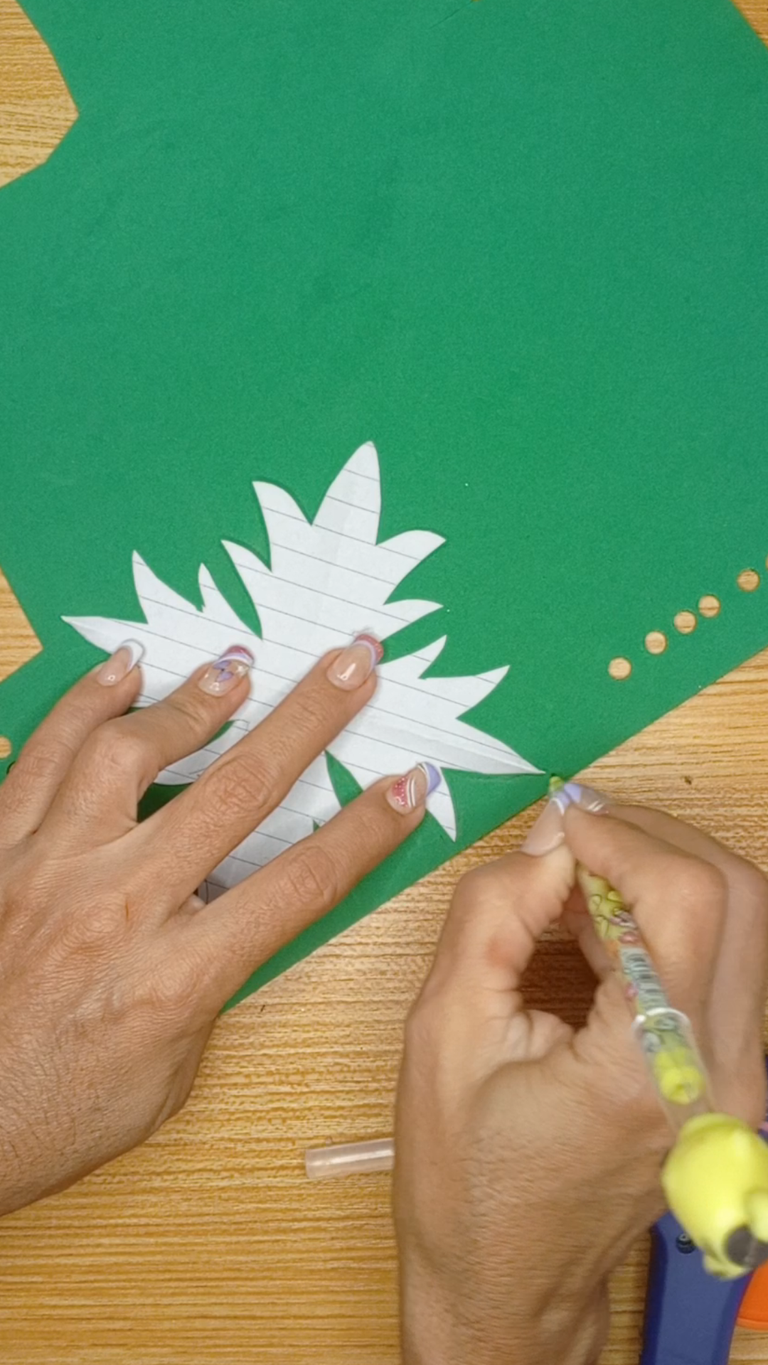 |  | 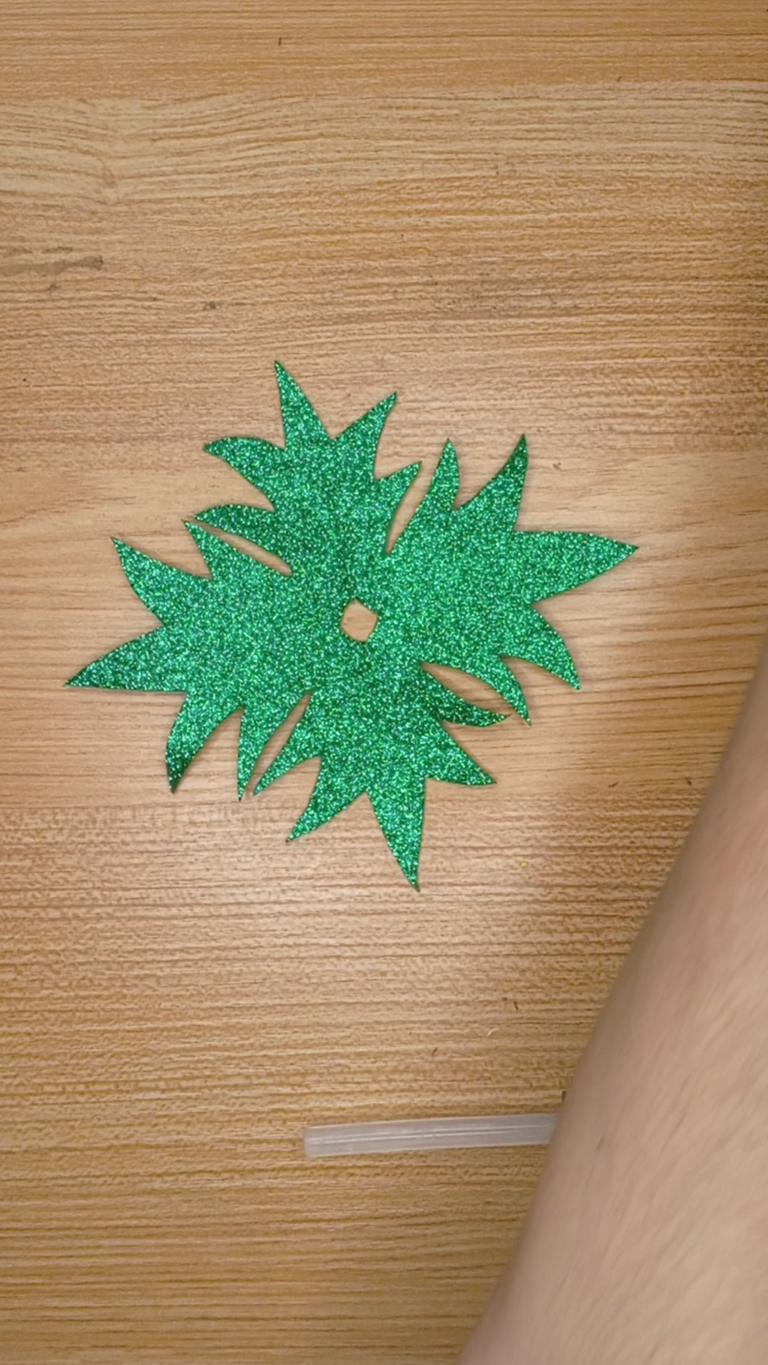 | 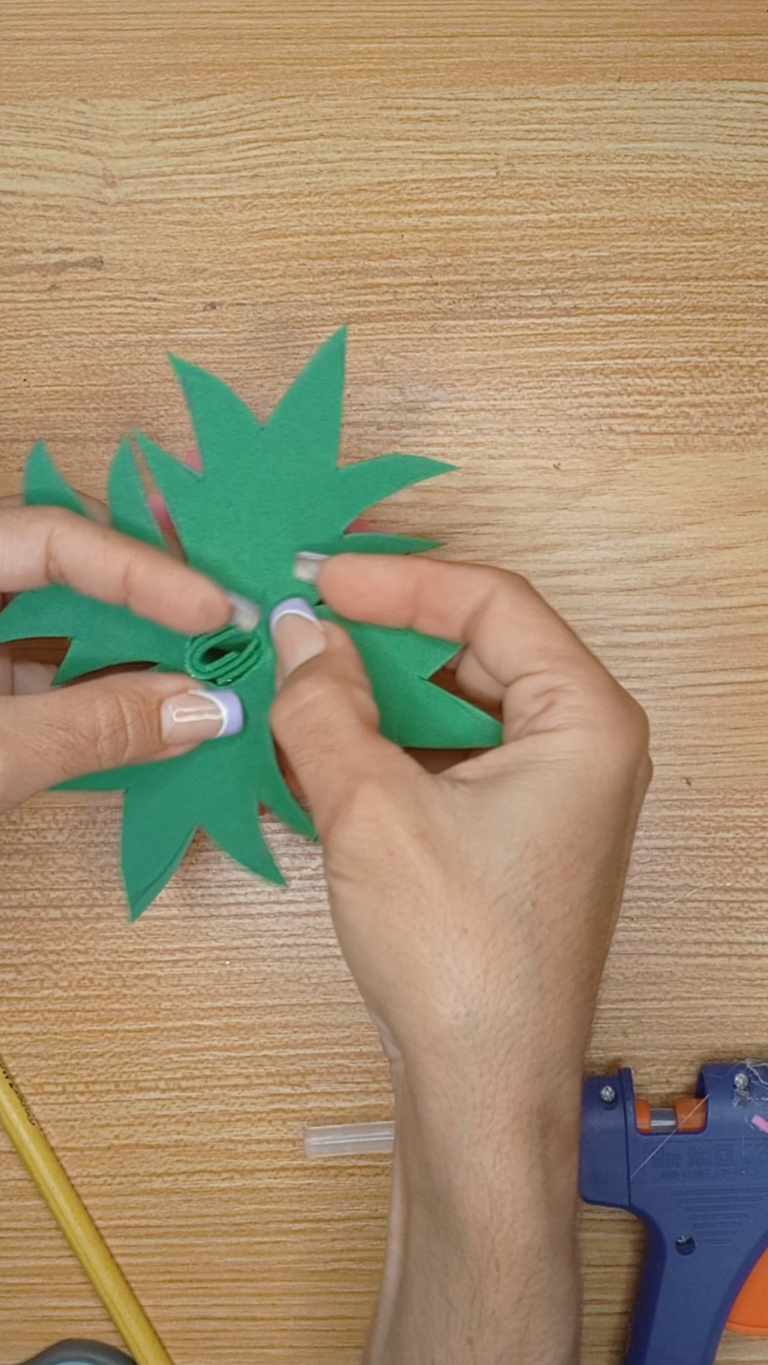 |
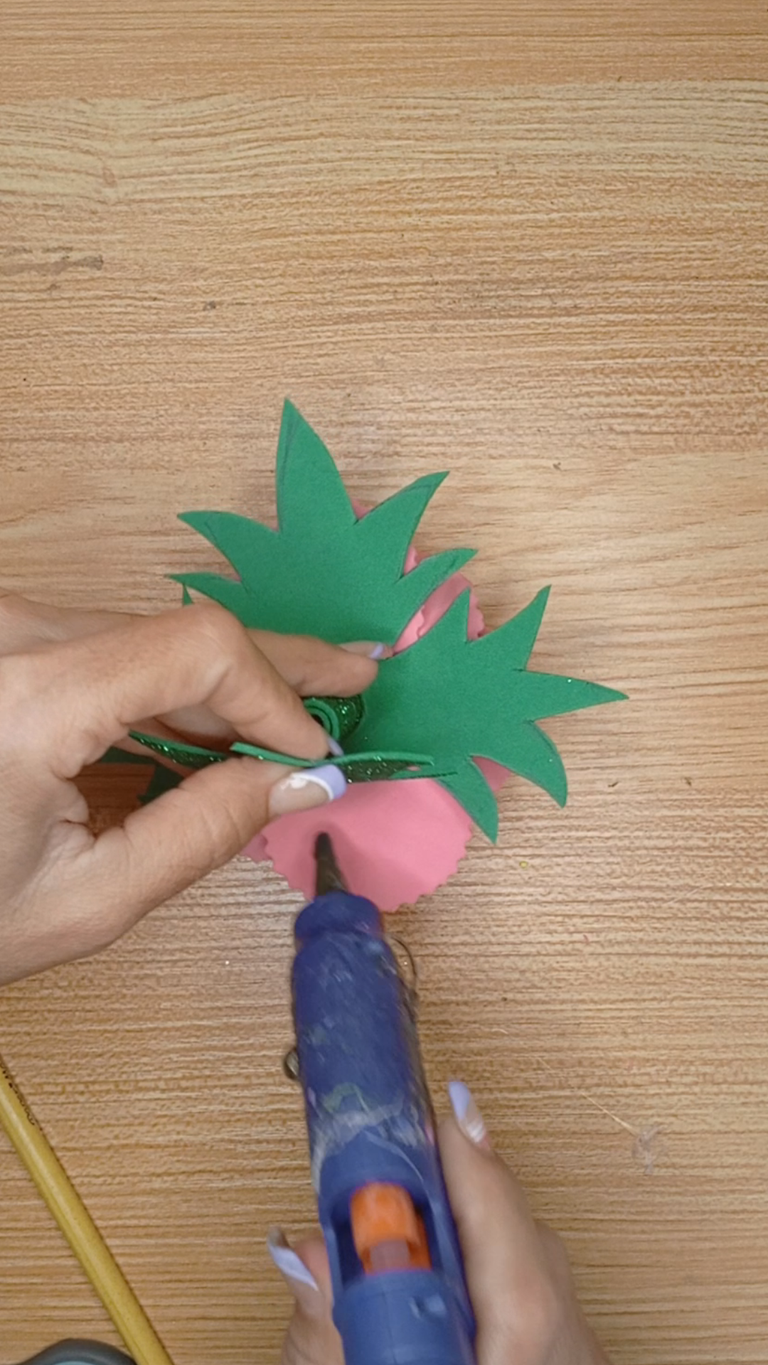
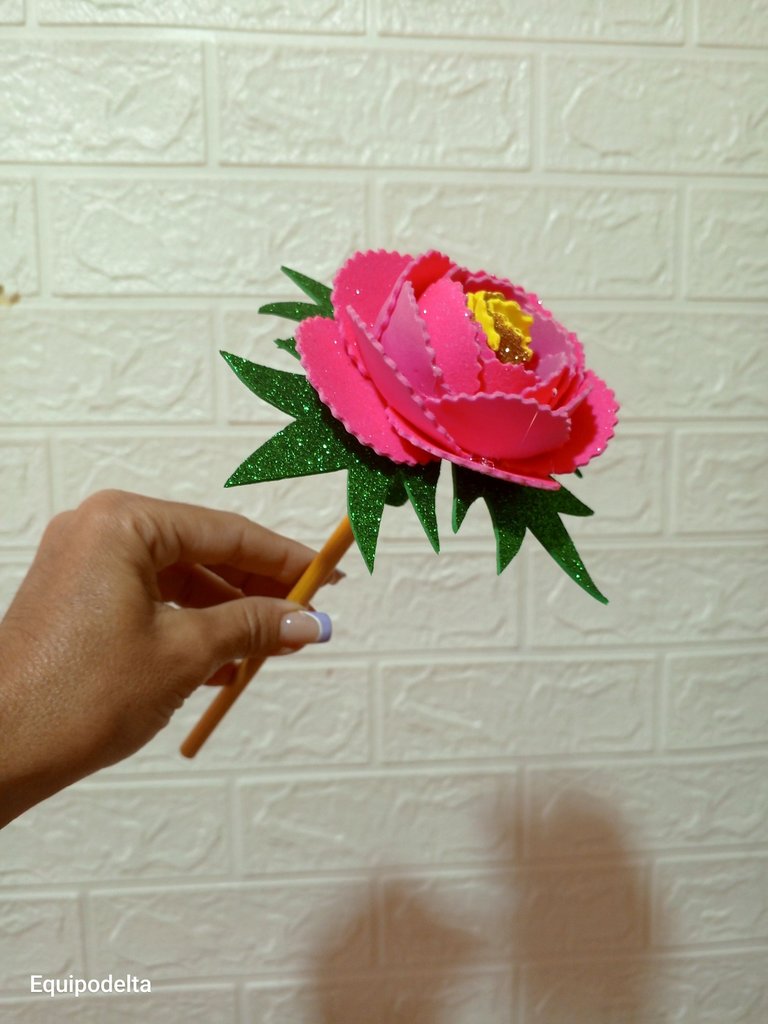
[Esp]
Realiza un molde para las hojas, que queden iguales en sus cuatro esquinas. Usa el molde para marcar el foami, recorta con la tijera, abre un huequito en el centro. Introduce el palito de la flor por el huequito de las hojas y luego aplica pegamento. Coloca el lápiz y con ello hemos terminado esta linda decoración.
! [English version]
Make a mold for the leaves, so that they are equal in their four corners. Use the mold to mark the foami, cut out with the scissors, open a hole in the center. Insert the flower stick through the hole in the leaves and then apply glue. Place the pencil and with that we have finished this beautiful decoration.


Créditos / Credits

💜💜💜
![]() 👉
👉  👉
👉 ![]() 👉
👉 ![]() 👉
👉 
Here / Bríndame un café

Posted Using INLEO
Hermoso trabajo amiga, el video te quedo genial y se puede apreciar muy bien el paso a paso 😍 es una excelente idea de emprendimiento, sobre todo para las escuelas jeje cuando iba al colegio me encantaba decorar mis lapices, aunque siempre los terminaba perdiendo, pero bueno jajaja
Me encanta 😍
me alegra que te guste buhito, jaja a mi me cuesta un mundo grabarme y la edición ni se diga. Las maestras se vuelven loquitas cuando mi hijo les lleva los lapiceros asi <3
Your pencil decoration is so lovely and this could cost a lot in the market but you were able to achieve this with the simple materials at your disposal. Amazing work friend, well done.
selected by @ibbtammy
Yes, I work with what I have at my disposal, but it's an excellent idea for a business venture. In schools, many artisan mothers offer exhibition and graduation packages that include little things like this. It's wonderful. Thank you for your support, community.
Es una gran idea personalizar los lápices, saludos @equipodelta .
Gracias Blanca. Amé tanto hacer esas florecitas que me están dando ganas de hacer un ramo.
El talento lo tienes, anímate hacer el ramo y lo publicas, esteré pendiente.
Que lindo trabajo, de verdad amiga que es una idea muy hermosa de decorar lápices, te voy a copiar la idea y voy a practicar a ver que tal me queda.
Gracias por compartir.
Qué honor siento :) eres una maestra del foami, me encanta tu trabajo.
Hola bella @equipodelta, lindo trabajo y muy cuchi.Me encanta. Dios siga bendiciendo tus manos.
https://www.reddit.com/r/crafting/comments/1p02i0n/pencil_pen_decorated_with_flowers/
This post has been shared on Reddit by @equipodelta through the HivePosh initiative.