DIY - Llavero letra “R” hecho con porcelanicrón / Keychain letter "R" made with cold porcelain (Esp/Eng)


[Esp]
¡Saludos comunidad!
Este llavero miniatura me recuerda a un dije que perdí en la calle que era de unas cerecitas rojas que están de moda, me gustaba porque era un rojo muy vivo y brillantes con pequeñas piedras brillantes, mi cadena se soltó y extravié el dije en algún lugar, eso me puso triste, en honor a esa pérdida me inspiré en otra pérdida más haciendo catarsis, pues la letra "R" pertenece al nombre de alguien que decidió irse por otro camino alejado del mío. Siempre lo llevaré en mi corazón, ya sea por frustración o por amor. He aquí las dos inspiraciones muy especiales que me hicieron hacer este mini llavero.
Hoy trabajé con porcelanicrón o porcelana fría, así que espero que les guste.
! [English version]
Greetings, community!
This miniature keychain reminds me of a charm I lost on the street that had some trendy little red berries on it. I liked it because it was a very bright red with little sparkling stones, but my chain came loose and I lost the charm somewhere. which made me sad. In honor of that loss, I was inspired by another loss, using catharsis, as the letter "R" belongs to the name of someone who decided to go down a different path, far from mine. I will always carry them in my heart, whether out of frustration or love. These are the two very special inspirations that led me to make this mini keychain.
Today I worked with porcelain clay, so I hope you like it.
Materiales / Materials
 |  |

| Spanish | English | |
| Molde de letra R | Letter R mold | |
| Crema par alas manos | Hand cream | |
| Pintura al frío, bordado líquido | Cold painting, liquid embroidery | |
| Pinceles, paño, pote con agua | Brushes, cloth, bucket of water | |
| Tijera, yesquero, aguja punta roma | Scissors, lighter, blunt-tipped needle | |
| Brillo al agua para pintura al frio o barniz | Water-based gloss for cold paint or varnish | |
| Pinza de electrónica | Electronics clamp |
Paso a paso / Step by Step
Step 1️⃣/ Paso 1️⃣
 |  | |
 |  |
[Esp]
La cerámica fría debe estar bien cerrada en doble bolsa y en un recipiente con tapa para evitar que se ponga dura. Toma un pedacito, la cantidad que necesitas. Esta letra es pequeña no necesitarás mucho.
Coloca crema en tus manos y distribuye masajeando que queden humectadas para poder amasar la masa de porcelana fría. Una vez esté lista toma el molde.
Estos moldes son para pastelería - repostería, funcionan muy bien.
Elige el diseño o letra que deseas.
Amasa nuevamente la porcelana para calentarla con tus manos.
! [English version]
Cold porcelain clay must be tightly sealed in a double bag and stored in a container with a lid to prevent it from hardening. Take a small piece, just the amount you need. This letter is small, so you won't need much.
Put cream on your hands and massage it in so they are moist to knead the cold porcelain dough. Once it is ready, take the mold.
These molds are for baking and pastry making, and they work very well.
Choose the design or letter you want.
Knead the porcelain again to warm it up with your hands.
Step 2️⃣/ paso 2️⃣
 |  |

[Esp]
Es bueno usar un rodillo para distribuir bien la masa, que quede pareja, la verdad no lo usé porque la pieza es muy pequeña.
Introduce la masa dentro del molde.
Corta la masa excedente.
Estos moldes son fantásticos porque tienen un botón que al presionar sale la letra sin ningún problema que se deforme o pegue.
! [English version]
It's a good idea to use a rolling pin to spread the dough evenly, but I didn't use one because the piece is very small.
Place the dough into the mold.
Cut off the excess dough.
These molds are fantastic because they have a button that, when pressed, releases the letter without any problems with deformation or sticking.
Step 3️⃣/ paso 3️⃣
 |  |

[Esp]
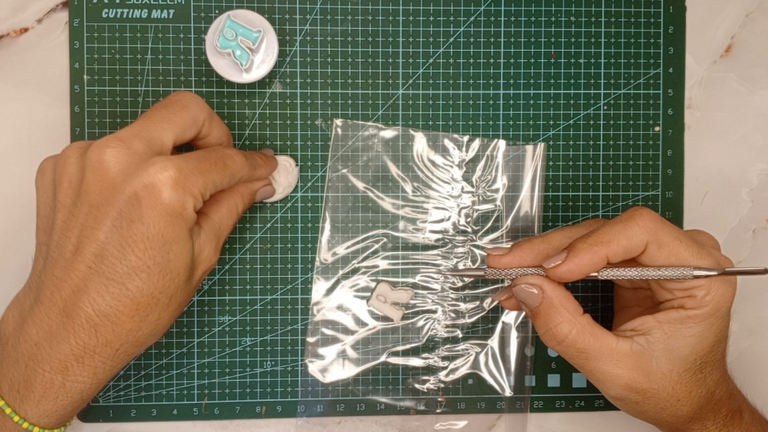
Con ayuda de la espátula acomoda los bordes.
Este Proyecto se hace en dos días, porque ahora, debes colocar la pieza sobre un plástico y dejarla que seque o endurezca por 24 horas.
! [English version]
Use the spatula to smooth the edges.
This project takes two days to complete, because now you must place the piece on plastic and let it dry or harden for 24 hours.
 |  |  |
 |  |
[Esp]
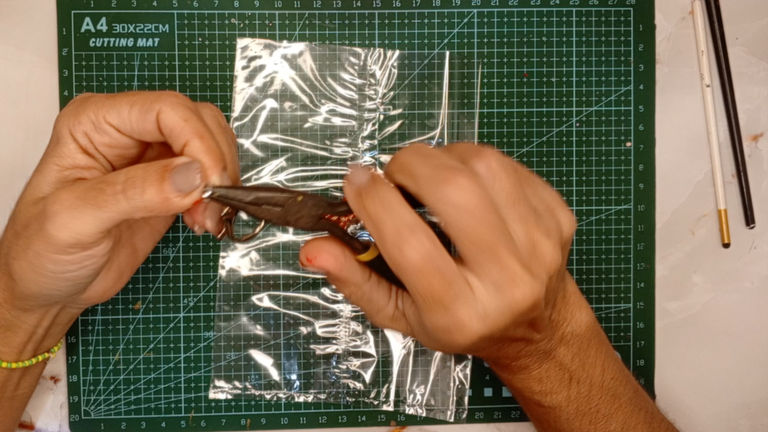
Antes de poner a secar la pieza, introduce un pequeño alambre de bisutería y realiza un aro en él. Ahora sí, deja que la pieza seque por 24 horas.
Prepara el color de pintura que sea de tu agrado, yo usé pintura rojo primario y bordado líquido dorado de la marca Oro color, también usé brillo al agua y entre cada aplicación deja secar.
Cuando ya esté seco puedes ponerle la cadena con el aro, es tan pequeño y tan llamativo su color, reviví mi dije perdido, ahora la "R" me acompaña colgando de mi bolso de mano.
Espero les guste.
! [English version]
Before putting the piece out to dry, insert a small piece of jewelry wire and make a loop in it. Now let the piece dry for 24 hours.
Prepare the paint color of your choice. I used primary red paint and gold liquid embroidery from the Oro Color brand. I also used water-based glitter and let it dry between each application.
Once it is dry, you can attach the chain with the loop. It is so small and its color is so striking. I revived my lost charm, and now the "R" accompanies me, hanging from my handbag.
I hope you like it.


Créditos / Credits


💜💜💜
![]() 👉
👉  👉
👉 ![]() 👉
👉 ![]() 👉
👉 
Here / Bríndame un café

https://www.reddit.com/r/clay/comments/1oqk0wa/my_first_keychain_letter_r_made_with_cold/
This post has been shared on Reddit by @equipodelta through the HivePosh initiative.
Lindo te quedó tu dijecito 💖
!discovery
Gracias querida <3 Dios te bendiga.
This post was shared and voted inside the discord by the curators team of discovery-it
Join our Community and follow our Curation Trail
Discovery-it is also a Witness, vote for us here
Delegate to us for passive income. Check our 80% fee-back Program
A lovely and simple way to make an initial. Excellent work! 💕
selected by @dayadam
I am watching it closely, you have a terrific and beautiful hand. ..🥰
Thank you for brightening my day, my dear.
Muy lindo detalle corazón, me encantó
HOla Mayi me alegra que sea de tu agrado