DIY: Flores con cinta de raso / Flowers with satin ribbon (Esp/Eng)


[Esp]
¡Saludos querida comunidad!
¡Qué importante es no rendirse! Intentarlo las veces que sea necesario.
Intenté recrear este tipo de flor varias veces, confieso que me quedaban feas. No era fácil hacer los pétalos, luego conseguí el truco, estas flores las adapté para ser usadas más adelante en un florero, no quería hacer las típicas rosas, quería otro modelo, encontré algo parecido a esto pero no son ideales para que sean flores de tallo alto, adaptarlas fue un desafío.
Te dejo el paso a paso explicado y
Un video que te invito a verlo.
Espero que les guste, pues tras varios intentos logré hacer la flor.
! [English version]
Greetings dear community.
How important it is not to give up! Try as many times as necessary.
I tried to recreate this type of flower several times, I confess that they were ugly. It was not easy to make the petals, then I got the trick, I adapted these flowers to be used later in a vase, I did not want to make the typical roses, I wanted another model, I found something similar to this but they are not ideal for them to be tall stem flowers, adapting them was a challenge.
I leave you the step by step explained and
A video that I invite you to watch.
I hope you like it, because after several attempts I managed to make the flower.
https://www.youtube.com/shorts/tApaUa-wN2A

Materiales / Materials
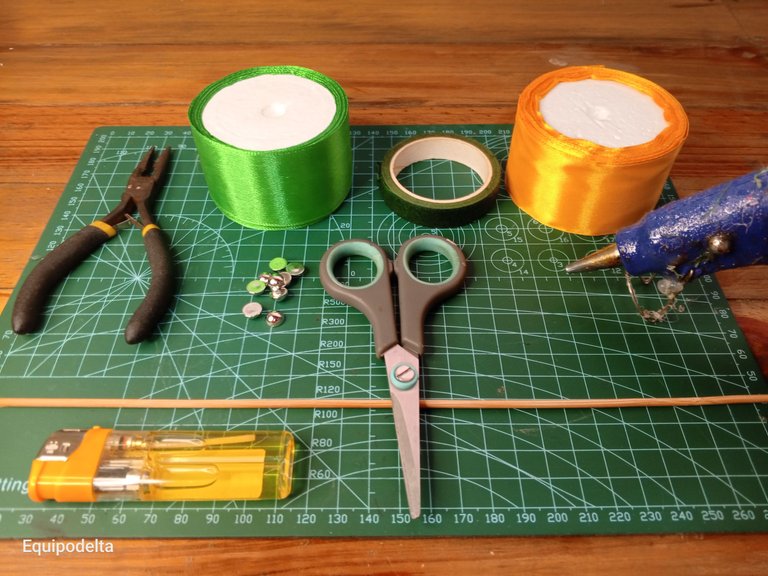
| Spanish | English | |
| Cinta de raso N°9 color amarillo y verde | Satin ribbon N°9 color yellow and green | |
| Media luna plateada | Silver crescent | |
| Tijera | Scissors | |
| Silicón caliente, pinza | Hot silicone, tweezers | |
| Yesquero, palitos de altura | Tinder, sticks of height | |
| Floratex | Floratex |
Paso a paso / Step by Step
Step 1️⃣/ Paso 1️⃣
 |  |  |  |
 |  |  |  |
[Esp]
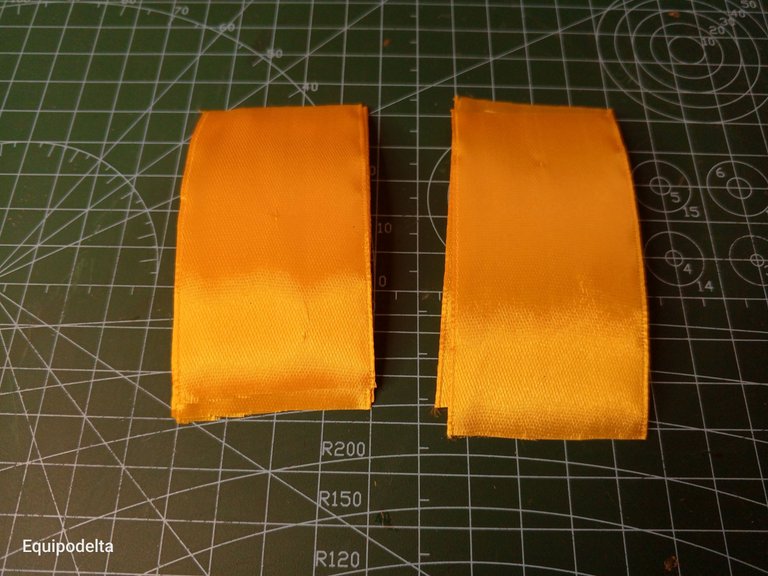
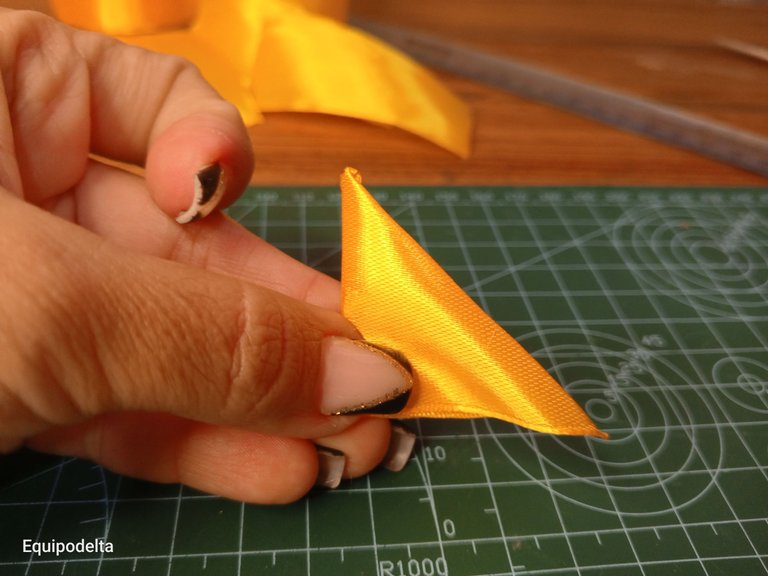
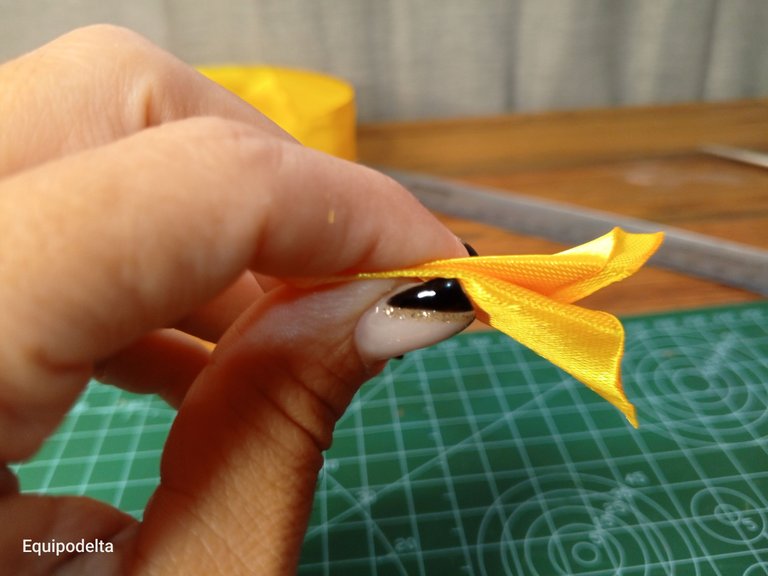
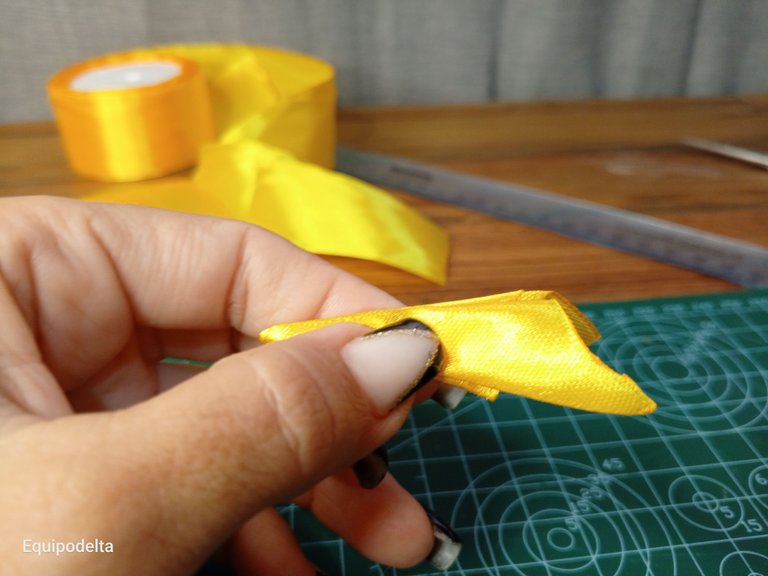
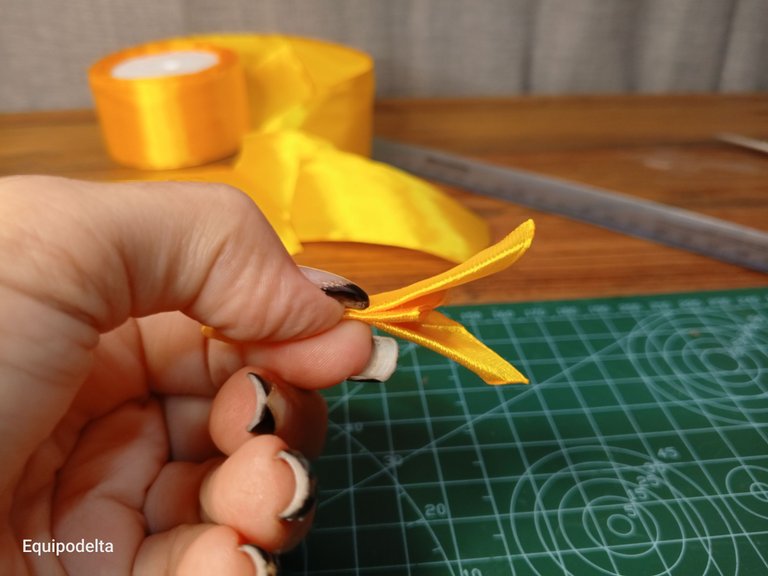
Corta varias tiras de cinta de raso color amarillo de 8 centímetros de largo.
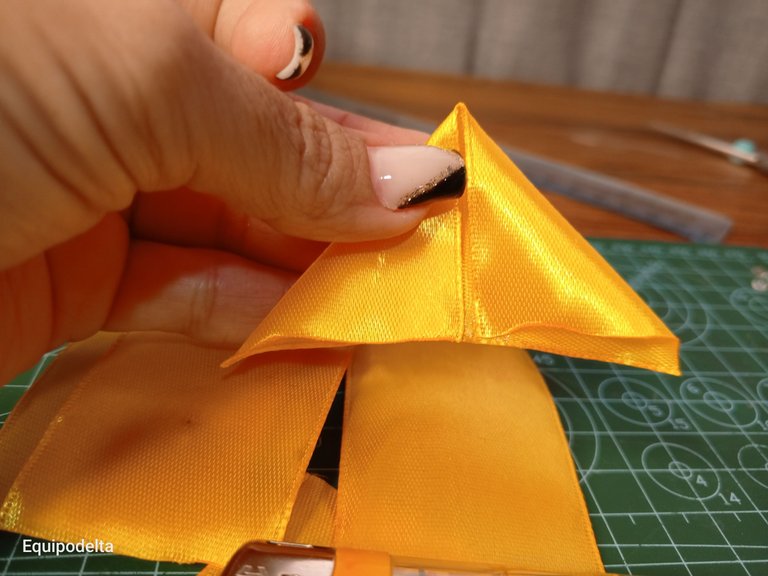
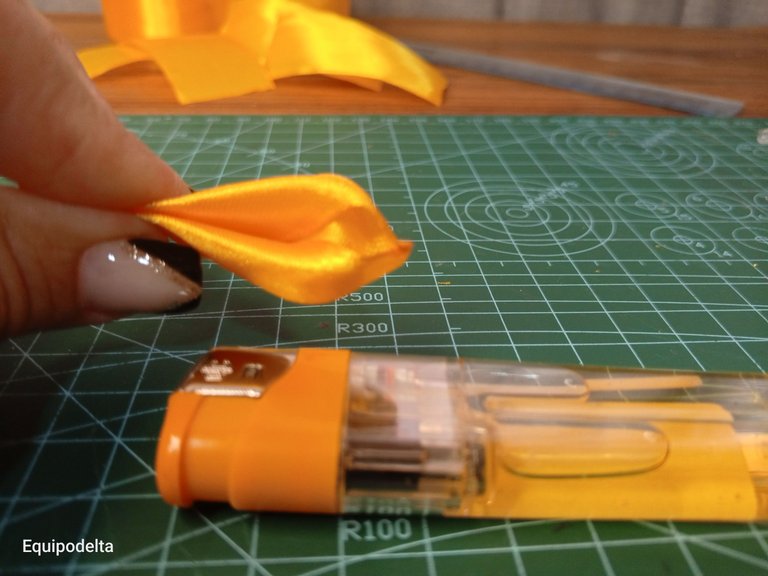
Toma una cinta, coloca un poco de pegamento en el centro y dobla cada punta hacia adentro en forma de casa.
Coloca nuevamente un punto de pega en el centro y dobla nuevamente la cinta hacia adentro formando un triángulo.
Coloca pegamento en cada uno de los lados de afuera y dobla las pestañas como si fueras armar un avioncito de papel.
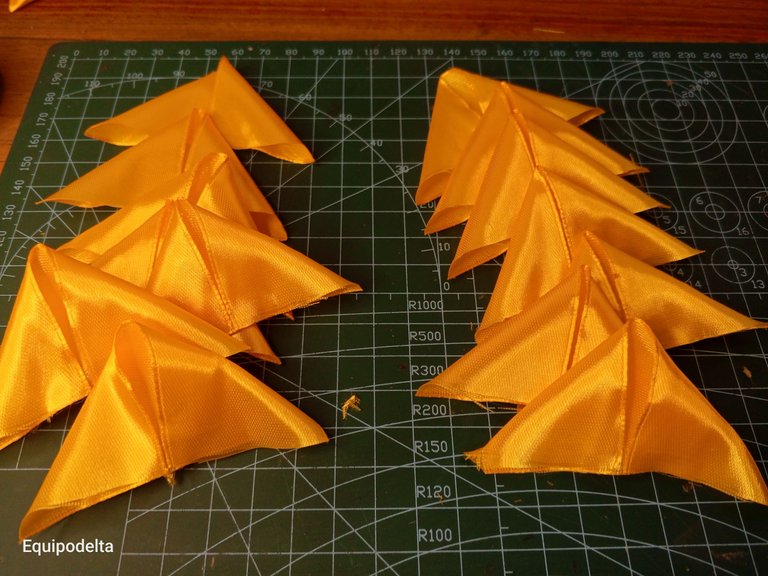
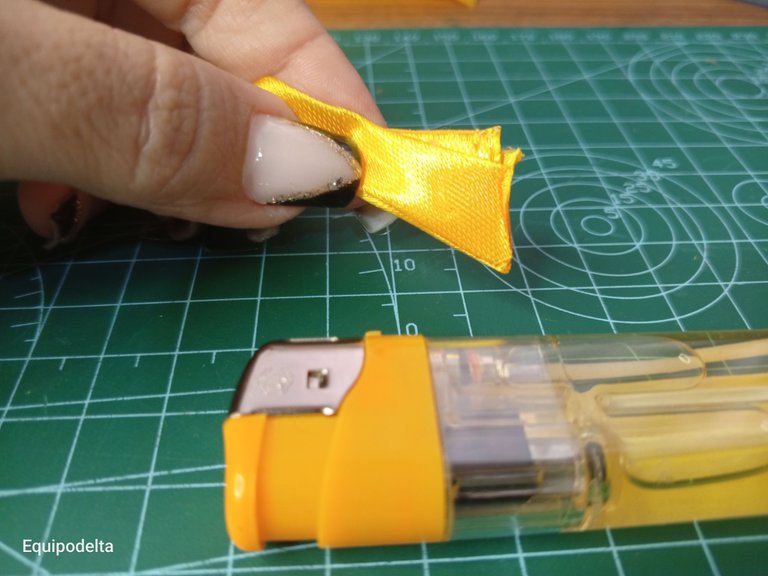
Corta el excedente y quema con un yesquero para evitar deshilache.
! [English version]
Cut several strips of yellow satin ribbon 8 centimeters long.
Take a ribbon, place a dot of glue in the center and fold each end inward in the shape of a house.
Place a dot of glue in the center again and fold the ribbon inward again to form a triangle.
Place glue on each of the outer sides and fold the tabs as if you were going to make a paper airplane.
Cut off the excess and burn with a tinderbox to avoid fraying.
Step 2️⃣/ paso 2️⃣
 |  |  |  |
 |  |  |  |

[Esp]
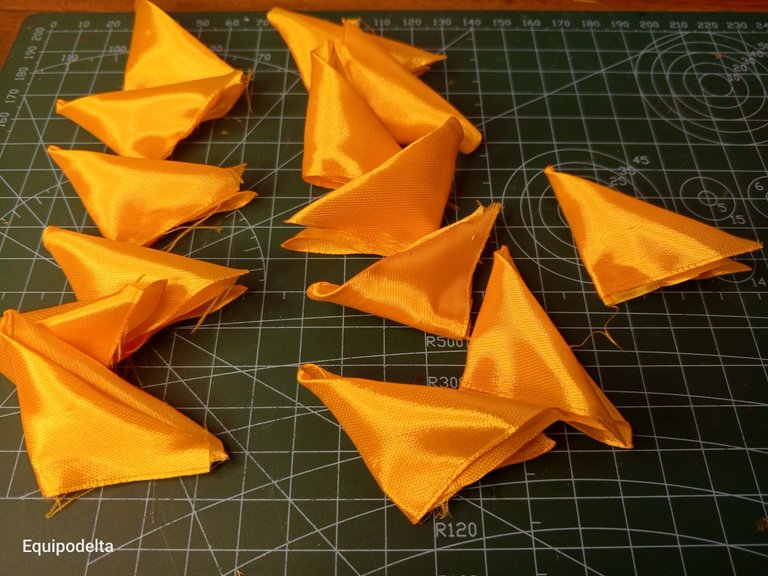
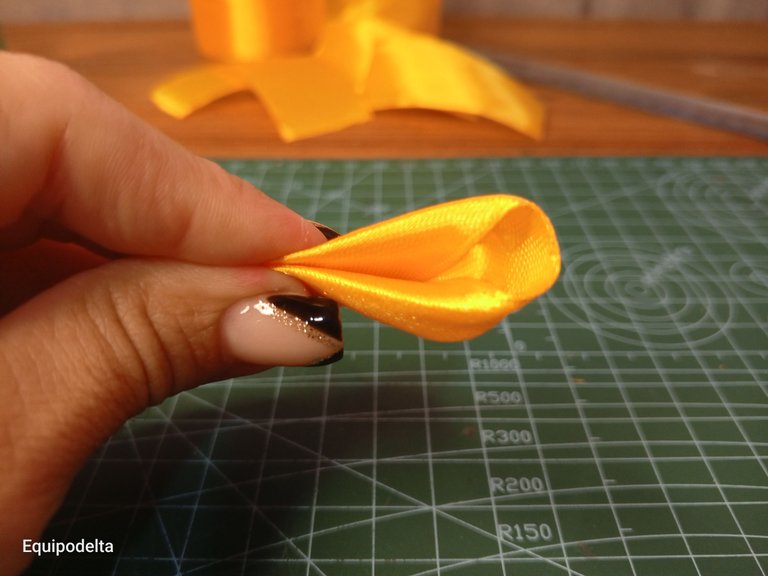
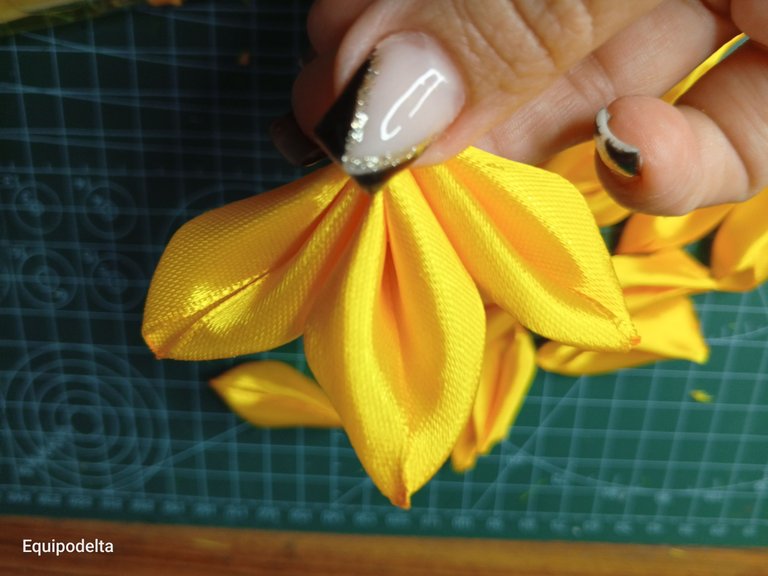
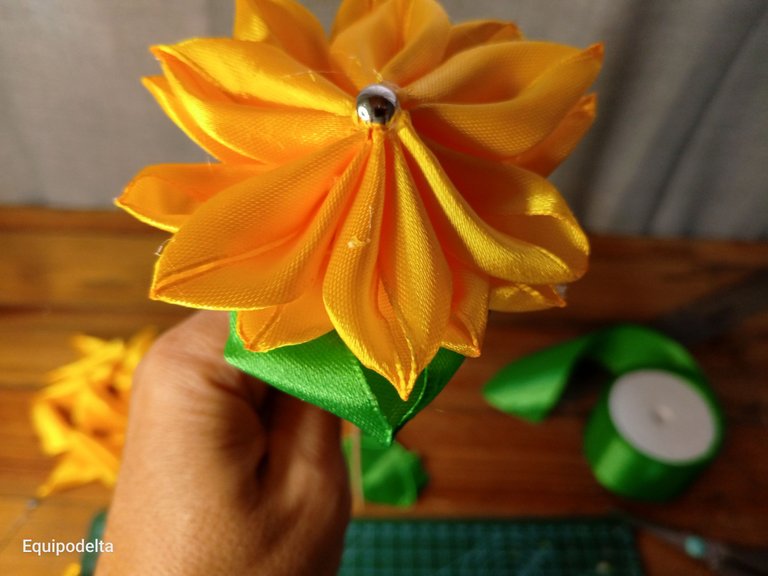
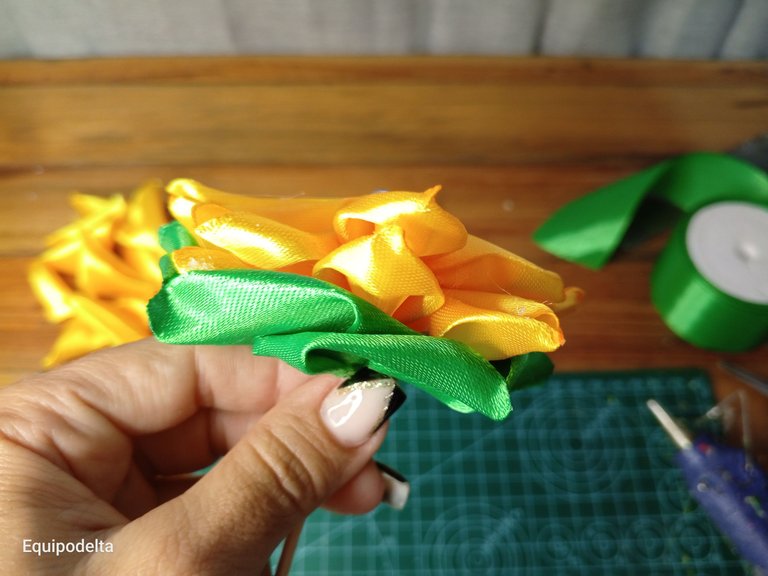
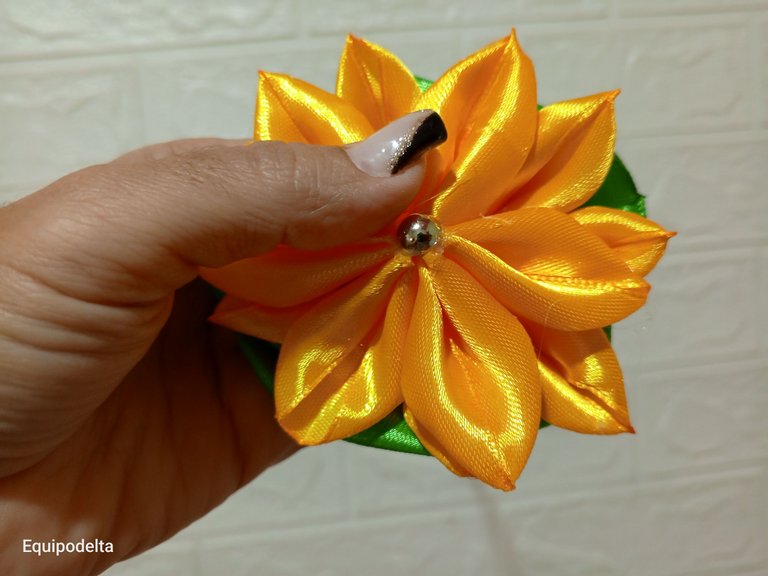
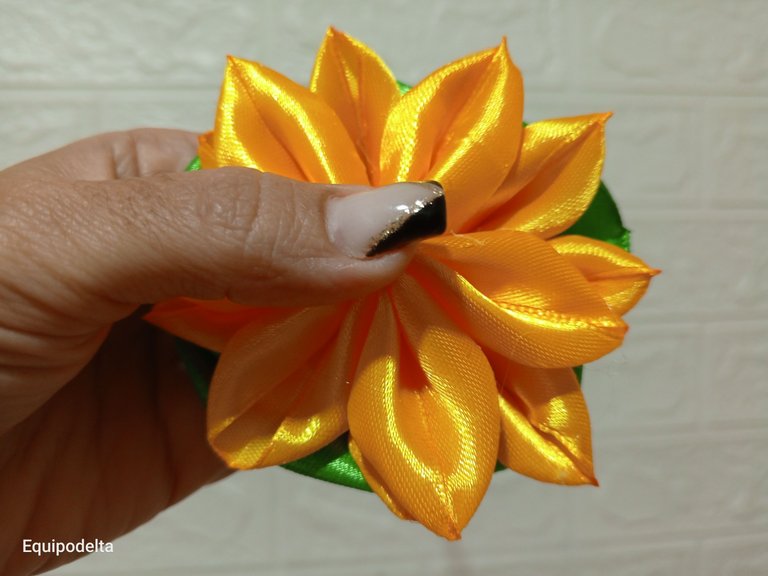
Toca la punta del pétalo empujándolo hacia adentro, ahora dobla y quema la punta formando un filo.
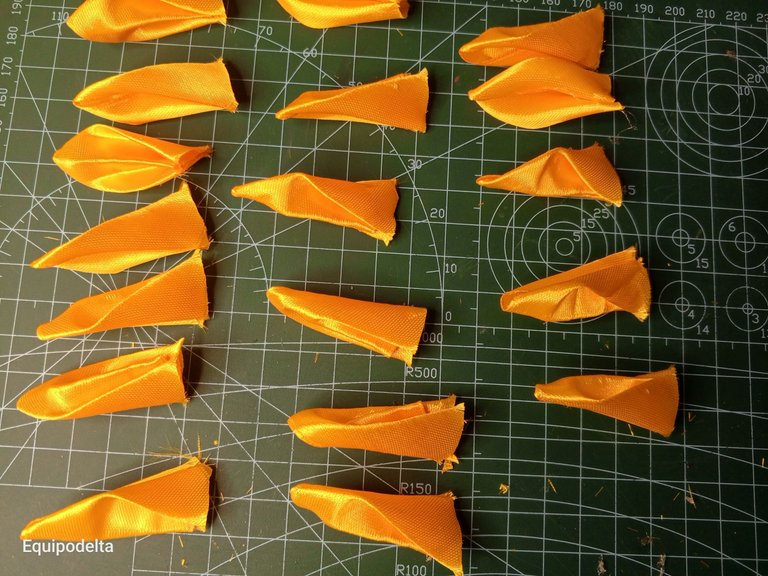
Estos pasos los repetirás con cada pétalo, la cantidad de ellos que necesites, para formar la cantidad de flores que necesites.
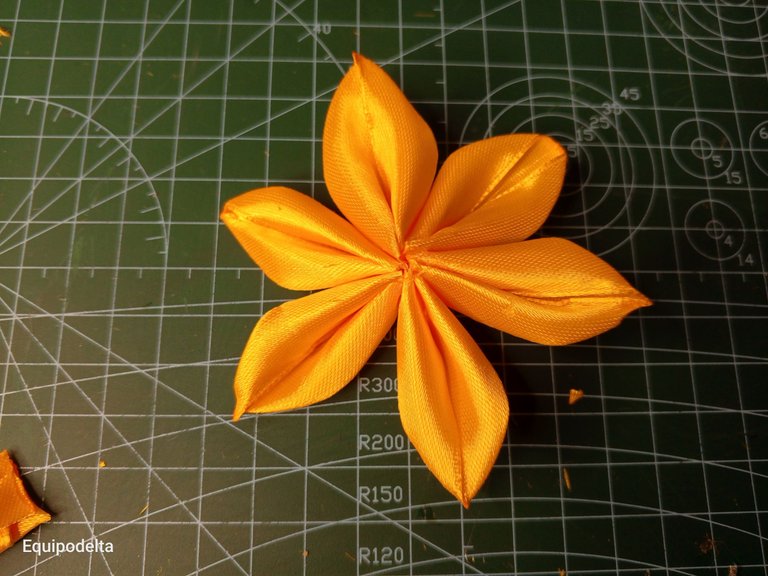
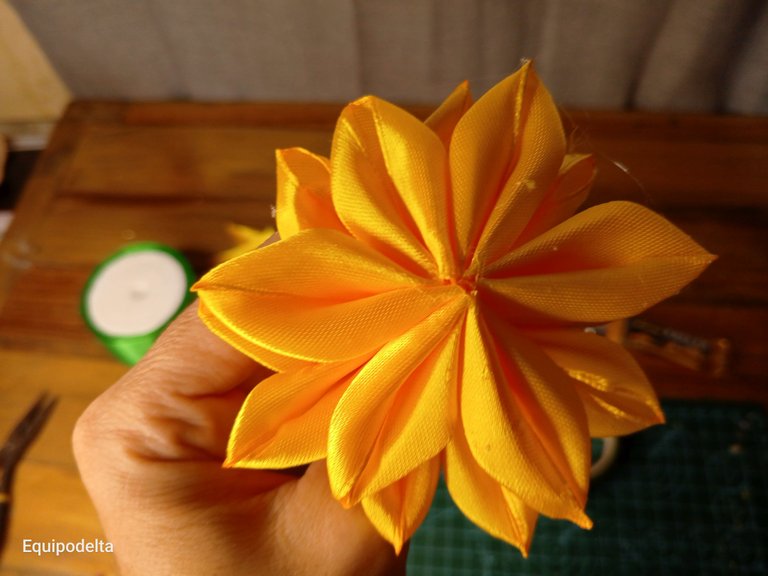
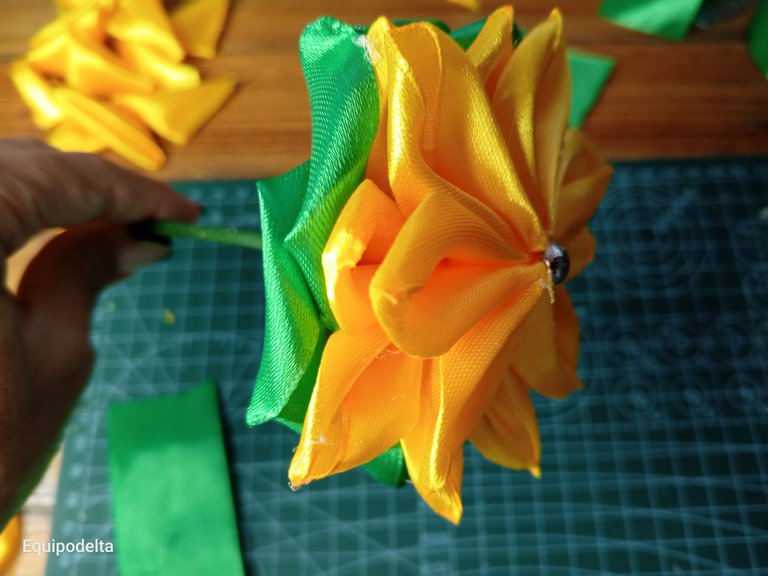
Pega cada pétalo entre si formando una estrella. necesitarás al menos 6 pétalos para formar una flor.
Esta flor tiene sus variantes al final decidí hacerla de una sola capa, pero si la deseas más poblada, puedes repetir el paso anterior uniendo los pétalos y pegarlo debajo de la otra flor formada.
Para tapar el centro, pega la media perla.
! [English version]
Touch the tip of the petal pushing it inwards, now bend and burn the tip forming a sharp edge.
Repeat these steps with each petal, as many petals as you need, to form as many flowers as you need.
Glue each petal together to form a star. You will need at least 6 petals to form a flower.
This flower has its variants in the end I decided to make it in a single layer, but if you want it more populated, you can repeat the previous step joining the petals and glue it under the other flower formed.
To cover the center, glue the half pearl.
Step 3️⃣/ paso 3️⃣
 |  |  | 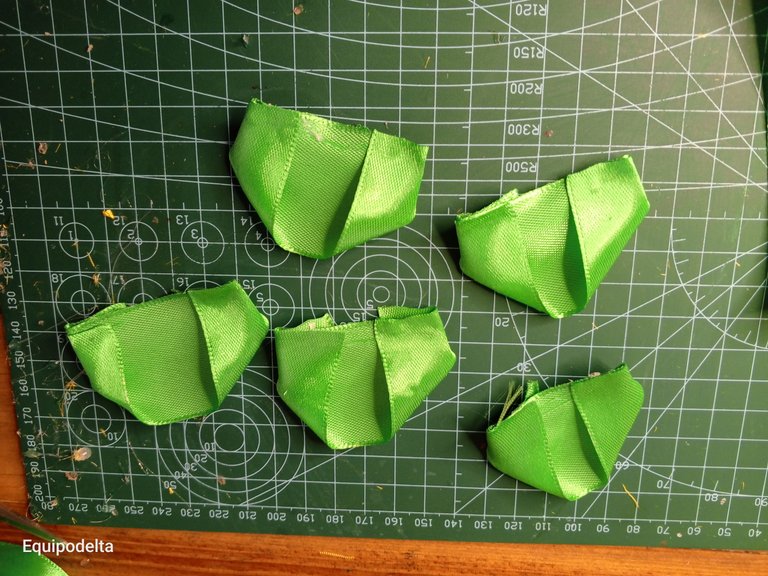 |
 |  |  |  |
[Esp]
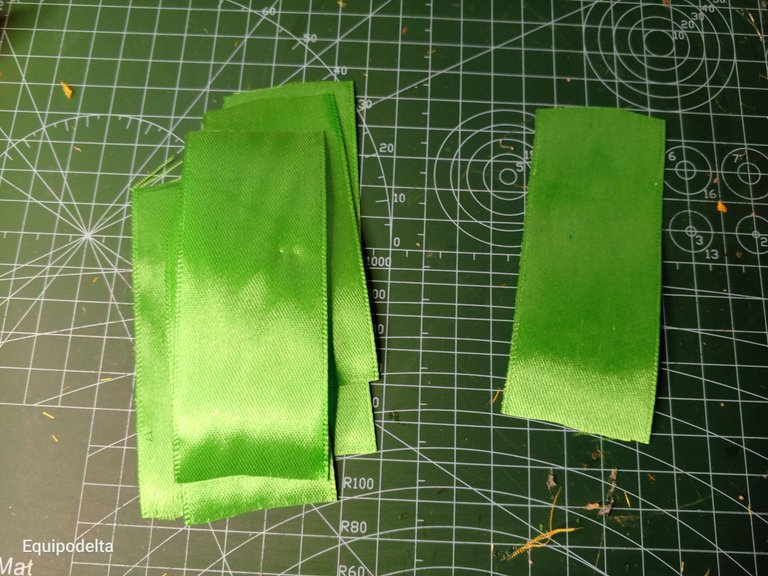
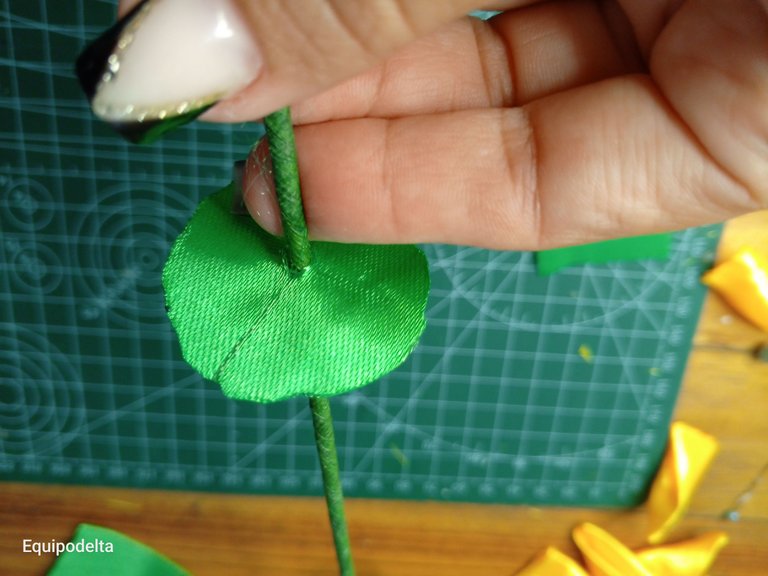
Corta varias piezas de 10 centímetros de cinta de raso color verde.
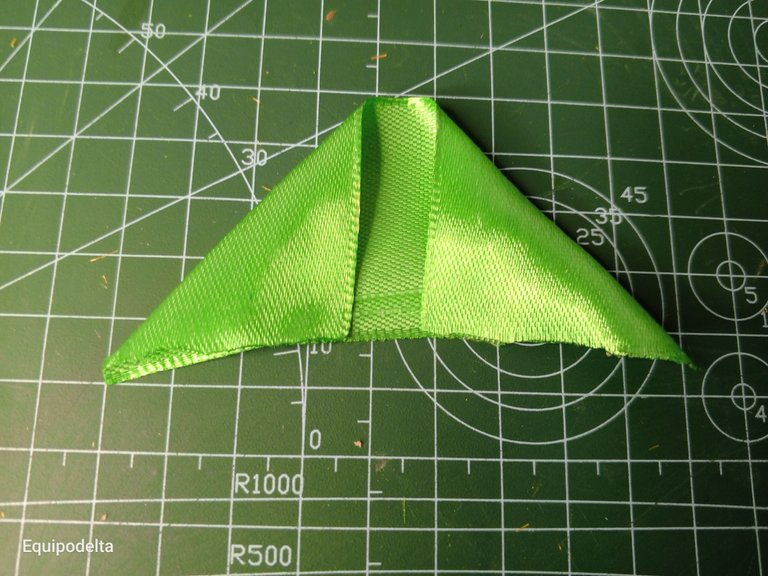
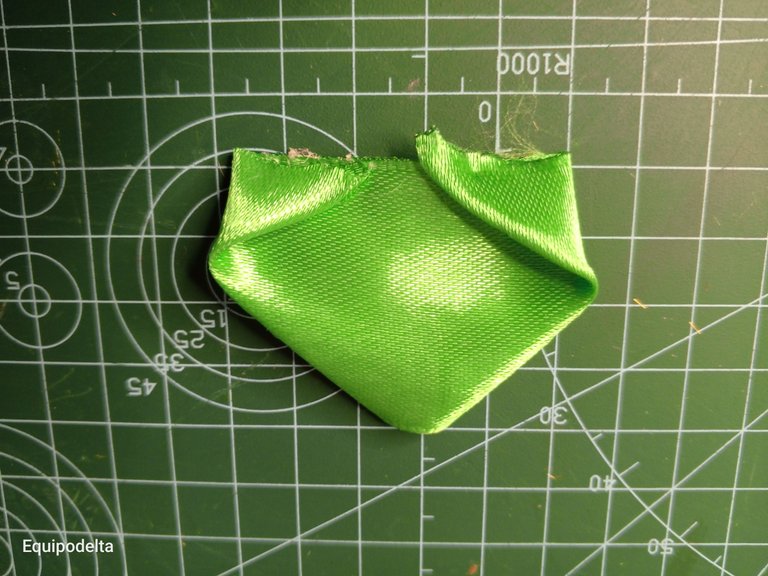
Coloca pegamento en las puntas de la parte inferior y dobla formando una casa.
Luego voltea la pieza y dobla las puntas hacia adentro y pega.
Repite estos pasos, cuantas hojas necesites para la cantidad de flores que necesites.
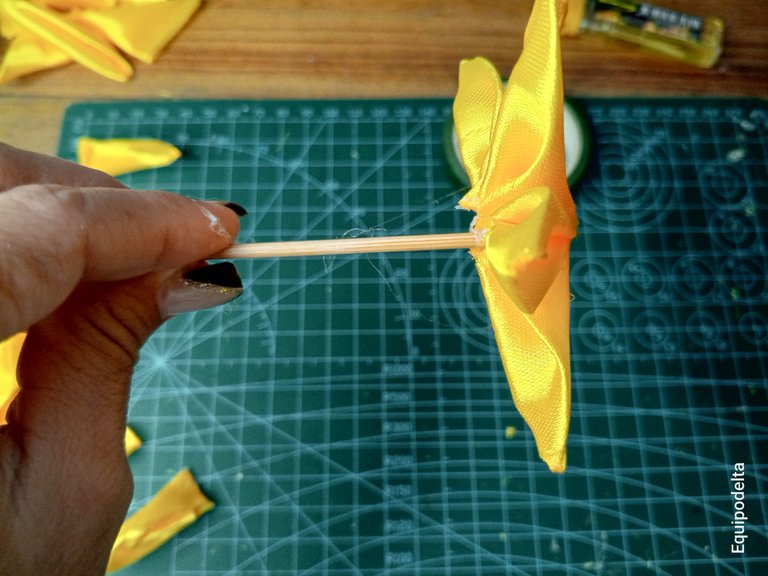
La tapa que cubre la parte inferior de la flor tiene una variante, preferí hacerla con un círculo de foami, queda mejor.
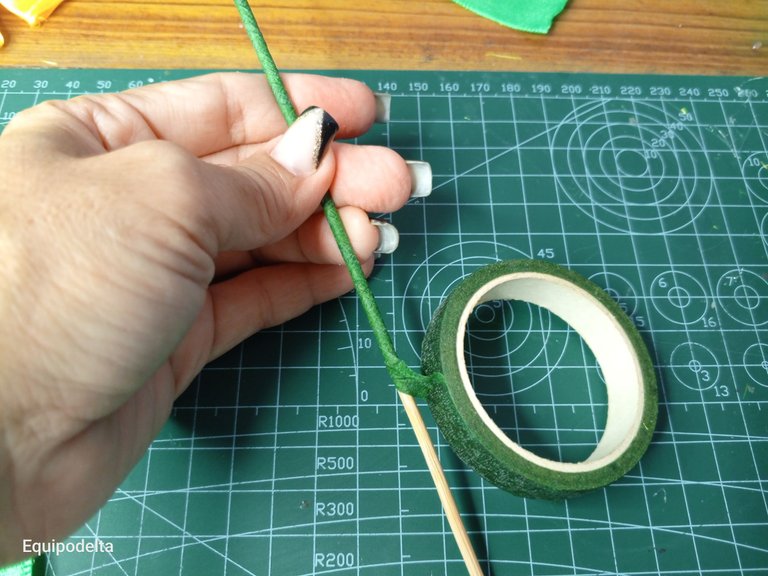
Forra el palito de altura con el floratex.
! [English version]
Cut several 10-centimeter pieces of green satin ribbon.
Put glue on the ends of the lower part and fold into a house.
Then turn the piece over and fold the ends inward and glue.
Repeat these steps, as many leaves as you need for the amount of flowers you need.
The lid that covers the lower part of the flower has a variant, I preferred to make it with a circle of foami, it looks better.
Line the height stick with the floratex.
Step 4️⃣/ paso 4️⃣
[Esp]
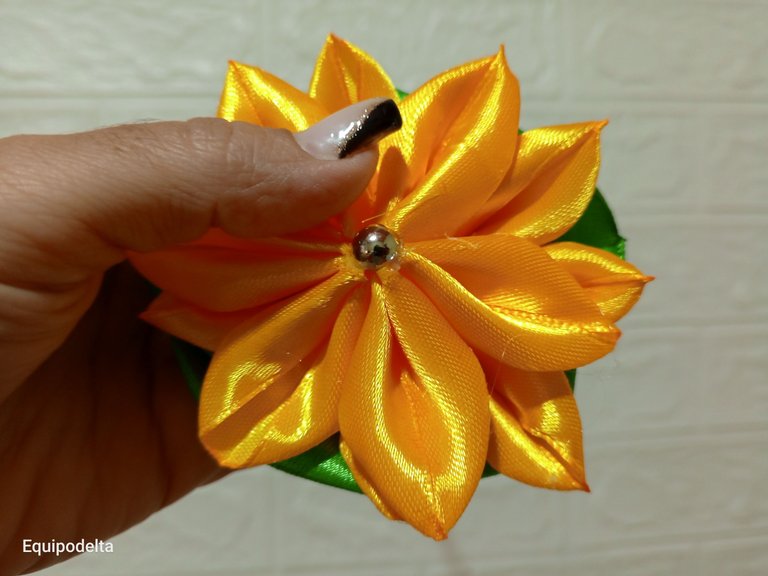
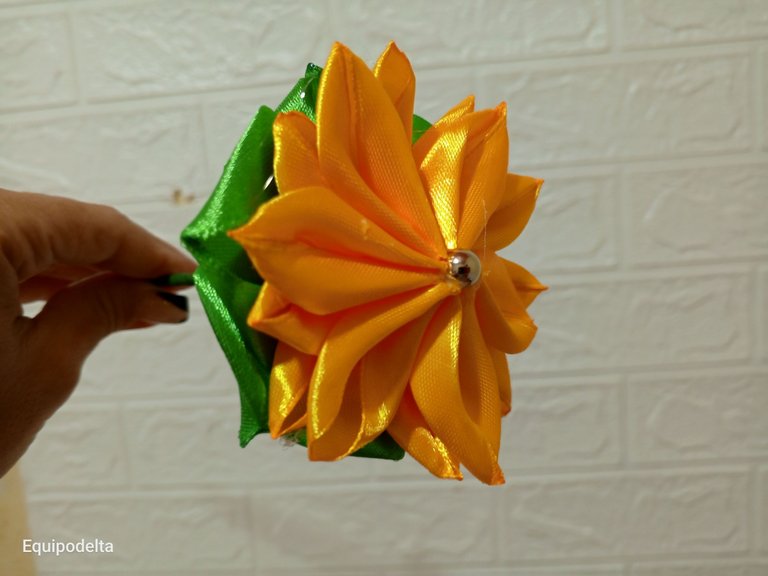
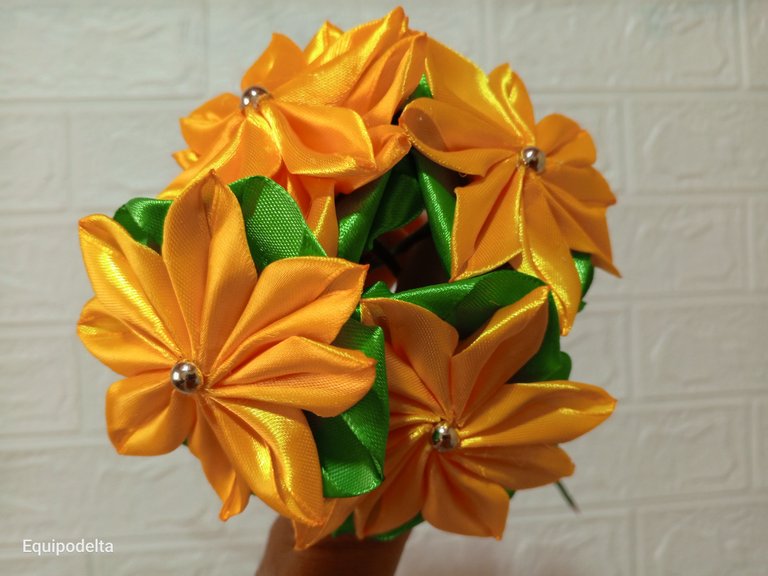
Esta flor lleva mucho más trabajo que una rosa es verdad, requiere de mucha dedicación y tiempo en cada pétalo, pero creo que vale la pena para tener algo diferente.
Estás flores las usaré más adelante cuando pueda comprar follaje para hacer un arreglo floral que espero compartir con ustedes.
Espero que les guste.
! [English version]
This flower takes a lot more work than a rose it is true, it requires a lot of dedication and time on each petal, but I think it is worth it to have something different.
I will use these flowers later when I can buy foliage to make a floral arrangement that I hope to share with you.
I hope you like it.


Créditos / Credits

💜💜💜
![]() 👉
👉  👉
👉 ![]() 👉
👉 ![]() 👉
👉 
Here / Bríndame un café

Hola amiga!! Me hiciste recordar cuando hice algunos cintillos decorados con ese tipo de flores, que quedan demasiado bellas. Te quedaron lindas y el color que escogiste es precioso y llamativo. Un abrazo 🫂
Hola amiga, es que son flores para eso, solo las adapté. El color de la cinta me encantó mucho por eso las elegí, llaman la atención, ojalá no se ensucien tan rápido, abrazos de vuelta amiga.
Te quedo hermoso.
Hello, @equipodelta, good morning.
I'm glad you didn't give up and tried so many times until you decided to make these beautiful flowers.
Beautiful video, I loved watching you create this gorgeous flower.
Everything turned out so beautiful. I admire the gift you have in your hands.
Have a wonderful weekend.
This is really so charming… now I have to made something my kid , hope share it with you all 😃
It would be great if you could share it with us, we're looking forward to it <3
Yeah … I am definitely share it … thanks 🤩
Me encanta el trabajo con cintas, he hecho flores parecidas y quedan bien bonitas. Es precioso este ramo, me encantó.
Coincido contigo, quedan hermosas y requieren de mucha practica, tiempo, dedicación, he visto gente que se toma su tiempo en hacerlas, sin prisa todo queda mucho mejor prestando atención a todos los detalles.
¡Preciosas! y son muy versátiles, las pueden usar para cualquier decoración.
Un abrazo amiga @equipodelta
Toda la razon amiga <3
La practica hace al maestro y de eso se trata, de prueba y error hasta que conseguis el resultado que tanto buscabas ❤️ me alegra que no te hayas rendido y asi lograras hacer estas hermosas flores, te quedaron muy lindas amiga 😍
Quiero esa maestria, jajaja por ahi estaba viendo otros modelos que hasta usan pinzas para sujetarlas, para apretarlas y quedan tan perfectas...
You've been curated by @plantpoweronhive! Delegations welcome!
Thanks for you support
Hola bella @equipodelta, ¡Wuao! que hermoso, me encanta ese color, huele a prosperidad. Parece un bouquet, en color banco debe quedar bello para una novia, 🤗.
Dios siga bendiciendo tus manos.
El color es realmente lindo, aunque las flores tienen su dificultad, intentaré otros modelos más adelante, espero que me queden bonitos.
Te quedaron muy bonitas, una tía hace unas semejantes, Pero las pone en uno de los extremos de los bolígrafos, para decorarlos, con unas manualidades hermosas ya sea para adornar algún espacio o también puede ser un lindo obsequio, saludos.
Hola Konchix, es que son para esos trabajos solo la adapte para un arreglo floral a ver cómo quedaba, la verdad es bastante dificultoso.
Glad for your perseverance making that,that takes lots of time to make😱Anyways the outcome is pretty,I'll be trying this one out to replace putting fresh flowers in my table,I'll just do these instead,thanks for the idea❤️have a nice day...
This is so beautiful, it's good for decorating the table and I will sure make one for myself as well. Thanks for sharing the step by step process, it will definitely be helpful.