DIY: Flores amarillas - Para toda ocasión / Yellow flowers - For all occasions (Esp/Eng)

[Esp]
Saludos querida comunidad.
Recuerdo a mi madre, ella amaba hacer flores de todo material, en su país Portugal hacia muchas para las fiestas de San Juan y las fiestas de San Antonio, ese tipo de flores para esas fiestas eran con plástico, bolsas, nunca pude aprender hacer las que ella hacia, le quedaban bellas. Antes de diciembre ella estaba haciendo algo con telas para cubrir mi arbolito, me hacia flores y cositas bordadas, amaba eso en ella y luego me las obsequiaba con tanta alegría ¡Madre mía siempre te voy a honrar!
A mi no se me daban mucho las manualidad antes, confieso, lo mio son técnicas en pintura al frio, biscochos y figuras, poco he podido compartir mis conocimientos en este tema con ustedes, los biscochos y las pinturas son muy costosos. Esto me recuerda ¡Jajaja! Todos los años mi madre esperaba llegar diciembre porque sabía que le iba a regalar un niño cantor de cerámica enorme de 40 centímetros de alto aproximadamente, ella esperaba con emoción ese momento para ver cómo lo iba a pintar, qué colores usaría y qué decoración haría esta vez, mi madre llegó a tener diez cantores entre otras cosas, los lucía con mucho orgullo debajo del arbolito y en la mesa de la sala tenía una pareja que le costaba retirarlos durante el resto del año, ella los amaba. Disculpen, me salí del tema, pero es que siempre voy a recordar a mi madre cuando hago flores. Estas en particular sé que las hubiera amado.
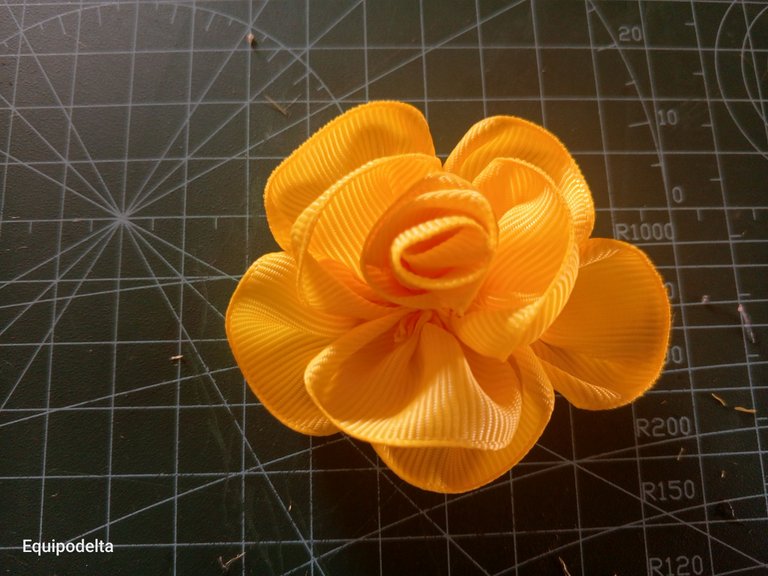
En mi post anterior hice unas diferentes, eran de color negro y eran para una pinza de cabello, pero por el color de la cinta, el paso a paso pudo no distinguirse mucho. Esta flor amarilla es algo diferente, el paso a paso lo verás con mayor claridad. No lleva nada de pegamento, aproveché hacerla en el corte de energía eléctrica por racionamiento que dura al rededor de 4 horas. me tomé mi tiempo para hacerla, ese es el secreto.
Espero les guste.
! [English version]
Greetings dear community.
I remember my mother, she loved to make flowers of all materials, in her country Portugal she made many flowers for the feasts of San Juan and the feasts of San Antonio, that type of flowers for those feasts were with plastic, bags, I could never learn to make the ones she made, they were beautiful. Before December she was making something with fabrics to cover my tree, she made me flowers and embroidered things, I loved that in her and then she gave them to me with so much joy, my Mother I will always honor you!
I was not very good at crafts before, I confess, my thing is cold painting techniques, biscuits and figures, I have not been able to share my knowledge in this subject with you, biscuits and paints are very expensive. This reminds me hahaha! Every year my mother waited for December to arrive because she knew that I was going to give her a huge ceramic singing child of approximately 40 centimeters high, she waited with excitement that moment to see how she was going to paint it, what colors she would use and what decoration she would do this time, my mother had ten singers among other things, she wore them with pride under the tree and on the living room table she had a couple that she had trouble removing them during the rest of the year, she loved them. Sorry, I got off topic, but I will always remember my mother when I make flowers. These in particular I know she would have loved them.
In my previous post I made some different ones, they were black and were for a hair clip, but because of the color of the ribbon, the step by step may not have been very distinguishable. This yellow flower is a little different, you will see the step by step more clearly. It doesn't have any glue, I took the opportunity to make it during the power outage due to rationing that lasts about 4 hours. I took my time to make it, that's the secret.
I hope you like it.
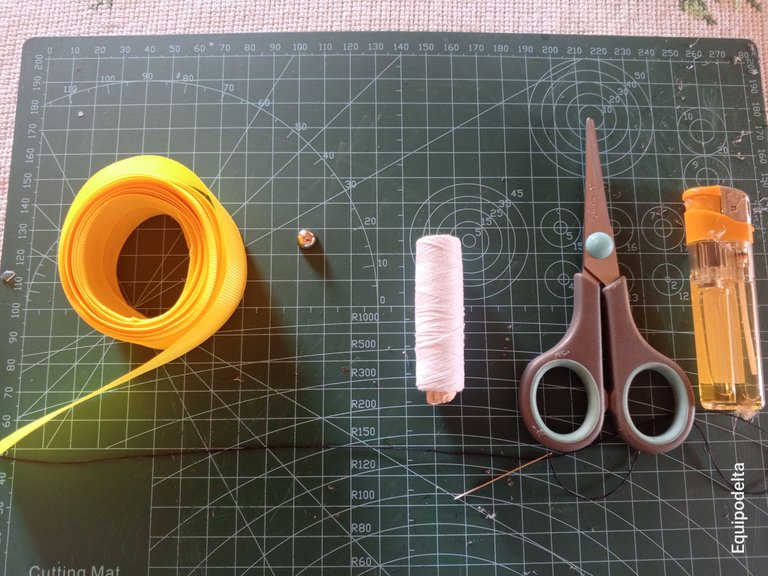
Materiales / Materials
| Spanish | English | |
| Cinta gross N°2 | Gross belt No. 2 | |
| Hilo y aguja de coser a mano | Thread and hand sewing needle | |
| Yesquero, tijera, cinta métrica | Tinder, scissors, tape measure |
Paso a paso / Step by Step
Step 1️⃣/ Paso 1️⃣
 |  | |
 |  |
[Esp]
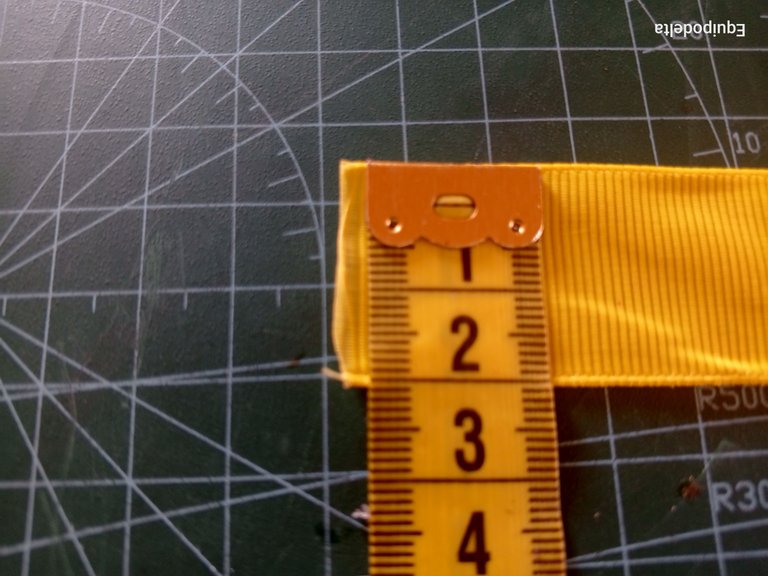
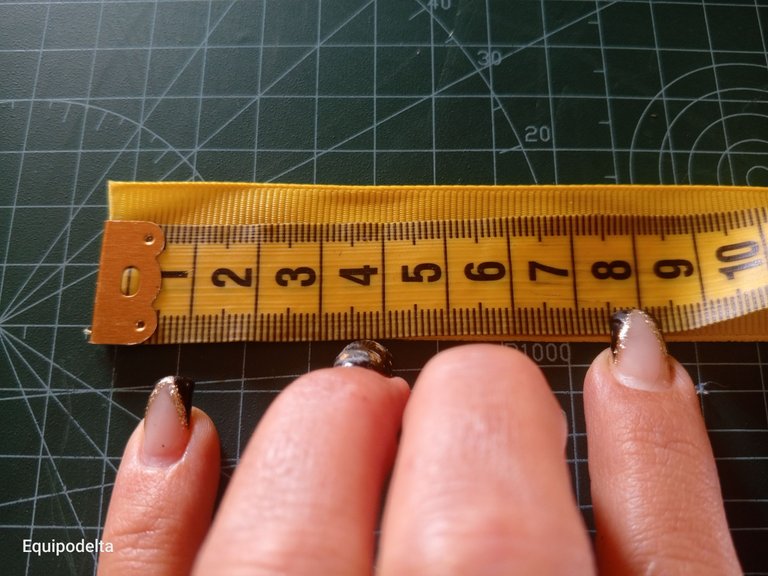
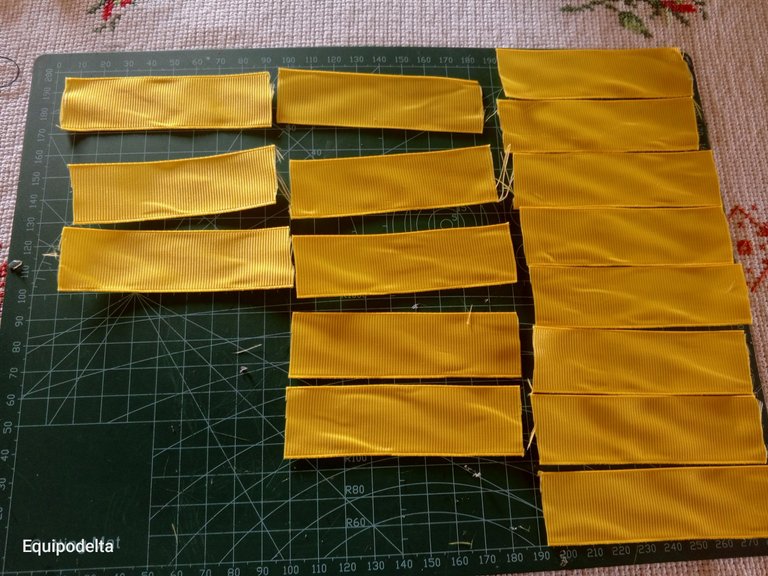
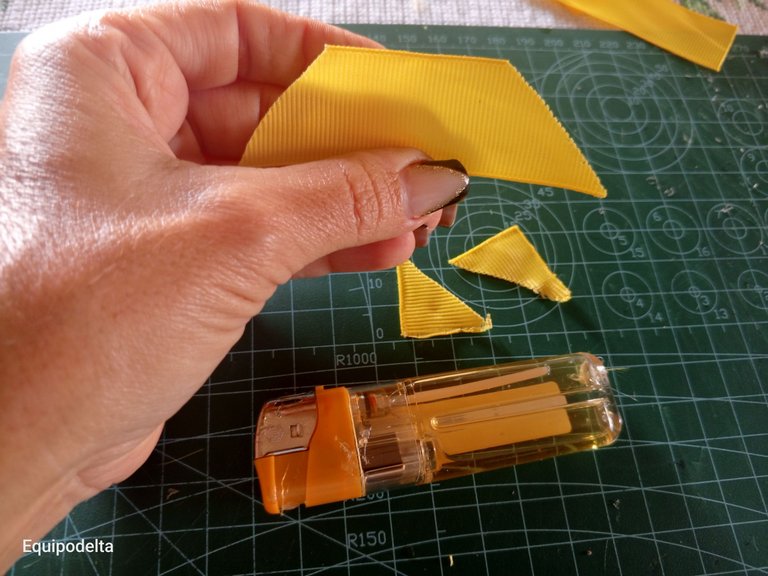
La cinta mide 2 Centímetros de ancho y el corte es 8 centímetros de largo.
Para este proyecto hay que cortar 16 piezas y 2 mas para el botón del centro.
Dobla una esquina hacia adentro.
! [English version]
The ribbon is 2 centimeters wide and the cut is 8 centimeters long.
For this project you need to cut 16 pieces and 2 more for the center button.
Fold one corner inward.
Step 2️⃣/ paso 2️⃣
 |  | |
 |  |
[Esp]
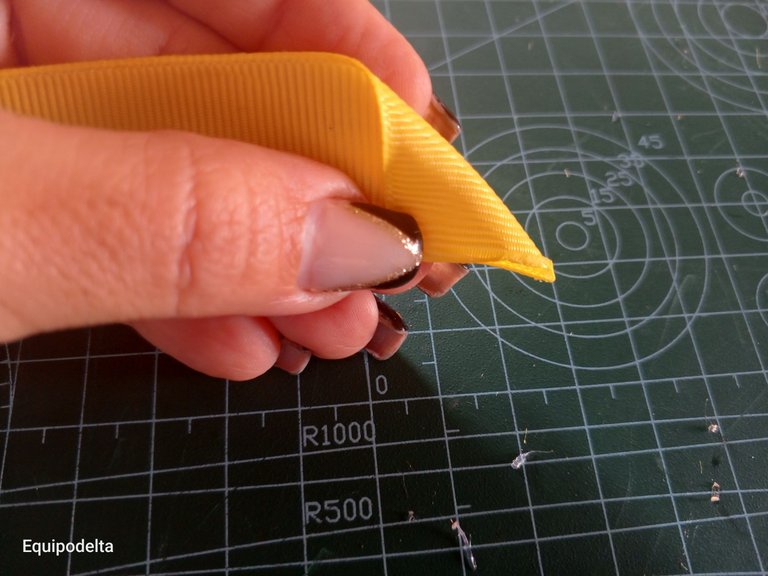
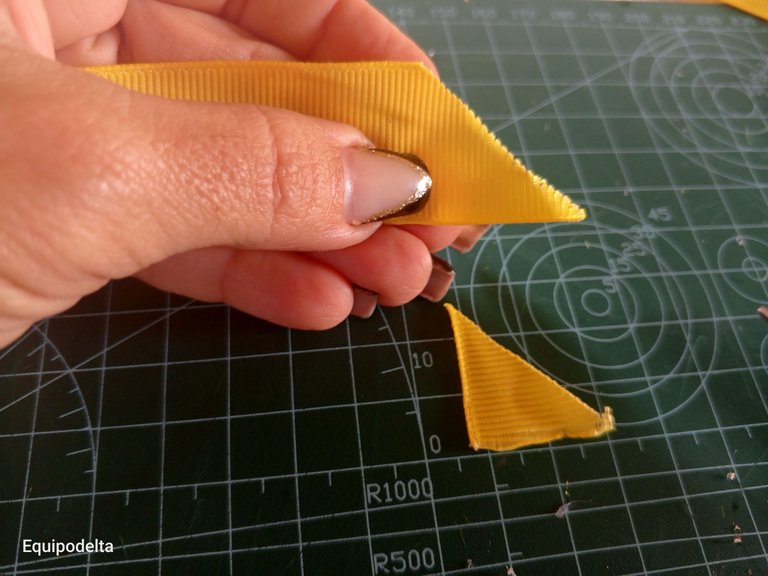
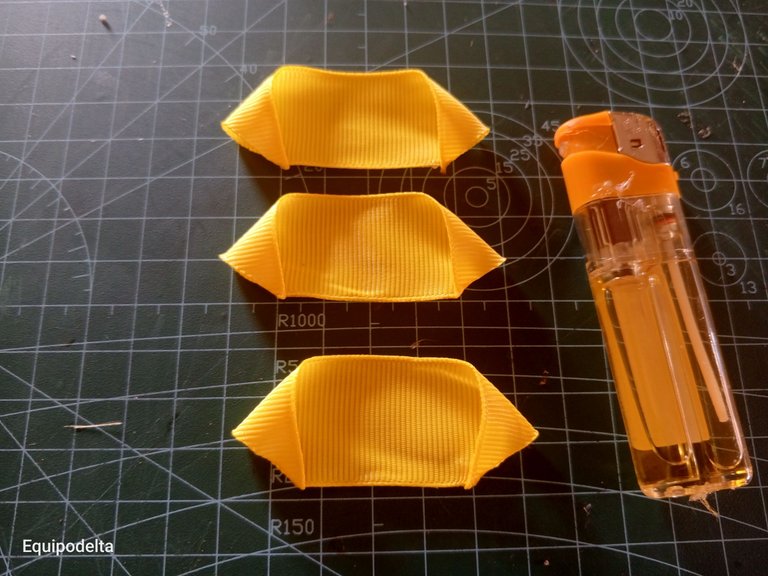
Corta diagonal.
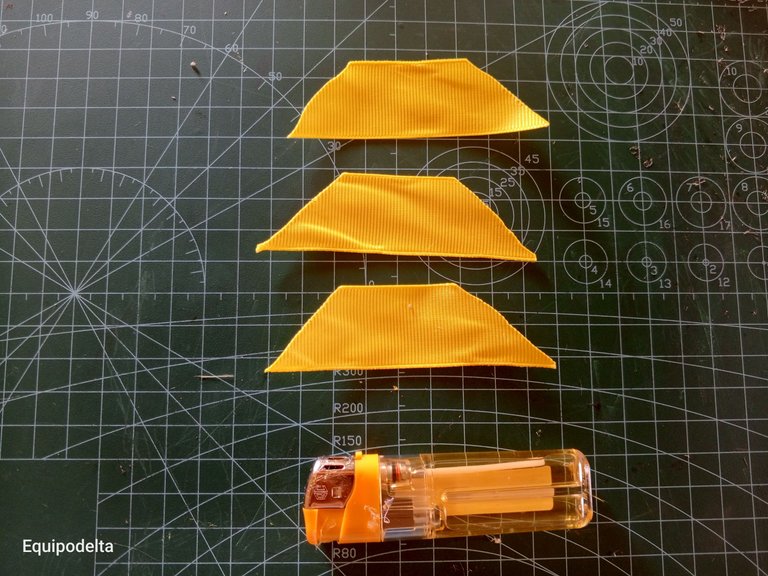
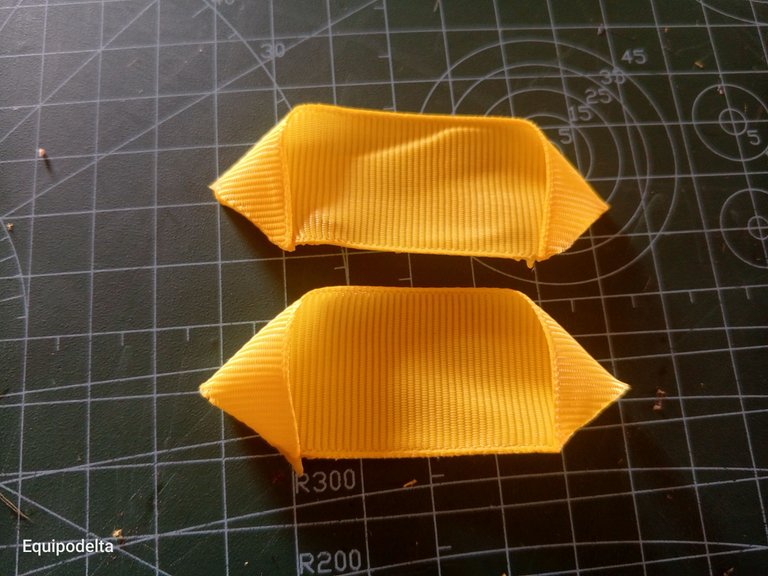
Dobla la siguiente pestaña hacia adentro y corta en diagonal para obtener la forma de un trapecio.
Quema las orillas con un yesquero.
Haremos la primera rueda de tres pétalos. Necesitamos tres cintas.
! [English version]
Cut diagonally.
Fold the next tab inward and cut diagonally to get a trapezoid shape.
Burn the edges with tinder.
We will make the first three-petal wheel. We need three ribbons.
Step 3️⃣/ paso 3️⃣
 |  | |
 |  |
[Esp]
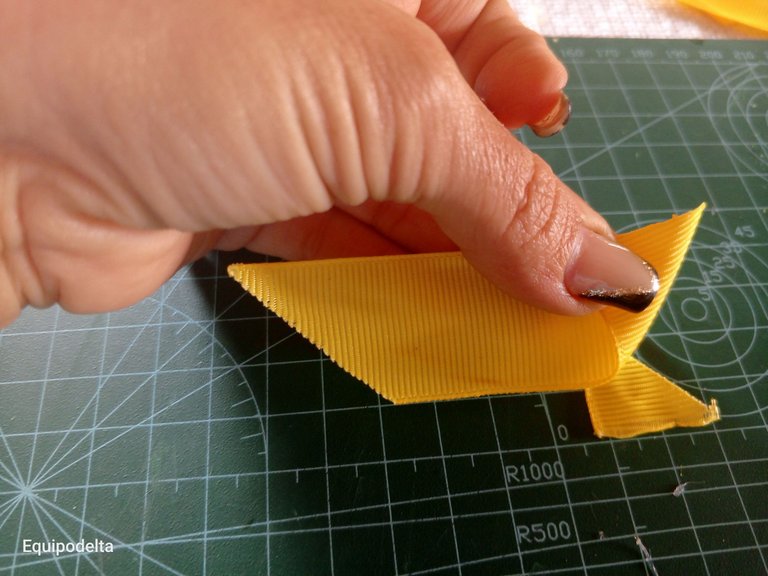
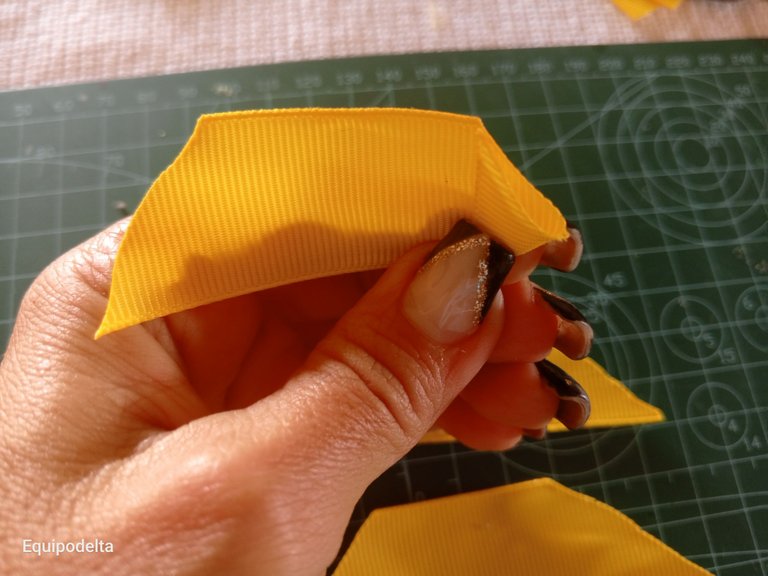
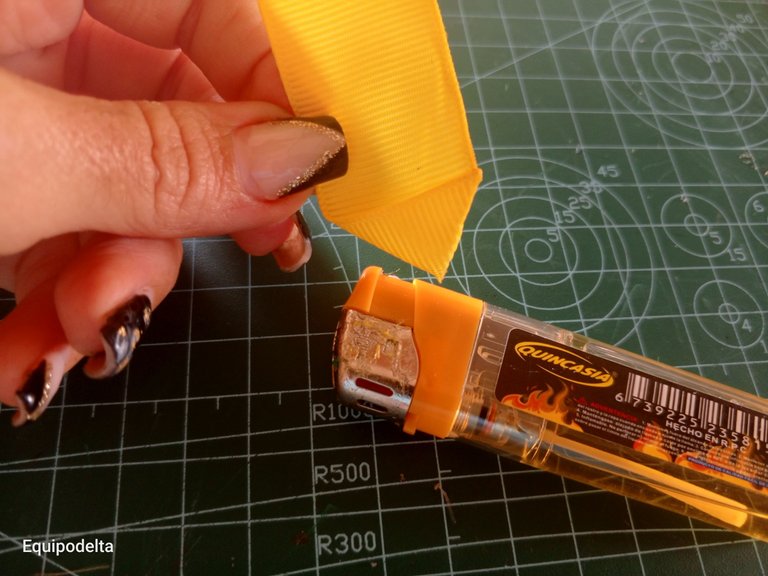
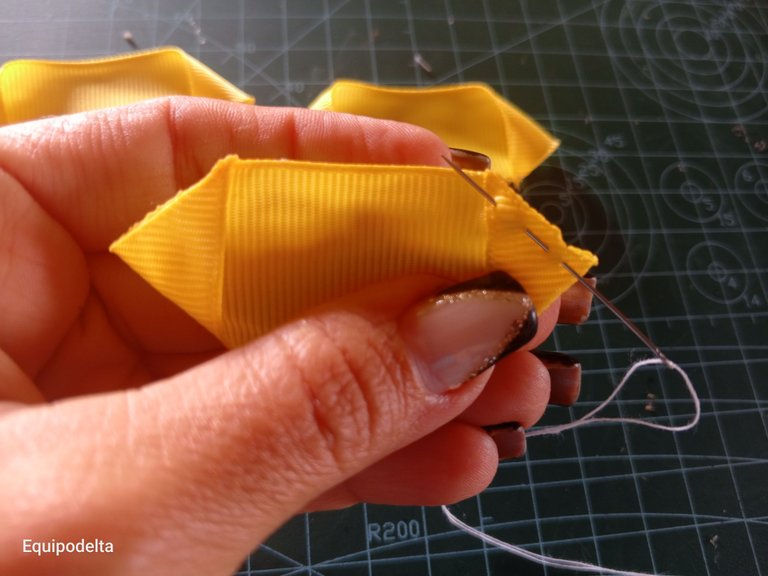
Toma la esquina, dobla hacia adentro y pega la punta con ayuda del fuego del yesquero, repite el procedimiento con la otra esquina.
Para hacer la primera línea de flores necesitamos tres piezas.
Cose por el lado de la abertura de punta a punta para fruncir.
! [English version]
Take the corner, fold inward and glue the tip with the help of tinder fire, repeat the procedure with the other corner.
To make the first line of flowers we need three pieces.
Sew on the side of the opening from end to end to gather.
Step 4️⃣/ paso 4️⃣
 |  | |
 |  |
[Esp]
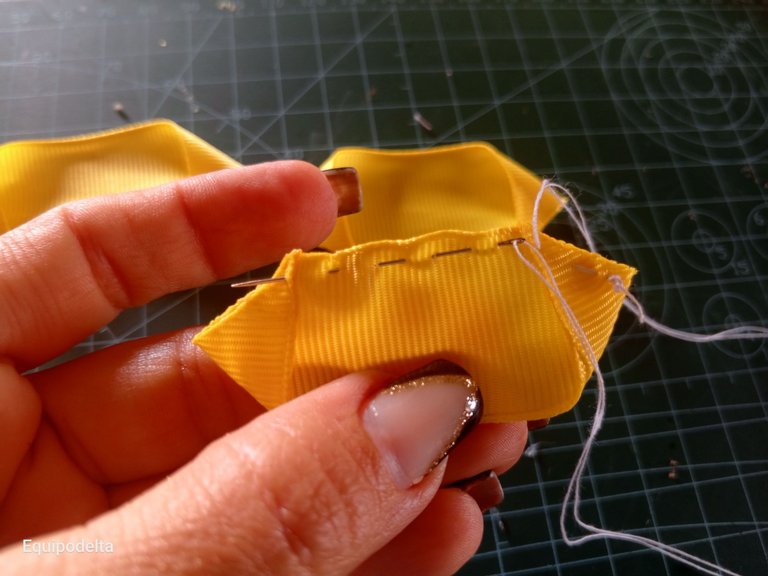
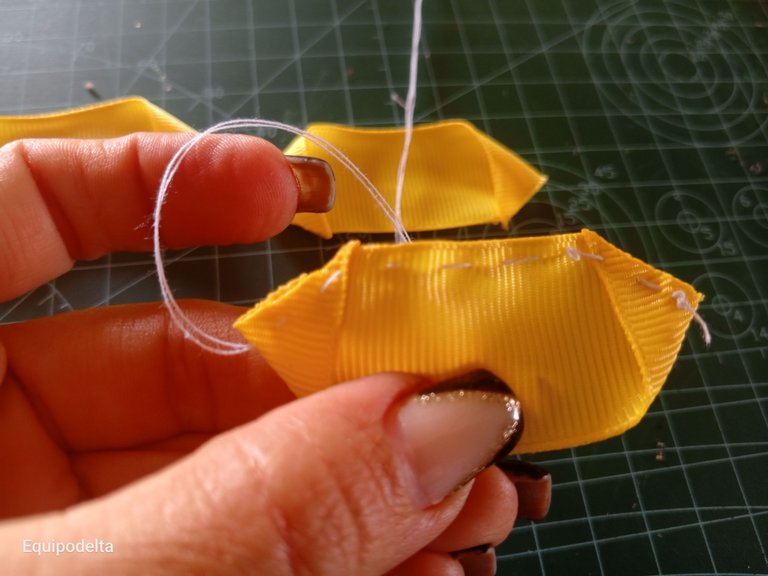
Sigue cosiendo por el borde con punto flojo para fruncir hasta llegar a la otra esquina.
Hala el hilo para formar el pétalo. Repite el procedimiento con otro pétalo sin cortar el hilo.
! [English version]
Continue sewing along the edge with loose stitch to gather until you reach the other corner.
Pull the thread to form the petal. Repeat the procedure with another petal without cutting the thread.
Step 5️⃣/ paso 5️⃣
 |  | |
 |  |
[Esp]
Todos los pétalos son hechos de la misma forma que los pasos anteriores, como cortar la cinta diagonal, luego unir las puntas con el calor del fuego del yesquero.
Para el botón necesitamos solo dos piezas.
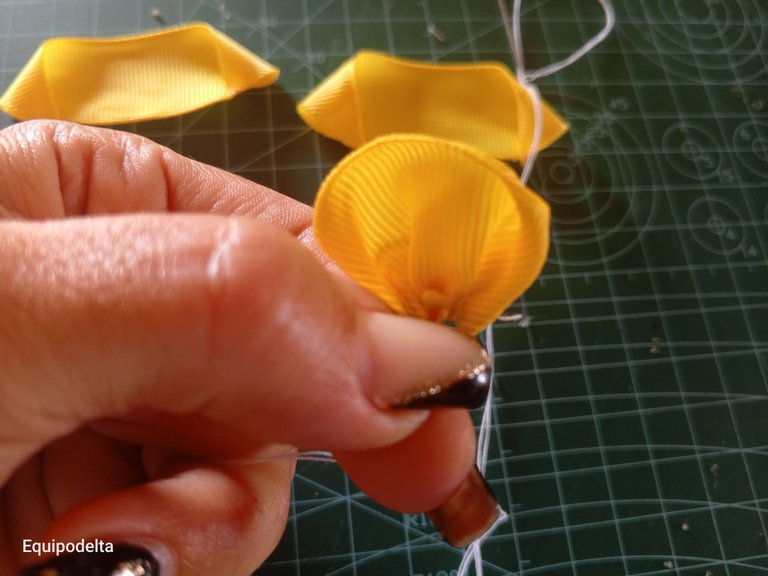
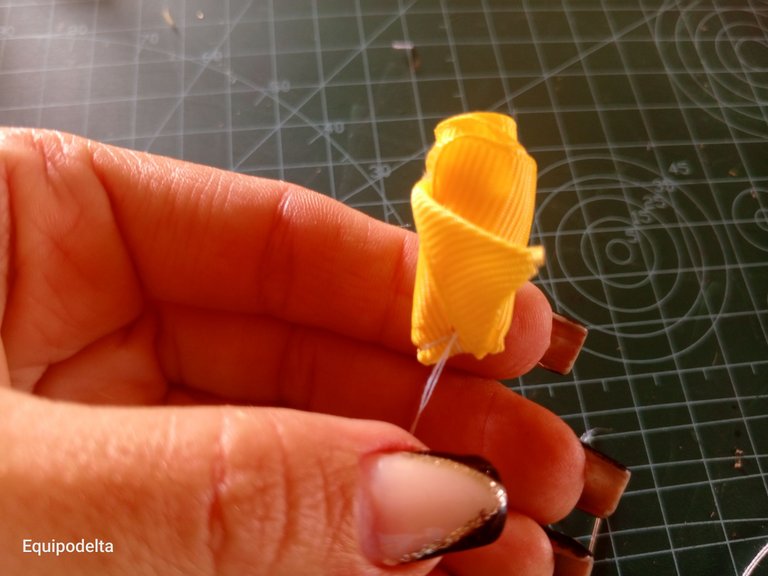
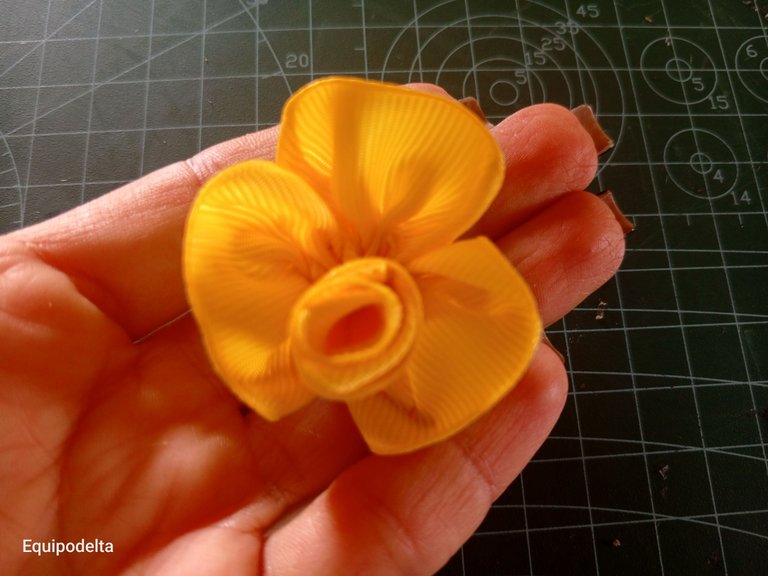
Enrolla el primer pétalo y cose para que no se suelte, luego el otro pétalo lo enrollas al rededor del mismo, cose para fijar.
Este botón lo introduces en la pieza de tres pétalos que armaste anteriormente, colócalo en el centro y cose por la parte de abajo para fijar las piezas. Puedes usar pegamento, pero a veces el pegamento se nota más que la costura.
! [English version]
All petals are made in the same way as the previous steps, such as cutting the diagonal ribbon, then attach the ends with the heat of tinder fire.
For the button we need only two pieces.
Roll up the first petal and sew so that it does not come loose, then roll the other petal around it, sew to fix.
Insert this button into the three-petal piece you made earlier, place it in the center and sew along the bottom to secure the pieces. You can use glue, but sometimes the glue is more noticeable than the stitching.
Step 6️⃣/ paso 6️⃣
 |  | |
 |  |
[Esp]
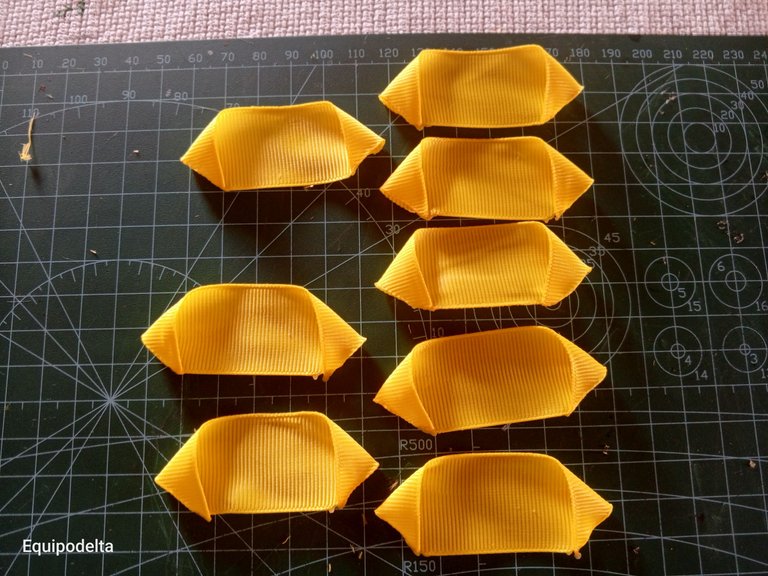
Necesitamos 8 piezas para la base. repetimos los pasos anteriores.
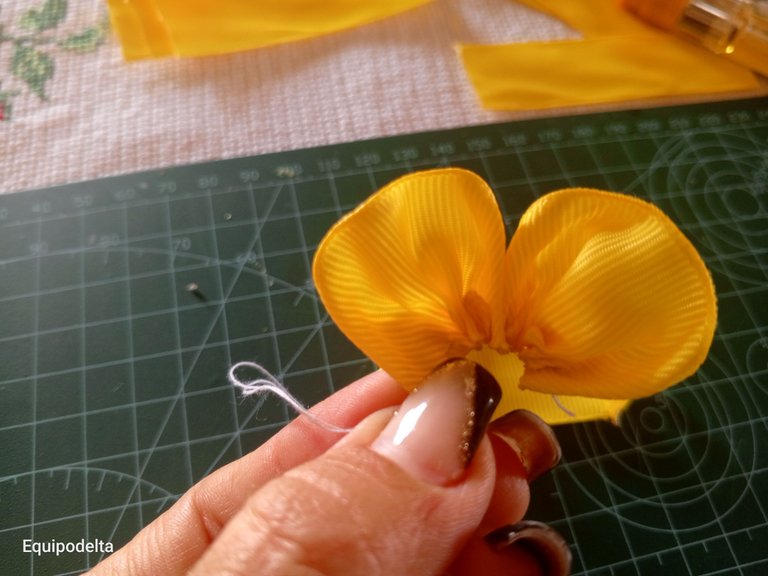
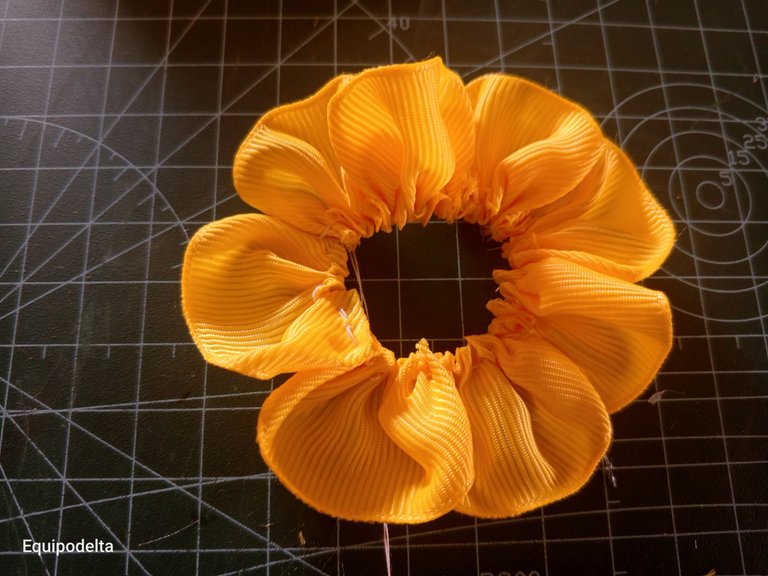
Cosemos todos los bordes halamos el hilo para fruncir, luego unimos los dos extremos de los pétalos.
Tomamos la pieza anterior donde cosimos el botón.
Coloca la base y sobre la base la pieza con el botón, cose para fijar.
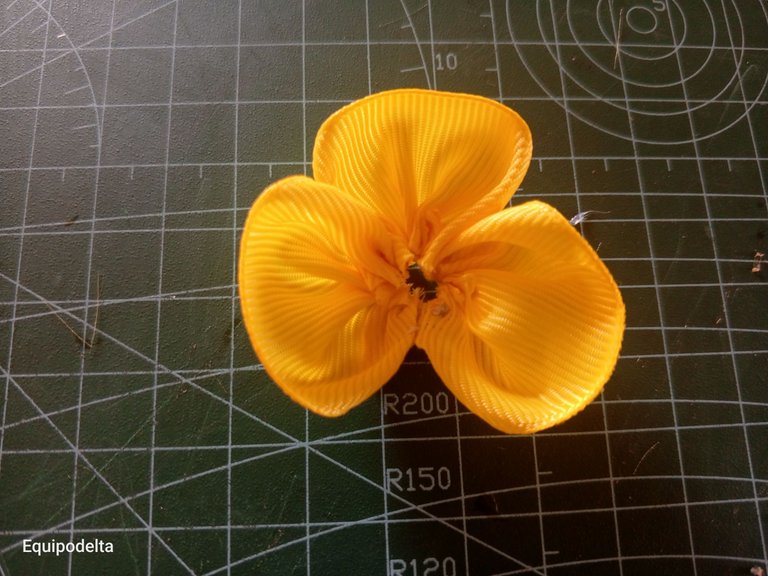
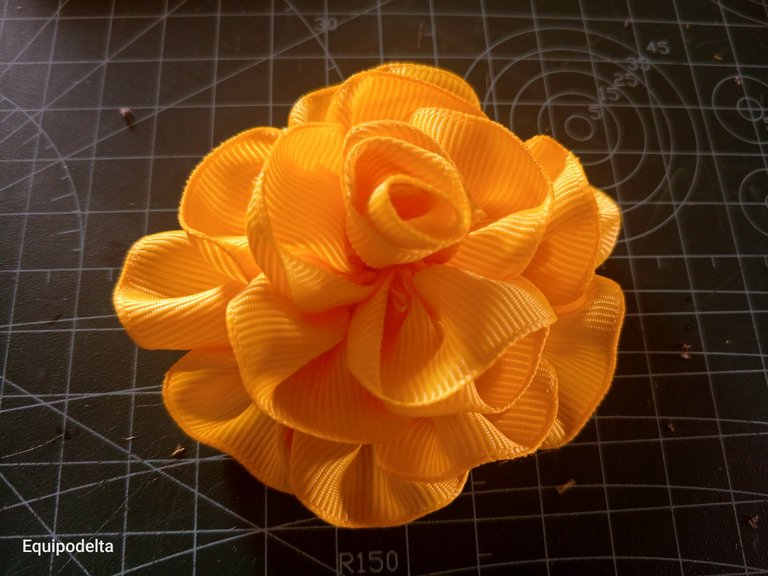
Esta es una hermosa flor que prácticamente al fruncir se hace sola.
Es ideal para muchos proyectos. espero te guste, es fácil de hacer y queda linda.
! [English version]
We need 8 pieces for the base. repeat the previous steps.
We sew all the edges pull the thread to gather, then join the two ends of the petals.
We take the previous piece where we sew the button.
Place the base and on the base the piece with the button, sew to fix.
This is a beautiful flower that practically puckers by itself.
It is ideal for many projects. I hope you like it, it is easy to make and looks beautiful.


Créditos / Credits

💜💜💜
![]() 👉
👉  👉
👉 ![]() 👉
👉 ![]() 👉
👉 
Here / Bríndame un café

Wow! It turned out so beautiful and yellow colour look charming with this flower 😀😀
U r right use r not good, infact u r best when it comes to crafting. Lovely work dear🫂🙂
This flower is truly amazing, its shape and color are very beautiful.
Preciosa, las flores amarillas tienen algo muy especial, me parece una excelente propuesta.
Waoo, esta flor te ha quedado preciosa, y muy bien explicado cada paso. A penas que consiga cinta voy a intentar hacerlas porque me han encantado.
Que hermosos y tiernos recuerdos tienes con tu mami, es muy lindo que los compartas por aqui ya que las flores son un recuerdo que te queda de ella y siempre es bueno tenerlos presentes y honrar su memoria ❤️ me encanto el color amarillo de esta flor, es preciosa 😍
Hello, @teamdelta, good morning
What beautiful and charming memories you have of your mother.
I can't believe you weren't good at crafts before; you have a gift for your hands.
What a beautiful color you chose to make these gorgeous flowers. They look great.
Have a beautiful Friday.
Lovely DIY floral work. The yellow flowers are bright and cheerful. perfect for any occasion. The petals are a delight
selected by @stevenson7
Se nota que te gusta el color amarillo. Te quedaron bellisimas las flores. Gracias por compartir el paso a paso.
Saludos amiga @equipodelta
Para esto hay que tener 2 cosas: paciencia y tiempo. Yo no tengo tiempo, sé hacer muchas cosas y justo por falta de tiempo no hago.
Quedaron muy lindas esas flores amarillas 💛😍
Congratulations @equipodelta! You have completed the following achievement on the Hive blockchain And have been rewarded with New badge(s)
Your next payout target is 52000 HP.
The unit is Hive Power equivalent because post and comment rewards can be split into HP and HBD
You can view your badges on your board and compare yourself to others in the Ranking
If you no longer want to receive notifications, reply to this comment with the word
STOPCurioso me resulta que antes no se te daban las manualidades. Eso era porque no les dabas toda la seriedad que le desbordas actualmente porque sin dudas sí se te dan y ¡de qué manera!
¡Hermosas estas flores amarillas!
Me hubiese gustado estar cuando pintabas cerámicas, muy bonitas palabras para tu mamá, s3 te da mut bien hacer flores, felicidades amiga.
Cada quien tiene su habilidad y don particular en que puede brillar, a mí me parece que las flores le quedaron muy bien.
El color está bastante bonito.