DIY: Flor de pascua hecha de cartulina escarchada / Poinsettia made from glittery cardstock (Esp/Eng)


[Esp]
¡Saludos comunidad!
En mi anterior post les mostré cómo hacer flores de pascua con tirro de papel, hacía las flores para decorar mi árbol de navidad, este año lo quería muy sencillo solo con telas y las flores que hice mas algunas decoraciones con limpiapipas, este año fue el año de la sencillez y el dorado, decorado con muy bajo presupuesto, mi árbol de navidad es muy alto y muy ancho, decorarlo es un montón. Este años trabajé con materiales que ya tenía. Sol compré los rollos de tela navideña para decorar y cada rollo de 10 metros me costó a penas 2$, solo usé dos. Tenía pensado hacer unas flores como la del tope del árbol, sin embargo, para ello era necesario otro rollo.
Las flores que hacía anteriormente llevaban escarcha y mucho trabajo, aunque quedaban muy hermosas, estaba teniendo problema de alergias pues la escarcha es muy menudita. Me preguntaba por la escarcha de antes era más gruesa, esta es un polvillo muy diminuto, queda hermosa, pero si eres alérgico debes considerarlo.
Yennys me comenta que podía hacerlas con foami escarchado, pero no me quedaría bien con ese material, recordé que hace meses compré cartulinas escarchadas y tenía dos pliegos , con ello hice las demás florecitas completando con las 4 anteriores, seis más. Estas que hice hoy quedan igual de estupendas y es una alternativa.
En la portada puedes ver cómo quedó mi árbol y en la siguiente foto me comentas en los comentarios ¿Cuál te gustó mas?
Además, te muestro cómo lo hice. Espero les guste.
! [English version]
Greetings, community!
In my previous post, I showed you how to make Easter flowers with paper strips. I made the flowers to decorate my Christmas tree. This year, I wanted to keep it very simple, using only fabric and the flowers I made, plus some decorations with pipe cleaners. This year was all about simplicity and gold, decorated on a very low budget. My Christmas tree is very tall and very wide, so decorating it is a lot of work. This year I worked with materials I already had. I only bought rolls of Christmas fabric to decorate, and each 10-meter roll cost me just $2. I only used two. I had planned to make some flowers like the ones on top of the tree, but that would have required another roll.
The flowers I made before had glitter and took a lot of work. Although they were very beautiful, I was having allergy problems because the glitter is very fine. I wondered if the glitter from before was thicker. This is a very tiny powder. It looks beautiful, but if you are allergic, you should consider that.
Yennys told me that I could make them with frosted foam, but that material wouldn't work for me. I remembered that months ago I bought some frosted cardstock and had two sheets left, so I used those to make the other flowers, adding six more to the four I had already made. The ones I made today look just as great and are a good alternative.
On the cover, you can see how my tree turned out, and in the next photo, let me know in the comments which one you liked best.
I'll also show you how I made it. I hope you like it.


Materiales / Materials

| Spanish | English | |
| Cinta de tela color dorado | Paper ribbon | |
| Cartulina escarchada | Frosted cardstock | |
| Tijera y pinza | Scissors and tweezers | |
| Pega blanca y escarcha color dorado | White glue and gold-colored glitter | |
| Mostacilla grande | Large seed bead | |
| Alambre de floristería | Floral wire | |
| Floratex | Floratex | |
| Pincel | Paintbrush |
Paso a paso / Step by Step
Step 1️⃣/ Paso 1️⃣
 |  | |
 |  |
[Esp]
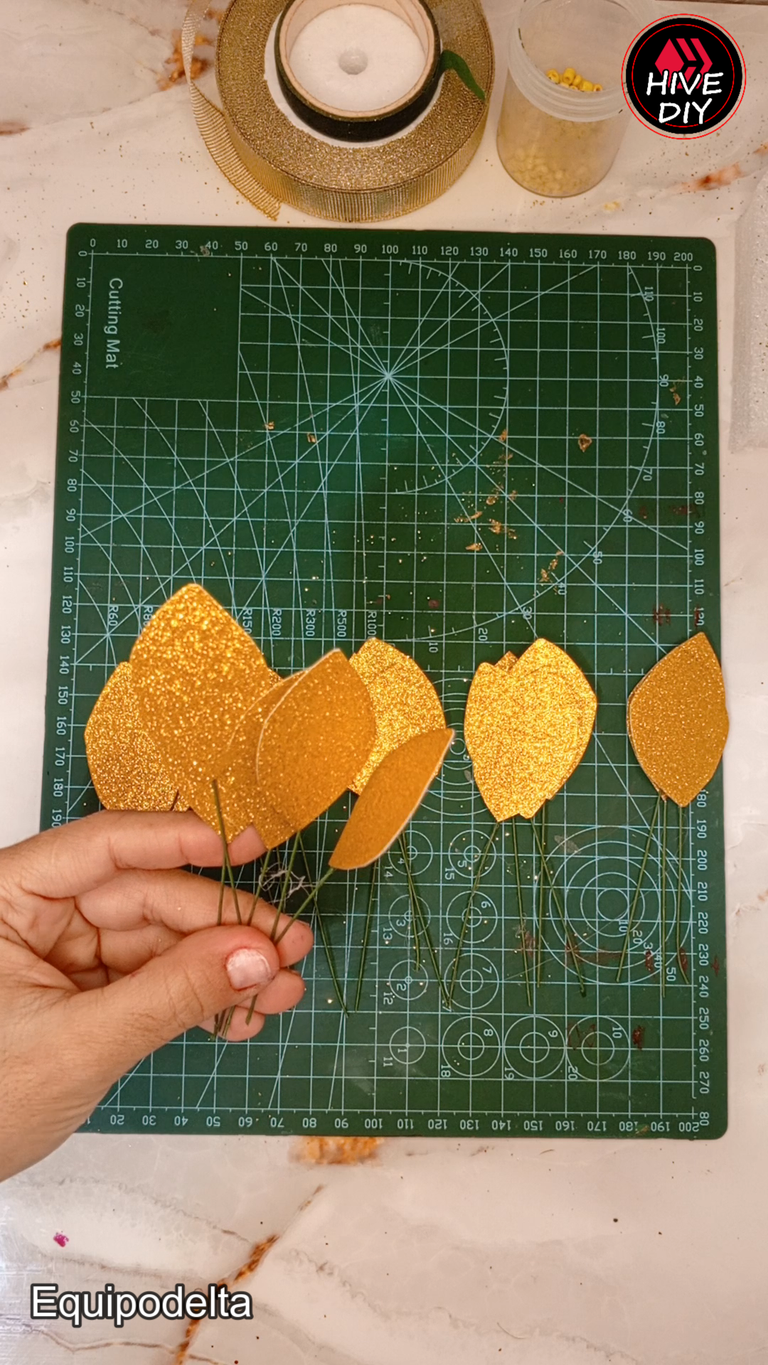
Recorta varios rectángulos de cartulina de 3 centímetros de ancho por 5 centímetros de largo, sugiero para un árbol, si tienes un presupuesto excelente, las flores mientras más grandes son más bonitas.
Ahora da forma a cada hoja. La cartulina es un material muy pero muy fácil para trabajar.
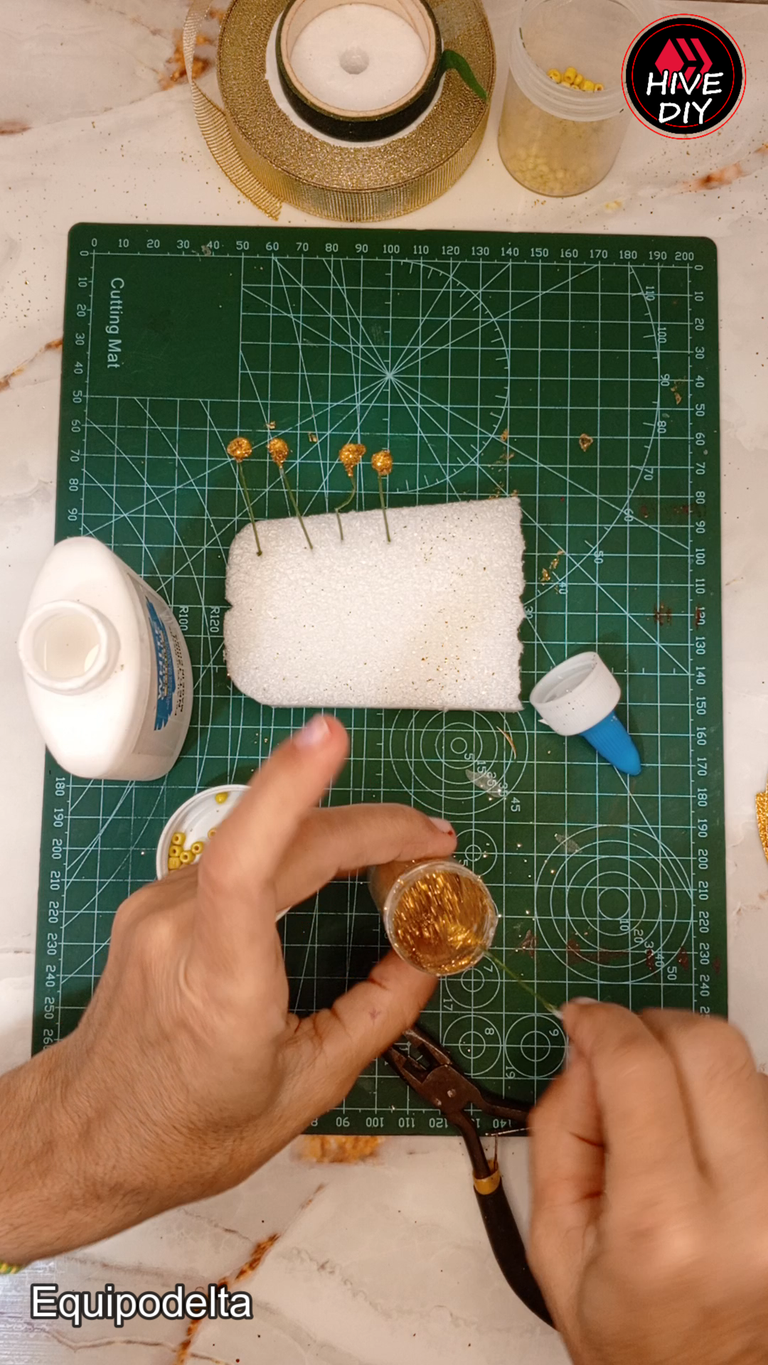
Corta varios trozos de alambre floral de al menos unos 8 a 10 centímetros de largo, introduce una mostacilla y con la pinza realiza un doblez al alambre para que no se salga, aplica pegamento en la mostacilla. quita el excedente y luego lo pasas por la escarcha dorada.
Realiza la cantidad de pistilos que necesites par ala cantidad de flores que tienes pensado hacer.
! [English version]
Cut out several rectangles of cardstock measuring 3 centimeters wide by 5 centimeters long. For a tree, I suggest that if you have a generous budget, the larger the flowers, the prettier they will be.
Now shape each leaf. Cardstock is a very, very easy material to work with.
Cut several pieces of floral wire at least 8 to 10 centimeters long, insert a bead, and use the pliers to bend the wire so that it does not come out. Apply glue to the bead, remove the excess, and then dip it in the gold glitter.
Make as many pistils as you need for the number of flowers you plan to make.
Step 2️⃣/ paso 2️⃣
 |  | |
 |  |
[Esp]
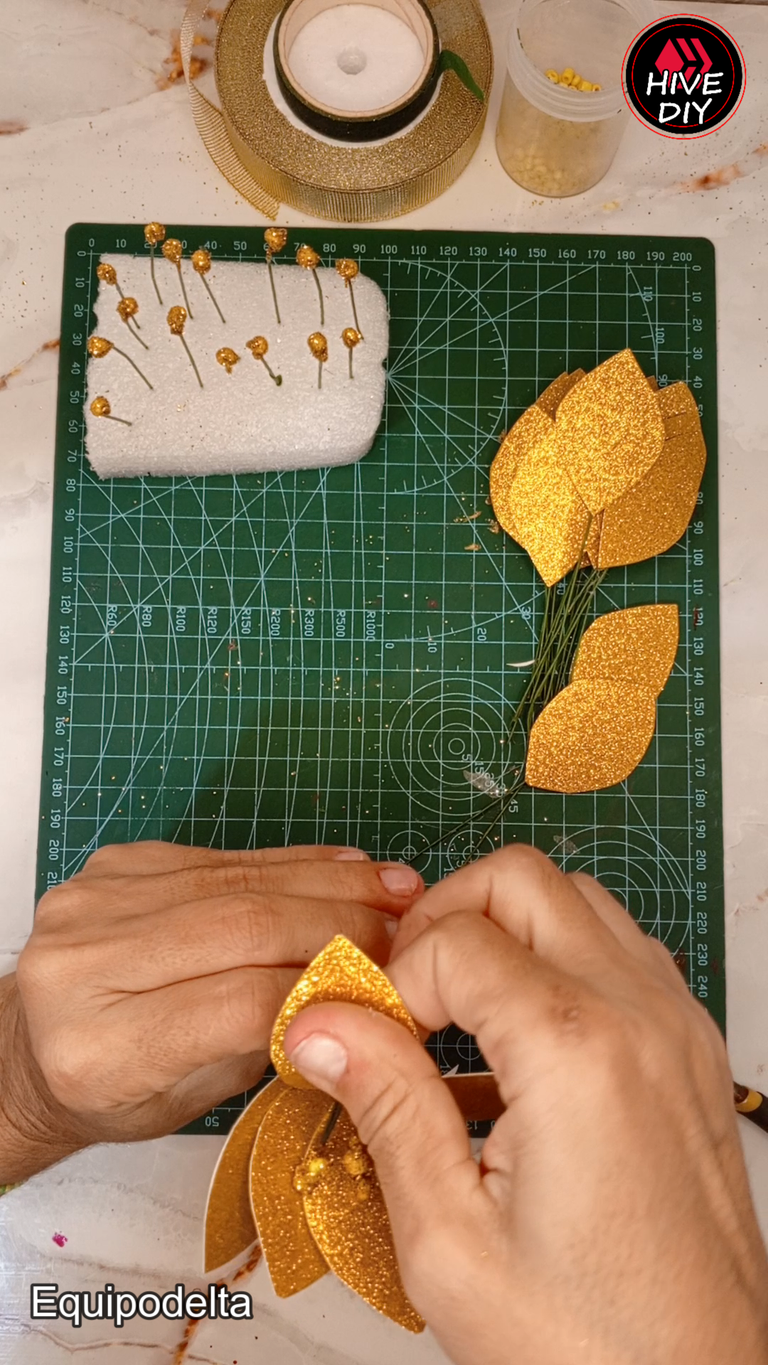
Toma cada hoja y aplica silicón caliente detrás, luego pega el alambre y deja secar.
Cada flor lleva 5 hojas.
Une 5 pistilos.
Luego une 5 de las hojas dando varias vueltas entre si con el alambre.
! [English version]
Take each leaf and apply hot glue to the back, then attach the wire and let dry.
Each flower has 5 leaves.
Join 5 pistils together.
Then join 5 of the leaves together, wrapping the wire around them several times.
Step 3️⃣/ paso 3️⃣
 |  | |
 |  |
[Esp]
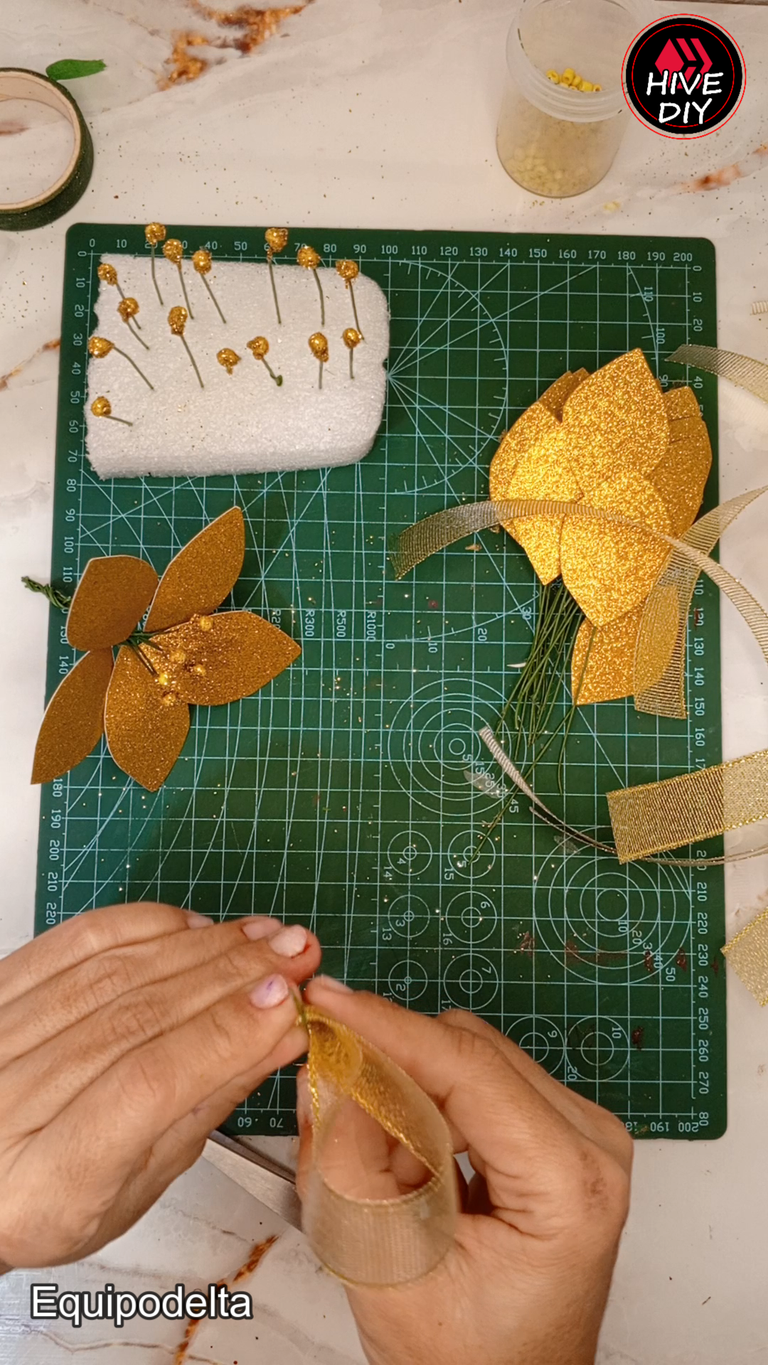
Ahora abre los pétalos.
Corta más alambre si es necesario y corta 15 centímetros de largo de cinta decorada dorada, las unes en el centro y las fijas con alambre floral, para cada flor necesitas dos.
! [English version]
Apply the frosting to the leaf with glue on both sides and let it dry. Repeat this process as many times as necessary.
Once everything is dry, take the pistils and join them together, then twist the wire and attach each leaf. I used six leaves and five pistils for each flower.
Take a piece of gold fabric ribbon approximately 15 centimeters long, cut it, and fold it in half. Tie it in the middle with floral wire. You will need two of these for each flower.
Step 4️⃣/ paso 4️⃣
 |  |

[Esp]
Estos adornos con las cintas los vas a unir de cada lado de la flor.
Ahora forra el palo de la flor con floratex.
Quedó estupenda. ¿Que opinan?
Gracias por visitarme.
! [English version]
You will attach these ribbon decorations to each side of the flower.
Now cover the flower stick with Floratex.
It turned out great. What do you think?
Thank you for visiting.


Créditos / Credits


💜💜💜
![]() 👉
👉  👉
👉 ![]() 👉
👉 ![]() 👉
👉 
Here / Bríndame un café

Bellísima reina 😍
!discovery
This post was shared and voted inside the discord by the curators team of discovery-it
Join our Community and follow our Curation Trail
Discovery-it is also a Witness, vote for us here
Delegate to us for passive income. Check our 80% fee-back Program
Hello @equipodelta, good morning!
It's wonderful that you had plenty of materials and spent so little money to make these beautiful flowers. I love the gold color and the simplicity of the designs.
Beautiful work!
I appreciate you sharing your method with us.
Have a wonderful day!
Tu arbolito es precioso y con estas flores doradas quedo mas hermoso todavia 😍 yo nunca aprendi a decorar mi arbolito, siempre queda deforme jaja quiza porque lo cargo mucho y apenas es unos centimetros mas alto que Buhito 😂
Estan hermosas las flores! 😍
Wow!!! This is breathtaking!!! This was crafted to perfection and we love it.
Awsome job!
selected by @ibbtammy