DIY: Flor de pascua dorada hecha de tirro de papel / Golden pounsettia with paper ribbon (Esp/Eng)


[Esp]
¡Saludos comunidad!
He querido decorar mi árbol de navidad, pero este año quería algo diferente y un color diferente. Este año quiero decorar mi árbol solo con cinta gruesa y flores doradas, todo dorado. Las flores de pascua pensé hacerlas yo, con cualquier material, sea tela, papel o foami; recordé que aprendí hacer flores con tirro de papel y quise intentarlo con este material ya que no es muy común la gente lo use para estas cosas. Para darle un ambiente navideño y que combinara con lo que pienso decorar en vez de pintarlas decidí aplicar escarcha.
Sé que voy tarde decorando mi árbol de navidad, pero este año no estoy muy motivada en hacerlo, sin embargo lo decoro este año por mi bebé para que sienta un poco más la alegría de navidad.
Te muestro cómo lo hice. Espero les guste.
! [English version]
Greetings, community!
I wanted to decorate my Christmas tree, but this year I wanted something different and a different color. This year I want to decorate my tree only with thick ribbon and gold flowers, all gold. I thought about making the poinsettias myself, using any material, whether fabric, paper, or foam; I remembered that I learned how to make flowers with paper tape and wanted to try it with this material since it's not very common for people to use it for these things. To give them a Christmas feel and match what I plan to decorate, instead of painting them, I decided to apply glitter.
I know I'm late decorating my Christmas tree, but this year I'm not very motivated to do it. However, I'm decorating it this year for my baby so that he can feel a little more of the Christmas spirit.
I'll show you how I did it. I hope you like it.

Materiales / Materials

| Spanish | English | |
| Cinta de tela color dorado | Paper ribbon | |
| Tirro de papel | Sewing machine | |
| Tijera y pinza | Scissors and tweezers | |
| Pega blanca y escarcha color dorado | White glue and gold-colored glitter | |
| Mostacilla grande | Large seed bead | |
| Alambre de floristería | Floral wire | |
| Floratex | Floratex | |
| Pincel | Paintbrush |
Paso a paso / Step by Step
Step 1️⃣/ Paso 1️⃣
 |  | |
 |  |
[Esp]
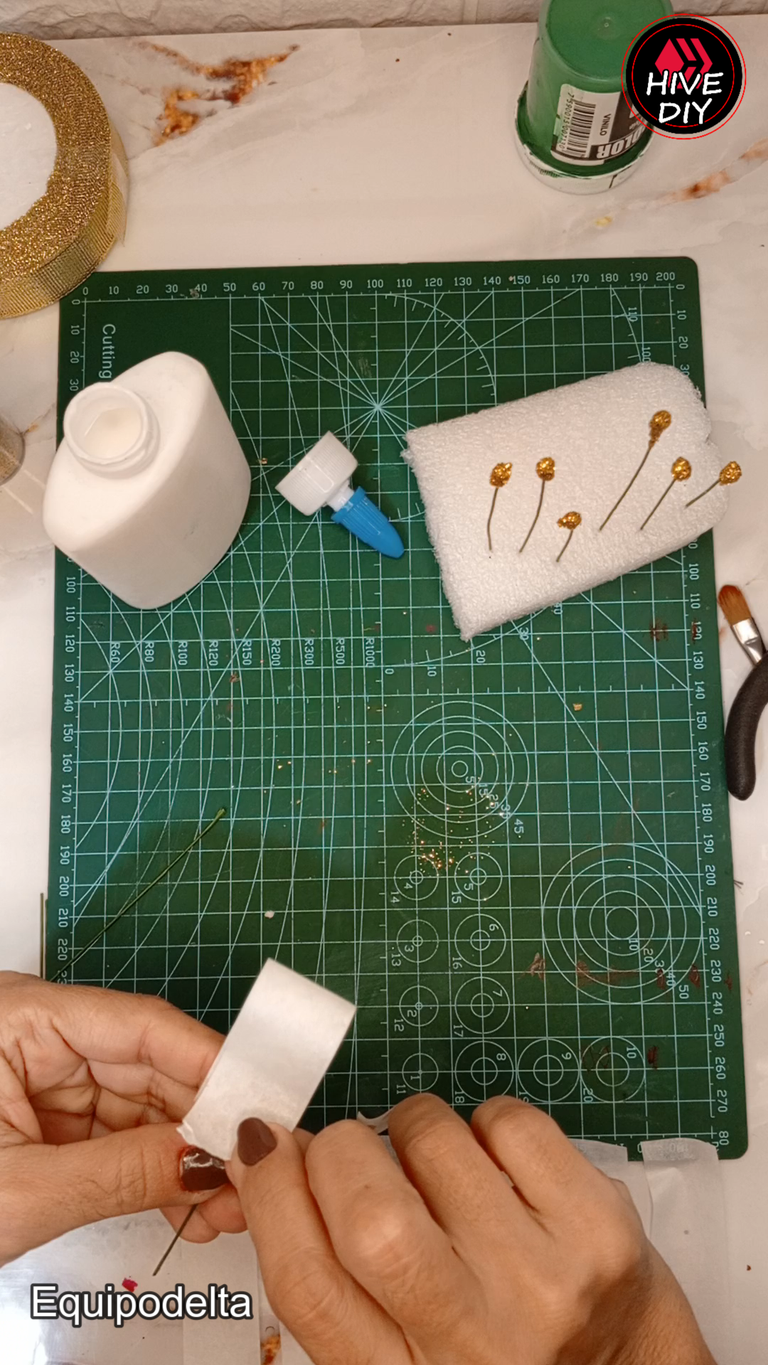
Hay materiales que salen en la foto que tuve que cambiar puesto que la perla corrida roja no funcionó como esperaba para hacer pistilos y lo reemplacé con mostacillas. tampoco usé los otros colores de escarcha, solo dorado ya que con el color del árbol de navidad no se verían, tampoco pinté las hojas de color verde, ya que preferí usar la escarcha dorada directo aplicada con pega.
Toma el alambre floral y corta trozos de 7 a 8 centímetros de largo. Corta las piezas que necesites para la cantidad de flores que hagas.
Introduce una mostacilla en el alambre y realiza un doblez para que quede fija, luego le aplicas pegamento quitando el excedente y seguidamente la pasas por la escarcha, ahora colócala en un lugar donde se puedan secar sin problemas.
Este procedimiento lo repetirás la cantidad de pistilos que necesites para la cantidad de flores que harás.
! [English version]
There are materials in the photo that I had to change because the red pearl didn't work as I expected for making pistils, so I replaced it with beads. I also didn't use the other colors of glitter, only gold, because they wouldn't show up against the color of the Christmas tree. I didn't paint the leaves green either, because I preferred to use gold glitter applied directly with glue.
Take the floral wire and cut pieces 7 to 8 centimeters long. Cut as many pieces as you need for the number of flowers you are making.
Insert a bead onto the wire and bend it to secure it in place. Then apply glue, removing any excess, and dip it in the glitter. Now place it somewhere where it can dry without any problems.
You will repeat this procedure for the number of pistils you need for the number of flowers you will make.
Step 2️⃣/ paso 2️⃣
 |  | |
 |  |

[Esp]
Mientras secan los pistilos puedes ir cortando lo que serán las hojas de la flor, corta trozos de tirro de tela de 10 centímetros de largo.
Toma un trozo de alambre floral y lo colocas en en centro del papel dejando mas de la mitad libre, dobla el tirro hacia adentro para pegarlo entre sí.
Corta la forma de cada flor.
Este procedimiento lo repetirás la cantidad de hojas que necesites para la cantidad de flores que harás.
Aplica pegamento en una hoja con ayuda de un pincel.
! [English version]
While the pistils are drying, you can cut what will become the leaves of the flower. Cut 10-centimeter-long pieces of fabric.
Take a piece of floral wire and place it in the center of the paper, leaving more than half free. Fold the fabric inward to stick it together.
Cut out the shape of each flower.
Repeat this process for the number of leaves you need for the number of flowers you will make.
Apply glue to a sheet of paper using a paintbrush.
Step 3️⃣/ paso 3️⃣
 |  | |
 |  |
[Esp]
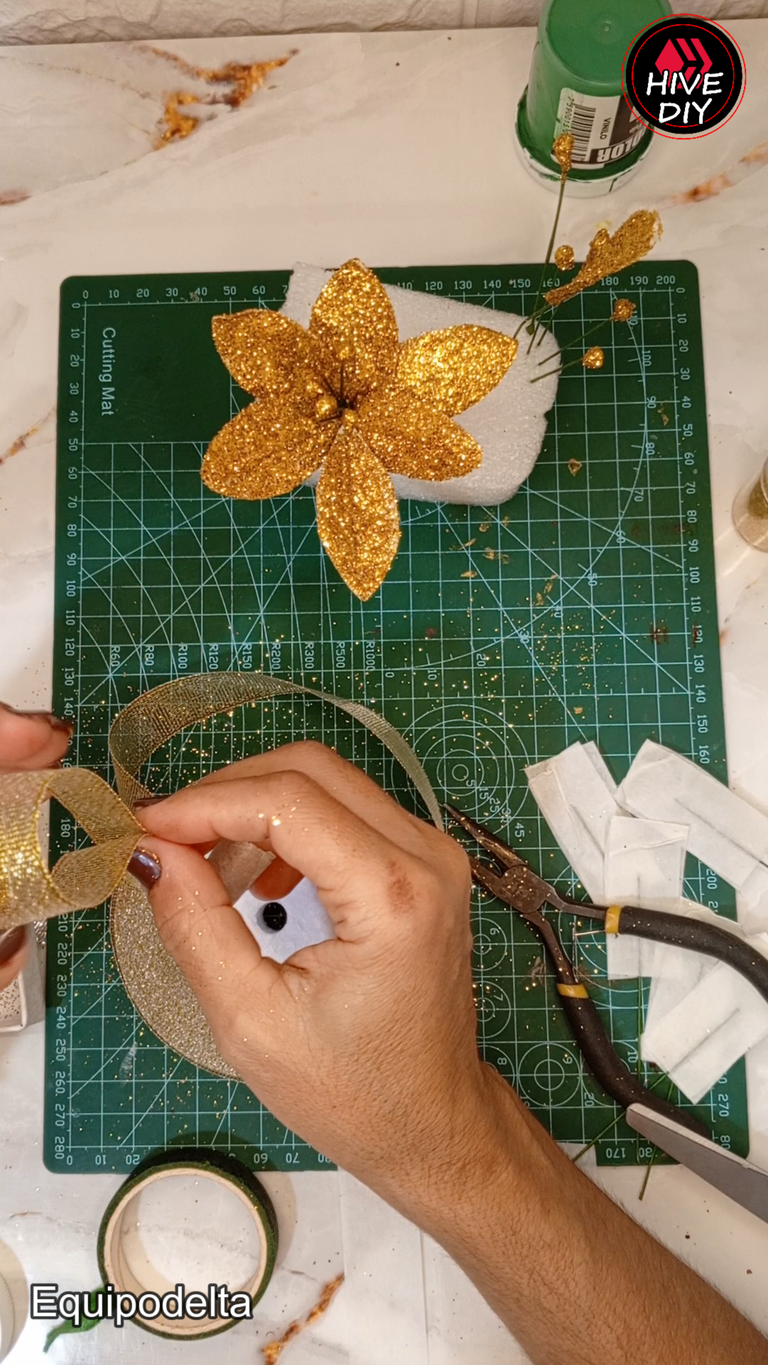
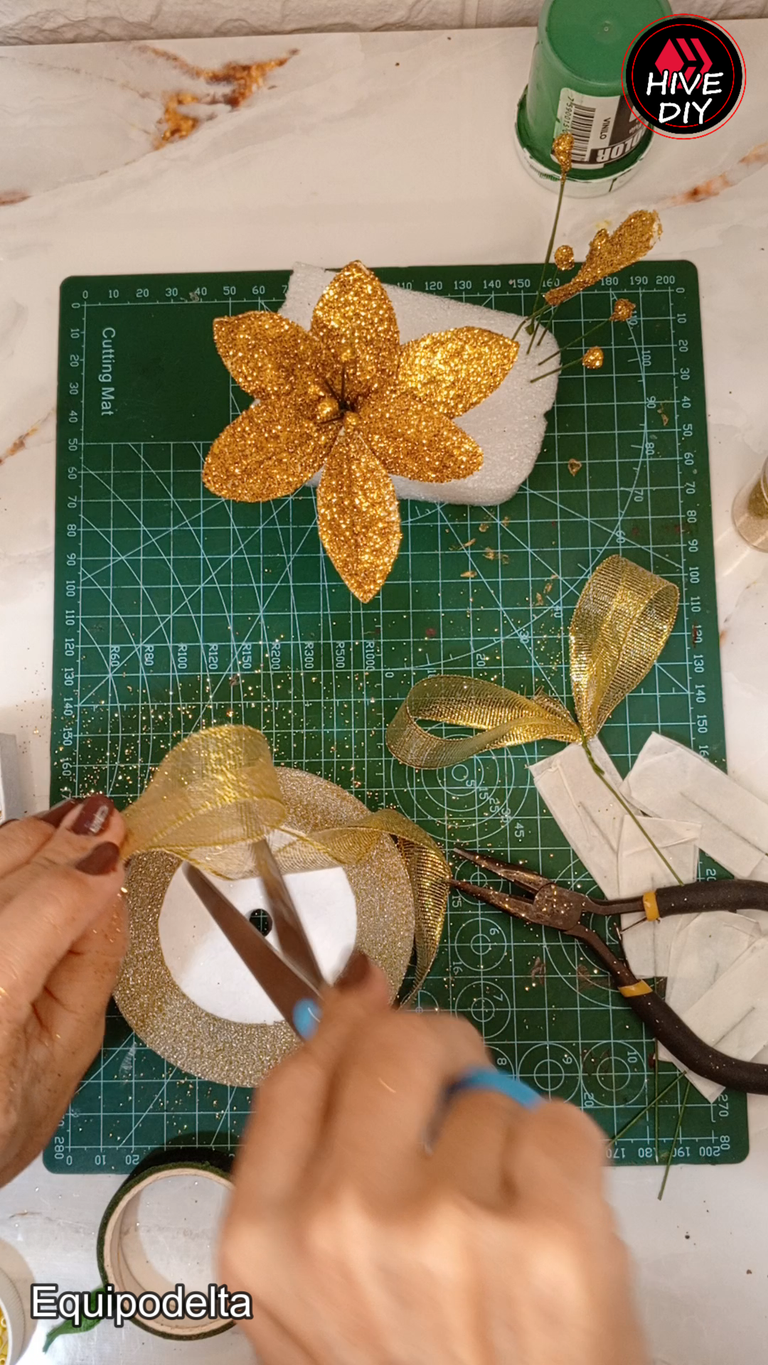
Aplica la escarcha sobre la hoja con pegamento por ambos lados y deja secar. Repite este procedimiento las veces que necesites.
Una vez todo esté seco, toma los pistilos y los unes entre sí, luego dando vueltas el alambre vas colocando cada hoja, to usé seis y cinco pistilos para cada flor.
Toma un trozo de cinta dorada de tela de aproximadamente 15 centímetros de largo cortas, y dobla a la mitad, en la mitad lo atas con el alambre floral. Necesitas dos de estos para cada flor.
! [English version]
Apply the frosting to the leaf with glue on both sides and let it dry. Repeat this process as many times as necessary.
Once everything is dry, take the pistils and join them together, then twist the wire and attach each leaf. I used six leaves and five pistils for each flower.
Take a piece of gold fabric ribbon approximately 15 centimeters long, cut it, and fold it in half. Tie it in the middle with floral wire. You will need two of these for each flower.
Step 4️⃣/ paso 4️⃣
 |  | |
 |  |
[Esp]
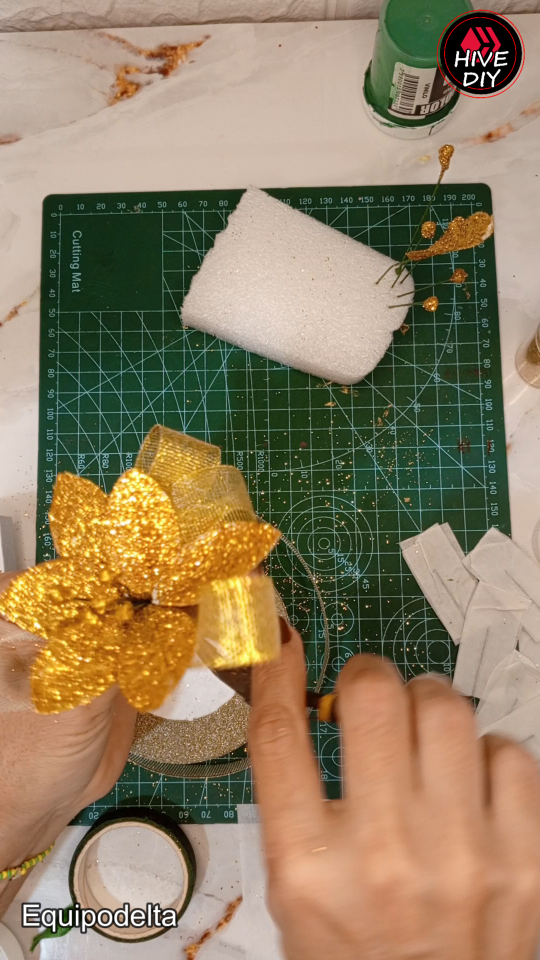
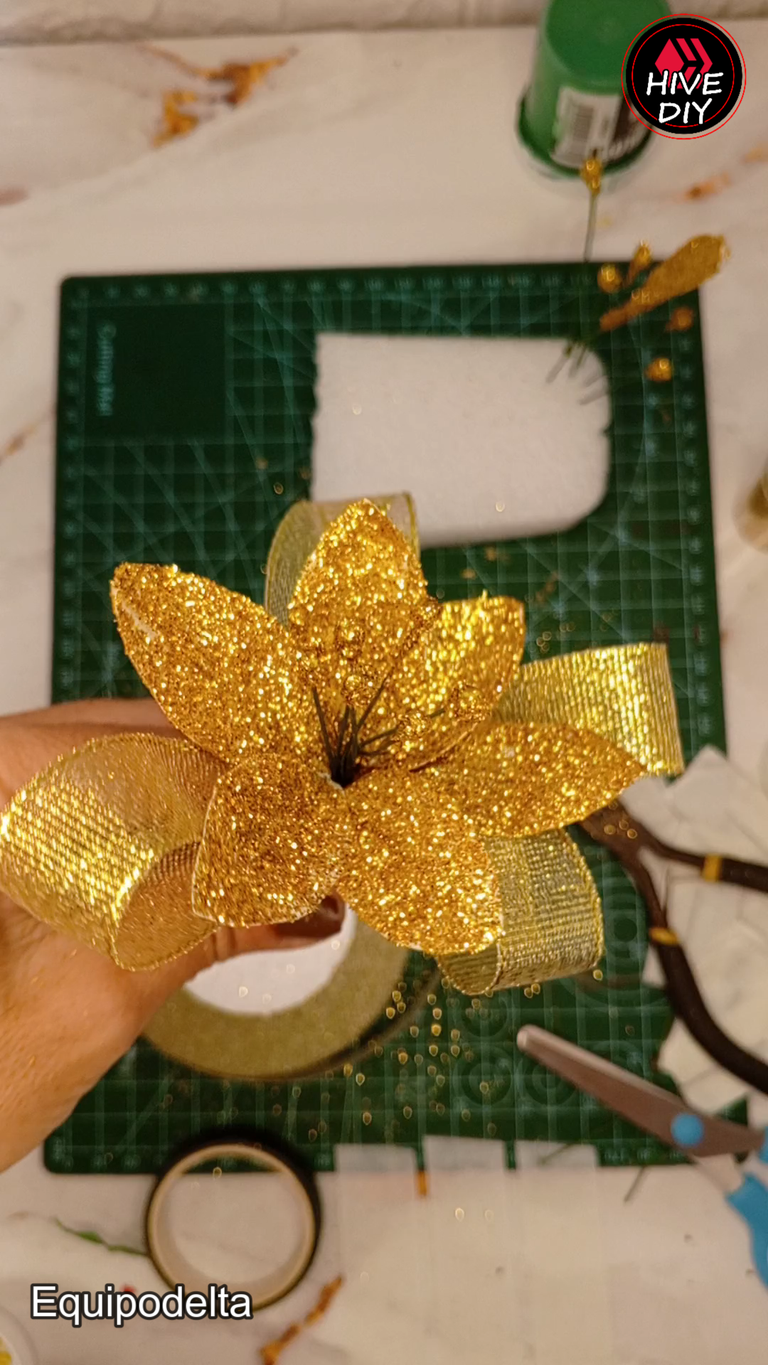
Una vez hagas las dos piezas de cinta las anudas en la flor a los lados, este elemento decorativo hará que resalte más.
Ahora forra los alambres con floratex.
Pude hacer al menos 4 flores, el proceso es muy lento, la escarcha es muy diminuta y terminé con alergia, no pude continuar, hablando con @yennysferm71 me sugirió otro material, a mi me encantó este pero sí requiere mucho trabajo, necesito al menos 20 flores más para decorar mi árbol, tal vez en el siguiente post les muestre cómo hacerlas en otro material sin embargo puedo decirles que como las presento hoy quedan estupendas.
Gracias por visitarme.
! [English version]
Once you have made the two pieces of ribbon, tie them to the sides of the flower. This decorative element will make it stand out more.
Now cover the wires with floratex.
I was able to make at least four flowers. The process is very slow, the glitter is very fine, and I ended up with an allergy, so I couldn't continue. I spoke to @yennysferm71, who suggested another material. I loved this one, but it does require a lot of work. I need at least 20 more flowers to decorate my tree. Maybe in the next post, I'll show you how to make them with another material, but I can tell you that the ones I'm presenting today look great.
Thank you for visiting.


Créditos / Credits


💜💜💜
![]() 👉
👉  👉
👉 ![]() 👉
👉 ![]() 👉
👉 
Here / Bríndame un café

Vaya, un trabajo bastante arduo y detallista, pero con un resultado realmente hermoso... Lo amé 😍😍😍
Has sido votado por
PROYECTO ENLACE
'Conectando Ideas y Comunidades'
PROYECTO ENLACE es un proyecto de curación de habla hispana enfocado en recompensar contenido de calidad y apoyar autores en su proceso de crecimiento en HIVE.
Creemos y apostamos por el futuro de esta gran plataforma, y estamos muy emocionados de poder hacerla crecer junto a esta comunidad. Así que te invitamos a publicar en nuestra COMUNIDAD y estar atento a todas las actividades que tenemos preparadas y que estaremos publicando en breve.
¿QUIERES AUTOMATIZAR TUS GANANCIAS DE CURACIÓN? SE PARTE DEL PROYECTO ENLACE APOYANDO A NUESTRO TRAIL EN HIVE.VOTE INGRESA AQUÍ PARA CONOCER LOS DETALLES.
¿QUIERES INVERTIR ENLACE? DESCUBRE COMO HACERLO Y GENERAR INGRESOS DE FORMA SEMANAL MEDIANTE TU DELEGACIÓN DE HP AQUÍ TE EXPLICAMOS COMO.
Te invitamos a participar en nuestro servidor de Discord: https://discord.gg/3S9y7BbWfS
Atentamente
EQUIPO ENLACE 2025
Te quedó espectacular, muy hermosa, en mi caso vamos a decorar el árbol con blanco y plateado🙂↔️. El tutorial está muy bien, se ve sencillo.
Gracias, me alegra que te guste, espero las reproduzcas en color plateado
This post has been manually curated by @steemflow from Indiaunited community. Join us on our Discord Server.
Do you know that you can earn a passive income by delegating to @indiaunited. We share more than 100 % of the curation rewards with the delegators in the form of IUC tokens. HP delegators and IUC token holders also get upto 20% additional vote weight.
Here are some handy links for delegations: 100HP, 250HP, 500HP, 1000HP.
100% of the rewards from this comment goes to the curator for their manual curation efforts. Please encourage the curator @steemflow by upvoting this comment and support the community by voting the posts made by @indiaunited.
Waooooo amiga nagira no sabia que podía.haverse con tirro que hermoso trabajo, lo ame ❤️
Gracias amiga, me alegra que te guste, hice otras, hoy te muestro
Your golden poinsettia looks elegant and catches the festive feel. Nice work.
selected by @stevenson7
Bellisimas, eso es lo lindo de la Navidad, nos inspira a ser creativos-
Un abrazo amiga @equipodelta
Gracias amiga. hoy muestro otras que hice en otro material