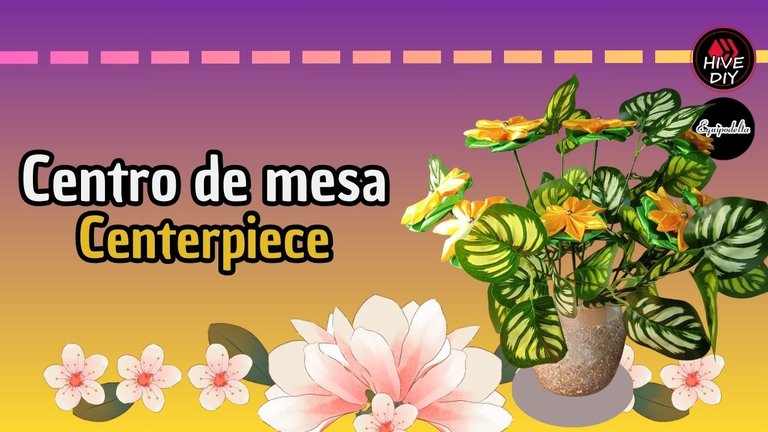
DIY: Centro de mesa / Centerpiece (Esp/Eng)

[Esp]
Saludos querida comunidad.
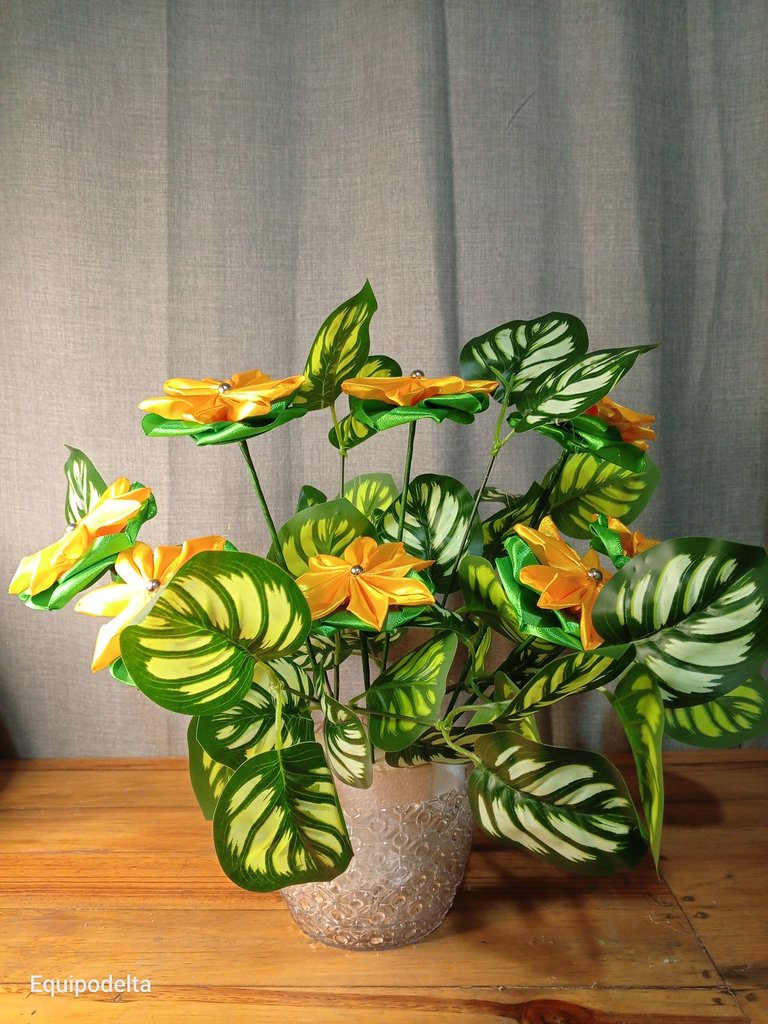
En mi post anterior se me fueron días haciendo unas flores, comenté que tuve varios intentos fallidos, también comenté que mi intención era convertirlas en un centro de mesa al que iba a compartirlo muy pronto. El día ha llegado. Me faltaba el follaje, pero hoy salí al centro de la ciudad aprovechando que mi amiga me vino a buscar y compré follaje, estaba a buen precio. ahora coloquemos las flores y vamos por unas recomendaciones que pienso dejar para que te queden mucho mejor.
! [English version]
Greetings dear community.
In my previous post I spent days making some flowers, I commented that I had several failed attempts, I also commented that my intention was to turn them into a centerpiece to which I was going to share it very soon. The day has arrived. I was missing the foliage, but today I went downtown taking advantage of my friend who came to pick me up and I bought some foliage, it was at a good price. Now let's place the flowers and let's go for some recommendations that I will leave to make them look much better.

Materiales / Materials
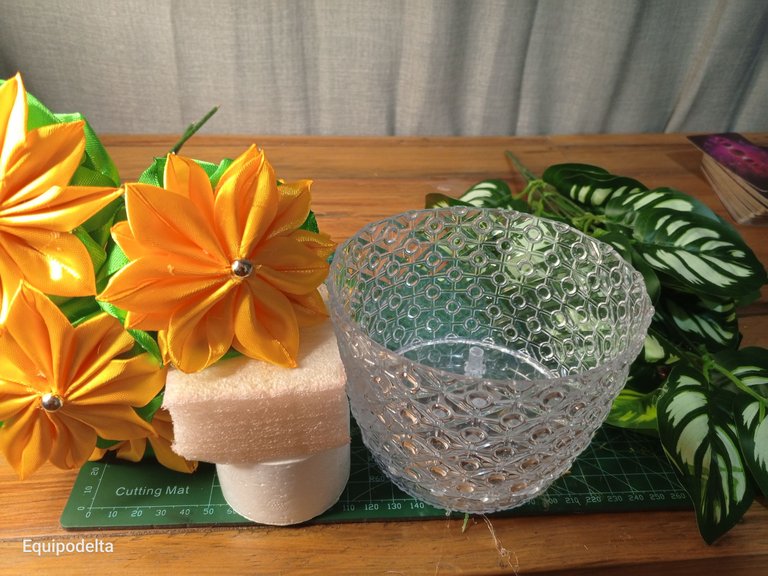
| Spanish | English | |
| Flores | Flowers | |
| Follaje | Follaje | |
| Florero de plástico | Plastic vase | |
| Anime | Anime |
Paso a paso / Step by Step
Step 1️⃣/ Paso 1️⃣
 |  |
[Esp]
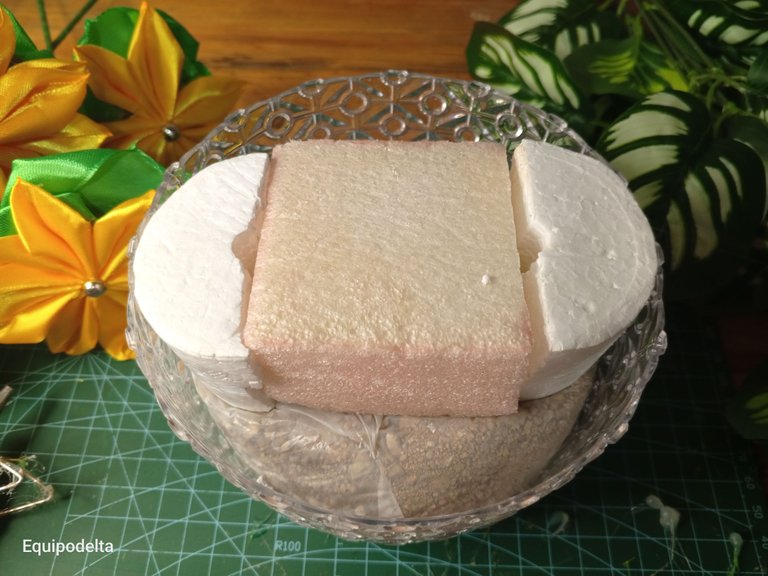
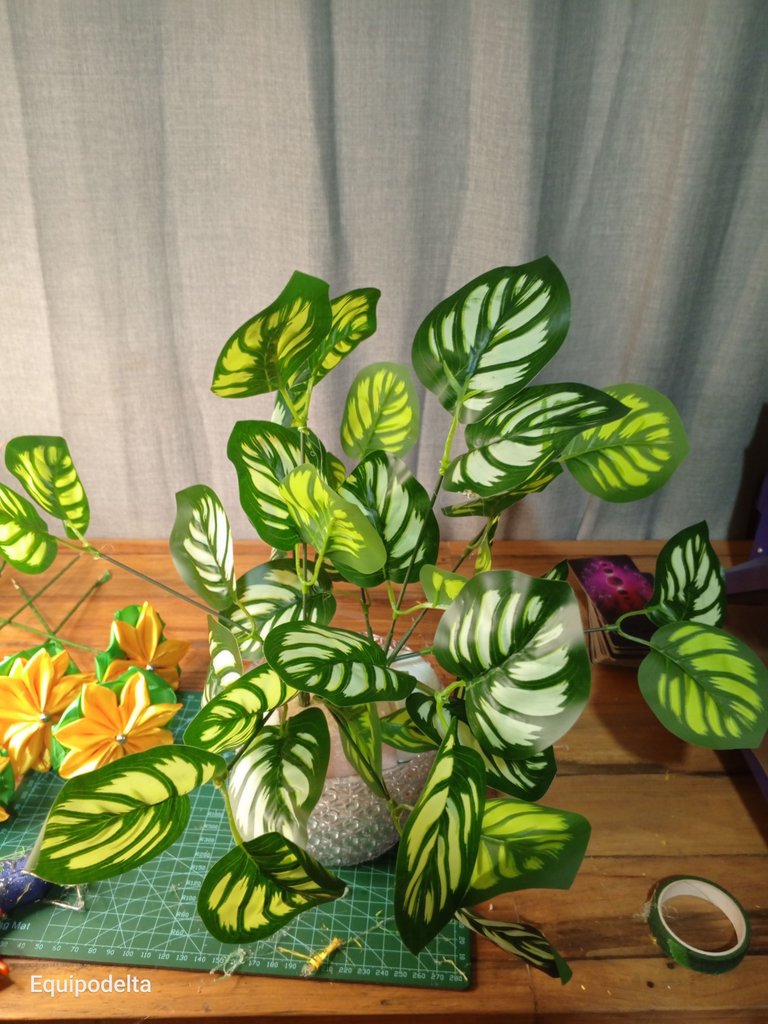
Preparamos la base, el interior debe ser algo pesado y firme para evitar que se voltee la pieza, hay cosas que aprendí en la floristería cuando trabajaba, la importancia de incluso colocar piedras dentro del florero y cubrirlo para que no se vea, claro si hablamos de flores artificiales, para las naturales basta con empapar el oasis y estará bastante pesado, sin embargo hay casos que requiere algo de contrapeso, para las flores artificiales es mejor usar espuma floral ya que el anime, como el que usé hoy puede deformarse y las flores aflojándose.
Luego de colocar la espuma floral y tener la base fija, comenzamos a colocar el follaje para cubrirla.
! [English version]
We prepare the base, the interior must be something heavy and firm to prevent the piece from turning over, there are things I learned in floristry when I worked, the importance of even placing stones inside the vase and cover it so that it is not seen, of course if we talk about artificial flowers, for natural ones just soak the oasis and it will be quite heavy, however there are cases that require some counterweight, for artificial flowers is better to use floral foam as the anime, as I used today can deform and the flowers loosening.
After placing the floral foam and having the base fixed, we begin to place the foliage to cover it.
Step 2️⃣/ paso 2️⃣
 |  |
[Esp]
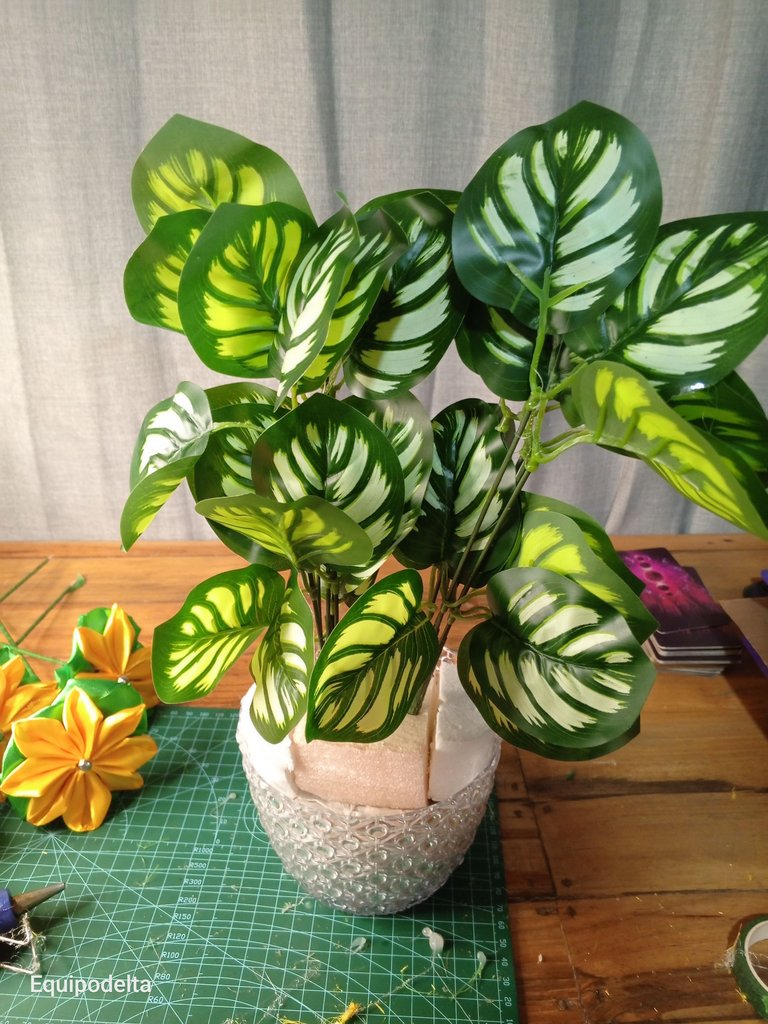
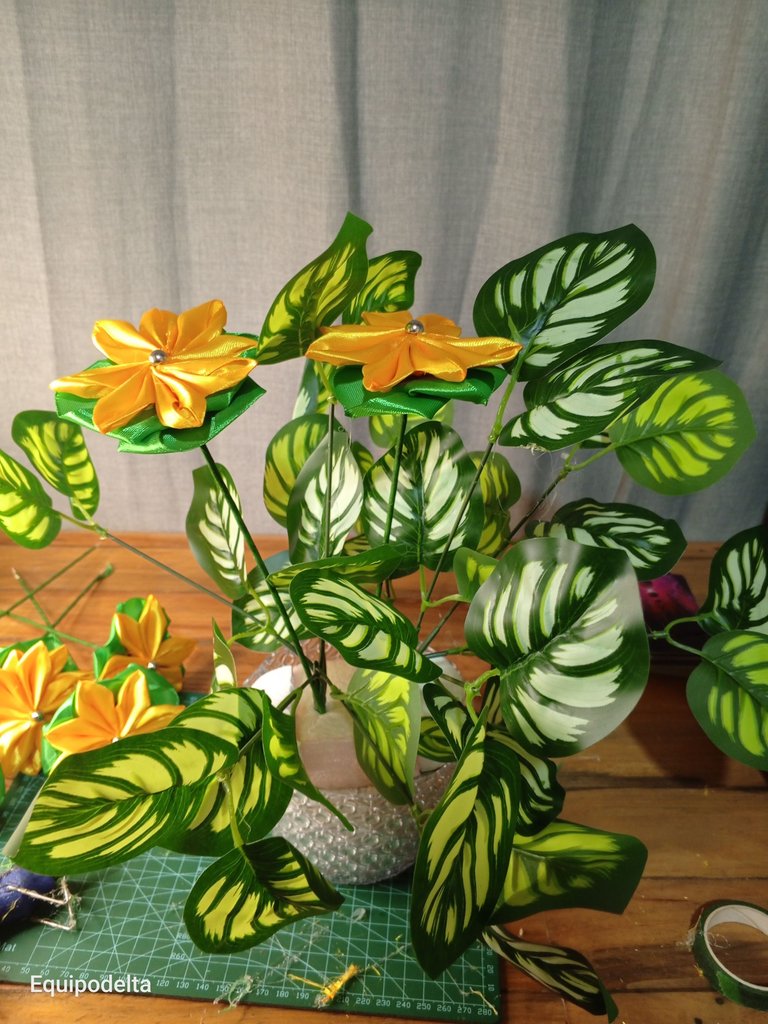
El follaje hay que abrirlo si es como este que viene en ramo, mientras abrimos acomodamos las hojas.
Comenzamos a colocar las flores.
¿Recuerdan que les dije que había adaptado estas flores para que fueran de tallo alto? Sabía que podía pasar que al ser muy altas me iba a costar se viera más armado, tendrían que ser muchas flores.
! [English version]
The foliage must be opened if it is like this one that comes in a bouquet, while we open it we arrange the leaves.
We begin to place the flowers.
Remember I told you that I had adapted these flowers to be tall stemmed? I knew that it could happen that if they were very tall it would be difficult for me to make it look more assembled, there would have to be many flowers.
Step 3️⃣/ paso 3️⃣
 |  |
[Esp]
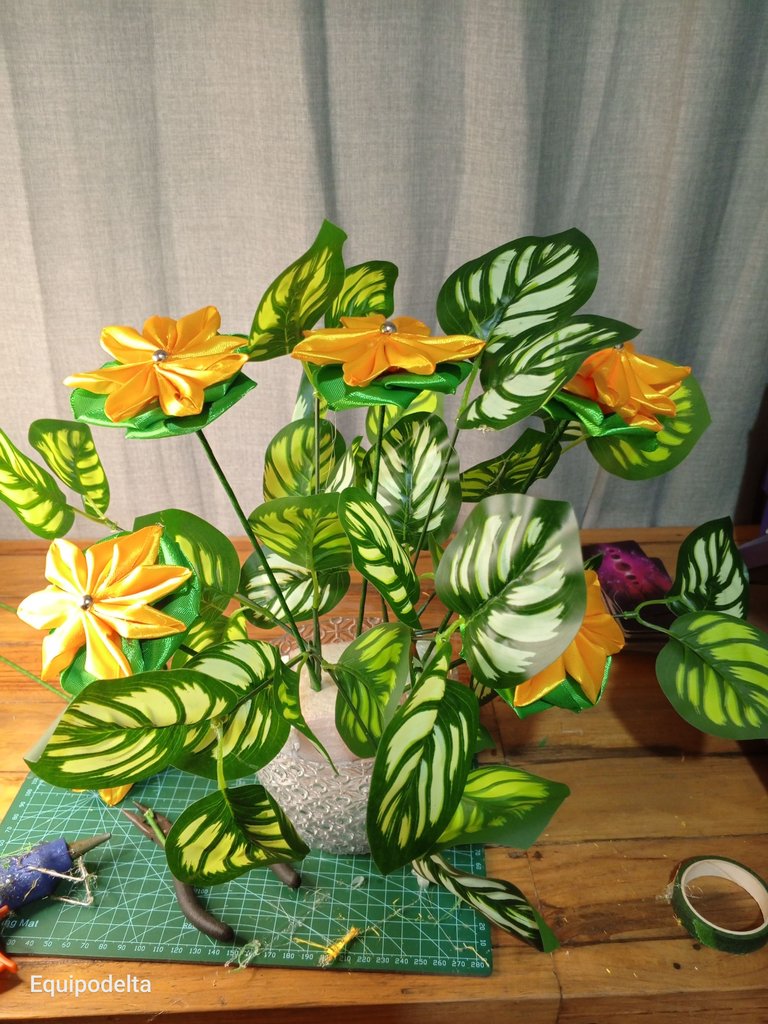
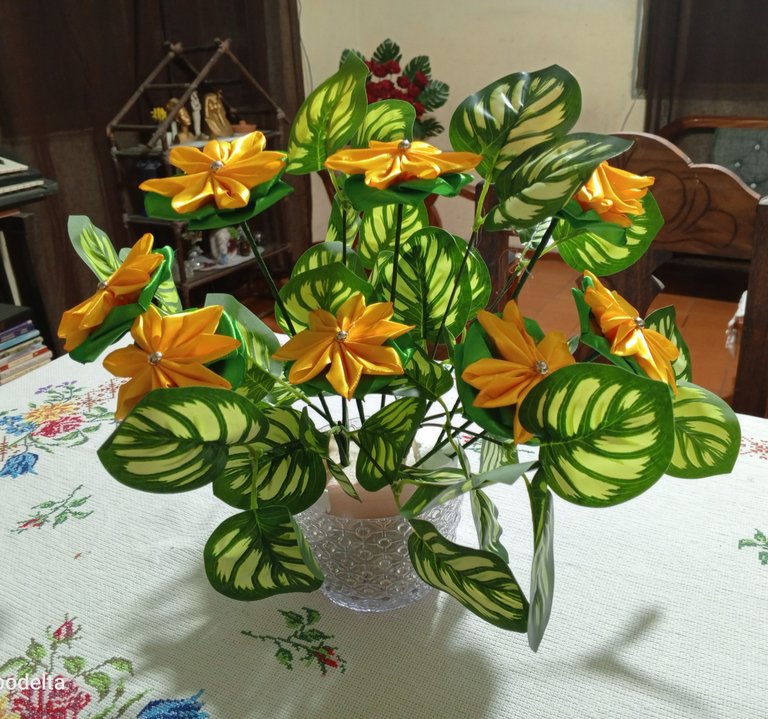
Continuamos colocando las flores... en algunos casos hay que recortar el tallo.
En ocasiones no es necesario que un arreglo foral se vea demasiado poblado, pero si es bueno que al menos las flores, estén cubiertas por el follaje.
! [English version]
We continue placing the flowers... in some cases it is necessary to trim the stem.
Sometimes it is not necessary that a foral arrangement looks too crowded, but it is good that at least the flowers are covered by the foliage.
Step 4️⃣/ paso 4️⃣
[Esp]
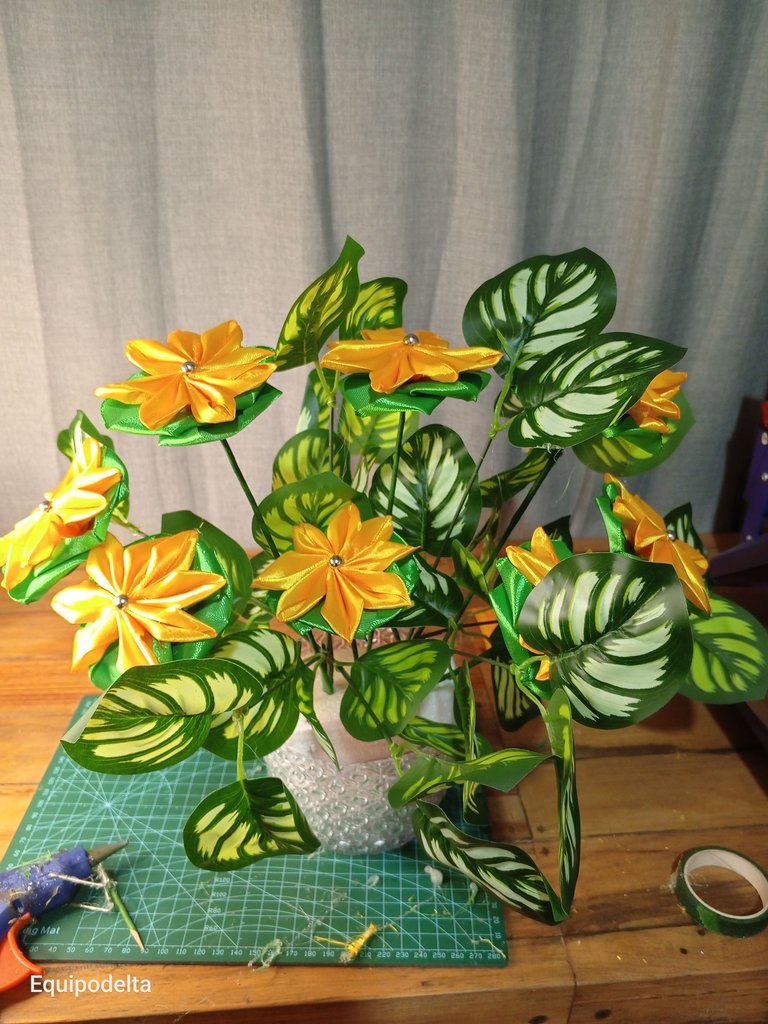
Es bueno al terminar colocar piedritas para decorar la base, si no lo cubre el follaje.
Tengo pensado comprar unos girasoles pequeños para que acompañen la decoración, ya que siempre que combinamos flores grandes y pequeñas, arrocitos o dos tipos de hojas, hacen buen contraste de texturas y agrado visual.
También colocarle ramas largas y secas le aparataría mayor elegancia.
Gracias por compartir compartir conmigo estos momentos.
! [English version]
It is good to place pebbles at the end to decorate the base, if the foliage does not cover it.
I am thinking of buying some small sunflowers to go with the decoration, since whenever we combine large and small flowers, small rice or two types of leaves, they make a good contrast of textures and visual appeal.
Also, adding long dry branches would make it look more elegant.
Thank you for sharing these moments with me.


Créditos / Credits

💜💜💜
![]() 👉
👉  👉
👉 ![]() 👉
👉 ![]() 👉
👉 
Here / Bríndame un café

Thanks for you support community
Una muy bella idea con recursos muy simples pero bien concebida.
Qué linda! Gracias. Lo aprecio mucho <3
Mi admiración y mi abrazo 🤗
Good morning, @equipodelta, how are you?
The foliage you've created is beautiful; it goes very well with the flowers you made.
Beautiful centerpiece, you're very creative.
Have a beautiful day.
Me alegra que te guste mi niña <3
Te quedó sencillamente fabuloso,
Está preciosa esa planta
Muchas gracias, me alegra que sea de tu agrado
This post has been manually curated by @bhattg from Indiaunited community. Join us on our Discord Server.
Do you know that you can earn a passive income by delegating to @indiaunited. We share more than 100 % of the curation rewards with the delegators in the form of IUC tokens. HP delegators and IUC token holders also get upto 20% additional vote weight.
Here are some handy links for delegations: 100HP, 250HP, 500HP, 1000HP.
100% of the rewards from this comment goes to the curator for their manual curation efforts. Please encourage the curator @bhattg by upvoting this comment and support the community by voting the posts made by @indiaunited.
Thanks fot you support community and Bhattag
Resulta agradable el balance certero que logras en el resultado final. Sin sobrecargas y sutilmente hermoso.
¡Gracias por compartírnoslo!
¡Feliz sábado!
Tienes razón porque ya iba a sobrecargarlo de flores y le quitaba frescura.
A veces, ¡menos es más!
¡Feliz miércoles!
Hola, quedó hermoso el centro de mesa. El color seleccionado luce espectacular.
Te quedó muy hermoso amiga, 😘 y el paso a paso genial, saludos
Te quedo muy bonito
Saludos @equipodelta
Hola amiga! Muchas gracias <3 bendiciones para ti
Me encantó lo bien que distribuistes los elementos se ve muy bonito y tiene una apariencia natural , siempre me es grato saludarte, @equipodelta 🌹
Me faltaron flores amiga, pero me di cuenta que quedaban mejor así, prefiero cubrirla con otros elementos como los que dije en el post. Gracias por visitarme <3
Los ángulos te quedaron perfectos, está muy bien esa distribución, tal vez querías ponerle más flores pero así está muy natural, un abrazo 🌹
Quedó genial, me encanta, está super bonito
A mí que me encantan las plantas puedo decirte que es un hermoso trabajo un colorido llamativo es realmente agradable
Gracias corazon lo aprecio mucho.
Hola bella @equipodelta, ¡wuao! quedo sencillamente espectacular. Dios siga bendiciendo tus manos y creatividad.