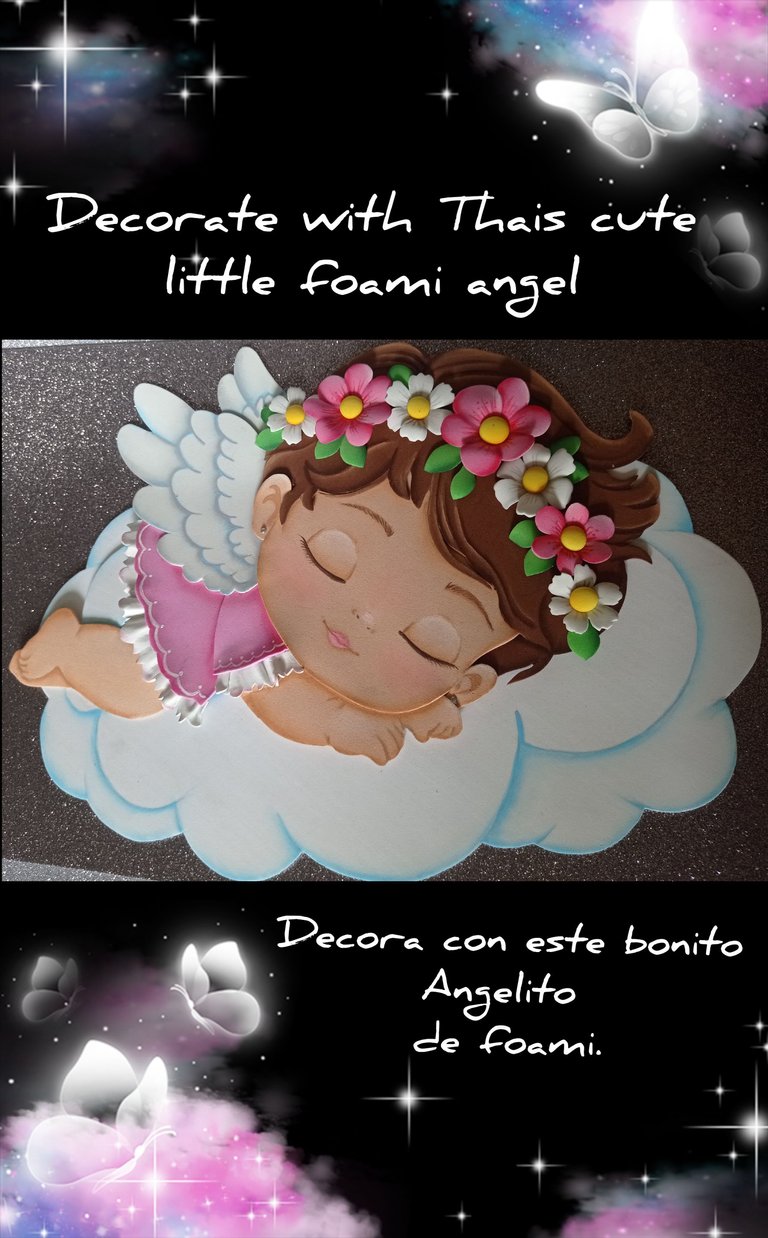
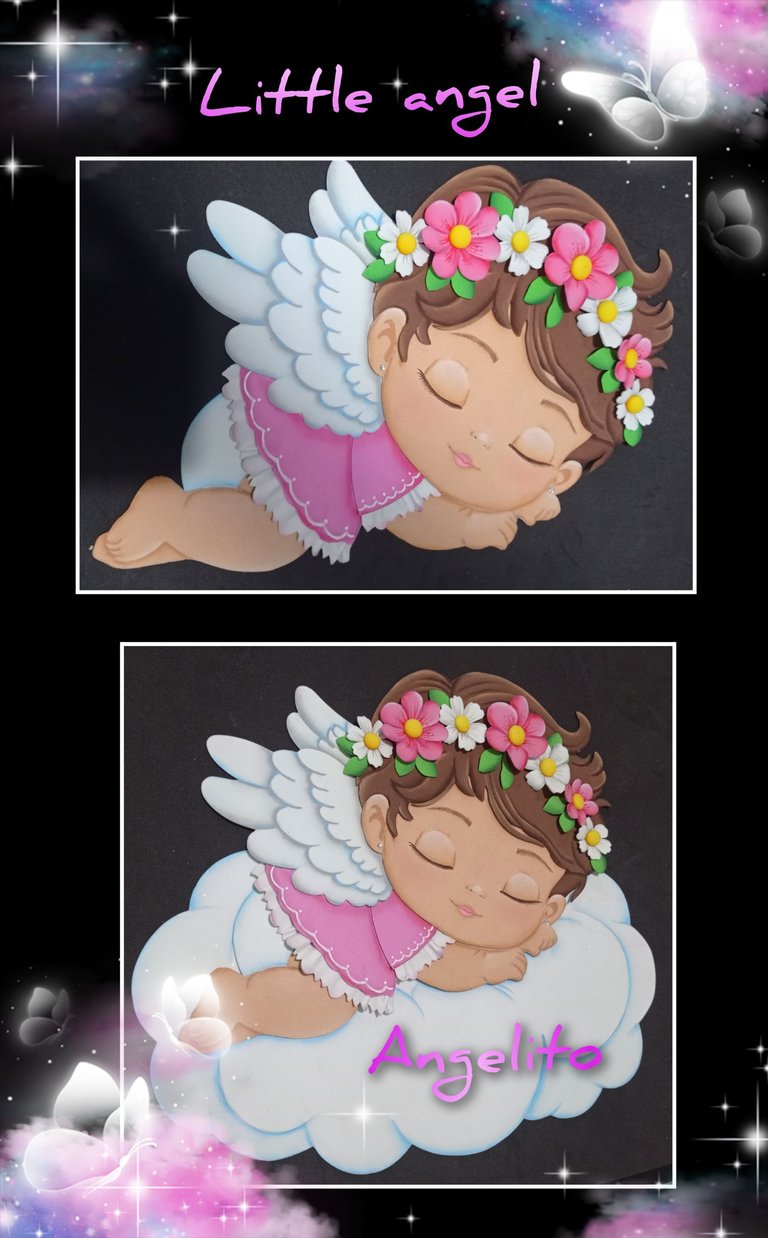
Hagamos en foami este hermoso angelito. Let's make in foami this beautiful little angel.
Hola queridos amigos.
Así que no esperemos más y comencemos:
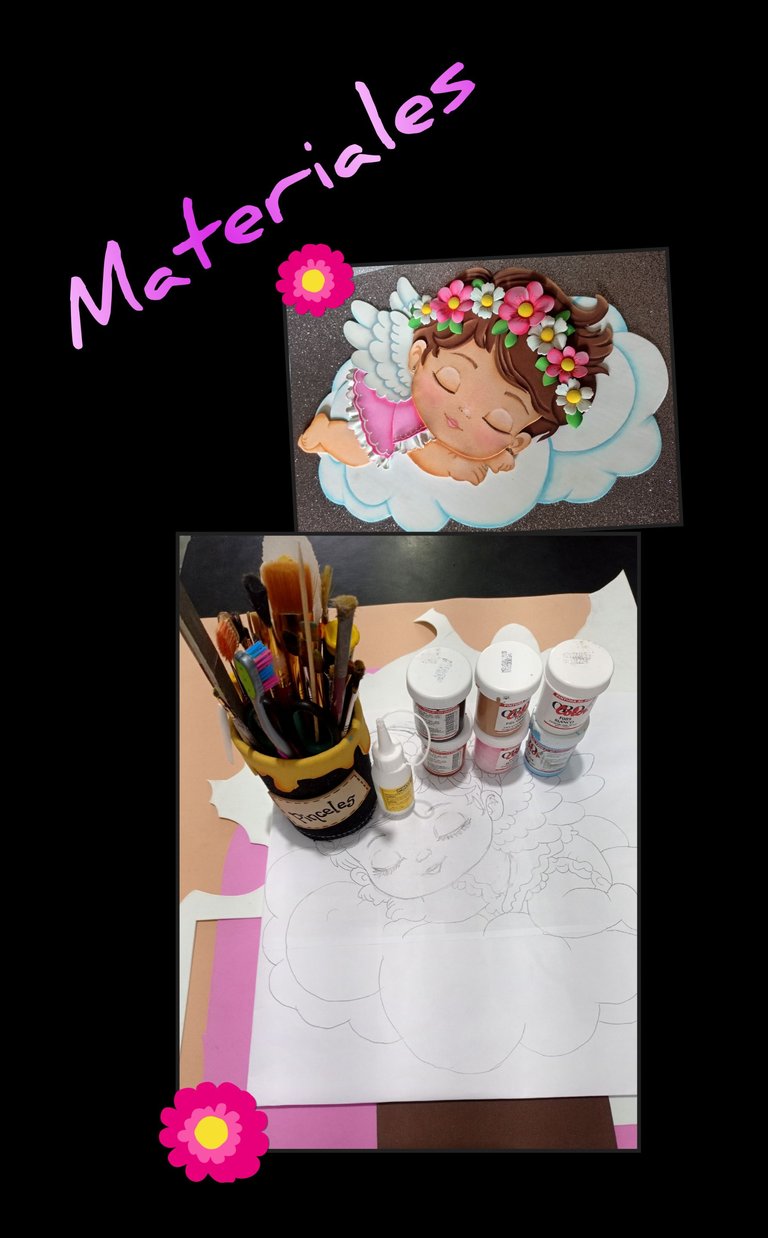
| Foami grande blanco | Foami de colores |
|---|---|
| Pinturas y pinceles | Tiza |
| Pedreria (zarcillos) opcional | Palito de madera |
| Tijeras | Silicón |
| Plancha eléctrica | Dibujo o impresión |
| Lápiz de mina blanda Hb |
Paso 1:
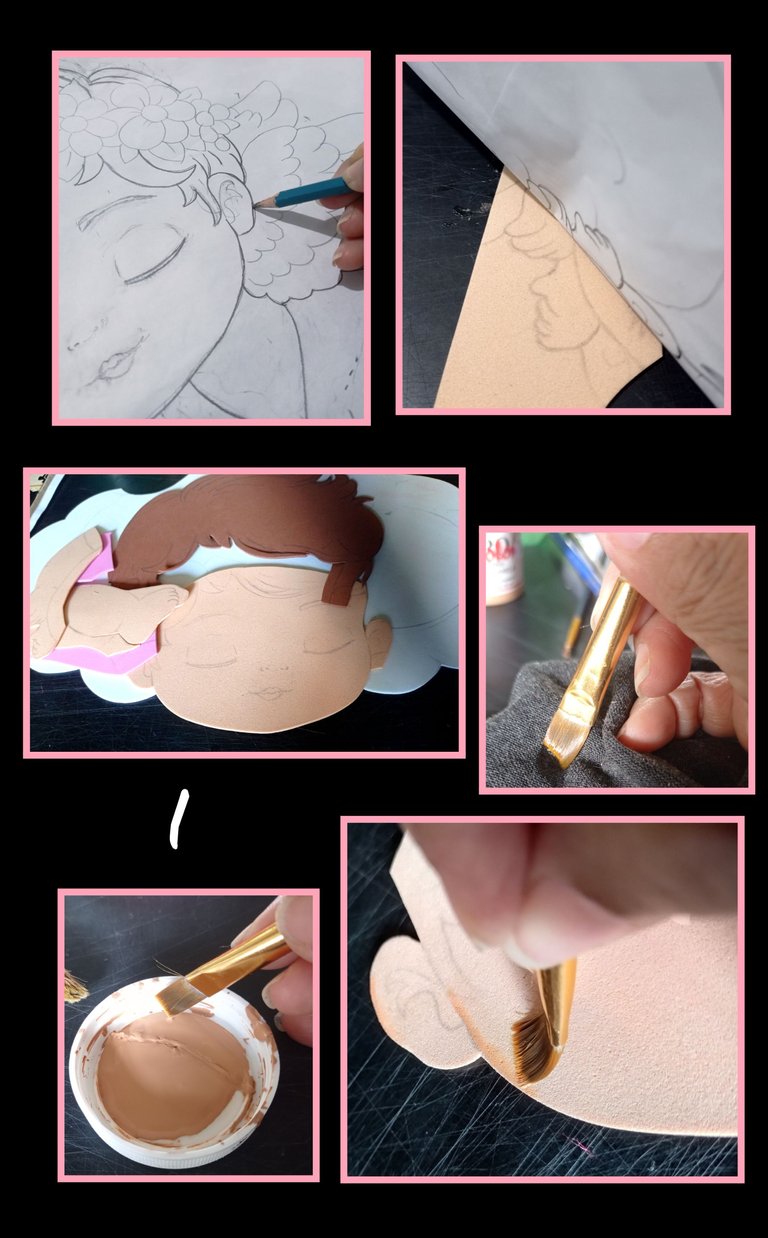
- Remarca el dibujo con lápiz de mina blanda luego coloca el papel sobre el foami (la imagen que pegue del foami), luego sujeta bien el papel y con los anillos de la tijera frota con un poco de fuerza, con cuidado de que no se ruede el dibujo, después levanta de un lado el papel para asegurarte de que se haya transferido toda la imagen, así harás con todas las piezas y recorta.
- Para pintar, moja el pincel en agua, quita el exceso pasando por un pañito seco y luego moja la punta del pincel en la pintura a usar y comienza a pasar el pincel por todo el borde de la pieza de foami en este caso use piel morena para la piel del angel.
Paso 2:
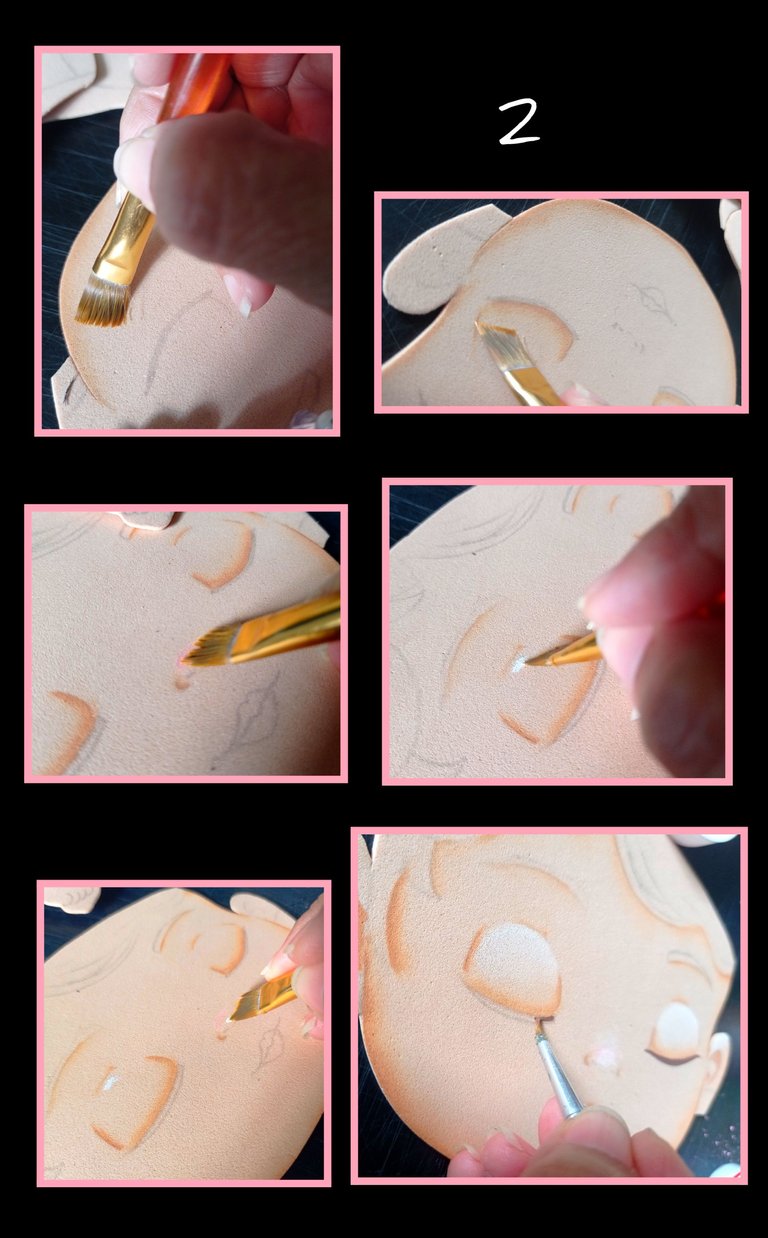
- Sigue difuminando el color por todas las partes de la carita, luego moja la punta del pincel en blanco y pasa por la parte alta de los párpados y nariz.
- Luego con un pincel punta fina o marcador pinta los ojos.
Paso 3:
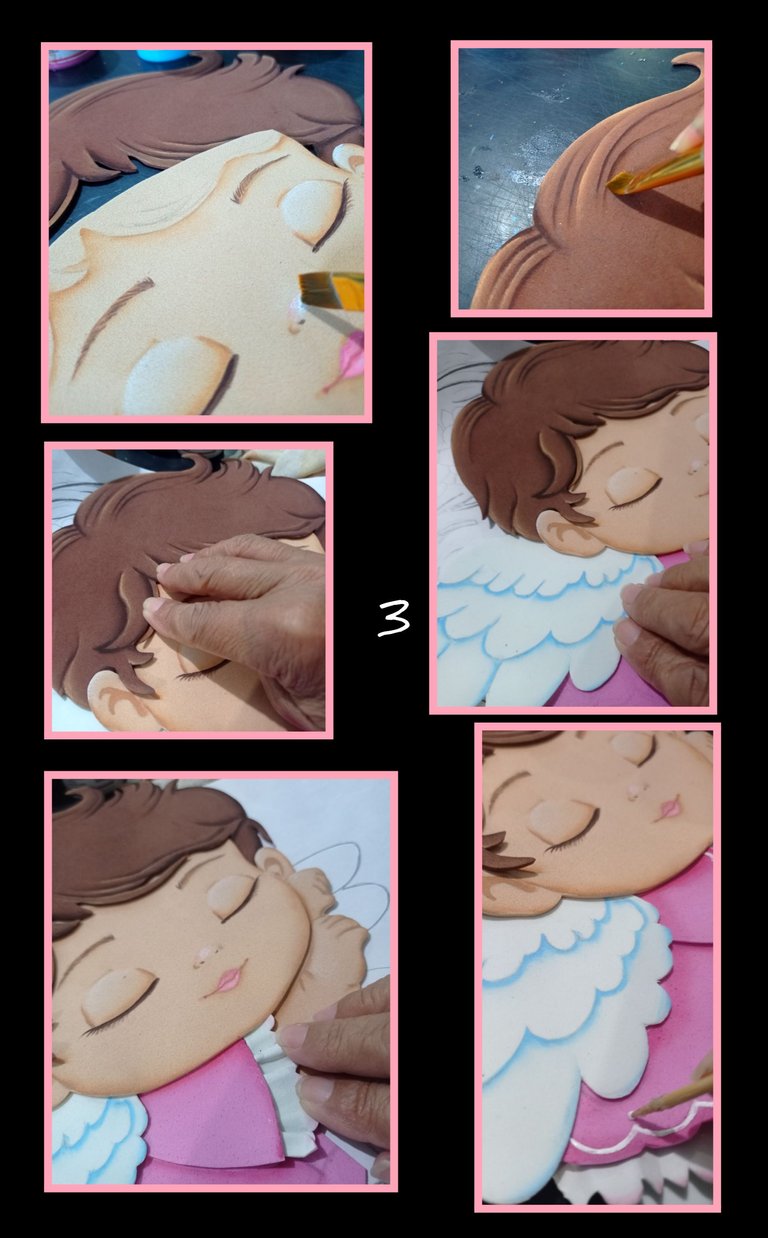
- Pinta boca rellenando los labios con color rosado y pasa una pincelada como de dos milímetros en las cejas, deja secar y luego haces trazos diagonales de abajo hacia arriba para hacer los pelitos de las cejas.
- Aparte moja el pincel en pintura marrón oscuro y pinta los trazos de los cabellos, así harás este procedimiento para todas las piezas que formarán esta figura y deja secar.
- Ahora comienza a aplicar silicón en las piezas y empieza a pegar y armar la figura.
Nota: para hacer el encaje, recorta una tira delgada y si tienes una tijera de formas corta uno de los extremos, calienta la plancha y pon el foami a calentar, luego comienza a rizar apretando el foami arruchando hasta que enfríe y tome la forma. - Después de armar la figura del angelito, pinta ondas en la parte inferior del vestido y manga.
Paso 4:
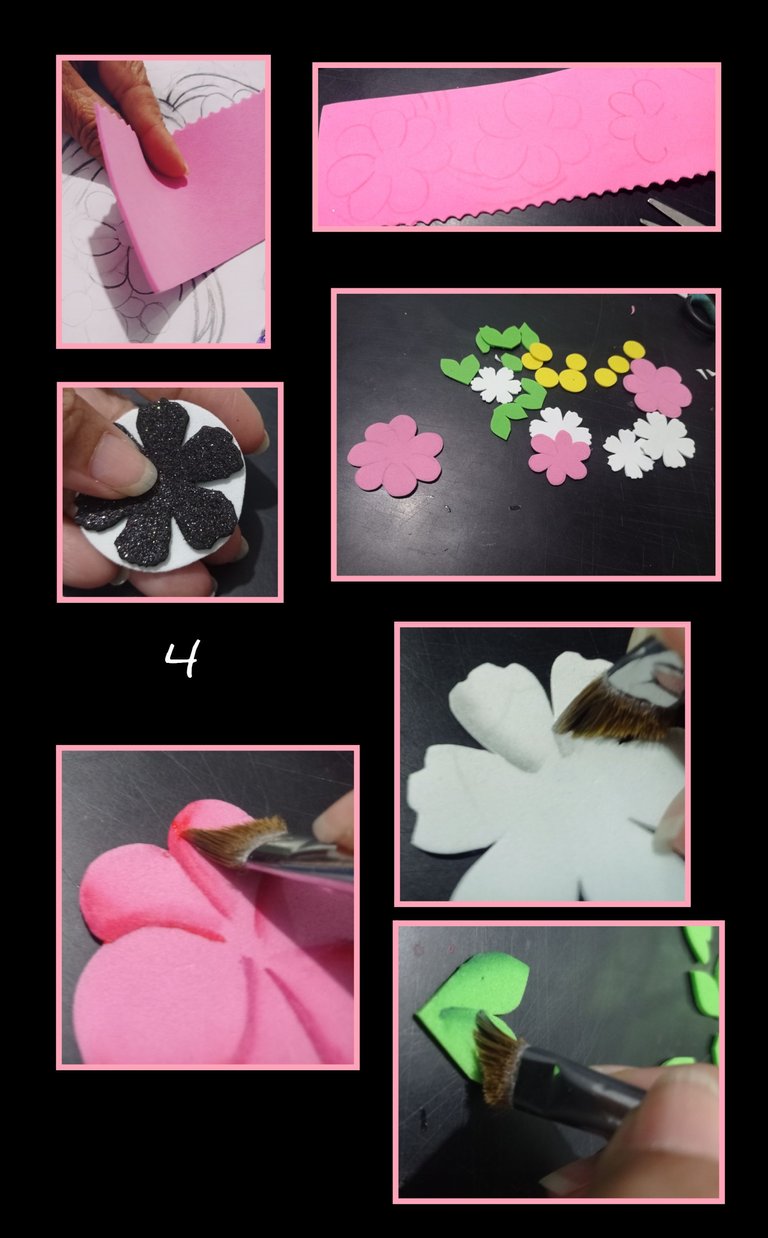
- Ahora Remarca las flores, transfiere al foami, y recorta, también puedes recortar círculos y recorta flores y hojas de distintos tamaños.
- Luego comienza a pintar los pétalos de las flores y hojas, de la misma forma que te explique en el paso 1.
Paso 5:
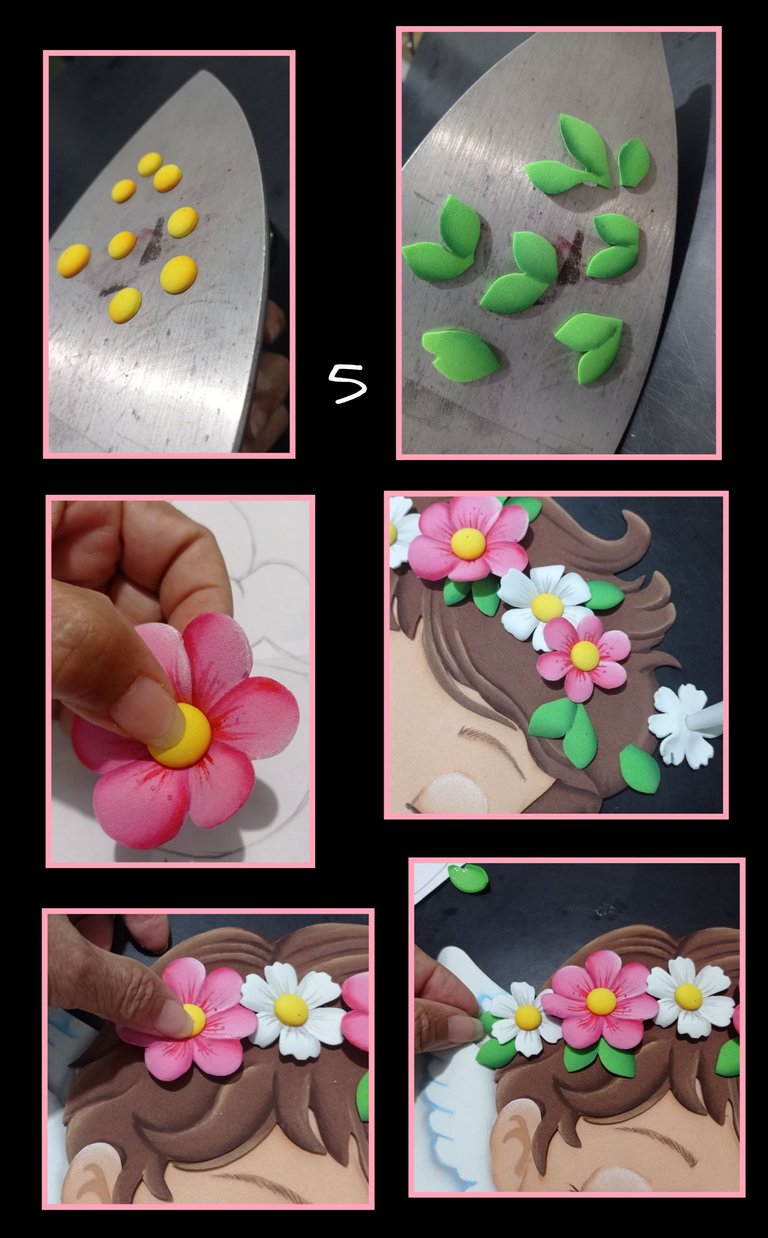
- Calienta la plancha a temperatura media y coloca los centros de las flores y hojas a que tomen forma.
- Igual coloca las flores, luego aplica silicón al borde de los centros amarillos y pega en el centro de las flores y deja secar, luego coloca sobre la cabeza del angelito, distribuye y comienza a pegar.
Paso 6:
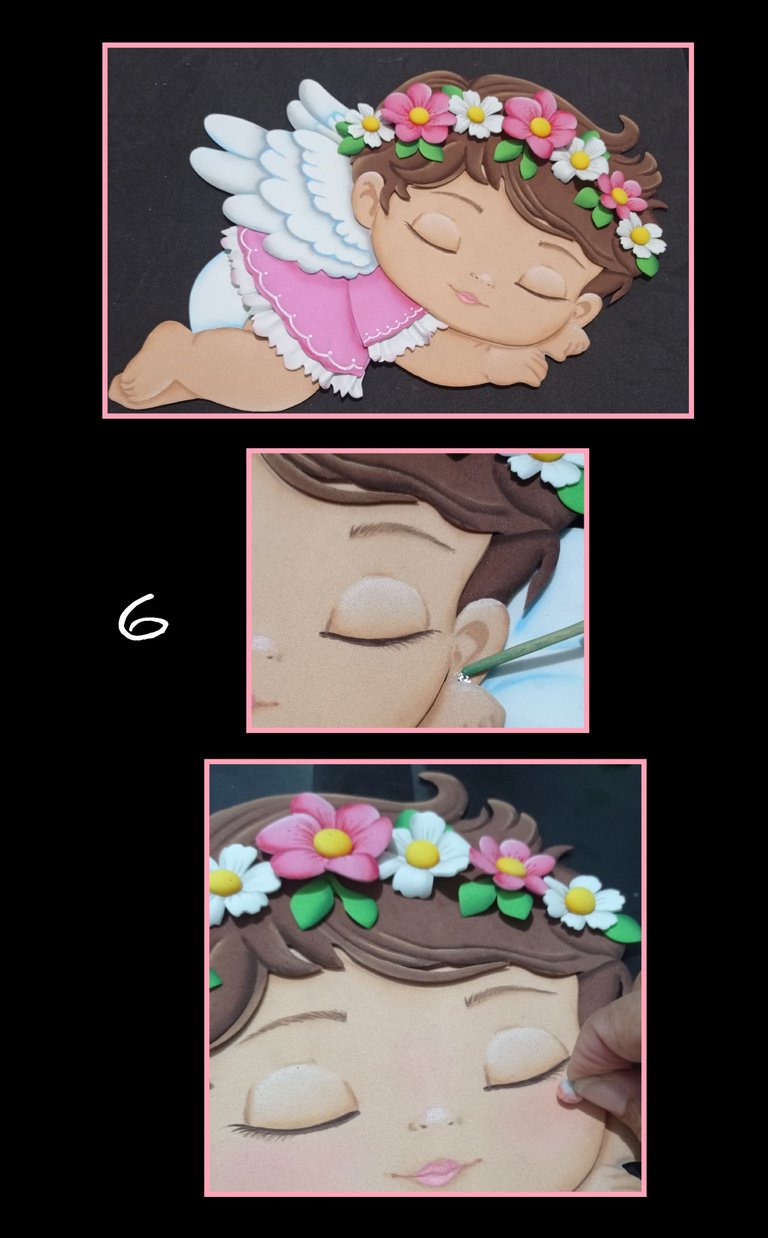
- Mira que bonita va quedando!
- Lo que falta es pegar los zarcillos con un poquito de silicón y por último con un poquito de algodón, frota sobre la tiza y pasa para ponerle un poquito de color a las mejillas.
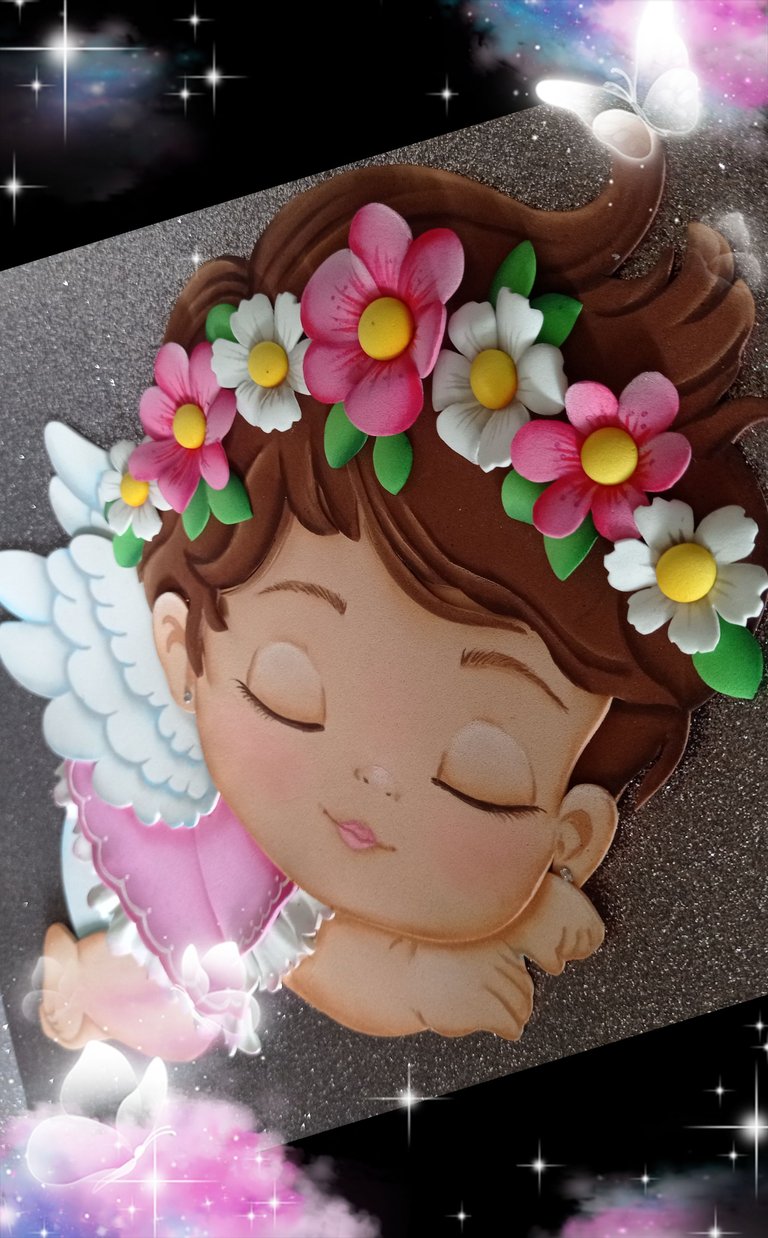
Así quedó listo!
Fuente:
https://www.pinterest.es/pin/476255729360777382/
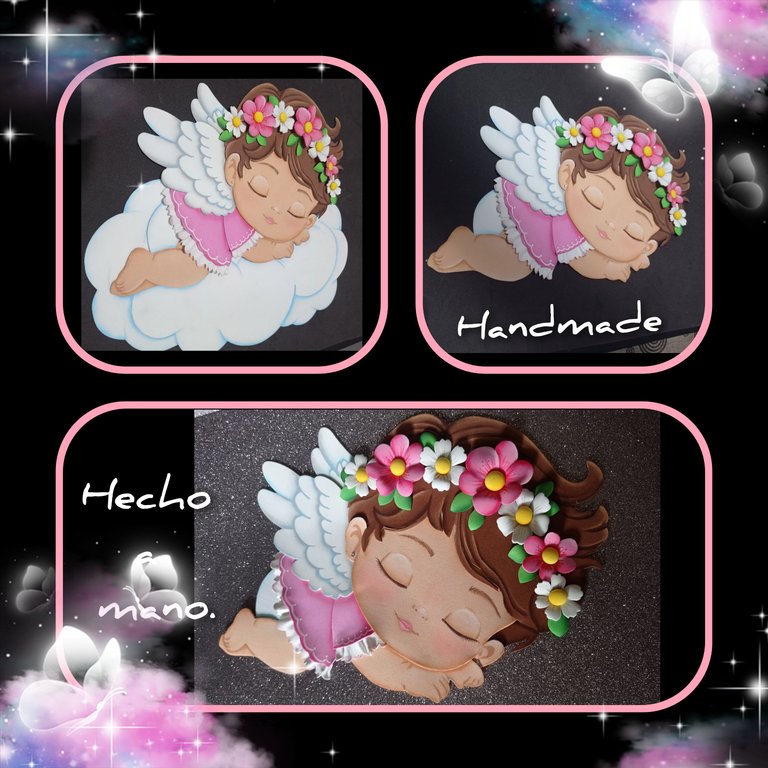
Mi publicación la traduje con DeepL, editada con etiquetas HTML, las fotos capturadas por mi Redmi Note 9 y las edité con GridArt.
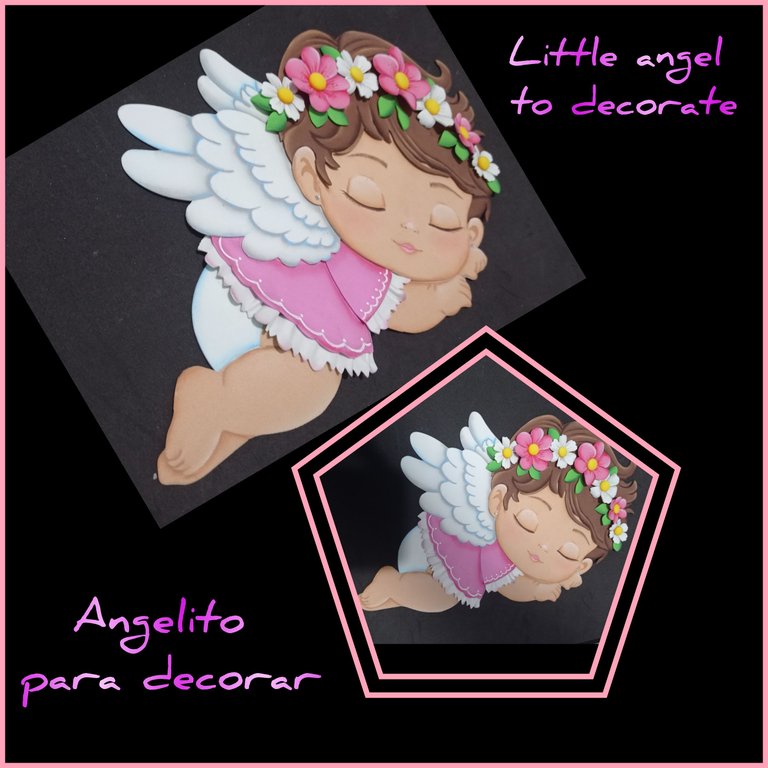

Espero te guste y animes a realizarlo, de ser así si tienes alguna duda, escríbeme y con gusto te ayudaré.
Y me despido feliz de haber compartido contigo, gracias por tu visita y apoyo.
English:


Hello dear friends.
So let's not wait any longer and let's start:

| Large white foami | Colored foami |
|---|---|
| Paints and brushes | Chalk |
| Pedreria (tendrils) optional | Wooden stick |
| Scissors | Silicone |
| Electric iron | Drawing or printing |
| Soft lead pencil Hb |
Step 1:

- Outline the drawing with a soft lead pencil, then place the paper on the foami (the image you glued on the foami), then hold the paper tightly and with the rings of the scissors rub with a little force, being careful not to roll the drawing, then lift the paper on one side to make sure that the whole image has been transferred, so you will do with all the pieces and cut out.
- To paint, dip the brush in water, remove the excess by passing it through a dry cloth and then dip the tip of the brush in the paint to use and start to pass the brush around the edge of the piece of foami in this case use brown skin for the skin of the angel.
Step 2:

- Continue blending the color all over the face, then dip the tip of the brush in white and go over the upper part of the eyelids and nose.
- Then with a fine tip brush or marker paint the eyes.
Step 3:

- Paint the mouth by filling in the lips with pink color and make a brush stroke of about two millimeters on the eyebrows, let it dry and then make diagonal strokes from bottom to top to make the eyebrow hairs.
- Then dip the brush in dark brown paint and paint the strokes of the hairs, you will do this procedure for all the pieces that will form this figure and let it dry.
- Now start applying silicone on the pieces and start gluing and assembling the figure.
Note: to make the lace, cut a thin strip and if you have a shape scissors cut one of the ends, heat the iron and put the foami to heat, then start to curl by squeezing the foami until it cools and takes the shape. - After assembling the angel figure, paint waves on the bottom of the dress and sleeve.
Step 4:

- Now trace the flowers, transfer to foami, and cut out, you can also cut out circles and cut out flowers and leaves of different sizes.
- Then start painting the petals of the flowers and leaves, in the same way as I explained in step 1.
Step 5:

- Heat the iron to medium heat and place the centers of the flowers and leaves to take shape.
- Then apply silicone to the edge of the yellow centers and glue in the center of the flowers and let dry, then place on the head of the angel, distribute and start gluing.
Step 6:

- Look how beautiful it looks!
- What's left is to glue the tendrils with a little bit of silicone and finally with a little bit of cotton, rub on the chalk and pass to put a little color to the cheeks.
That's it!

Source:
https://www.pinterest.es/pin/476255729360777382/

My post was translated with DeepL, edited with HTML tags, photos captured by my Redmi Note 9 and edited with GridArt.


I hope you like it and encourage you to make it, if so if you have any questions, write me and I will gladly help you.
And I say goodbye happy to have shared with you, thanks for your visit and support.
Hola amiga @elmundodebetty 👋🏾
Demasiado hermoso este trabajo que nos compartes. Admiro mucho la habilidad que tienes para trabajar con foami. Muchas gracias por compartir tu creación 🫂
Hola amiga Lelys, gracias a ti por tus palabras y que bueno que te guste mi trabajo.
A tí por leerme y apoyarme.
Bendiciones.
¡Felicidades! Esta publicación obtuvo upvote y fue compartido por @la-colmena, un proyecto de Curación Manual para la comunidad hispana de Hive que cuenta con el respaldo de @curie.
Si te gusta el trabajo que hacemos, te invitamos a darle tu voto a este comentario y a votar como testigo por La Colmena.
Si quieres saber más sobre nuestro proyecto, te invitamos a acompañarnos en nuestro servidor de Discord.
!discovery 45
This post was shared and voted inside the discord by the curators team of discovery-it
Join our Community and follow our Curation Trail
Discovery-it is also a Witness, vote for us here
Delegate to us for passive income. Check our 80% fee-back Program
You know how to work very professionally the design in foami with excellent techniques, I love it because we learn a lot from them, this spectacular shading, gives them a lot of movement and three-dimensional aspect. This little angel is beautiful, like everything you do.
@sagarkothari88 vote
https://twitter.com/hivediy47901/status/1763054870758625528
¡¡¡Buen trabajo!!! Gracias por publicar tu excelente contenido en Hive Diy, hermoso angelito nos has presentado hoy, de verdad que te quedo muy lindo y coqueto
Tu comunidad artesana ahora es testigo
