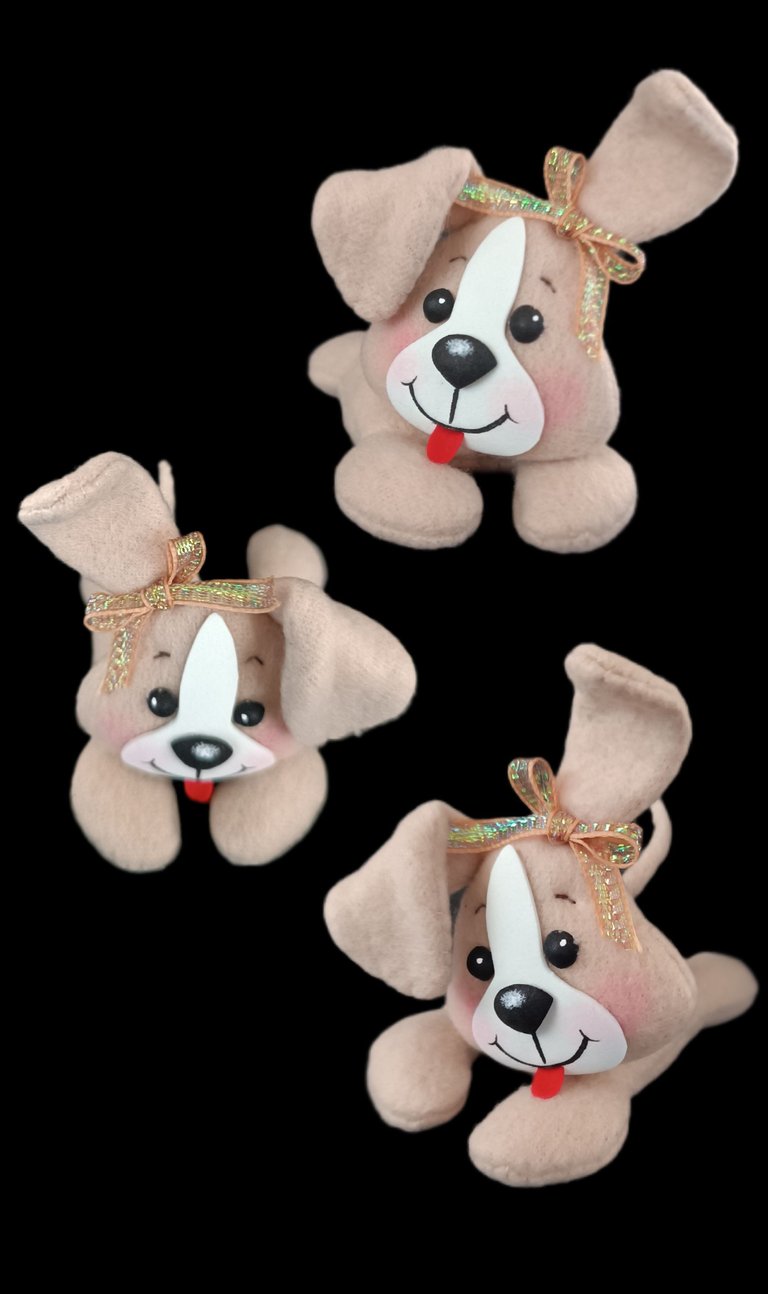
DIY/Te enseño como realizar un fácil y hermoso perrito de tela. Eng/ DIY/I'll show you how to make an easy and beautiful fabric dog.

Buenas noches queridos amigos y creadores de esta Gran Comunidad.
Los materiales que utilicé son:
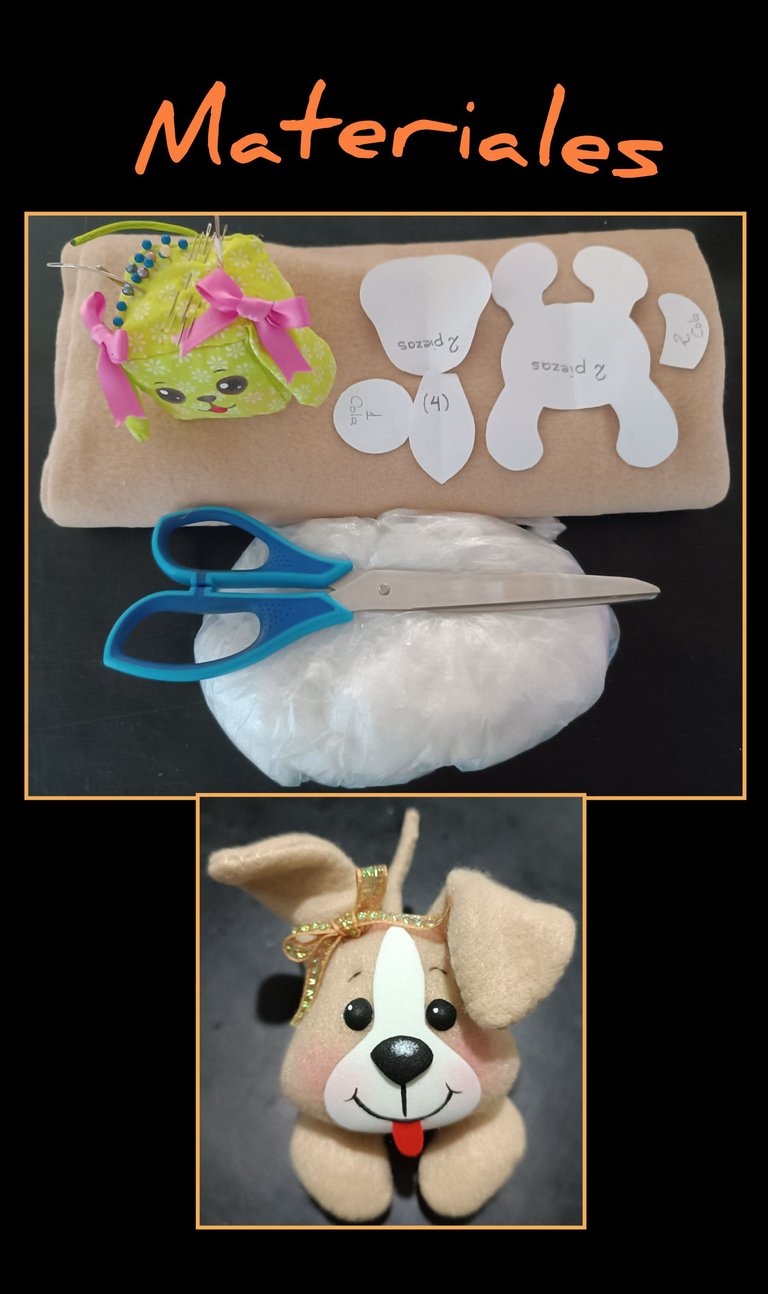
| Retazo de tela | Foami blanco y negro |
|---|---|
| Agujas, hilo y alfileres | Cinta de tela |
| Algodón | Pintura, pincel y tiza o rubor |
| Molde | Silicón |
¡Ahora te invito a que me acompañes en el paso a paso!
Paso 1:
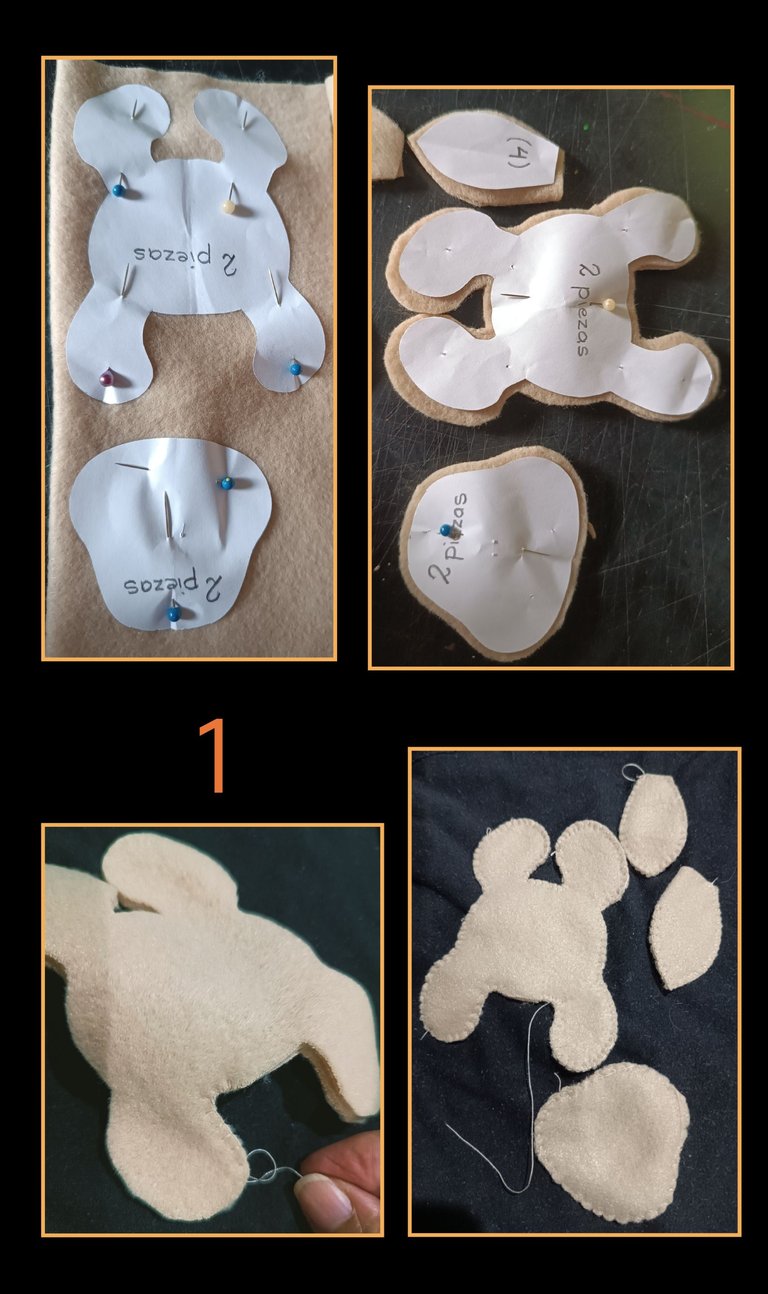
- Fija con alfileres los patrones a la tela, después recorta dejando un borde de 0.5 milímetros y empieza a coser a mano con punto ojal por todo el contorno de las piezas y deja una abertura de 1.05cms para voltear.
Paso 2:
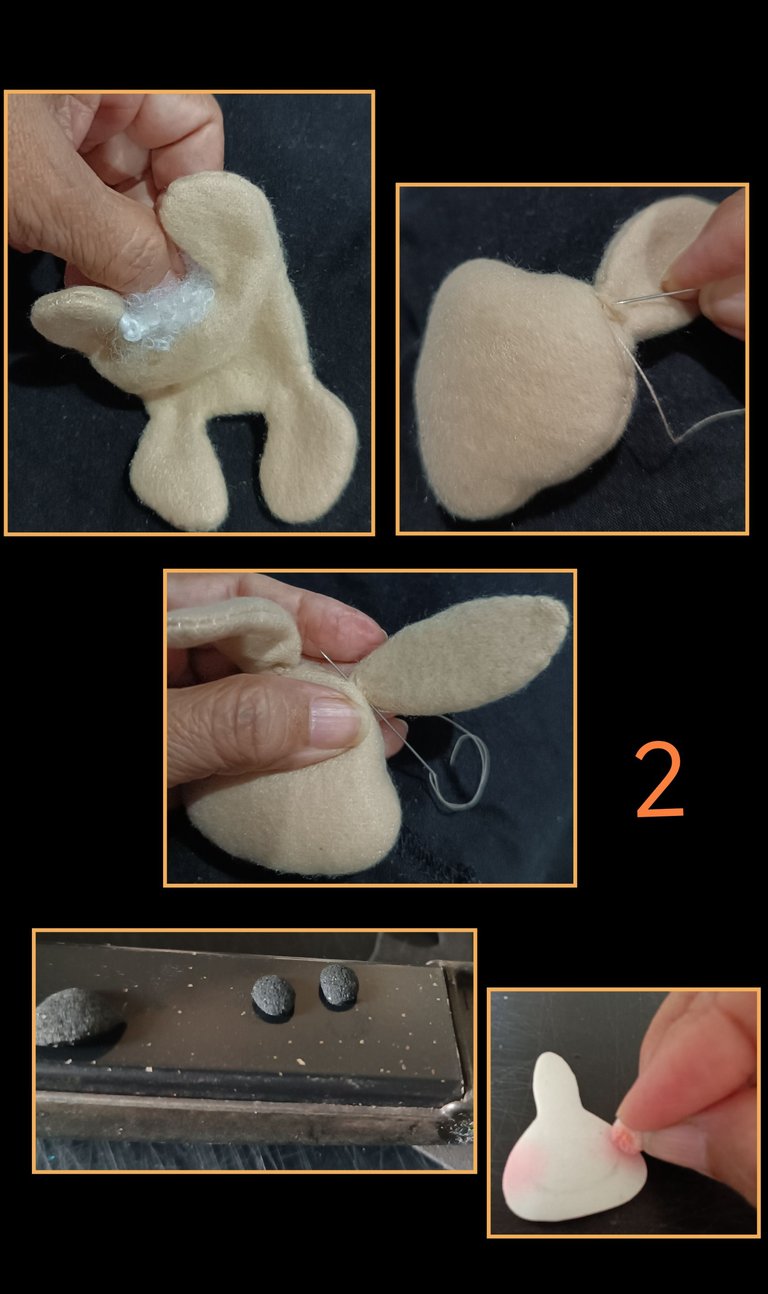
- Después de voltear las piezas, comienza a rellenarlas con algodón, y cierra las aberturas, luego cose las orejas a la cabeza.
- Aparte recorta dos círculos pequeños en foami y la nariz, calienta la plancha y espera que tomen forma y retíralos del calor, recorta la forma del hocico y con tiza dale color, y pinta la boca.
Paso 3:
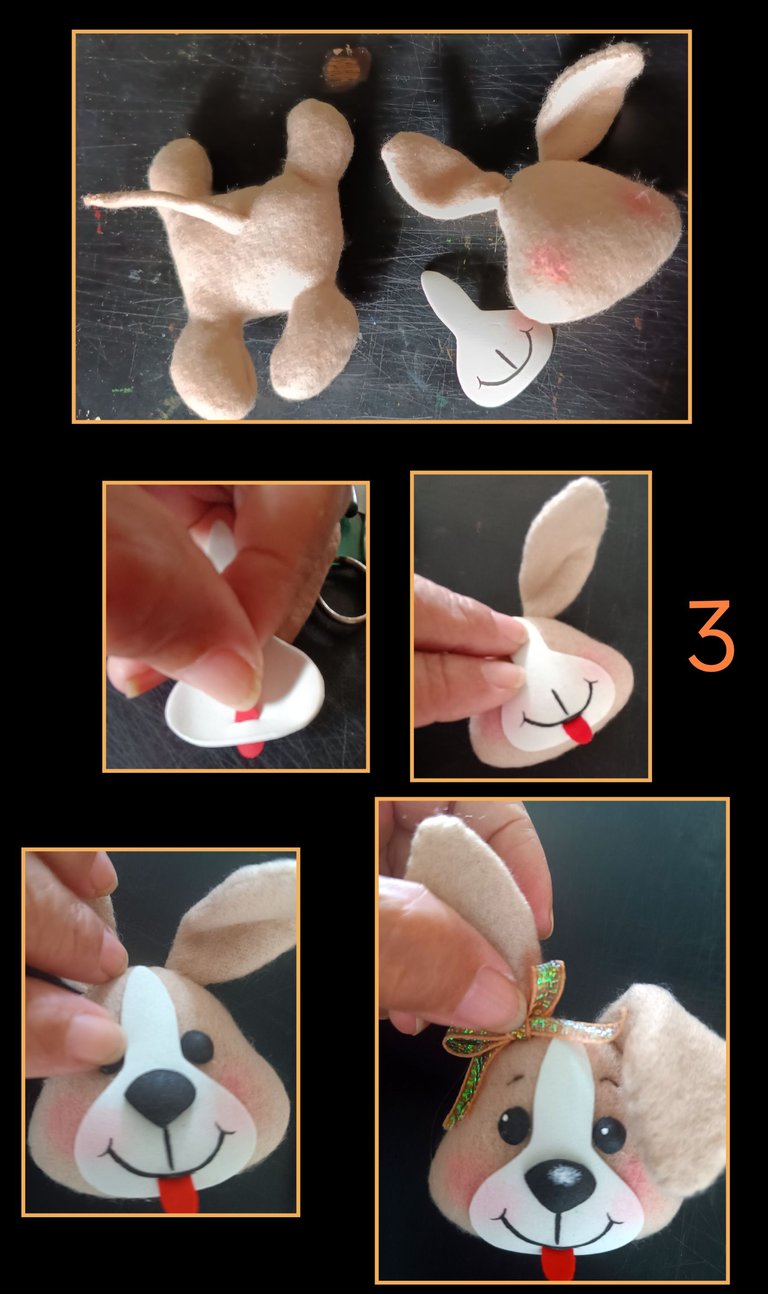
- Cose la cola y luego haz una pequeñita abertura en la boca para insertar la lengua y pega por la parte trasera, luego aplica silicón a la pieza de foami y pega a la cara.
- Luego pega la nariz y los ojos con silicón, luego pon puntos de luz en los ojos y nariz y por último, haz un lacito y pega a una orejita.
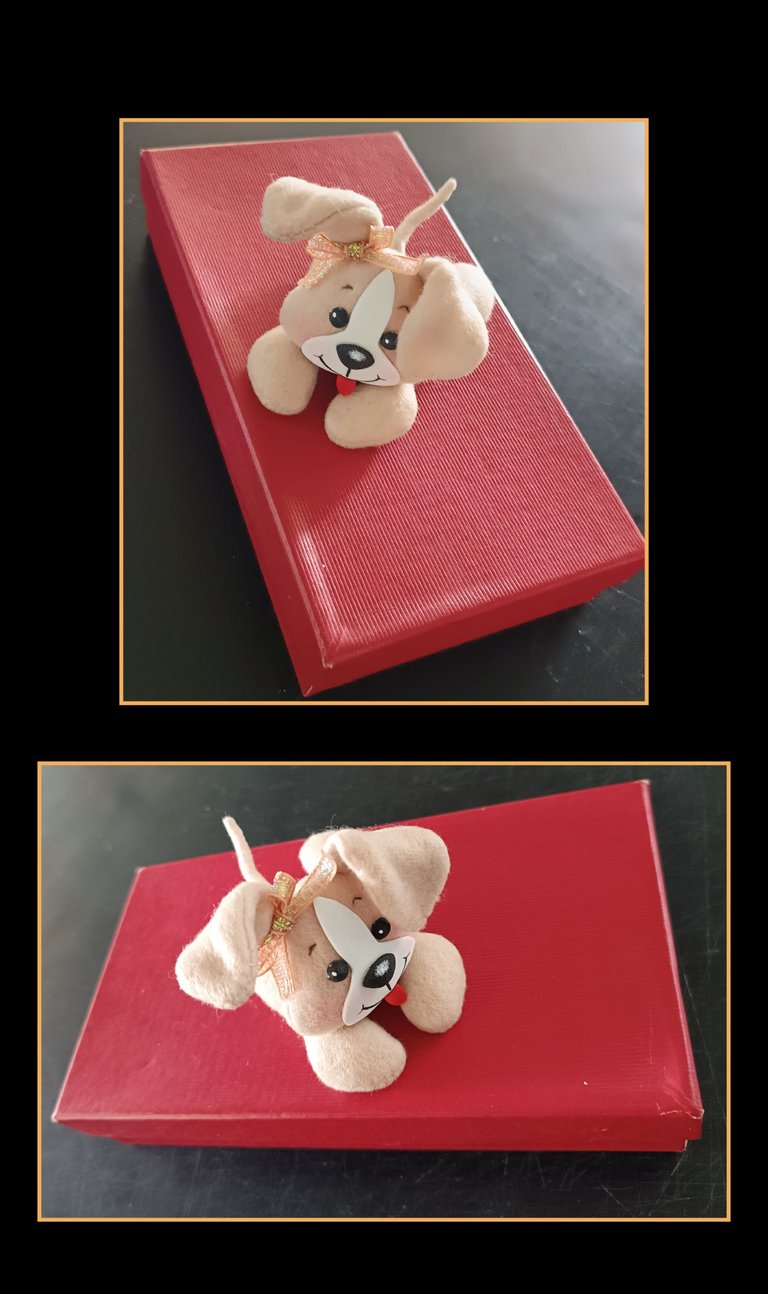
Paso 4:

Para terminar, aplica silicón en la parte baja de la cabecita y pega al cuerpo, haz un poco de presión hasta que seque.
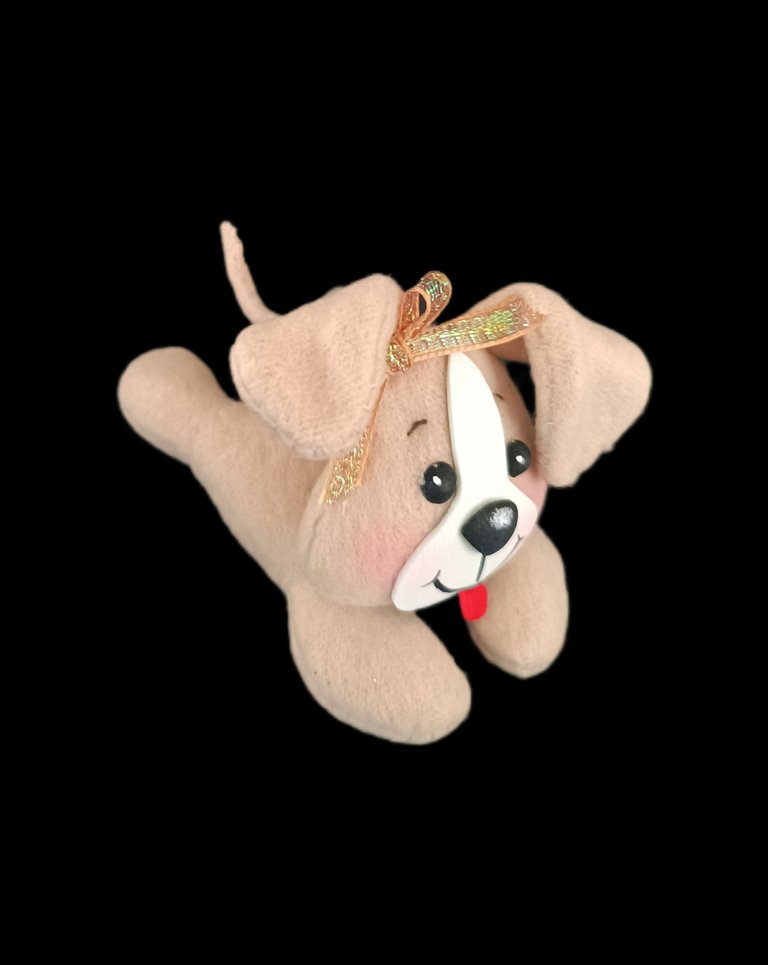
Así de rápido y fácil queda terminado este lindo perrito.

Espero te animes y realices uno a tu gusto.
Editor de fotos: GridArt.
Teléfono: Redmi Note 12.
Hasta mi próximo tutorial.
Muchas gracias por tu apoyo.
Saludos.
Good evening, dear friends and creators of this great community.
The materials I used are:
| Fabric scraps | Black and white foam |
|---|---|
| Needles, thread, and pins | Fabric ribbon |
| Cotton | Paint, paintbrush, and chalk or blush |
| Mold | Silicone |
Now I invite you to join me in the step-by-step process!
Step 1:
- Pin the patterns to the fabric, then cut around them leaving a 0.5-millimeter border and start sewing by hand with a blanket stitch around the entire outline of the pieces, leaving a 1.05-cm opening to turn them inside out.
Step 2:
- After turning the pieces inside out, start stuffing them with cotton and close the openings, then sew the ears to the head.
- Separately, cut out two small circles from foam and the nose, heat the iron and wait for them to take shape, then remove them from the heat, cut out the shape of the snout and color it with chalk, and paint the mouth.
Step 3:
- Sew the tail and then make a small opening in the mouth to insert the tongue and glue it to the back, then apply silicone to the foam piece and glue it to the face.
- Then glue the nose and eyes with silicone, then add dots of light to the eyes and nose, and finally, make a little bow and glue it to one ear.
Step 4:
To finish, apply silicone to the bottom of the head and attach it to the body, applying a little pressure until it dries.
That's how quick and easy it is to make this cute little dog.
I hope you feel inspired to make one to your liking.
Photo editor: GridArt.
Phone: Redmi Note 12.
Until my next tutorial.
Thank you very much for your support.
Best regards.
Saludos Betty, un trabajo ciertamente hermoso el que nos compartes. Tenía tiempo sin ver una de tus publicaciones pero esto está bellísimo.
!discovery 35
Saludos y bendiciones Gabo.
Que lindo ver este comentario, de verdad me alegra mucho que te haya gustado mi trabajo.
Muchas gracias.
This post was shared and voted inside the discord by the curators team of discovery-it
Join our Community and follow our Curation Trail
Discovery-it is also a Witness, vote for us here
Delegate to us for passive income. Check our 80% fee-back Program
Muchas gracias @discovery-it por el apoyo a mi publicacion.
Que lindo y tierno 🥹
Gracias amiga, que bueno saber que te gustó.
Que cosita tan preciosa, cómo amante de los gatos imagino que te quería espectacular.
Que bueno verte por acá nuevamente bella con tu hermoso trabajo. Bendiciones...
!LUV
Hola amiga, me alegra saber que te gustó y que bueno que te gusten los gaticos.
Muchas gracias, si por aquí de nuevo para compartir con mucho cariño con ustedes.
🙏Igual para ti.
🤗
This is a beautiful and fascinating work, as always you present us with a beautiful tutorial with a tender final result.
selected by @dayadam
Muchas gracias @diyhub por tu comentario y apoyo.
Feliz día @innerblocks por el apoyo a mi publicación.
Wow, this is a complete package, beautiful, cute and adorable.
Muchas gracias, que bueno que te gustó mi trabajo.
Saludos.
Ay chu mío, que cosita más tierna y adorable querida Betty
Excelente trabajo! Este post ha sido curado por el equipo de @hivediy
Unete a nuestro Trail
You can also delegate using our preconfigured Hivesigner links:
| 50 HP | 100 HP | 250 HP | 500 HP | 1000 HP | 1500 HP | 2000 HP |
Te hemos dado un poco más de visibilidad en nuestras RRSS
https://x.com/hivediy47901/status/1954181171702616560
¡Wao! Hola querida amiga, feliz de estar nuevamente con ustedes y de ver tan lindo comentario. Muchas gracias por el apoyo que me brindan. 🙏
Saludos @elmundodebetty, que lindo perrito, tus trabajos son espectaculares ❤️😍
Feliz fin de semana!
Hola amiga, que bueno saber que te ha gustado mi trabajo.
Muchas gracias, los tuyos también.
Igual para ti. Bendiciones.
This little fabric dog turned out so cute! The details, like the bow and painted features, make it extra charming. Thanks for explaining each step so clearly,it makes me want to try making one myself.
Feliz domingo amiga.
Me alegra mucho ver tu comentario y aún más saber que te gustó.
Espero lo intentes, de verdad es muy fácil de realizar y si lo haces, por favor me lo etiquetas, sé que quedará muy lindo.