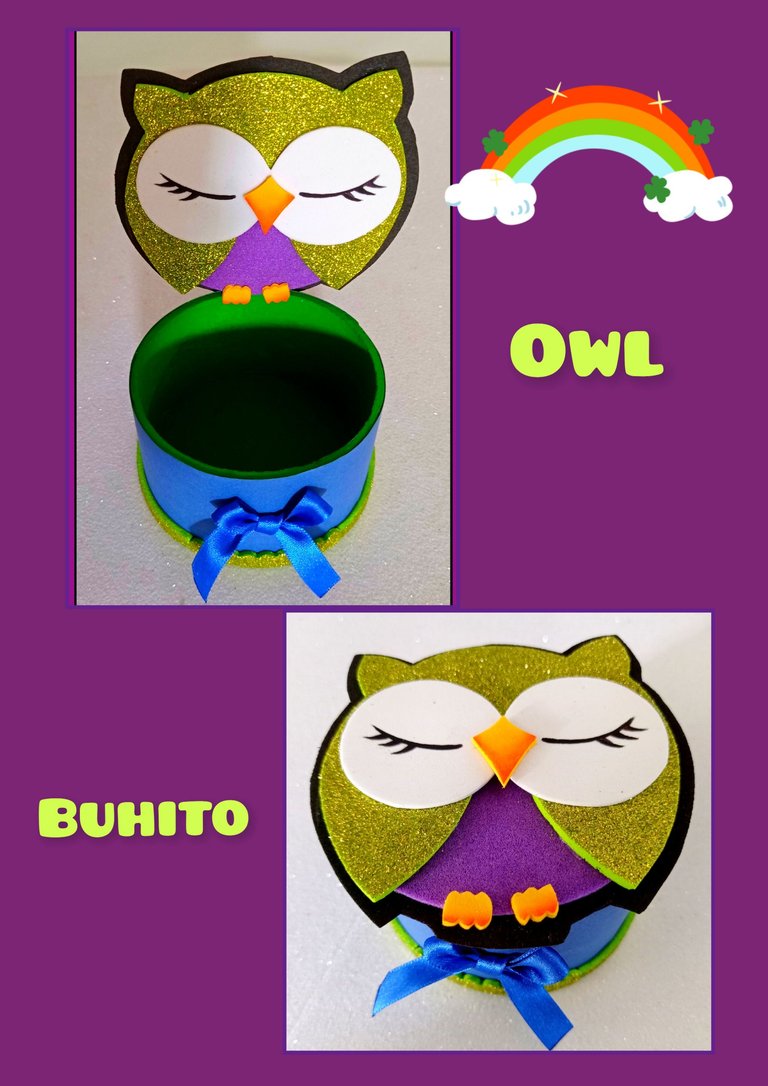
Diseña y haz un lindo Adorno (Buhito) Reciclando. ESP/ENG Design and make a cute Recycled Owl Ornament.


Feliz noche queridos amigos y creadores de la comunidad.
¿Cómo están?
Los materiales a usar son:
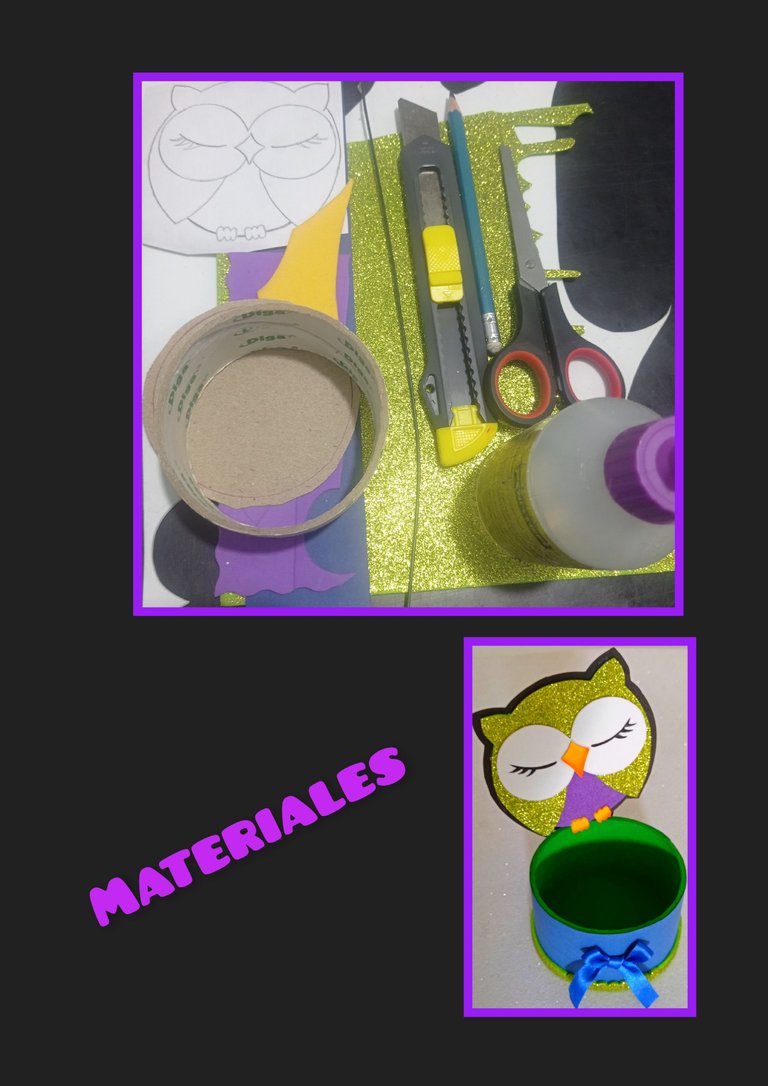
| Tubo de cartón (Cinta adhesiva) | Foami mate y escarchado |
|---|---|
| Lápiz | Tijeras y cuchilla |
| Cartón | Cinta de tela |
| Cartulina escolar | Pinturas y pinceles |
| Silicón | Dibujo o impresión |
Paso 1:
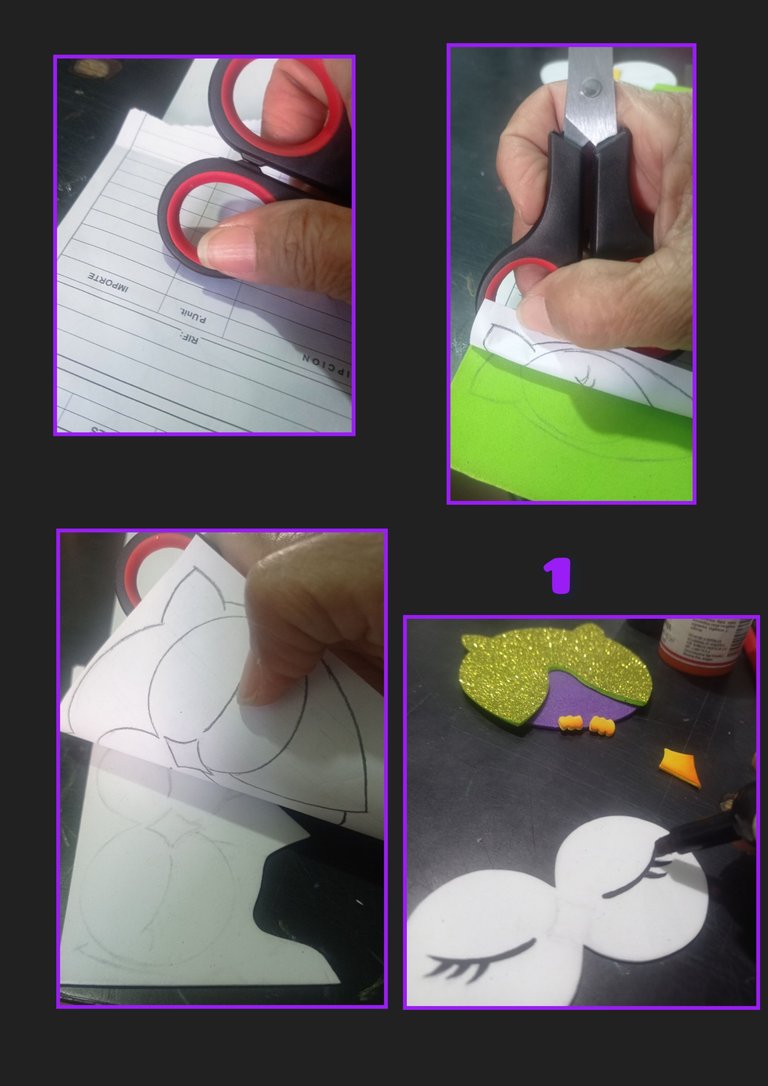
- Remarca el dibujo y coloca sobre el foami, luego frota con la tijera para transferir la imagen, este paso lo repetirás con cada pieza a transferir y luego recorta.
- Con un marcador pinta ojos y pestañas y con pintura o tiza, pinta el pico y patas.
Paso 2:
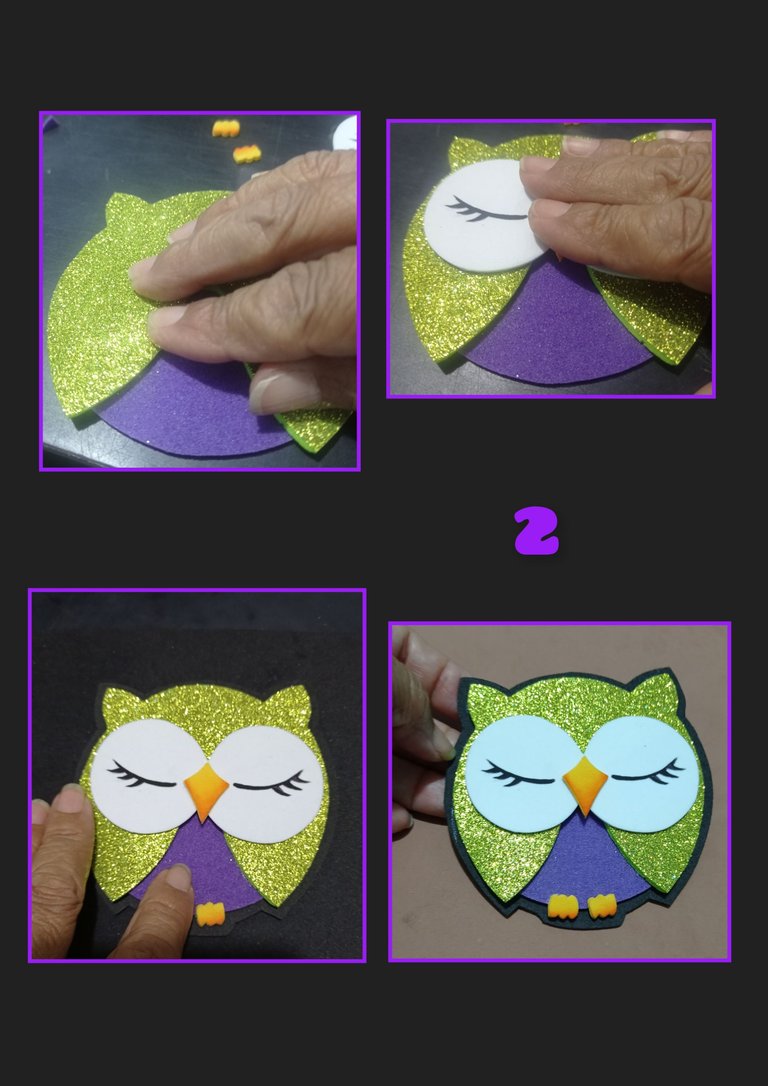
- Aplica silicón en las piezas y comienza a armar la figura, luego aplica silicón al buhito y pega sobre un foami negro, recorta dejando un pequeño borde por todo el contorno.
Así queda listo el buhito.
Paso 3:

- Ahora, marca sobre un cartón, todo el borde de tubo de cartón, recorta y pega al cilindro, luego pinta por dentro.
- Después de dejar secar, recorta una tira de cartulina y pega hasta forrar todo el cilindro.
- Aparte, recorta una tira de foami y pega en la parte inferior del cilindro.
- Si deseas puedes pegar el buhito como tapa del cilindro usando un pedacito de cinta de tela.
Quedará así.
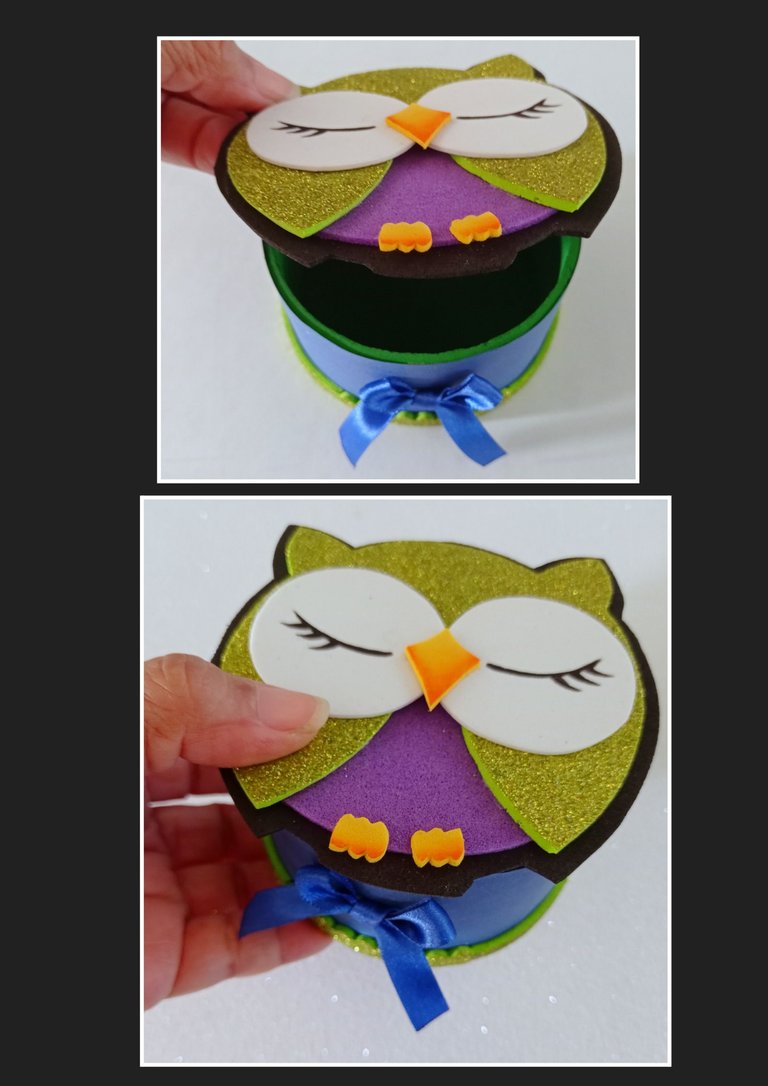
Y puedes decorar con un lacito en el frente, como muestro en la foto.
Ahora te muestro otra idea de como puedes usar el buhito en el cilindro.

En la parte inferior del buhito, puedes dejar sin pegar la parte de las paticas, aplicar silicon y pegar al cilindro, haciendo un poco de presión hasta que pegue bien.
¡Así queda terminado!
Editor de fotos: GridArt
Teléfono: Redmi Note 9
Fuente:
https://es.pinterest.com/pin/7248049390027135/
Ahora llegó la hora de despedirme no sin antes agradecer tu visita y apoyo.
Espero te sea de utilidad mi tutorial y saques provecho a esos tubos de cartón que podemos reciclar y crear cosas muy útiles y bonitas.
Hasta mi próximo tutorial.
Happy evening dear friends and creators of the community.
How are you?
So I invite you to join me to see the process.
The materials to use are:
| Cardboard tube (adhesive tape) | matte and frosted Foami |
|---|---|
| Pencil | Scissors and blade |
| Cardboard | Cloth tape |
| School cardboard | Paints and brushes |
| Silicone | Drawing or print |
Step 1:
- Outline the drawing and place it on the foami, then rub with the scissors to transfer the image, repeat this step with each piece to be transferred and then cut it out.
- With a marker paint eyes and eyelashes and with paint or chalk, paint the beak and legs.
Step 2:
- Apply silicone on the pieces and begin to assemble the figure, then apply silicone to the owl and paste on a black foami, cut out leaving a small border around the contour.
The owl is ready.
Step 3:
- Now, mark on a cardboard, the entire edge of the cardboard tube, cut out and glue to the cylinder, then paint inside.
- After letting dry, cut out a strip of cardboard and glue to line the entire cylinder.
- Separately, cut out a strip of foami and glue it to the bottom of the cylinder.
- If you wish, you can glue the owl as a cylinder lid using a piece of fabric tape.
It will look like this.
And you can decorate with a bow on the front, as shown in the photo.
Now I show you another idea of how you can use the owl in the cylinder.
At the bottom of the owl, you can leave the part of the paws unglued, apply silicone and glue to the cylinder, making a little pressure until it sticks well.
This is how it is finished!
Photo editor: GridArt
Phone: Redmi Note 9
Source:
https://es.pinterest.com/pin/7248049390027135/
Now it's time to say goodbye, but first I want to thank you for your visit and support.
I hope you find my tutorial useful and take advantage of those cardboard tubes that we can recycle and create very useful and beautiful things.
Until my next tutorial.
Congratulations @elmundodebetty! You have completed the following achievement on the Hive blockchain And have been rewarded with New badge(s)
Your next target is to reach 400 posts.
You can view your badges on your board and compare yourself to others in the Ranking
If you no longer want to receive notifications, reply to this comment with the word
STOPBuen día, muy agradecida por mis insignias y feliz de mi logro, espero llegar pronto a mi nuevo objetivo.
Gracias.
Un buhito 😍 que lindura, me encanto el detalle que se puede posar en el borde de la cajita y usarse como tapa, que lindo trabajito y es un buho!!! 😍 jajaja ya me calmo 😂
Beautiful work you've given us with recyclable materials. It's a spectacular multipurpose ornament.
Gracias a ustedes @diyhub por siempre apoyar mis publicaciones.