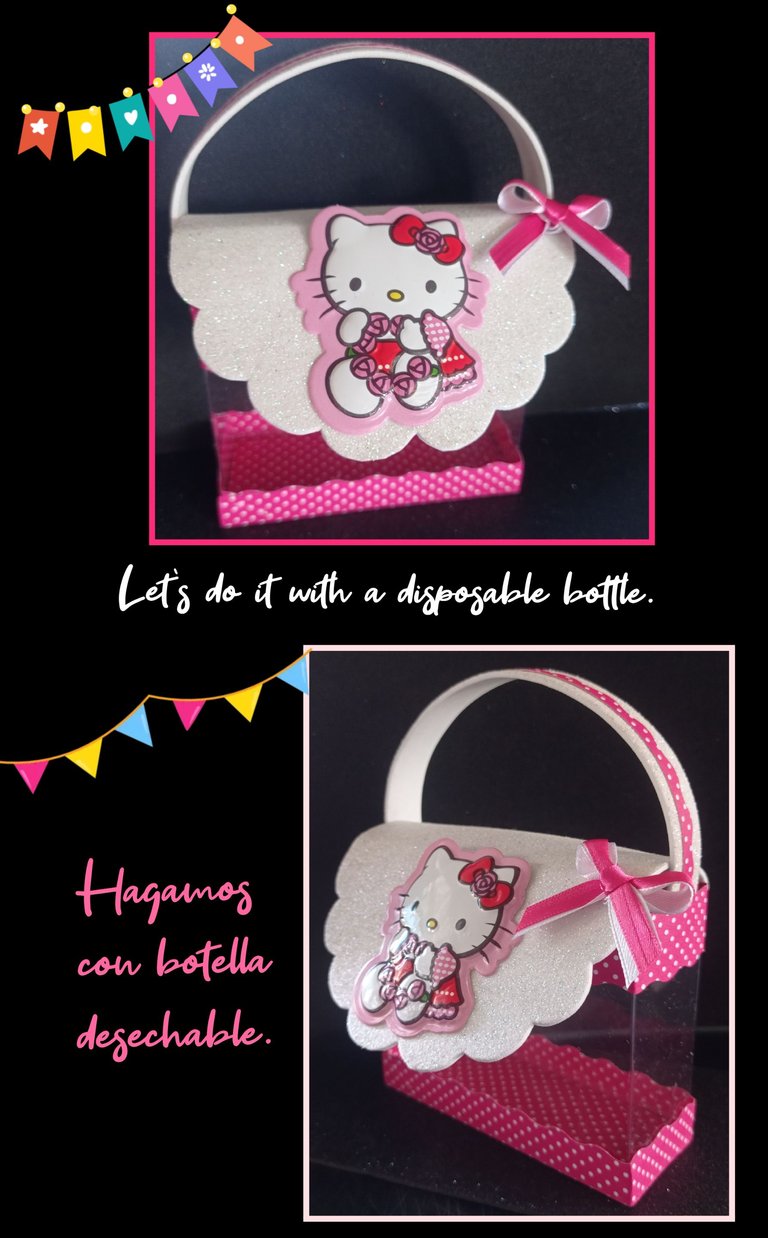
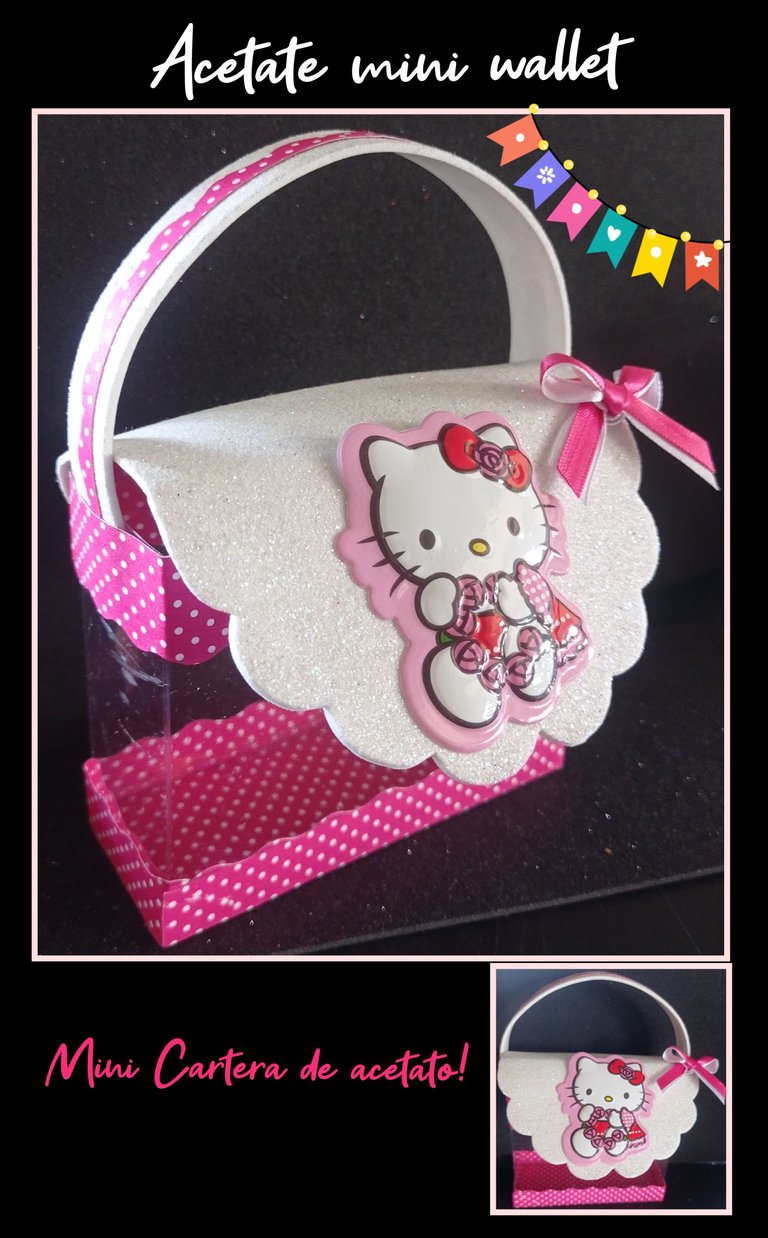
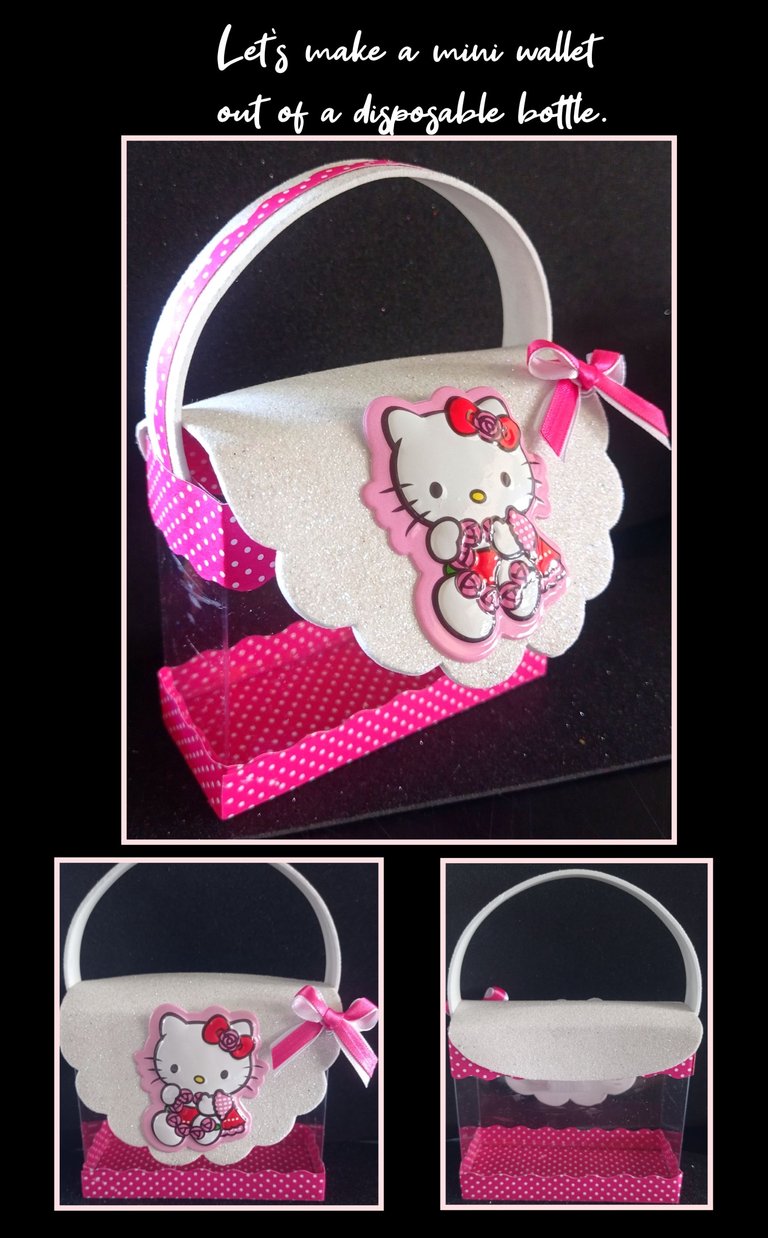
Aprende y haz esta Mini Cartera con acetato de botellas plásticas.ESP/ENG.Learn how to make this Mini Wallet with acetate from plastic bottles.
Buenas noches queridos amigos.
Así que te invito a que sigas conmigo y ubiques estos materiales:
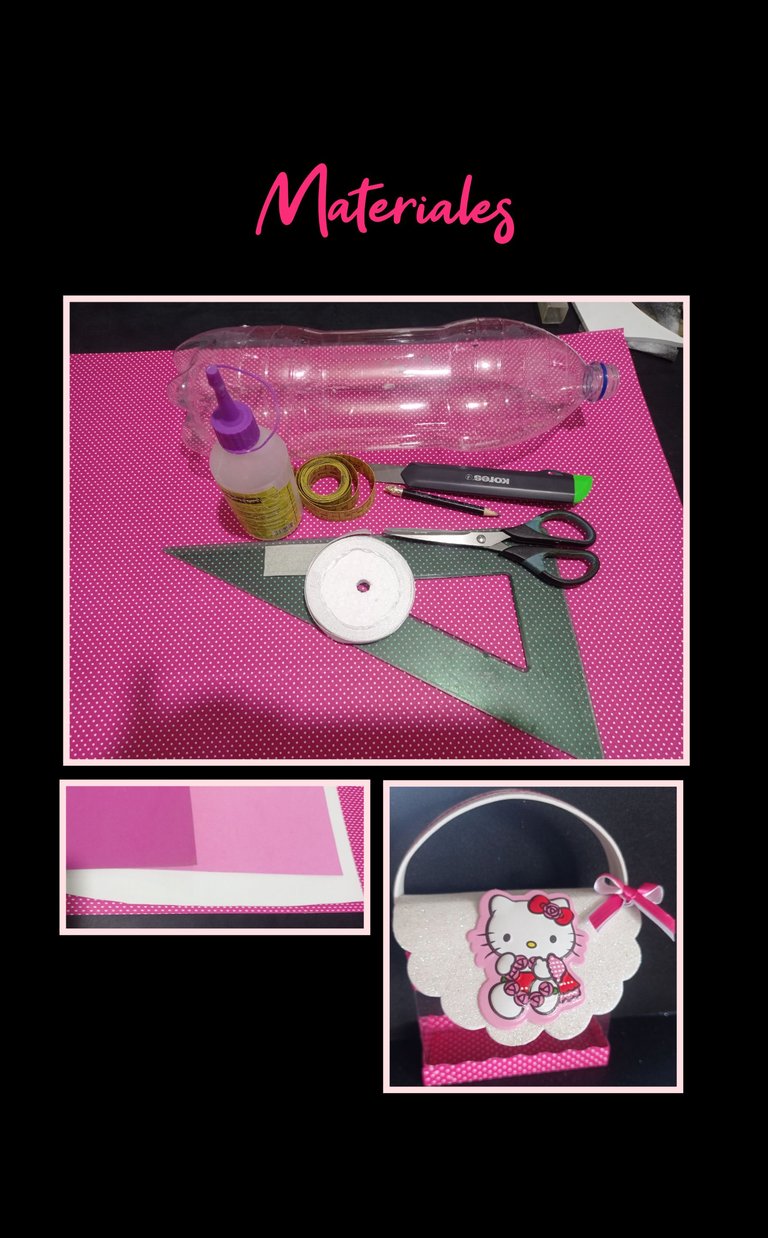
| Botella plástica | Cuchilla y tijera |
|---|---|
| Cinta métrica o regla | Cierre mágico |
| Cinta de raso | Lápiz |
| Foami escarchado | Aplique |
| Silicón |
Paso 1:
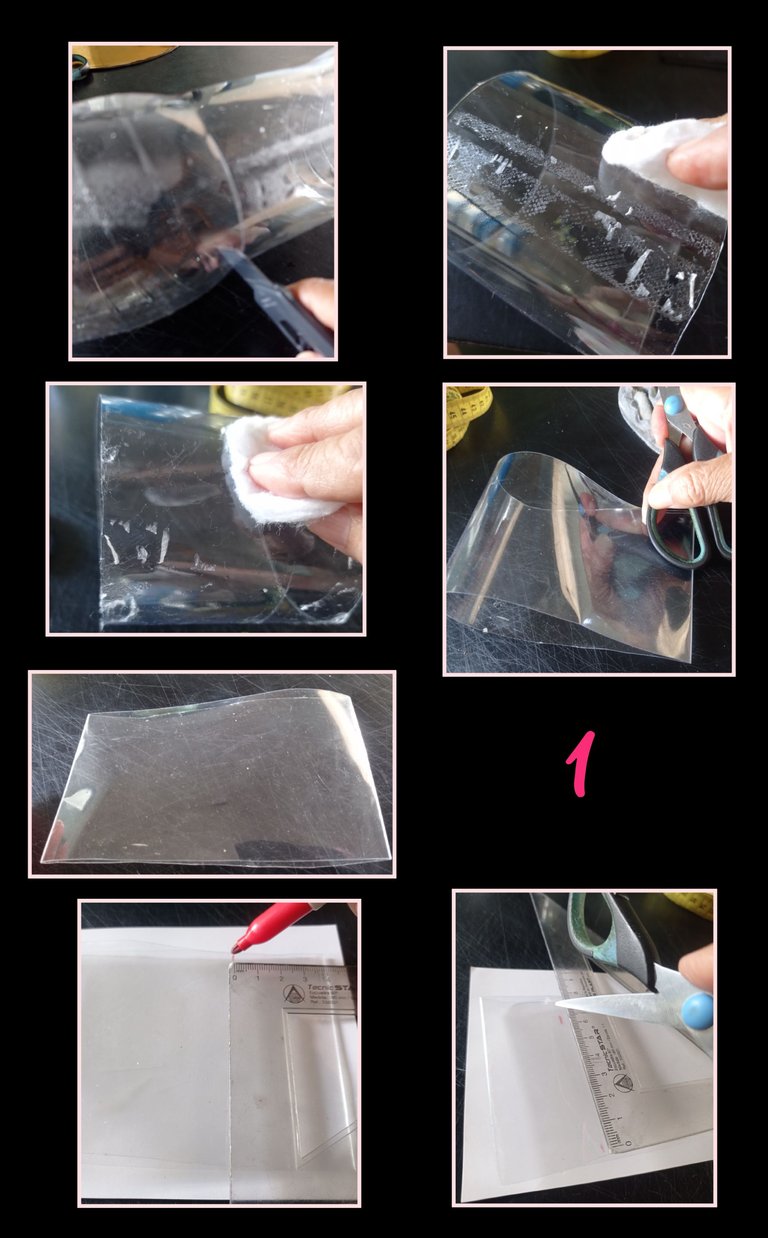
- Recorta la botella con una cuchilla y saca la parte central (lisa),luego con un algodón impregnado en aceite y pasa frotando por encima de la pega de la etiqueta hasta que se despegue totalmente.
- Ahora dobla un lado pasando la tijera varias veces y luego pasa por el otro lado hasta formar un rectángulo como se aprecia en la foto.
- Luego con un marcador, haz una marca a 4cm de cada lado y luego pasa suavemente la punta de la tijera marcando una línea para luego doblar.
Paso 2:
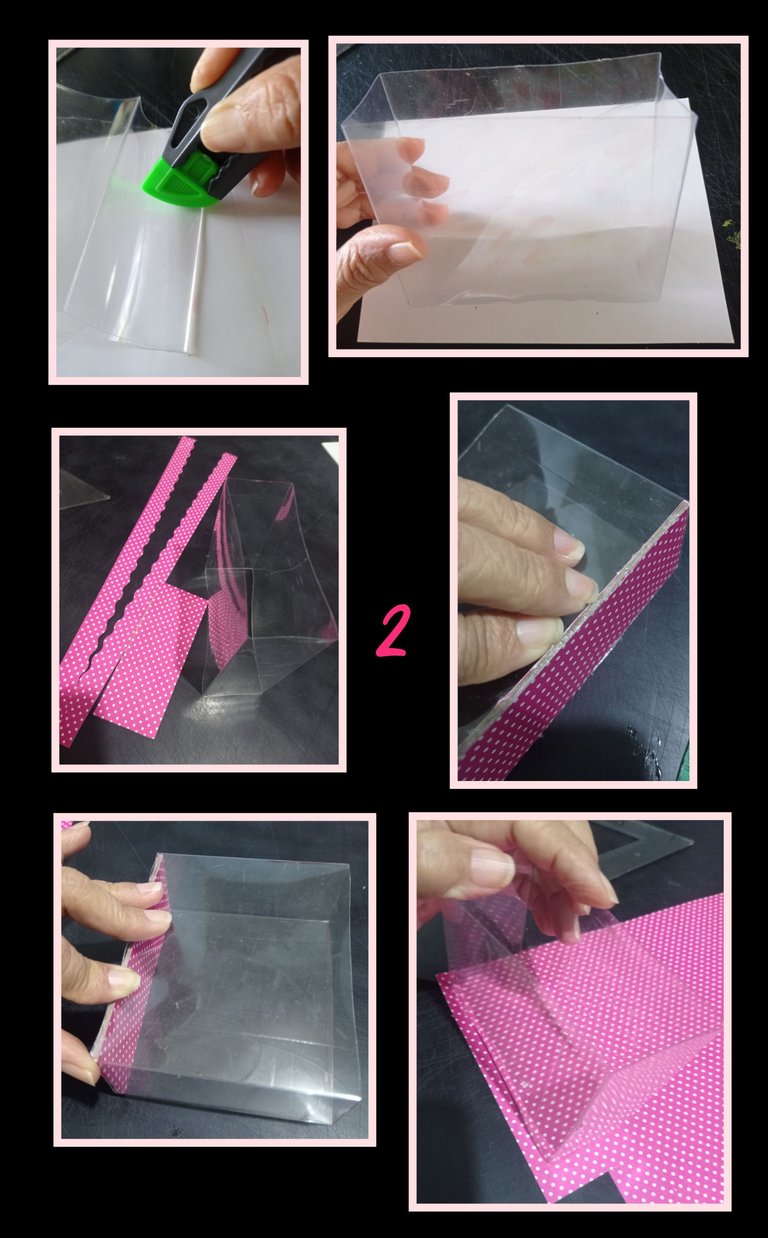
- Con el borde de la cuchilla o tijera haz los dobleces y arma el cuadro o rectángulo en forma de caja.
- En cartulina marca todo el contorno del rectángulo de acetato y recorta 2 piezas en cartulina y una de cartón para armar la base, aplica silicón y en el borde y pega por todo el contorno y deja secar.
- Ahora coloca nuevamente el rectángulo de acetato sobre la cartulina, marca el contorno y deja 1 cm de pestaña y recorta.
Paso 3:
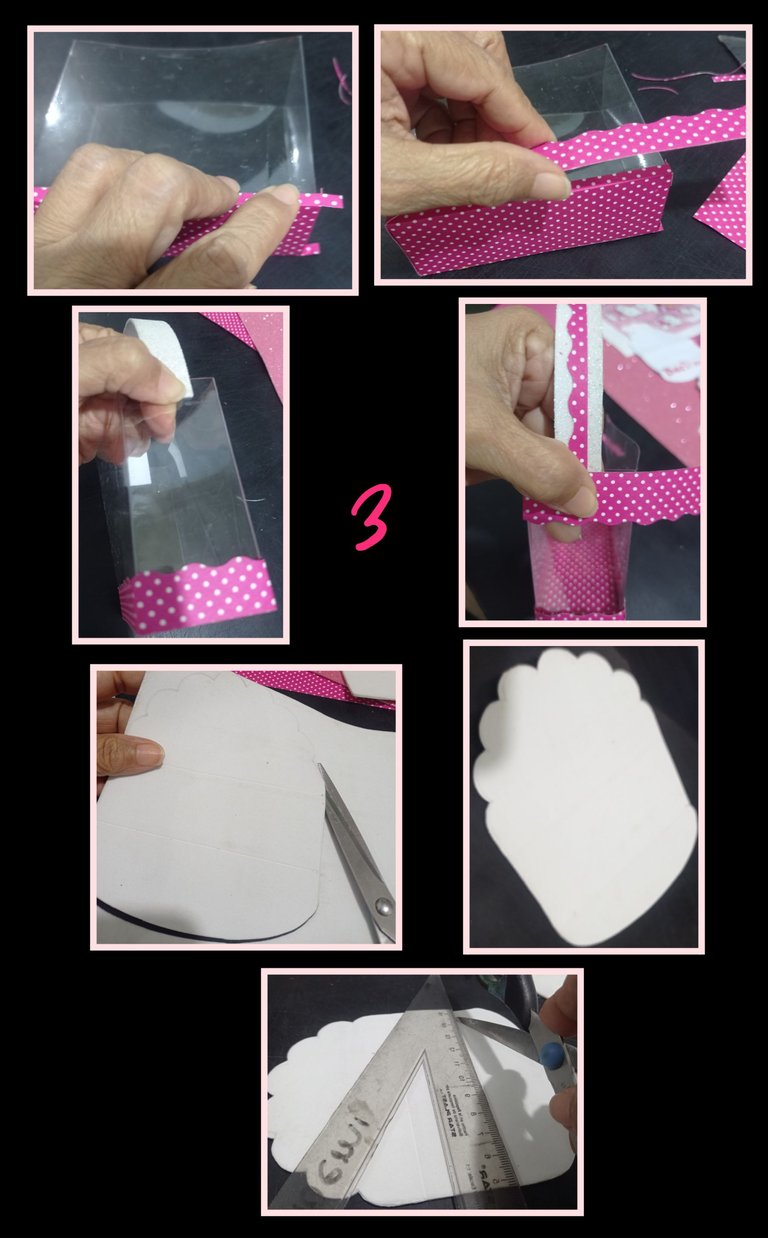
- Aplica silicón a la base y pega al acetato.
- Nuevamente aplica silicón y pega una tira de cartulina o foami en la base.
- Para el asa, recorta una tira de foami del largo y ancho que desees y pega a cada extremo en el lado angosto y decora con una tira de cartulina.
- Luego pega otra tira de cartulina y pega en la parte alta del rectángulo haciendo presión en la parte del asa hasta que seque bien el silicón.
- Ahora marca una solapa o tapa del ancho del rectángulo o caja de acetato sobre foami y recorta en forma de ondas y remarca con la tijera dos líneas del ancho de la caja de acetato
Paso 4:
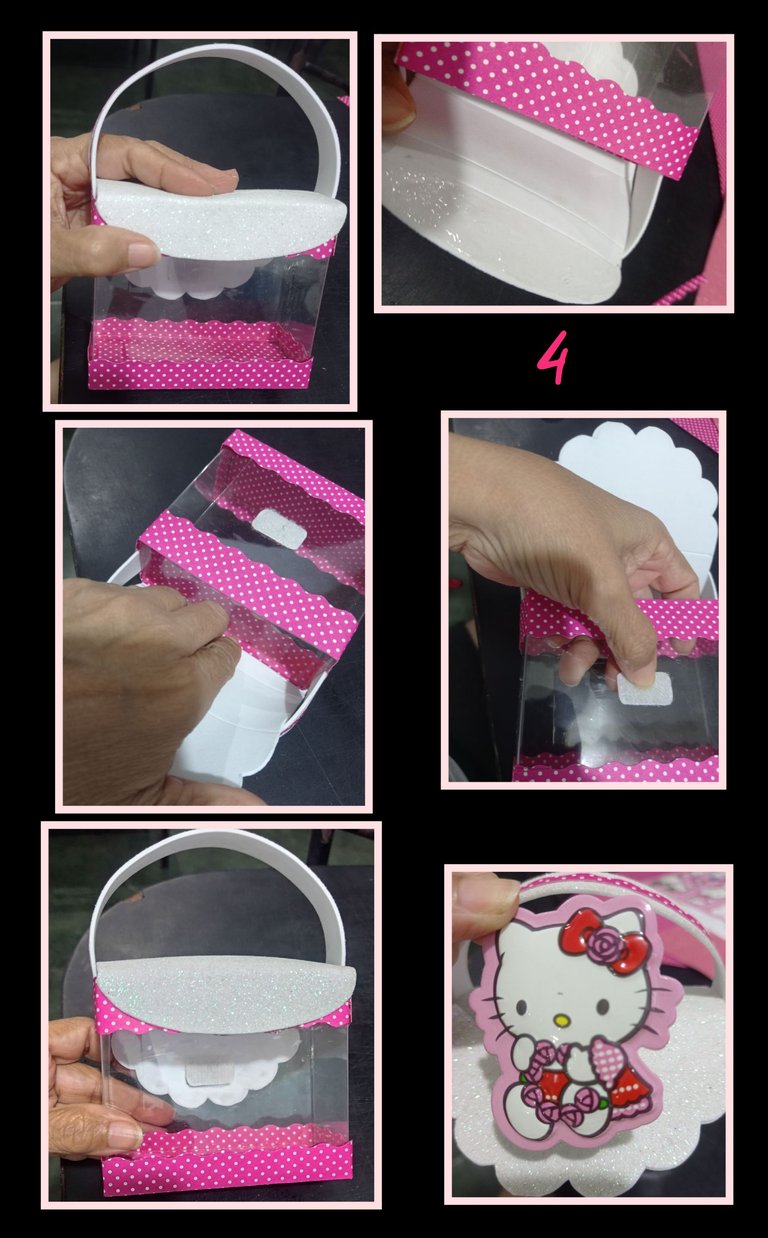
- Aplica silicón y pega en la parte trasera la solapa, luego acuesta y haz presión por la parte delantera, coloca un pedacito de cierre mágico en la parte central de la carterita, aplica silicón y pega, deja secar y luego pega el otro pedazo de cierre
en la solapa. - Ahora mide el aplique de la Hello Kitty en la parte delantera de la solapa.
Paso 5:
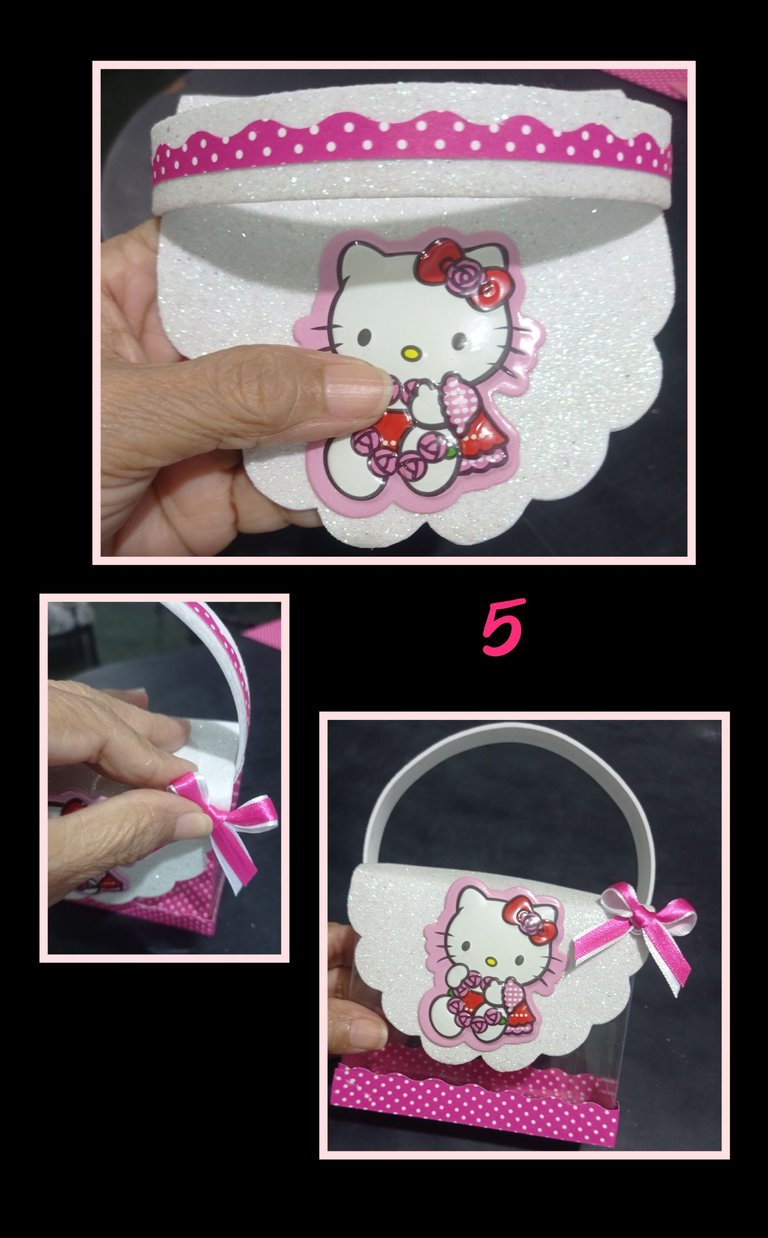
- Aplica silicón a la Kitty y pega a la solapa y por último, haz un lacito y pega a tu gusto.
Así quedó terminada esta linda Carterita.
Ahora te mostraré otras fotos del resultado de este tutorial.
Fuente:
https://ar.pinterest.com/pin/920915823804966652/
traductor: DeepL
Etiquetas: HTML
Teléfono: Redmi Note 9
Editor fotos: GridArt.
Espero sea de tu agrado mi publicación, deseo te sirva de guía si te animas a realizarlo.
Muchas gracias por leerme y apoyarme.
Hasta mi próximo tutorial.
English:
Good evening dear friends.
So I invite you to follow along with me and locate these materials:
| Plastic bottle | Blade and scissors |
|---|---|
| Tape measure or ruler | Magic clasp |
| Satin ribbon | Pencil |
| Frosted Foami | Appliqué |
| Silicone |
Step 1:
- Cut the bottle with a blade and remove the central part (smooth), then with a cotton swab soaked in oil and rub over the label sticker until it comes off completely.
- Now fold one side with the scissors several times and then fold the other side to form a rectangle as shown in the photo.
- Then with a marker, make a mark 4cm from each side and then gently pass the tip of the scissors marking a line and then fold.
Step 2:
- With the edge of the knife or scissors make the folds and assemble the box or rectangle in the shape of a box.
- Mark the outline of the acetate rectangle on cardboard and cut out 2 pieces of cardboard and one piece of cardboard to form the base, apply silicone to the edge and glue all around the outline and let dry.
- Now place the acetate rectangle back on the cardboard, mark the outline and leave a 1 cm flange and cut out.
Step 3:
- Apply silicone to the base and glue to the acetate.
- Again apply silicone and glue a strip of cardboard or foami to the base.
- For the handle, cut a strip of foami to the length and width of your choice and glue to each end on the narrow side and decorate with a strip of cardboard.
- Then glue another strip of cardboard and glue on the top of the rectangle, pressing on the handle part until the silicone dries well.
- Now mark a flap or lid of the width of the rectangle or acetate box on foami and cut in the shape of waves and mark with the scissors two lines of the width of the acetate box.
Step 4:
- Apply silicone and glue on the back of the flap, then lay down and press on the front, place a small piece of magic zipper in the center of the card case, apply silicone and glue, let it dry and then glue the other piece of zipper on the flap, then place a small piece of magic zipper in the center of the card case, apply silicone and glue, let it dry and then glue the other piece of zipper on the flap.
on the flap. - Now measure the Hello Kitty applique on the front of the flap.
Step 5:
- Apply silicone to the Kitty and glue to the flap and finally, make a bow and glue to your liking.
That's how this cute little box is finished.
Now I will show you other pictures of the result of this tutorial.
Source:
https://ar.pinterest.com/pin/920915823804966652/
translator: DeepL
Tags: HTML
Phone: Redmi Note 9
Photo editor: GridArt.
I hope you like my publication, I hope it will serve as a guide if you are encouraged to do it.
Thank you very much for reading and supporting me.
Until my next tutorial.
Wow que hermosa, me gustaría hacerla para recuerdo del cumple de mi sobrina gracias por compartir
Hola amiga, que bueno que te gustó y claro quedan muy bonitas, aprovecha esas botellas y hazlas, seguro te quedarán muy lindas.
Gracias a ti por comentar ....siempre y con gusto.
Bueno ese sería un desafío, esa parte del arte no va mucho conmigo jeje
Excelente forma de reciclar el plastico de una botella, con una bonita y practica cartera de Kitty, muy linda Kitty 😍 ella va a cuidar nuestras pertenencias que coloquemos alli jeje
Hola buhito, si claro amiga, se pueden hacer muchas cosas lindas.
Jajajaja, así es!
Gracias por tu comentario.
Bendiciones y feliz día.
Gracias por el apoyo.
¡Felicidades! Esta publicación obtuvo upvote y fue compartido por @la-colmena, un proyecto de Curación Manual para la comunidad hispana de Hive que cuenta con el respaldo de @curie.
Si te gusta el trabajo que hacemos, te invitamos a darle tu voto a este comentario y a votar como testigo por La Colmena.
Si quieres saber más sobre nuestro proyecto, te invitamos a acompañarnos en nuestro servidor de Discord.
Muchas gracias @la-colmena por el apoyo prestado a mi publicación.
Que buena forma de reciclar las botellas plásticas 😱😍 quedó muy muy bonito 🥰
Buen día amiga, sí de verdad que es una idea genial.
Que bueno que te gustó.
Are you sure that I will not order for this bag for my little niece
Sería un regalito muy lindo para ella.
Saludos y gracias por comentar.