Diy crafting - making a face cap from coloured paper
Greetings to the admirable members of this community, it's been a wonderful week and I hope you all are doing well. Fridays are always my free days and one of the enjoyable activity I love doing on Fridays are crafting and transforming the ordinary into the extraordinary. Creativity often hides in plain sight, tucked between sheets of paper, waiting for hands and imagination to bring it to life and what my hands were able to bring to reality today is a face cap crafted entirely from Coloured paper and I will be showing you guys how I made it, Stay tuned.
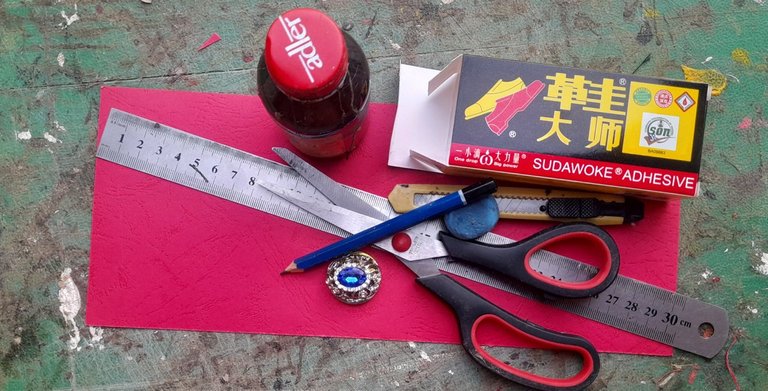
materials
• Red embossed paper
• Pencil
• Eraser
• Scissors
• Paper cutter
• Adhesive
• Evostik gum
• Ruler
• Spoiled ring
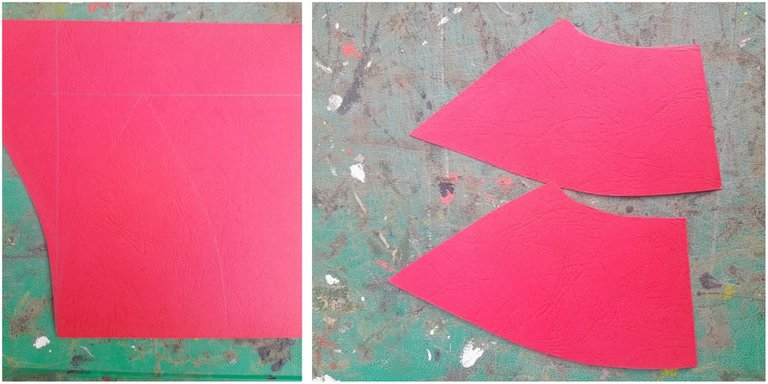
step 1
I began by measuring and cutting the side panel. I measure the height to be 16 cm and the width to be 9 cm. I drew the pattern using this measurement and then cut it out using scissors. I also made a duplicate because the side panels are two.
step 2
Here I measure and cut the back panel. The height of the back panel is also 16 cm but the width is measured 11 cm. I then drew a similar pattern to the one in Step 1. I cut it out with scissors, and I also cut a part at the back panel where the back strap will be fixed.
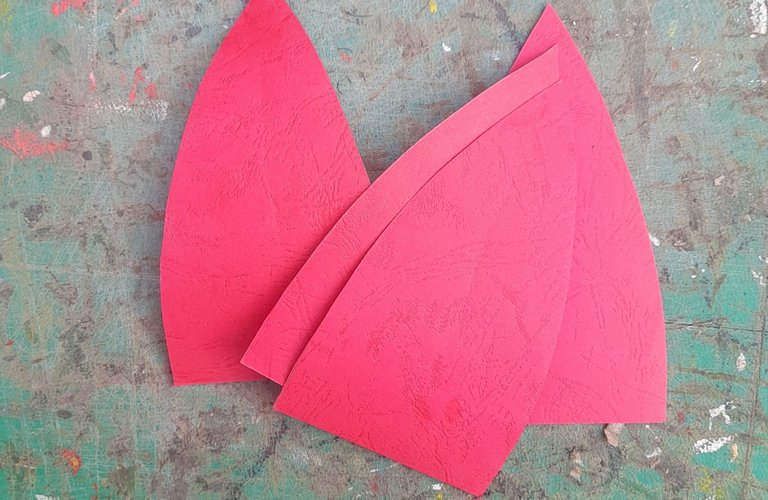
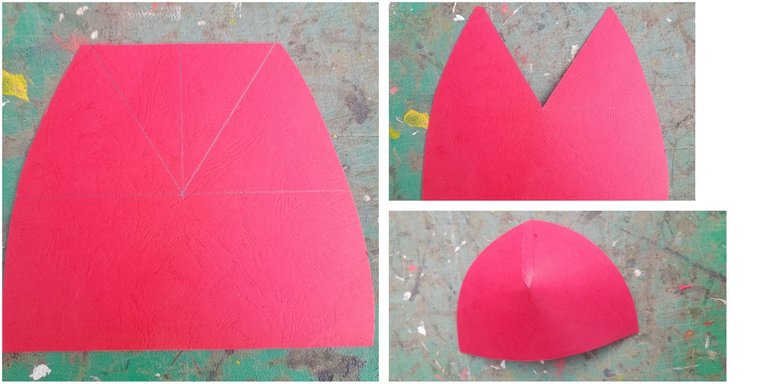
step 3
At this step, I measure and cut the front panel. The front panel measures 16 cm high and 19 cm wide. I then cut a v shape 8 cm long from the top of the front panel after which I joined the two edges together using Evostic gum. I cut a 0.5-inch wide paper to cover the edge.
step 4
I joined the side panels and the back panel together using adhesive and Evostic gum. I cut a paper of 0.5 inches wide paper and used it to cover the points where the panels meet. I also gum the back strap.
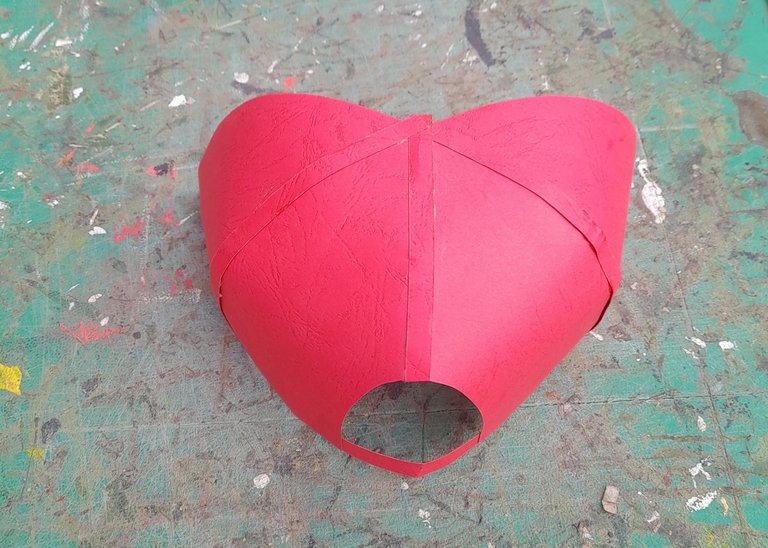
step 5
I joined the front panel with the other panels to form the cap. I also cover the edges with a 0.5-inch wide paper.

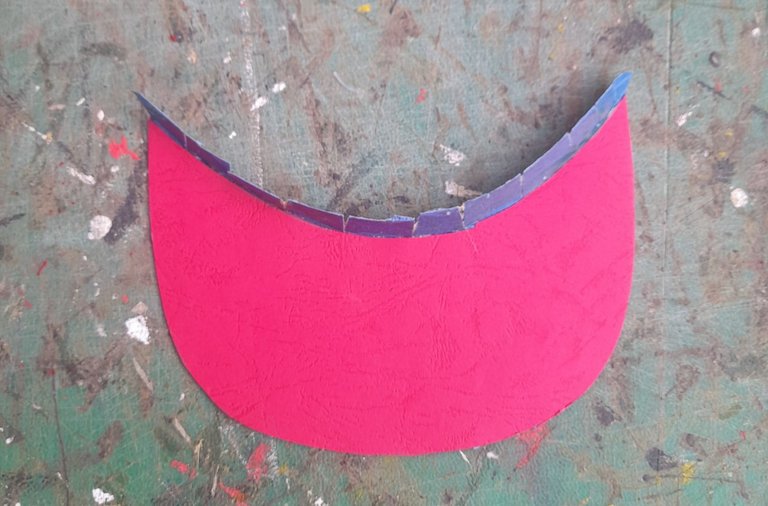
step 6
Then I constructed the bill of the cap. I put the cap on a piece of paper, drew and cut the bill. I doubled the paper with blue embossed paper through the inside to make it thick (strong) and then made some cuts to at the other end.
step 7
After doing that, I applied gum at the cut edge and then gummed the bill with the cap.
step 8
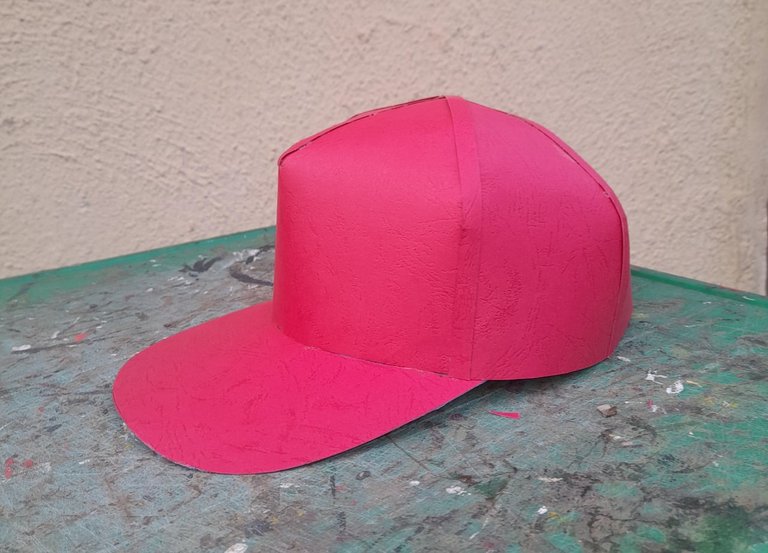
I drew a small circle on a piece of paper, cut it out and gummed it on top of the cap to serve as the top button. I also gummed a 0.5-inch paper around the edge of the cap and finally, I gummed the head of a spoiled ring on the front panel to add beauty.
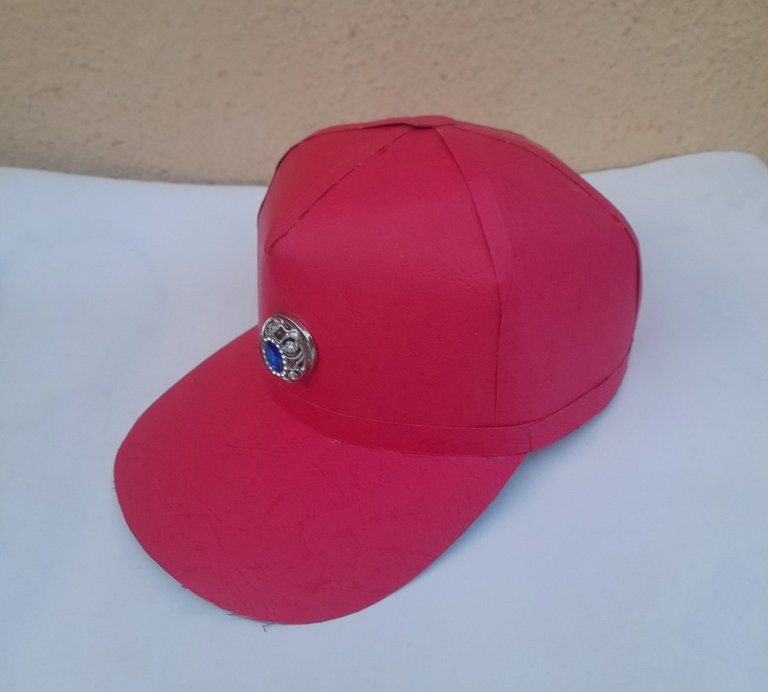
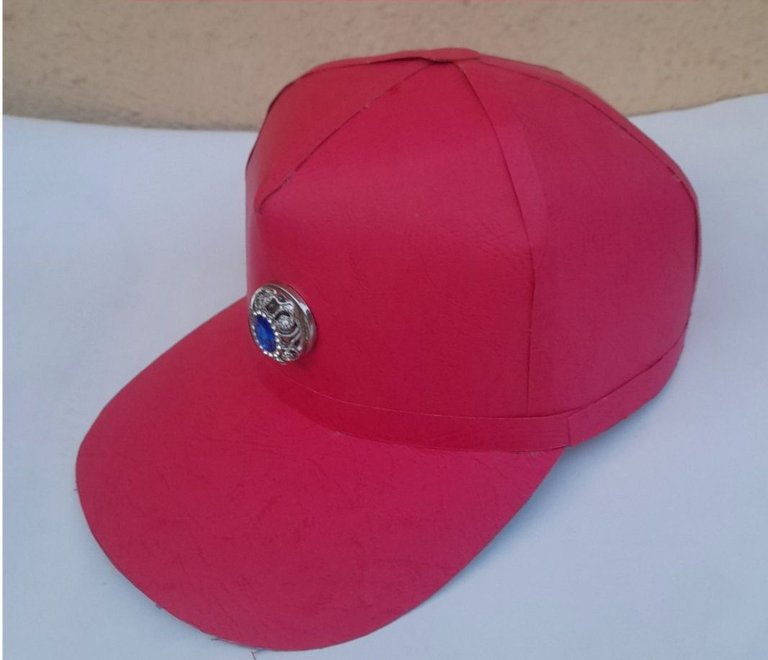
Finally my face cap is now complete and my final result is below
In the end, what I was left with is more than just a paper hat. It’s a symbol of imagination, proof that with a bit of effort and inspiration, ordinary things can be transformed into extraordinary creations. The coloured paper cap stands tall—not just as a DIY craft, but as a celebration of the handmade spirit. Hope you all enjoyed reading through my post and have a nice weekend.
Wow really looking like a cap from scratch
You did well
Thank you
Welcome 🤗🤗
Wow! At a glance, i thought it's a real cap made from fabric, you have done a great job here, keep it up.
Thank you
It's hard to believe that this cap is made of colored paper. It looks pretty cool. It shows your creativity. Great job! Keep it up!
selected by @rezoanulvibes
Thanks for the lovely comment, I really appreciate
Kai I was wondering on my to make a face cap before, thank you for sharing this illustration and I tell you this is super amazing.
You have created a hat with great feeling using the amazing Red embossed paper and inspired by the beautiful design. Above all, this extraordinary skill has turned the art into a unique beauty. Thank you very much for presenting each step in a smooth manner.