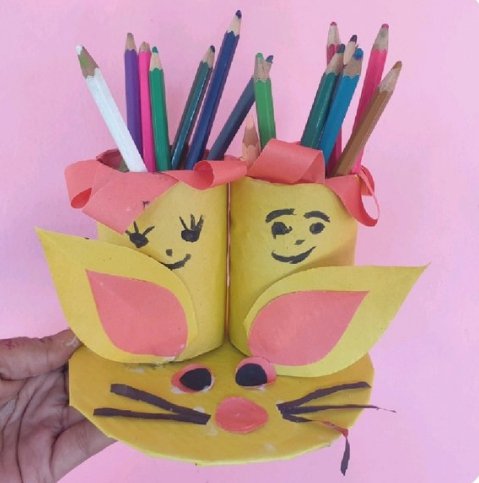
Creative Sunday : Diy bunny themed pencil holder
A happy Sunday to everyone and it's an honour being here with you all once again, I hope you all are having a great day today and doing just well and fine. Crafting is a beautiful way to express creativity, recycle material and create something functional and fun and Sundays are the perfect day for it. This Sunday, I decided to create something useful and vibrant—a pencil holder made entirely with colored paper. It turned out to be a fun-filled, imaginative, and satisfying experience that combined the joy of creating with the usefulness of organizing my study space. Without further ado, join me as I create this pen holder.
materials
• Pencil.
• Scissors.
• Compass.
• Cardboard.
• Paper glue.
• Black marker.
• 2 plastic bottles.
• Red colour paper.
• Black colour paper.
• Yellow colour paper .
making process
step 1
At the beginning, i took a cardboard and place a pencil and compass on the cardboard and draw a big circle. Cut the circle with scissors along the circle line drawn on the cardboard.
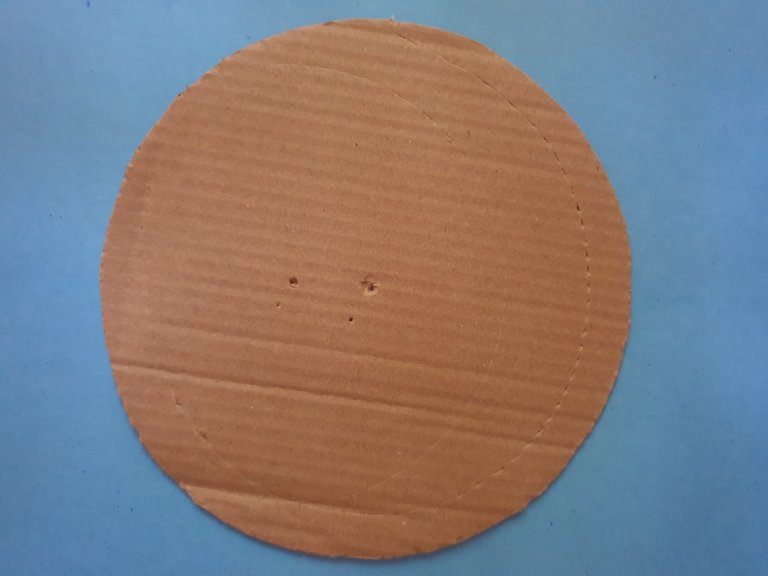
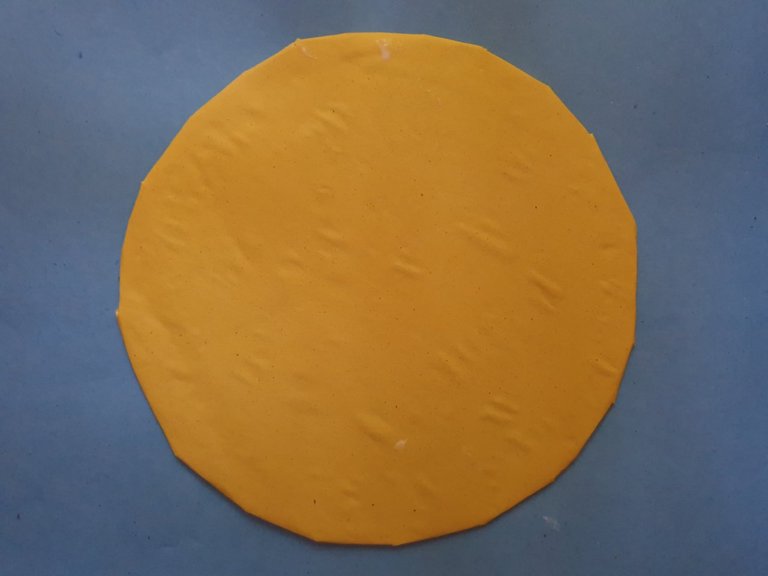
step 2
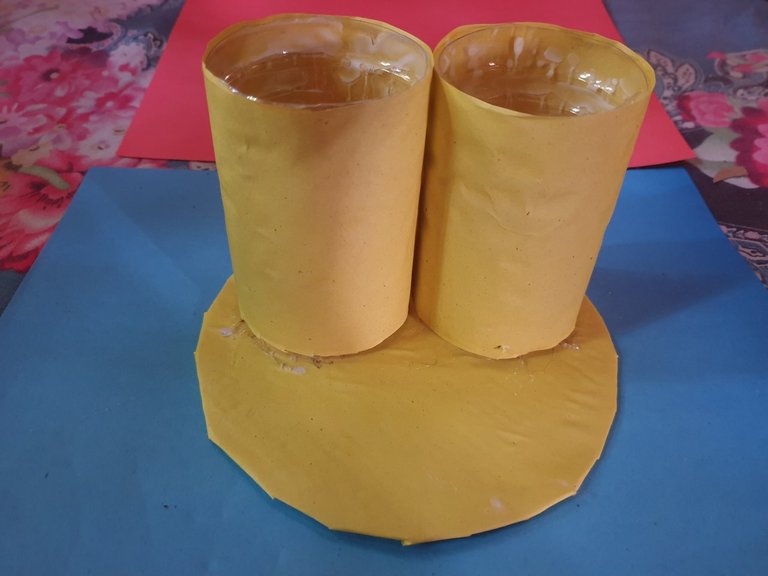
Then I applied paper glue on the round cardboard and then I attach my yellow coloured paper on the surface of it.
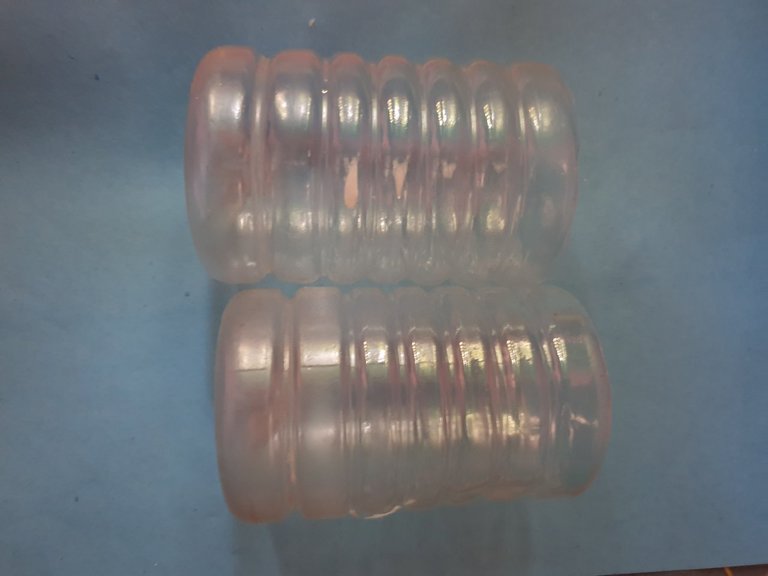
step 3
Now I then took two bottles of the same size and cut the middle of the bottle which will be used to make the pen holder.
step 4
Then I took two more pieces of yellow paper and attach the two yellow papers around the two bottles with the help of paper glue.

step 5
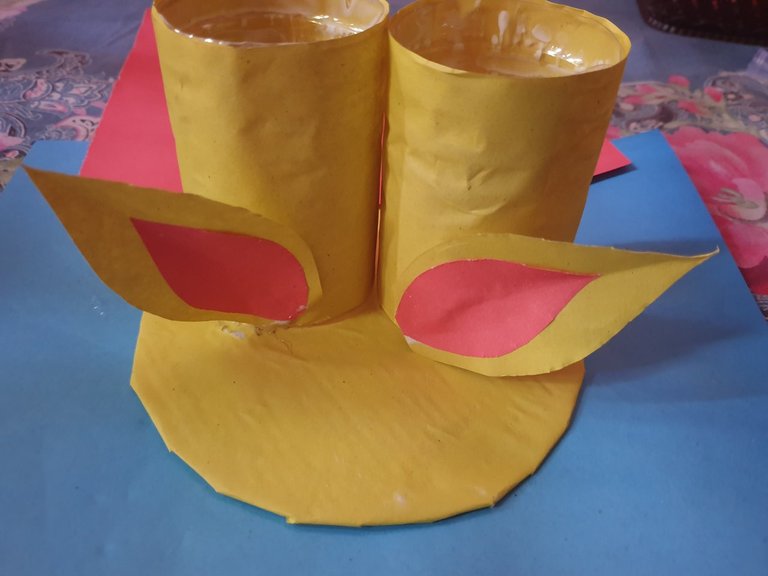
Then I then attach the two bottles wrapped in yellow paper on top the circular yellow cardboard with the help of my paper glue.
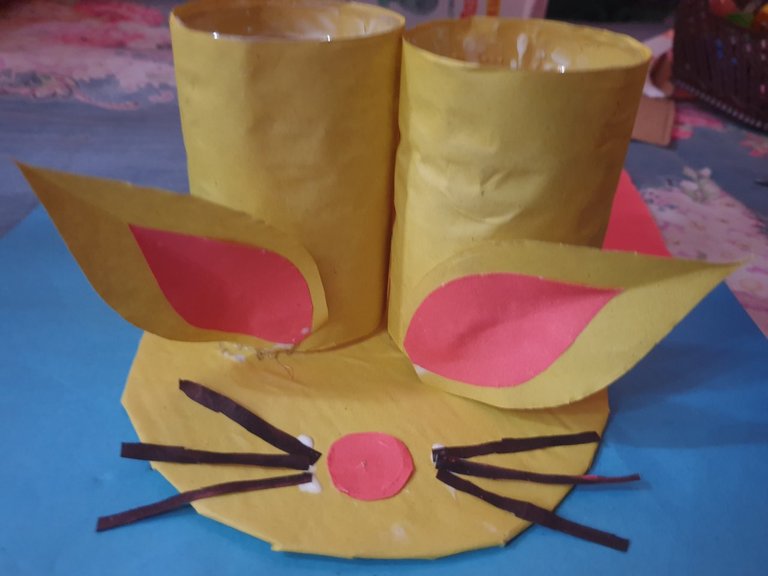
step 6
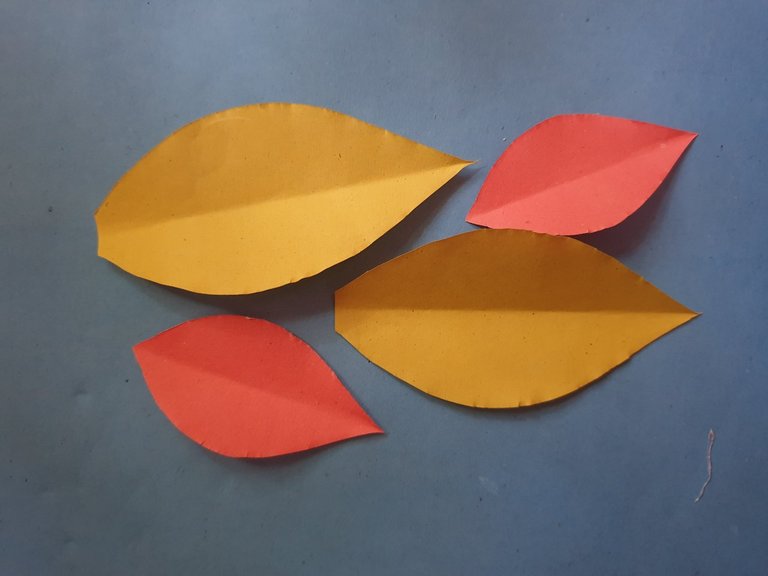
After that, I took two pieces of red and yellow paper and cut the paper with two scissors to make a total of four small and big ears which will be attached to the two sides of the pen holder.
step 7
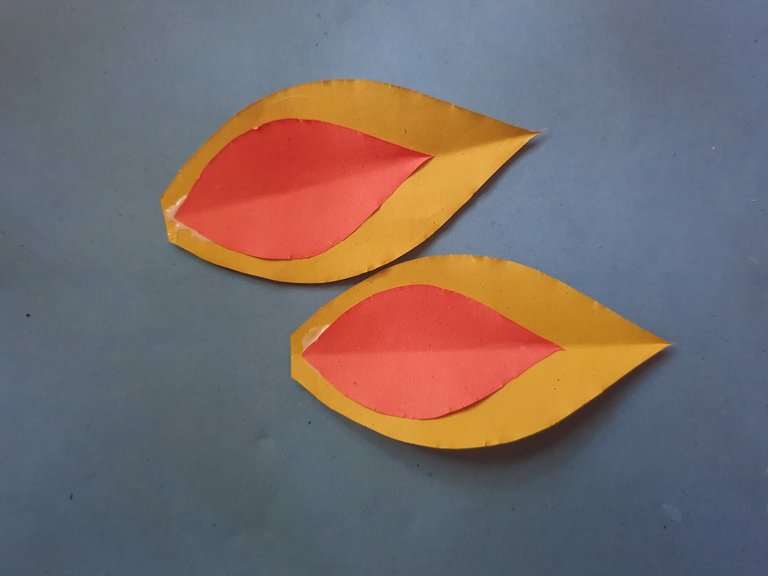
Then I Attach the small red ears to the big yellow ears made in step 6 with paper glue, Then i attach the two large ears made to the bottle on both sides of the pen holder.
step 8
Then I now took a piece of black paper and cut it into pieces with scissors and cut each piece into a lengthwise shape.
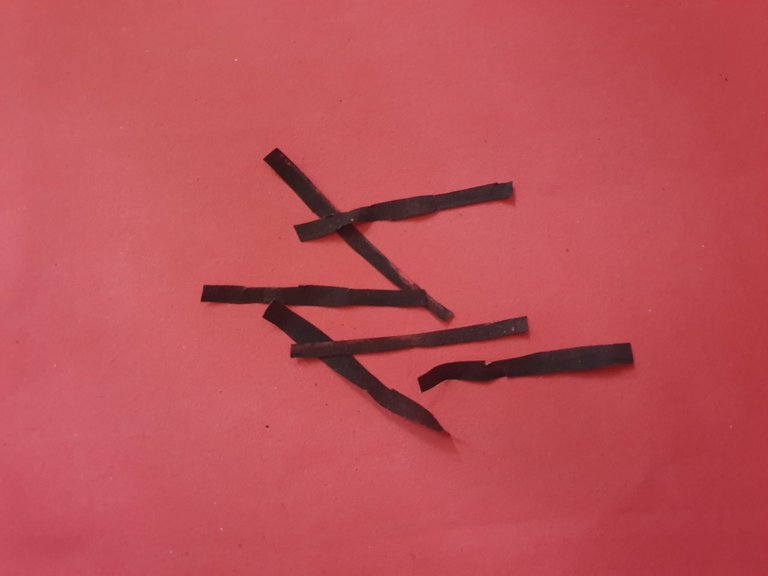
step 9
Here I attach the long pieces of black paper to the two sides of the front of the pen and attach another circular piece of red paper in the middle
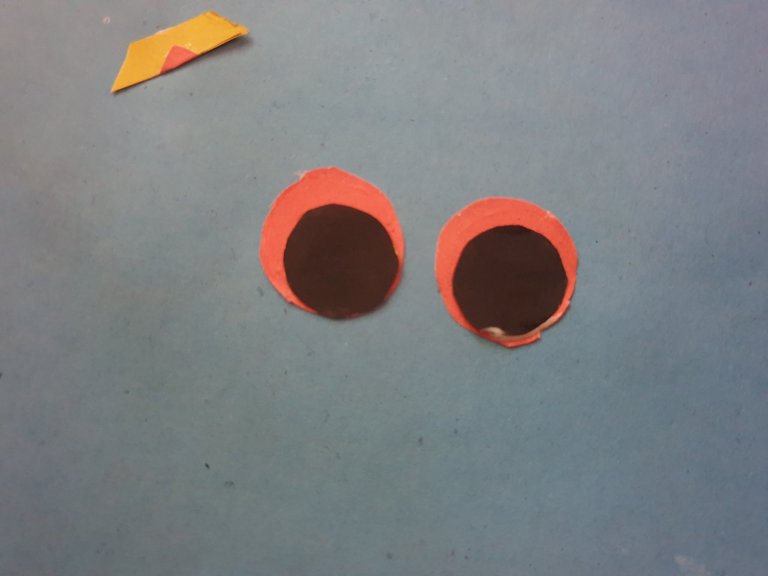
step 10
Now I have taken a piece of red paper and divide it into two circular pieces and similarly take a piece of black paper and divide it into two circles and attach the black piece of paper to the red paper with paper glue to make the eyes.
step 11
Finally, in this step, I connected the two eyes of the pen holder made in the front part of the pen holder and draw the eyes, mouth, and nose of the pen holder with a black ink marker on both sides of the two bottles.
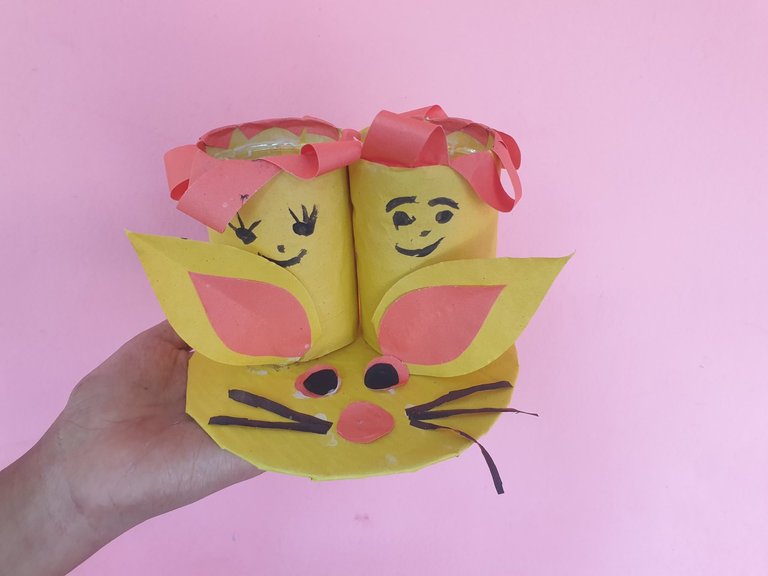
Then I finally finished making this wonderful pen holder and here's my final result.
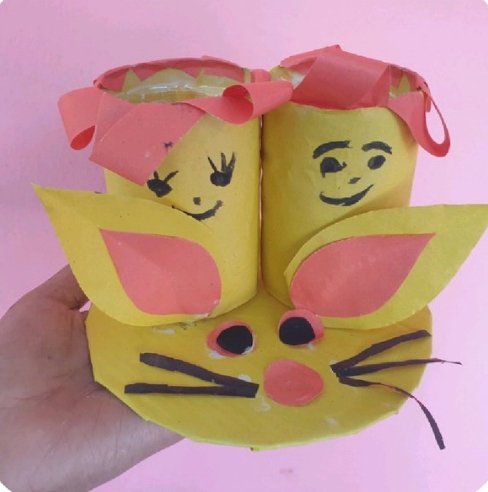
In conclusion, making a pencil holder with colored paper was a perfect Sunday activity. It was creative, relaxing, and rewarding. Such small crafts encourage us to think out of the box, care for the environment, and appreciate the little things. This pencil holder now sits proudly on my desk, reminding me of a joyful Sunday and the magic of making something with my own hands. I hope you all like my craft today and thanks for your time, happy Sunday to you all.
WOW! What you did, that's impressive. It looks amazing. Good to see how you made this. Keep up the good work!
selected by @rezoanulvibes
Thanks, am glad you liked it