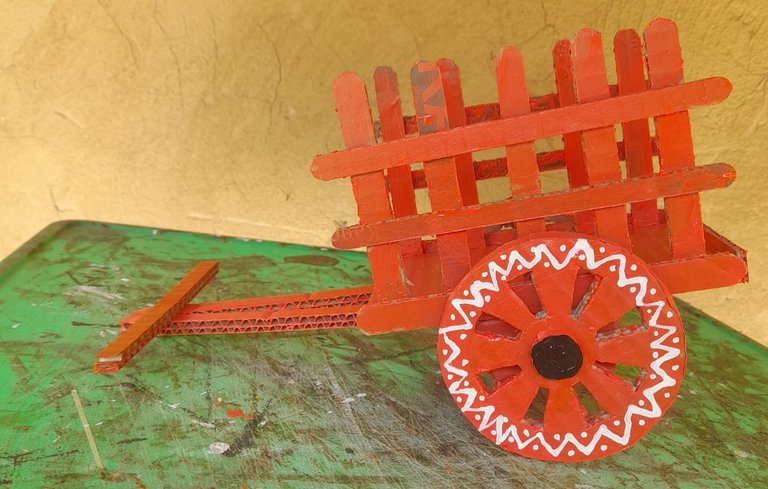
Bullock cart made from cardboard
Greetings and I welcome you all to my blog. Creativity is a divine and wonderful gift and being able to craft amazing things from simple materials allows me to express myself in unique and meaningful ways. When my church announced a talent hunt competition I saw it as an opportunity to showcase my artistic skills while celebrating tradition and craftsmanship. After much thought on what to do,I decided to create a miniature bullock cart out of cardboard and simple materials, Here's how I made it.

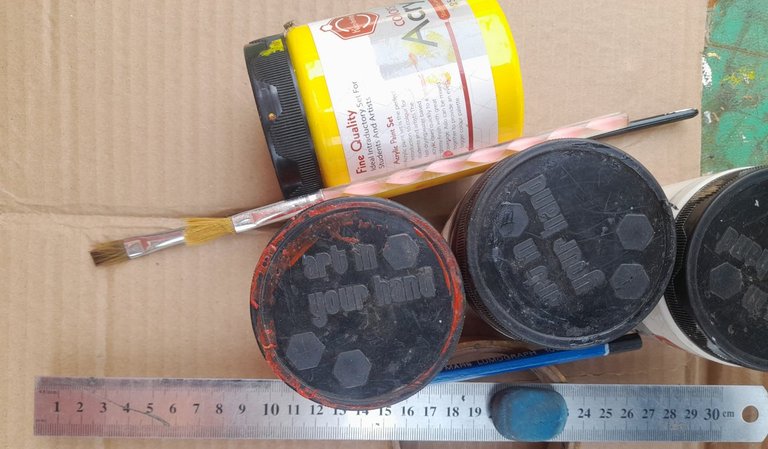
MATERIALS NEEDED
• waste carton
• Scissors
• Paper cutter
• Acrylic colours
• Brushes
• Pencil
• Eraser
• Ruler
• Sharpener
• Masking tape
• Evostik gum
• Compass
step I
I began by constructing the wheel of the cart. I used a compass to construct three circles and all of them had the same centre. One of the circle is very small and the other two are big. I then designed how the wheel would look on the circle.
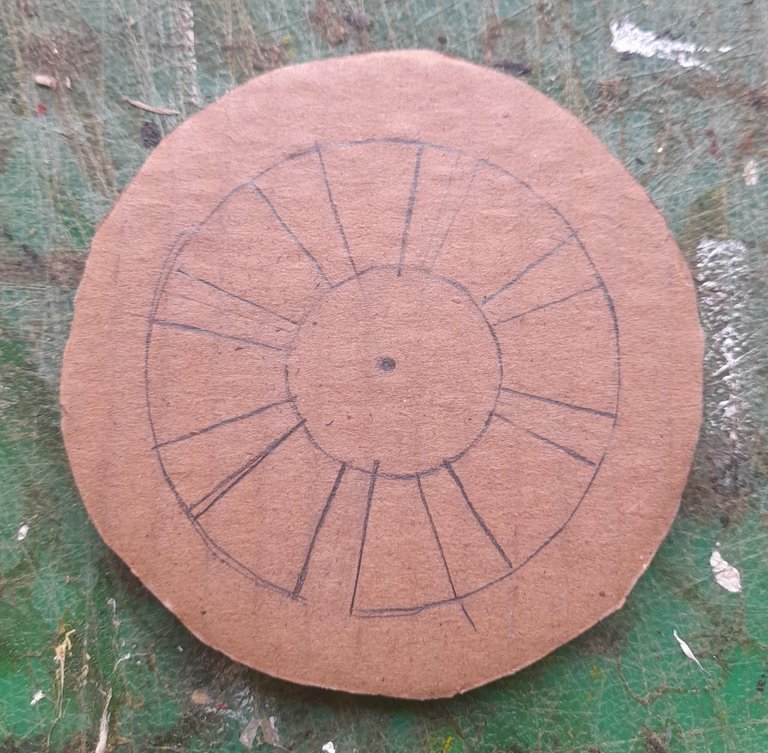
step 2
Then using my paper cutter I cut out the tyre design which I drew to make it look like an actual tyres.

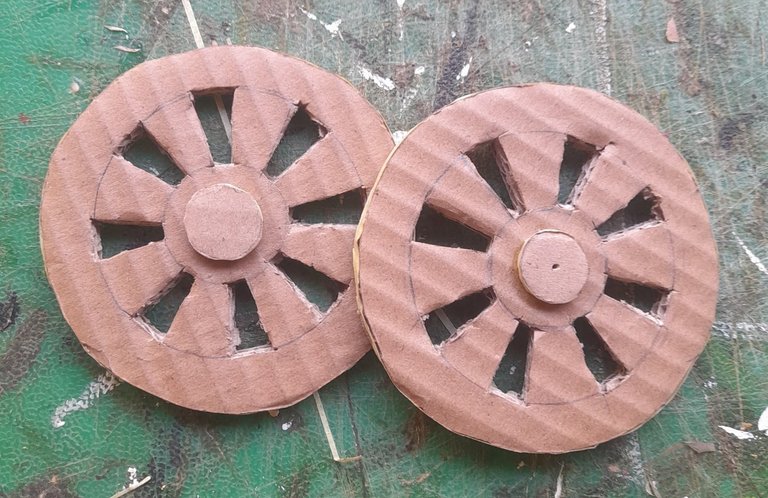
step 3
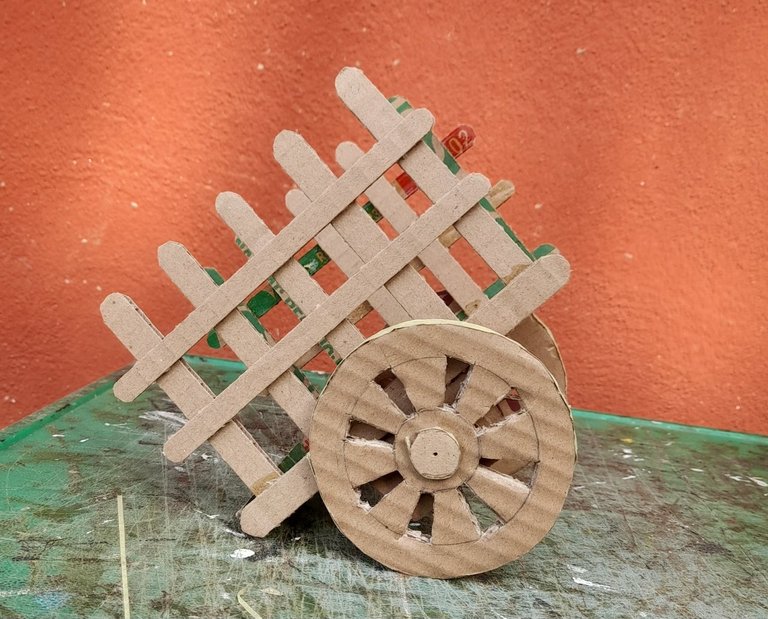
After doing that, I drew a small circle on my cardboard and cut it off using my Scissor, then I attach it to the center of the wheel to complete the wheel construction.
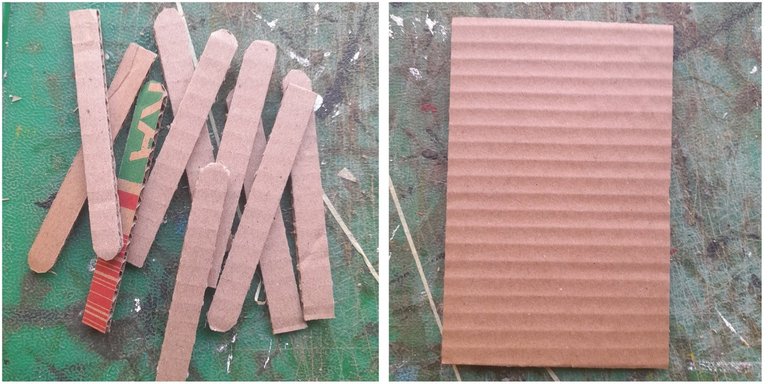
step 4
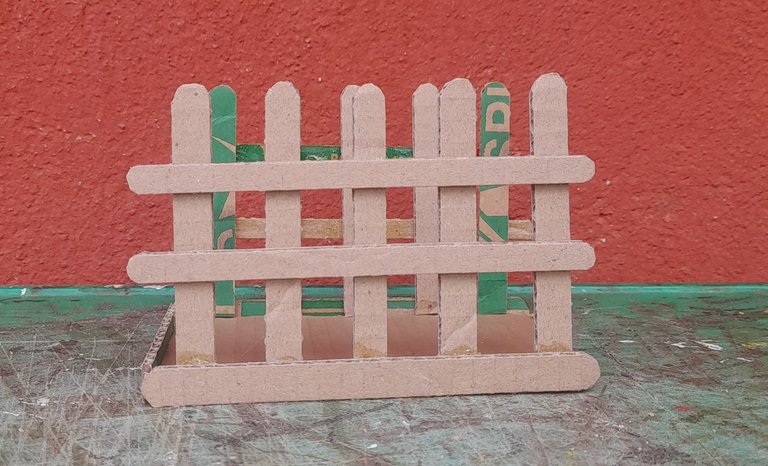
The next thing I constructed was the cockpit. I measure the base of the cock pit to be 16cm by 11cm. I also cut some cardboard to be 1.5cm wide to form the pillars and bars of the cockpit
step 5
In this step, I then gummed all the measurements done in step 4 to form the cockpit.
step 6
Here I cut two cartons in the form of a trapezium, made a hole and glued it under the cockpit to help hold the axle. I cut an iron to form the axle and I made it pass through the trapezium shape under the cockpit. Finally, I gummed the wheel at both sides of the axle.
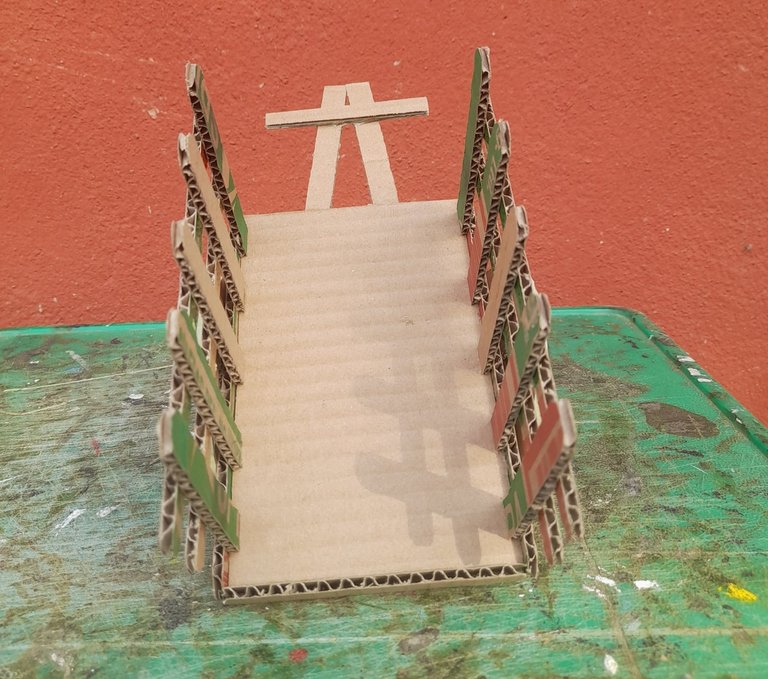
step 7
Next I made the draft pole and the yoke by the measurements of 18 cm long and 1.5 cm wide for the draft pole, then for the yoke I measured 14 cm long and 1.5 cm wide. Then I gummed the draft pole under the cockpit and crossed by the yoke at the other end.
step 8
Here, I coloured the cart using an acrylic colour. I mixed red, yellow and white acrylic colours, and the result is used to colour the cart as shown below.
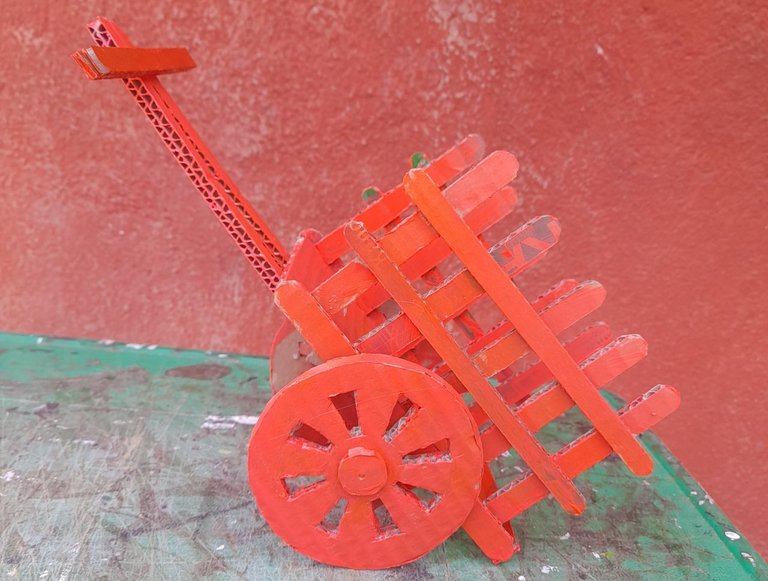
step 9
Here I designed the wheel of the cart using my white acrylic colour paint as shown below.
step 10
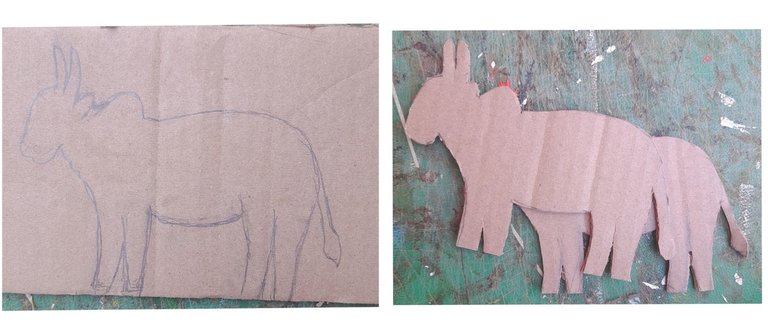
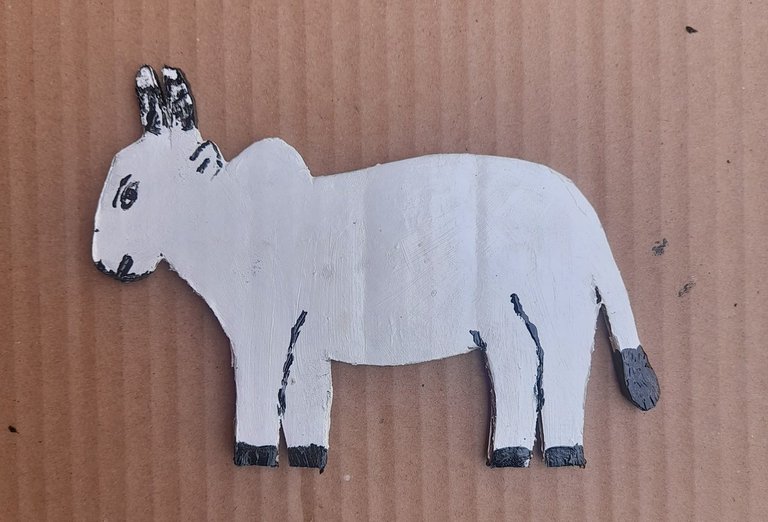
Next I drew two shape of cows on my cardboard and then used my Scissor to carefully cut it off, Then I coloured it's body with white acrylic colour and shaded it's mouth, nostril, horn, tail, and hooves to be black.
step 11
I mount the cart on the two bullocks. The yoke rested on their back and I gummed it with evostic gum. I also drew the bullock nose rope using yellow colour, and I coloured the horns of the cows to be red. Finally, I gummed beads on the pillars of the cockpit and gummed a rectangular carton under the Bullock Card to make it firm.
Then my craft was finally complete and here's my final result
Partaking in my church's talent hunt competition with this handcrafted bullock cart was a fulfilling experience that allowed me the opportunity to showcase my artistic skills while paying homage to rural heritage and faith driven perseverance. I hope you like my craft and thank you for your time.
Art is life and being able to express oneself in diverse way is amazing. Great work and thanks for sharing.
Hola @eberechi01 es un hermoso trabajo con materiales de reciclaje
How great, it's a very beautiful job, I hope you do very well in the church contest, it's a beautiful creation 😊
Thanks ☺️
awesome work, you have done a great job👍
Thanks
You're welcome, friends. Happy Friday.