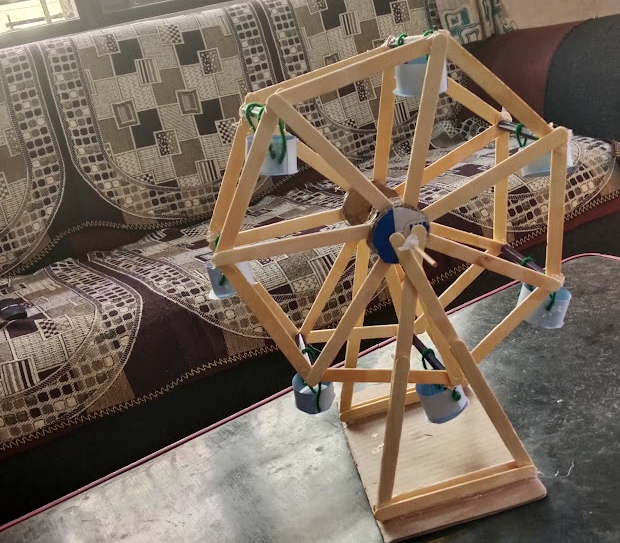
Building a Ferris wheel using ice cream sticks : a creative Diy project
Greetings to you all and my fellow creative friends of this community, hope you had a great weekend and I welcome you all to my blog.Today am so excited to share a craft which I have been working on for weeks now but today I finally completed it. I wanted to try something different and unique with some sticks which I have been gathering but I couldn't finish it on time because I didn't have enough ice cream sticks to complete it so I waited for some time to gather the necessary material, but today I present to you a Ferris wheel made from ice cream sticks and it's making process below stay tuned.....
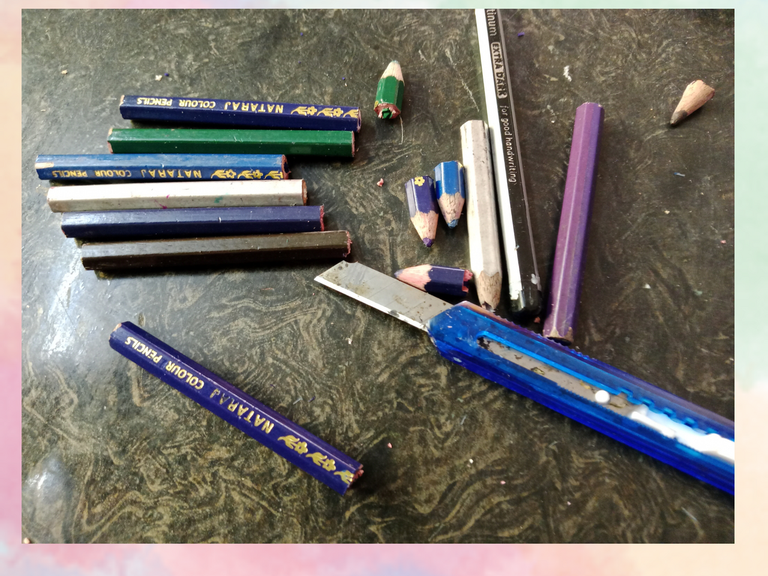
MATERIALS
• Icecream sticks
• Glue gun
• Waste Pencils
• Scale
• Scissors
• Knife/Cutter
• Chart paper
• Thread
• Waste card board sheet

step I
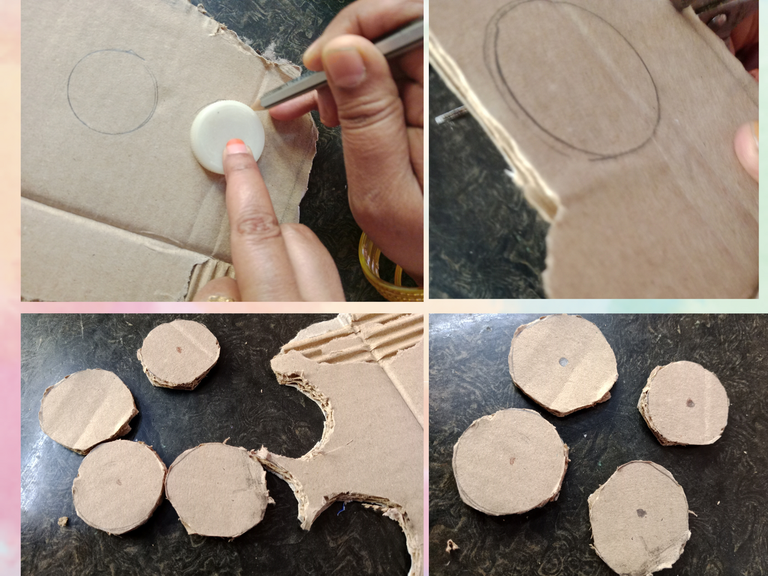
First , I cut my cardboard sheet into four circle of one and half inches in diameter.
step 2
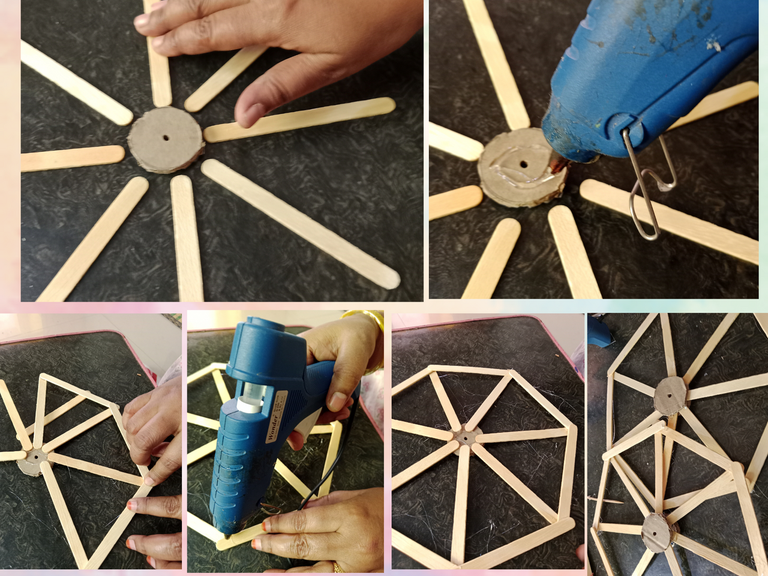
Then I took eight ice cream sticks and place them on a round cardboard which we jut cut it, forming a circle with the radius of the circle and glue them together with glue gum
step 3
Then I connected the edges with another stick and stick each popsicle stick to its edge, thus connecting them together so that it looks like a cart wheel. An the stick another round card board on its center

step 4
After doing that, with that same manner make two wheels
step 5
Then I took my waste pencil which I have gathered and cut them into equal length of two inches, make seven pencils in this way.
step 6
Then I took the waste pencil which I have cut and stick them to the edge's of the stick in vertical position, so that the wheel can connect to the other wheel , at the same time these pencil will be holding the bucket of the wheel.

step 7
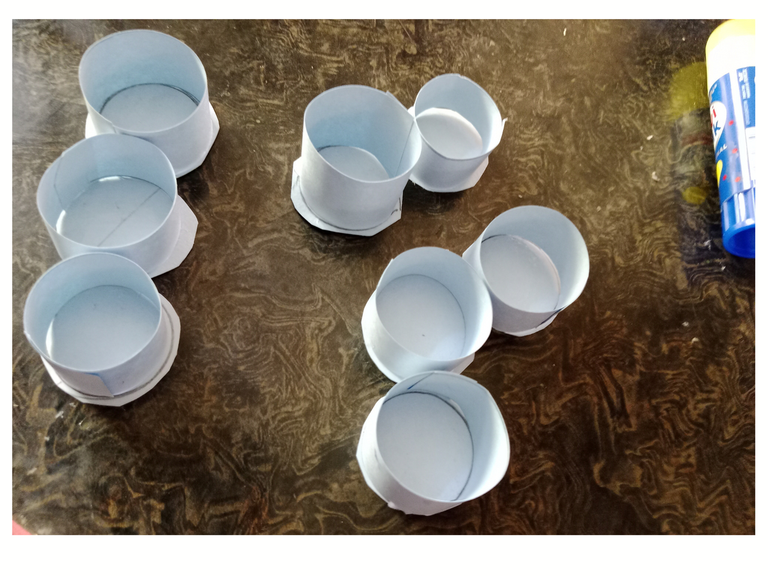
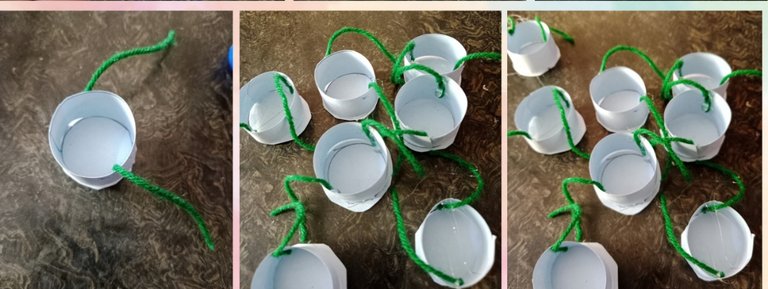
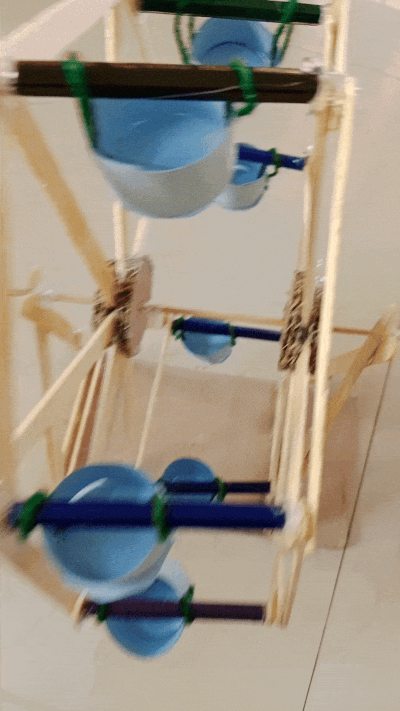
Now i need to make a bucket to sit on the giant wheel. For that, take chart paper and cut 7 rectangles of size 0.75x3.5 in one go. Roll it into a circle and stick it like a ring. Then stick the chart made of a circle to cover its bottom part
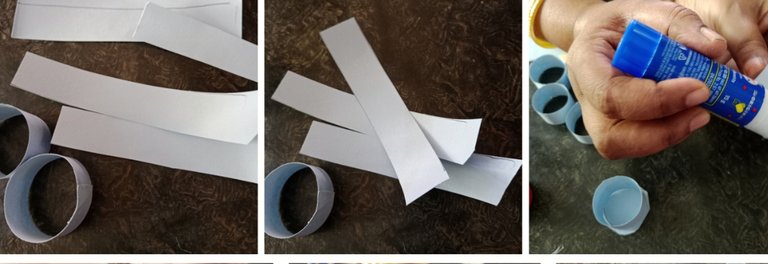
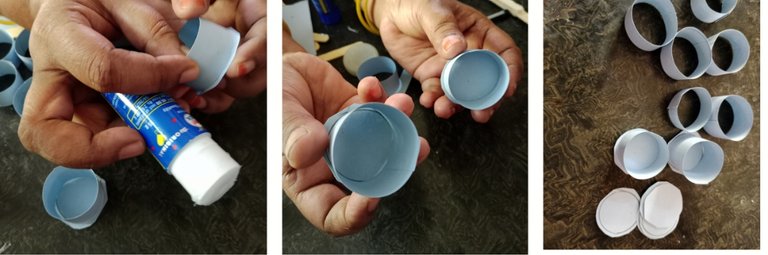
step 8
Now cover the bottom of the bucket with chart paper and then I took the thread to hang these budgets and cut 14 pieces of two inches wide and stick them on both sides of these buckets.
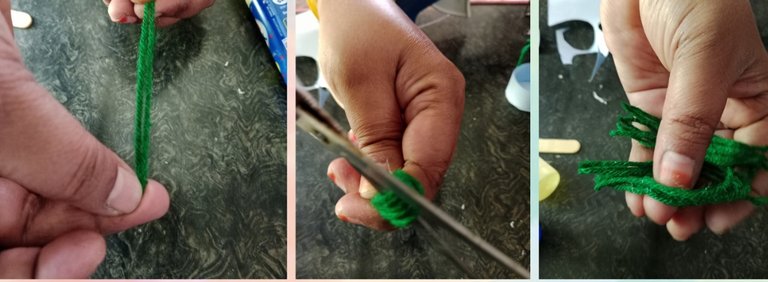
step 9
After gluing the thread, I then set them aside to dry for a while.
step 10
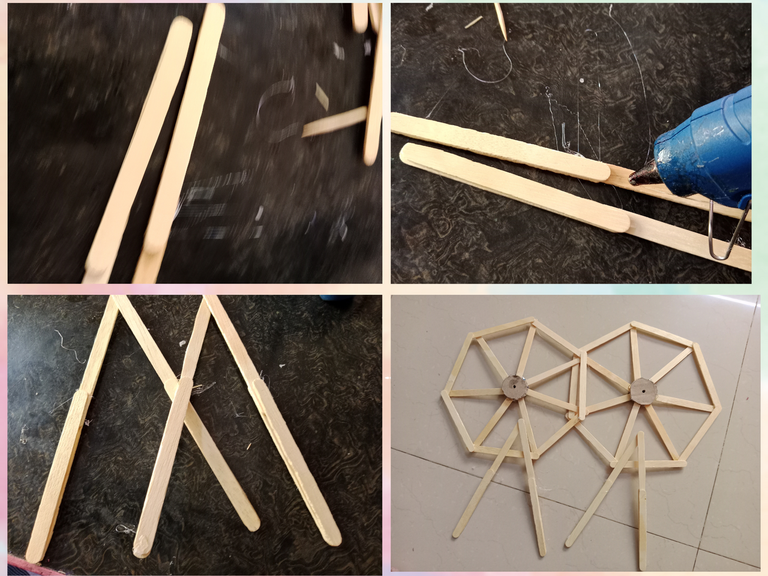
After doing that, I took a 4 x 8 rectangular piece of cardboard and attach the seven shaped pole on both side of the cardboard vertically.
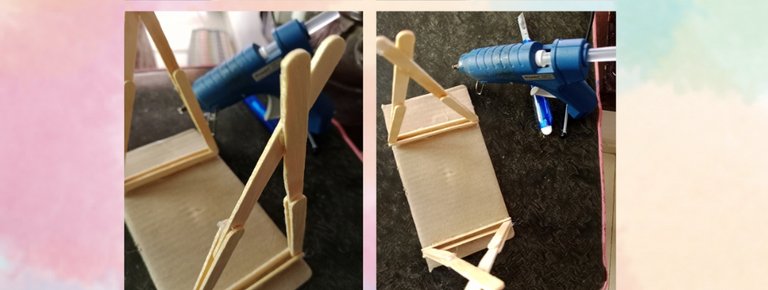
step 11
Now I took the statue that I have already made and insert a stick in the middle of it and place the two ends of the stick in the middle of the two poles. I Place it there and spin the wheel to see.
step 12
After doing that I then took the bucket which I have already made and stack them in the pencil and allow them to hang.
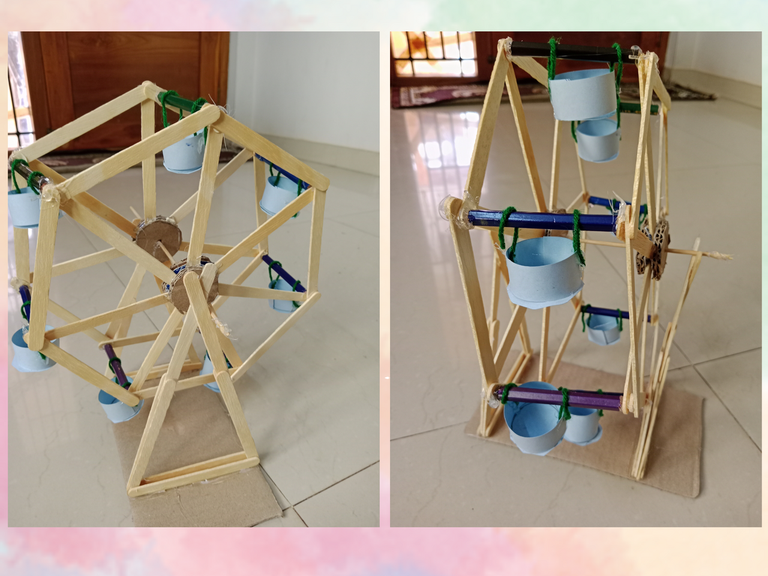
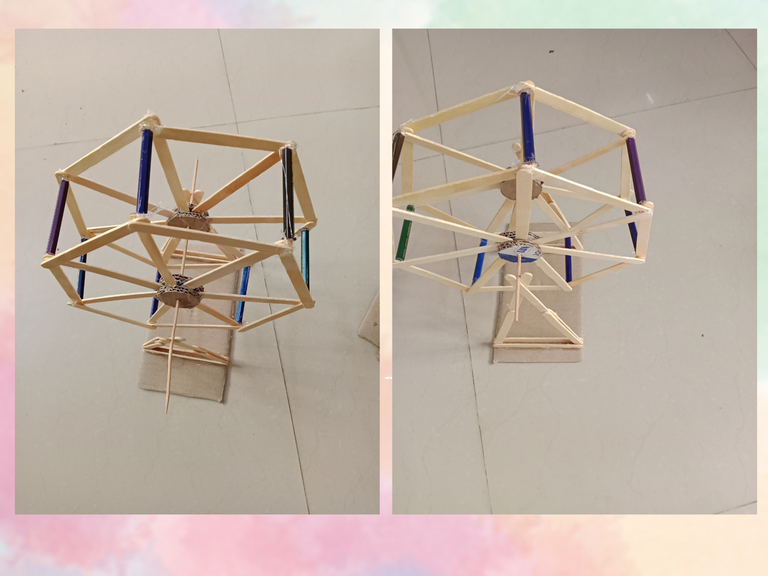
step 13
Then I spin my wheel craft and it was finally done here's my final result.
This DIY project is not just a fun activity but also an educational experience. It introduces basic engineering concepts such as balance, rotational movement, and structural integrity. Moreover, it fosters creativity, patience, and problem-solving skills. I hope you all liked my post and feel free to drop your thoughts in the comments section.
!discovery 30
This post was shared and voted inside the discord by the curators team of discovery-it
Join our Community and follow our Curation Trail
Discovery-it is also a Witness, vote for us here
Delegate to us for passive income. Check our 80% fee-back Program
Wuuuaaaaooo, eso quedó espectacular 👌
Very nice 👍
Thanks
Welcome🎉
It turned out really beautiful; it’s definitely a very creative project. It’s even nice that the wheel can spin, a clear sign that your work was a total success. It could use a bit more color and sparkle to bring more joy to it, but the structure is a great job. ✨
Awesome. I love this project 👏🏻👏🏻👏🏻
These really look beautiful, such a nice craft kudos to you.
Thanks am glad you liked it very much ☺️
Putting all of this together was not a walk in the park but you did it anyway and you finished strong. Well done and thanks for sharing.
Thanks, indeed it was really difficult to assemble all the right parts together but I tried and I finished well. Thanks for your valuable feedback once again.
It looks like a very fun craft.
How beautiful is an excellent and beautiful recycling job. Thank you for sharing your creation with all of us.
Thank you