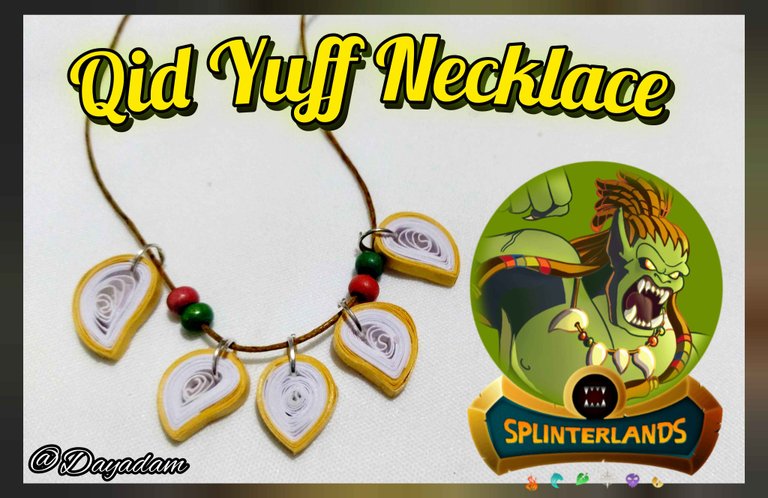
Qid Yuff Necklace with Pendant Charms // Quilling Technique [Eng-Esp]
Hello everyone... ✨
Hello to my dear Hivers and the dear community of artists Jewelry, as always very pleased and excited to be here again, showing you my work made with love and especially for you...
Greetings to the Splinterlands community, and everyone who lives there, I am pleased to be here to participate in the Splinterlands Art Contest Week 302.
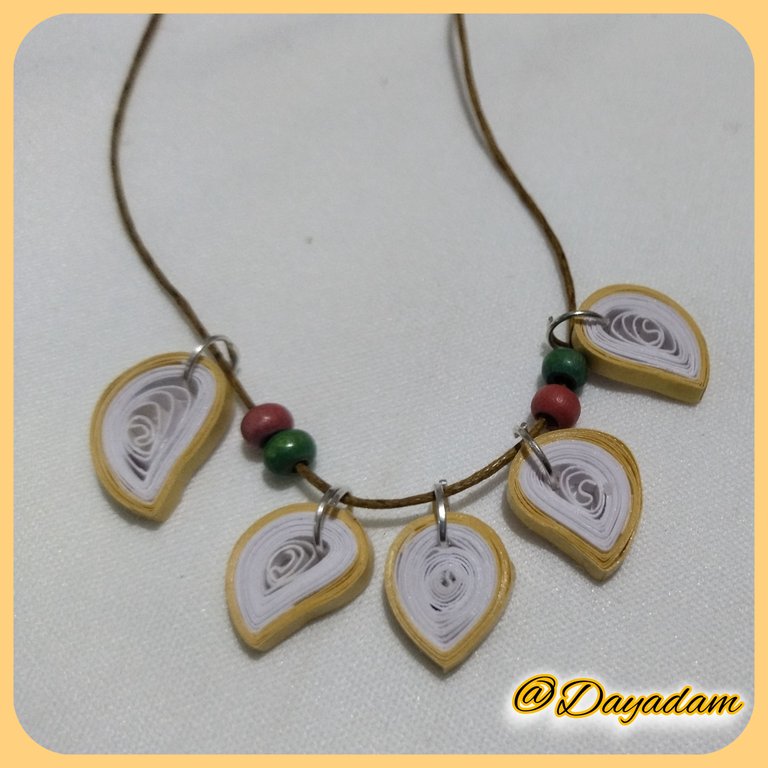
For today I bring you a necklace with hanging charms decorated with wooden beads, with a very simple step by step and creative process inspired by the letter, Qid Yuff, from which I wanted to materialize just the necklace that has the main character on her lap in the quilling technique.
If you want to know more about the game, I leave you my reference link to enter it and navigate through this wonderful world: https://splinterlands.com?ref=dayadam
Hoping you like my work, without further ado, I leave you with my creative process.
Let's start:😃

Hola a Todos...✨
Hola a mis queridos Hivers y a la querida comunidad de artistas Jewelry, como siempre muy complacida y emocionada de encontrarme por acá nuevamente, mostrándole mi trabajo hecho con mucho amor y especialmente para ustedes.
Un saludo para la comunidad de Splinterlands, y todos los que hacen vida por allí, me gratifica estar por acá para participar en el Splinterlands Art Contest Week 302.
Para hoy les traigo un collar con dijes colgantes decorados con perlas de madera, con un paso a paso y proceso creativo bastante sencillo inspirados en la carta, Qid Yuff, de la cual quise materializar justo el collar que posee el personaje principal en su regazo en la técnica de quilling.
Si quieren saber más con respecto al juego les dejo mi enlace de referencia para que ingresen en él, y naveguen por este maravilloso mundo: https://splinterlands.com?ref=dayadam
Esperando les guste mi trabajo, sin más preámbulos, les dejo mi proceso creativo.
Comencemos:😃

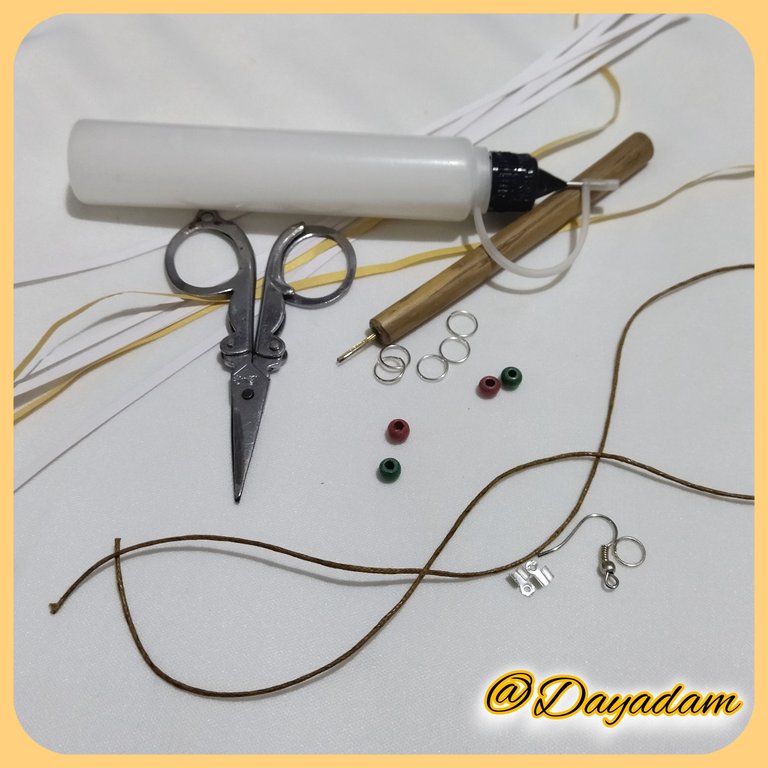
• Cintas de quilling.
• Aguja para quilling.
• Pega blanca extra fuerte (de carpintería).
• Tijera.
• Pincel.
• Hilo yute color marrón.
• Tapa nudos de bisutería.
• Anzuelo de bisutería.
• Perlas de madera.
• Argollas diversas de bisutería.
• Pinza punta fina.
• Quilling ribbons.
• Quilling needle.
• Extra strong white glue (for carpentry).
• Scissors.
• Paintbrush.
• Brown jute thread.
• Jewelry knot stopper.
• Jewelry hook.
• Wooden beads.
• Various jewelry rings.
• Fine-tipped tweezers.

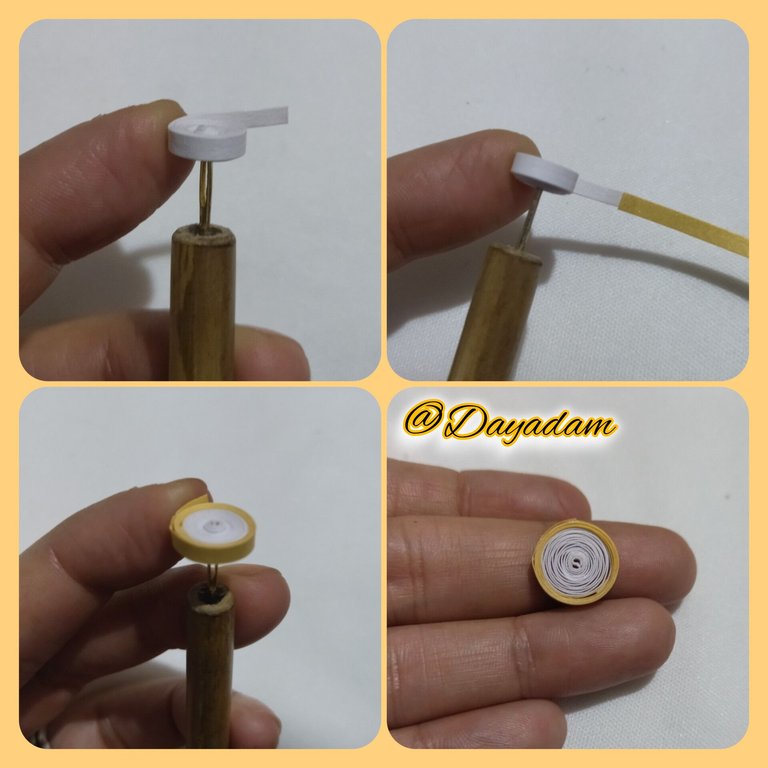
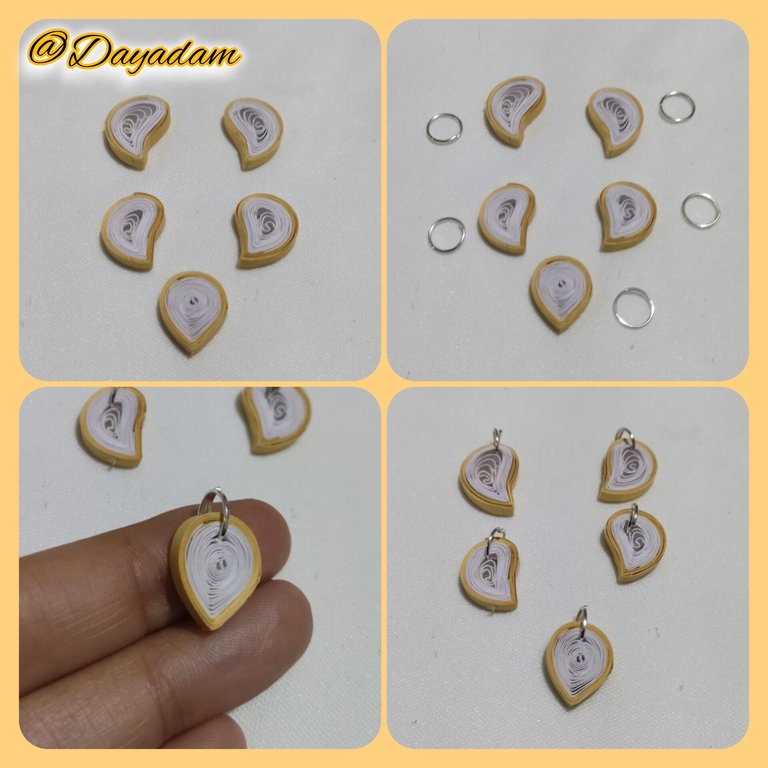
- To make the charms that I will present below, I used recycled ribbons, cutting from a white cardboard strips of 3mm wide, the golden ones if they are quilling ribbons that I already had cut.
- We begin by taking one of the white ribbons and with the help of the quilling needle we will roll until we reach the end of the ribbon, then we will take a piece of golden ribbon 3mm wide, we will join the Bianca and continue rolling until we finish with all the ribbon, we take out of the needle we will release a little, seal with extra strong bianca glue, to obtain a semi-open circle.
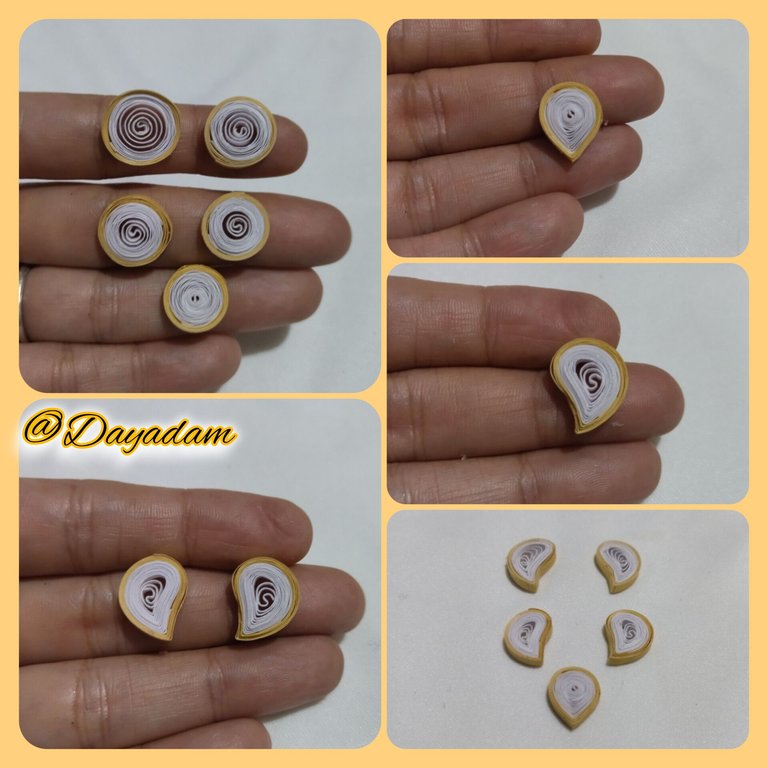
- We will continue making two circles combined white with gold, but this time we will loosen a little more so that it is a little bigger than the first one.
- Under the same previous parameters we will make two combined circles but these must be a little bigger than the previous two, that is to say we must loosen a little more when taking out of the needle.
- At this point we are going to mold the circles, the smallest one that will go in the middle, we will mold it in the shape of a drop, pinching it with our fingers at one of its tips.
- The remaining 4 circles will be molded in the shape of a drop, a little more inclined at the tip.
- Once the molded pieces are ready, we are going to place in each one of them a costume jewelry ring.

• Para llevar a cabo los dijes que a continuación les presentaré, utilice cintas de reciclaje, cortando de una cartulina blanca en desuso tiras de 3mm de ancho, las de color doradas si son cintas de quilling que ya tenia cortadas.
• Comenzamos tomando una de las cintas de color blanco y con la ayuda de la aguja para quilling vamos a enrollar hasta llegar al final de la cinta, luego vamos a tomar un trozo de cinta dorada de 3mm de ancho, uniremos a la Bianca y continuaremos enrollando hasta finalizar con toda la cinta, sacamos de la aguja soltaremos un poco, sellamos con pega bianca extra fuerte, para obtener un círculo semi abierto.
• Continuaremos realizando dos círculos combinados blanco con dorado, pero está vez soltaremos un poco más para que quede un poco más grande que el primero.
• Bajos los mismos parametros anteriores haremos dos círculos combinados pero estos deben se un poco más grandes que los dos anteriores, es decir debemos soltar un poco más al sacar de la aguja.
• En este punto vamos a moldear los círculos, el más pequeño que ira en el medio, lo moldearemos en forma de gota, pellizcando el mismo con los dedos en una de sus puntas.
• Los 4 círculos restantes los moldearemos en forma de gota un poco más inclinadas en la punta.
• Listas las piezas moldeadas, vamos a colocar en cada una de ellas una argolla de bisutería.

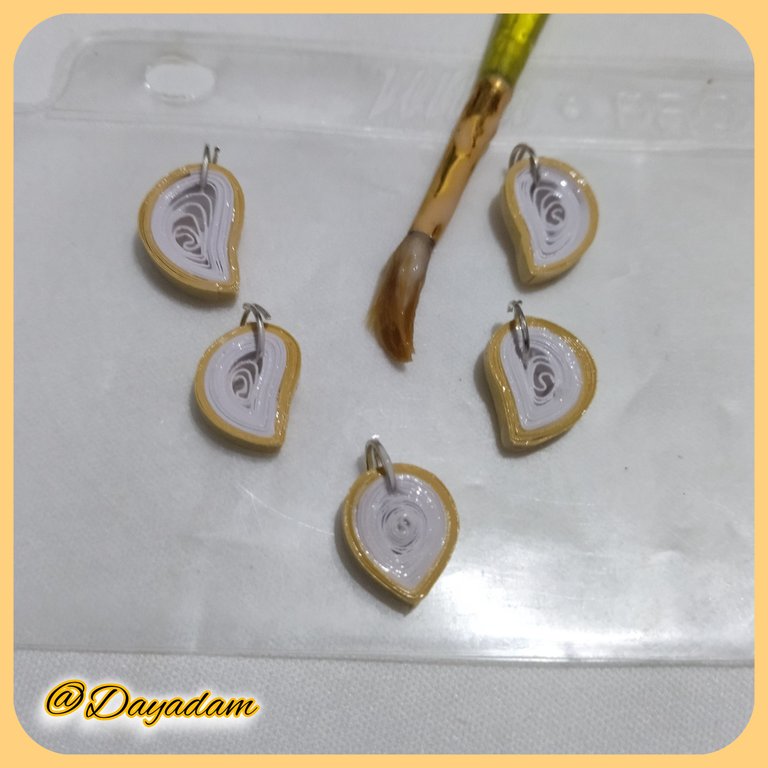
- Apply to each of the charms with a brush, several layers of extra strong white glue to protect, plasticize and give a little shine, let dry between one layer and another.
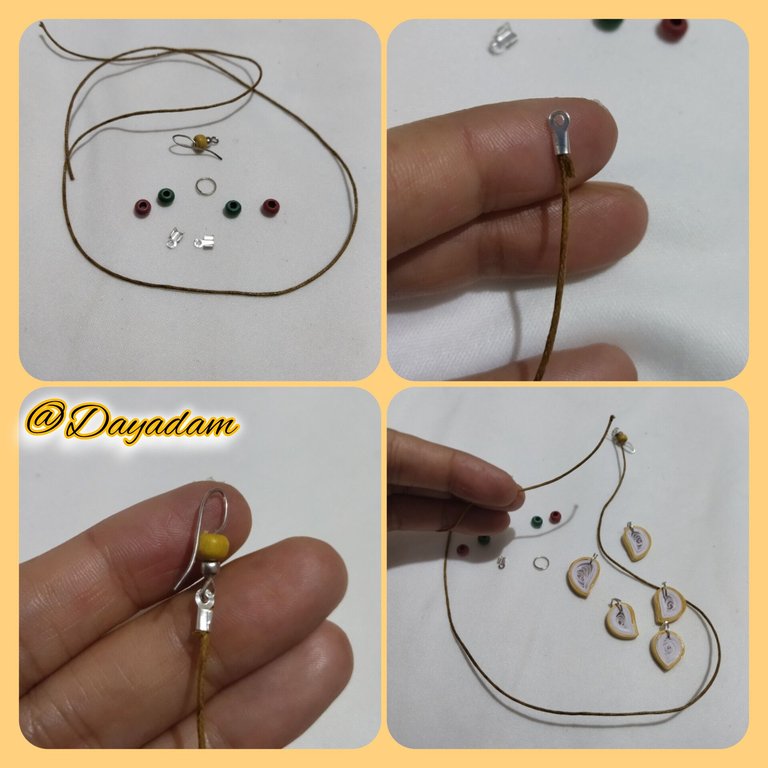
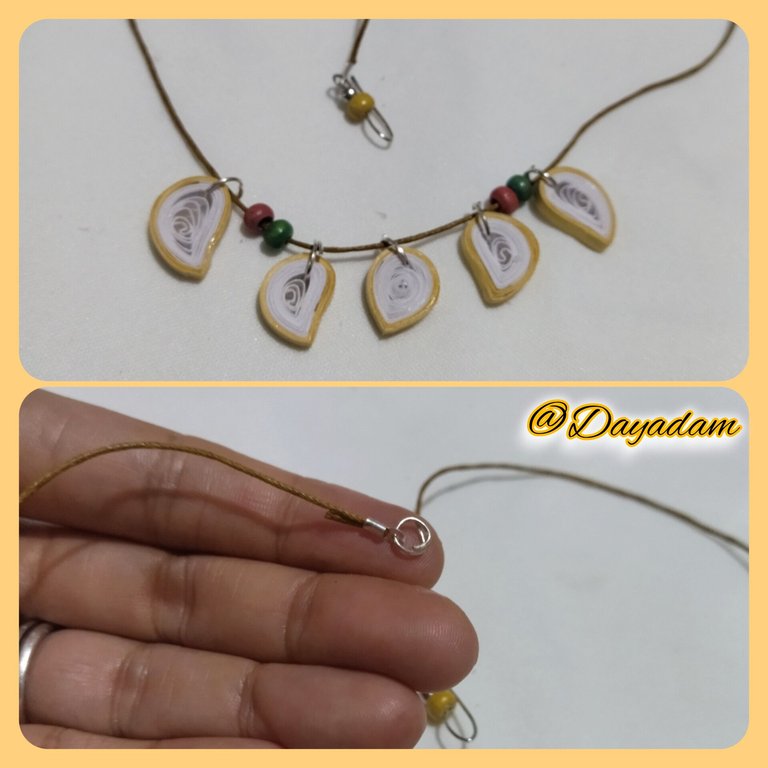
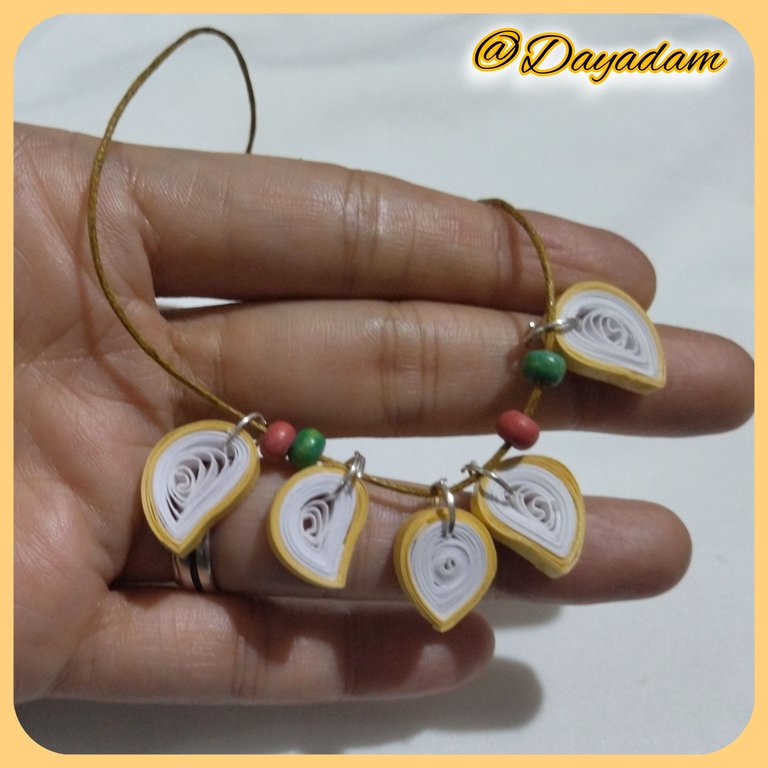
- Let's assemble our necklace, for this I took a thin brown jute thread, in one of its ends I placed a bijouterie knot cover, and as a locking ring a bijouterie hook to which I placed a wooden bead to prevent the ring from coming off once the necklace is ready to be used.
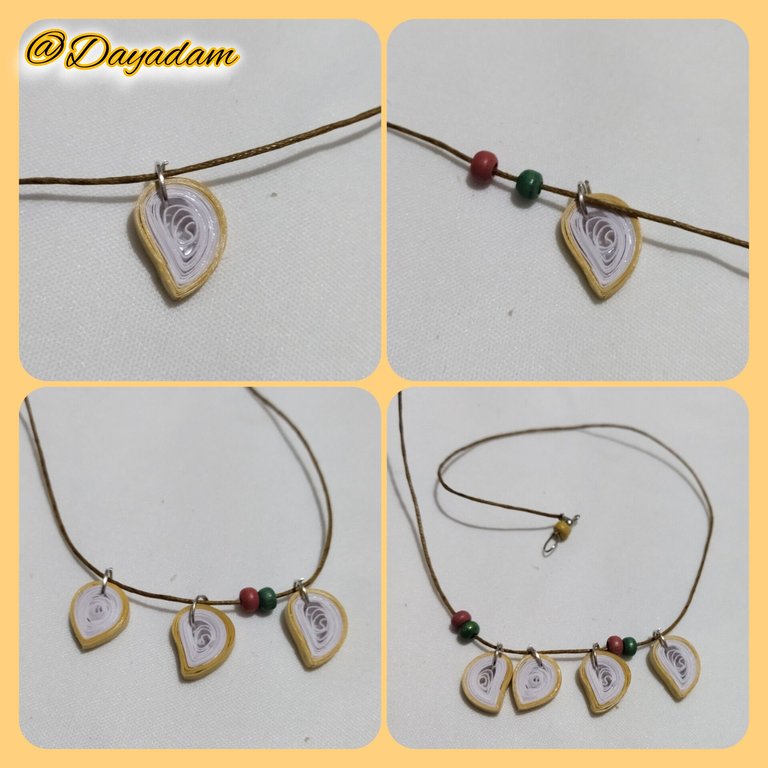
- Then I began to put the charms and pearls to form the necklace as you can see in the pictures, when we finished with all the charms and wooden pearls, we finish by placing the last knot cover and a costume jewelry ring.
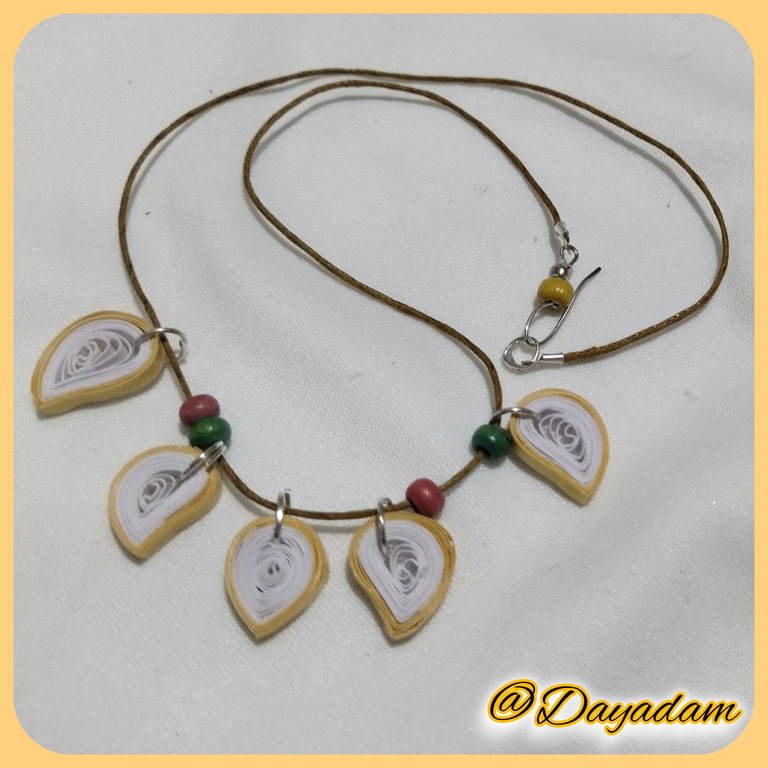
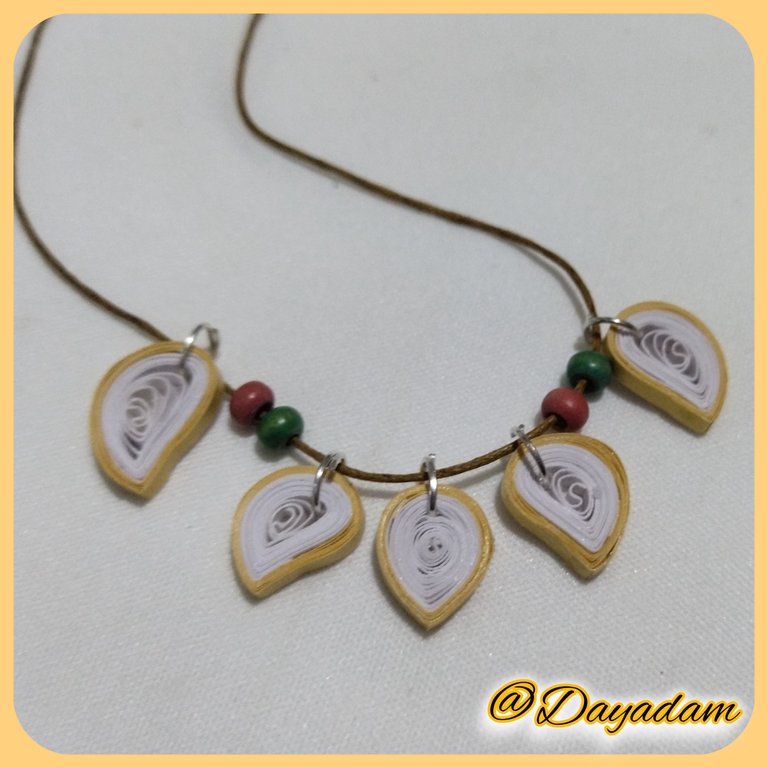
- In this way we have ready this necklace of pendant charms that I materialized inspired in the letter "Qid Yuff".".
• Aplique a cada uno de los dijes con un pincel, varias capas de pega blanca extra fuerte para protejer, plastificar y darle un poco de brillo, deje secar entre una capa y otra.
• Vamos a armar nuestro collar, para esto tome hilo yute fino color marrón, en una de sus puntas coloque un tapa nudos de bisutería, y como trancadero un anzuelo de bisutería al cual le coloque una perla de madera para evitar que se salga la argolla una vez que esté listo el collar para su uso.
• Luego comencé a meter los dijes y perlas para formar el collar tal como pueden ver en las imagenes, al terminar con todos los dijes y perlas de madera, finalizamos colocando el último tapa nudos y una argolla de bisutería.
• De esta manera tenemos listo este collar de dijes colgantes que materialice inspirado en la carta "Qid Yuff".


What did you think, did you like it?
I hope you did, I hope you liked my explanation, procedure and photos, I made them with love for you.
"Let out that muse that inspires you, and let your imagination fly".
Thank you all, see you next time.
¿Que les pareció, les gustó?
Espero que sí, que les haya gustado mi explicación, procedimiento y fotos, los hice con mucho cariño por y para ustedes.
"Deja salir esa musa que te inspira, y deja volar tu imaginación".
Gracias a todos, nos vemos en la próxima.

Thanks for the support @splinterboost ✨
That's a nice effort man 👏... The necklace of pendants looks beautiful in the end
Congratulations you received an ecency upvote through the curator @ahmedhayat. Keep spreading love through ecency
Thank you very much for the support friend. I'm glad you like the work I do. Blessings @ahmedhayat 💕
Thus is beautiful dear
Thank you very much dear 💕
Congratulations @dayadam! You have completed the following achievement on the Hive blockchain And have been rewarded with New badge(s)
Your next target is to reach 12000 upvotes.
You can view your badges on your board and compare yourself to others in the Ranking
If you no longer want to receive notifications, reply to this comment with the word
STOPCheck out our last posts:
Thanks @hivebuzz 🤗
Keep aiming higher @dayadam, there's no limit to what you can achieve.
Congratulations, your post has been upvoted by @dsc-r2cornell, which is the curating account for @R2cornell's Discord Community.
Gracias por el apoyo @dsc-r2cornell ✨
Hermoso trabajo, quedó exacto como al personaje de la carta 🥰
Gracias hermosa. La verdad quedé muy satisfecha con el resultado final, me encantó porque así como dices quedó muy parecido al original. Abrazos 🤗
Que belleza de formas en cada una.. 😍😍 quedó idéntico
Gracias amigo, yo misma quedé sorprendida con la similitud y fue un trabajo bastante sencillo.
Abrazos 💖
Y bien hermoso.. literalmente lo sacaste de la tarjeta 😍
Que lindo te quedó...me encanta como representas los detalles de cada carta 😍.
!LUV
!PIZZA 🍕
Gracias mi hermosa @chacald.dcymt, por siempre estar presente y por tus palabras.
Un abrazo fuerte para ti 💖
$PIZZA slices delivered:
@chacald.dcymt(2/5) tipped @dayadam
Now this is the real meaning of creativity. Seriously I love your work. This particuler work will have to be duplicated by me. I will try my best to make it beautiful and waite for ur comment once am done.
What beautiful words, I am very honored that you like my work and it inspires you to do something similar. I'm waiting for yours, you're free to mention me, I'd like to see it. Hugs @idarasuas ☺️