Marill in 3D Quilling Technique [Eng-Esp]
Hello everyone...✨
Hello to my dear Hivers and the dear community of artists Diyhub, as always very pleased and excited to be here again, showing you my work made with love and especially for you.
I have 2 very beloved people who have a lot of affinity with Pokémon, they play, collect cards, in short they love these characters, and in other opportunities I have already made some, and I will continue to do because there are countless of them are beautiful and many of them are good with the technique I apply.
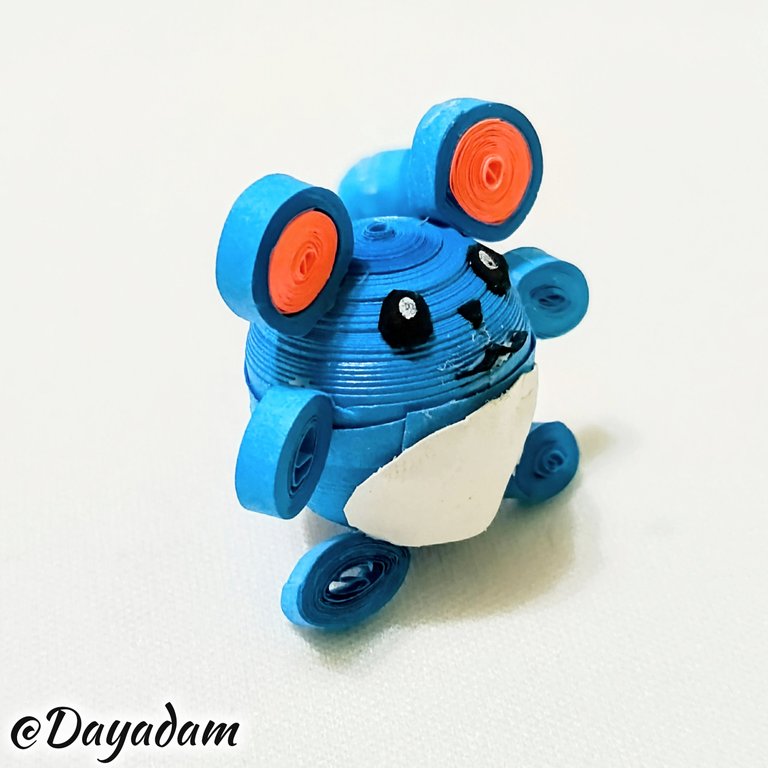
For today I decided to make the character Marill in 3D, in the quilling technique.
Hoping you like it, I leave you my creative process:
Let's get started:😃

Hola a Todos...✨
Hola a mis queridos Hivers y a la querida comunidad de artistas Diyhub, como siempre muy complacida y emocionada de encontrarme por acá, mostrándole mi trabajo hecho con mucho amor y especialmente para ustedes.
Tengo 2 personitas muy amadas que tienen bastante afinidad con Pokémon, juegan, coleccionan cartas, en fin les encantan estos personajes, ya en otras oportunidades he realizado algunos, y seguiré realizando ya que hay infinidades de ellos son hermosos y muchos se me dan bien con la técnica que aplico.
Para hoy decidí hacer a el personaje Marill en 3D, en la técnica de quilling.
Esperando que sea de su agrado, les dejo mi proceso creativo:
Comencemos:😃
 |

• Cintas de quilling.
• Plantilla para moldear círculos.
• Lápices de colores.
• Cartulina.
• Pega blanca extra fuerte (de carpintería).
• Tijera.
• Pincel.
- Quilling ribbons.
- Template to mold circles.
- Colored pencils.
- Cardboard.
- Extra strong white glue (carpentry glue).
- Scissors.
- Brush.

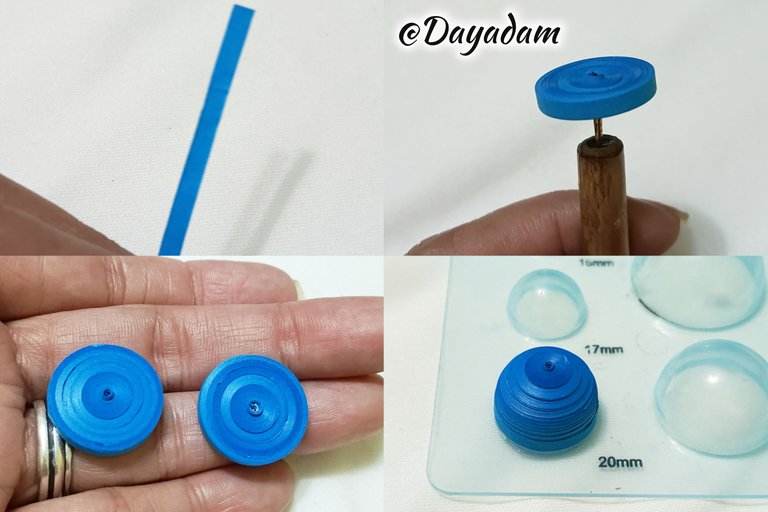
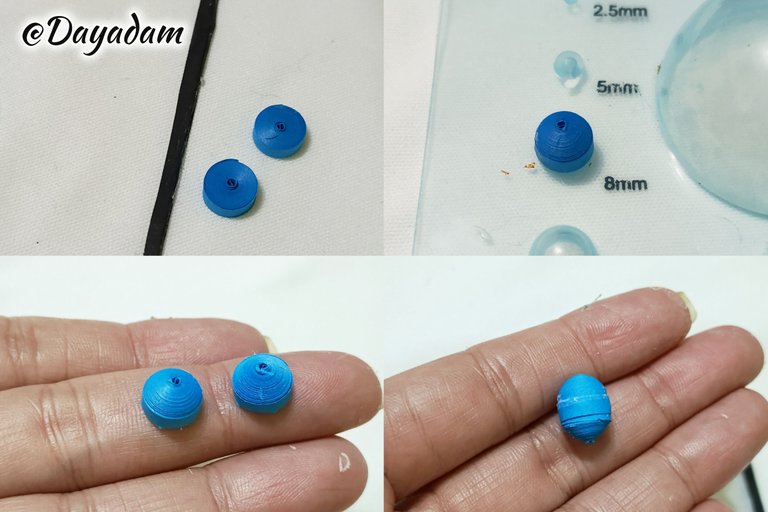
- I started by taking blue quilling tape 3 mm wide, with the needle I rolled until I reached the end of the tape, seal it with extra strong white glue, pull it out to get a closed circle, we will need two equal circles, this will be the body of the character.
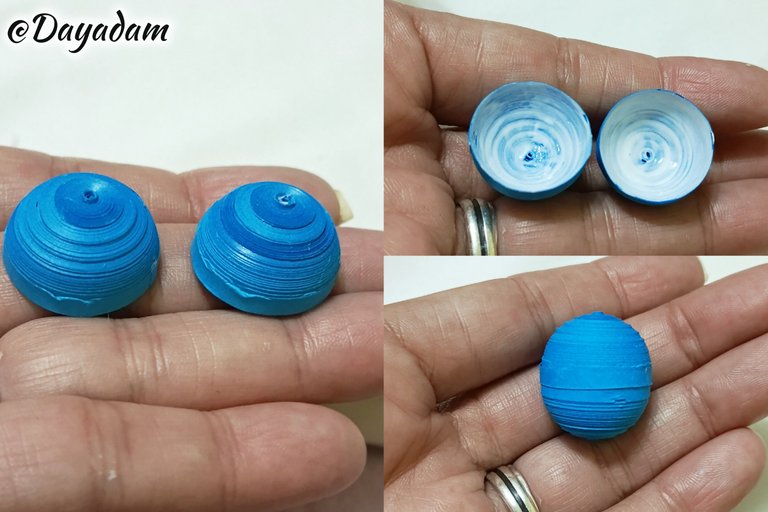
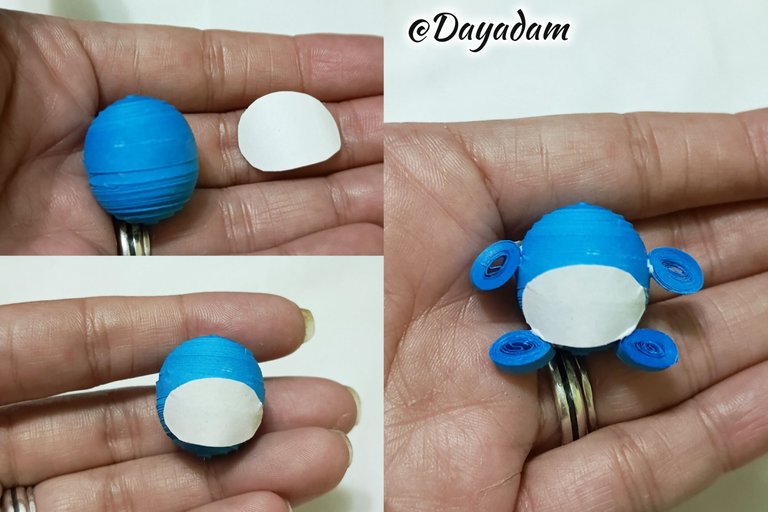
- We are going to mold both circles in a template in the measure number 20 mm, we take out of the mold apply extra strong white glue on the inside to prevent them from deforming, let dry very well, we will join both circles passing a ribbon through the middle.
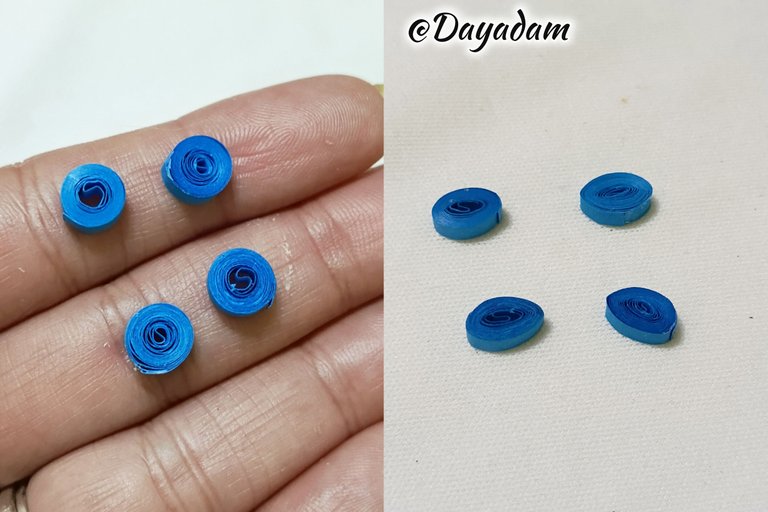
- For the arms and feet of the character, make 4 small circles closed with blue tape 3 mm wide, mold them flattening a little with your fingers.
- I cut out a small oval from a white cardboard, glued the body of the character, then I proceeded to glue the arms and feet.

• Comencé tomando cinta para quilling de color azul de 3 mm de ancho, con la aguja enrollé hasta llegar al final de la cinta selle con pega blanca extra fuerte, saque de la misma para obtener un círculo cerrado, vamos a necesitar dos círculos iguales, este será el cuerpo del personaje.
• Vamos a moldear ambos círculos en una plantilla en la medida número 20 mm, sacamos del molde aplicamos pega blanca extra fuerte por la parte interna para evitar que los mismos se deformen, dejamos secar muy bien, uniremos ambos círculos pasando una cinta por el medio.
• Para los brazos y pies del personaje, realice 4 pequeños círculos cerrados con cinta azul de 3 mm de ancho, los moldee aplanando un poco con los dedos.
• Recorté un pequeño óvalo de una cartulina color blanco, pegué del cuerpo del personaje, seguido de esto procedí a pegar brazos y pies.
 |  |
 |  |
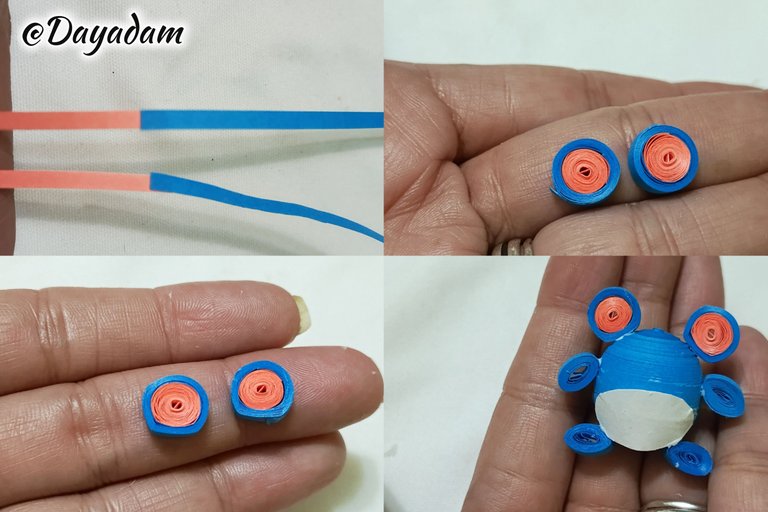
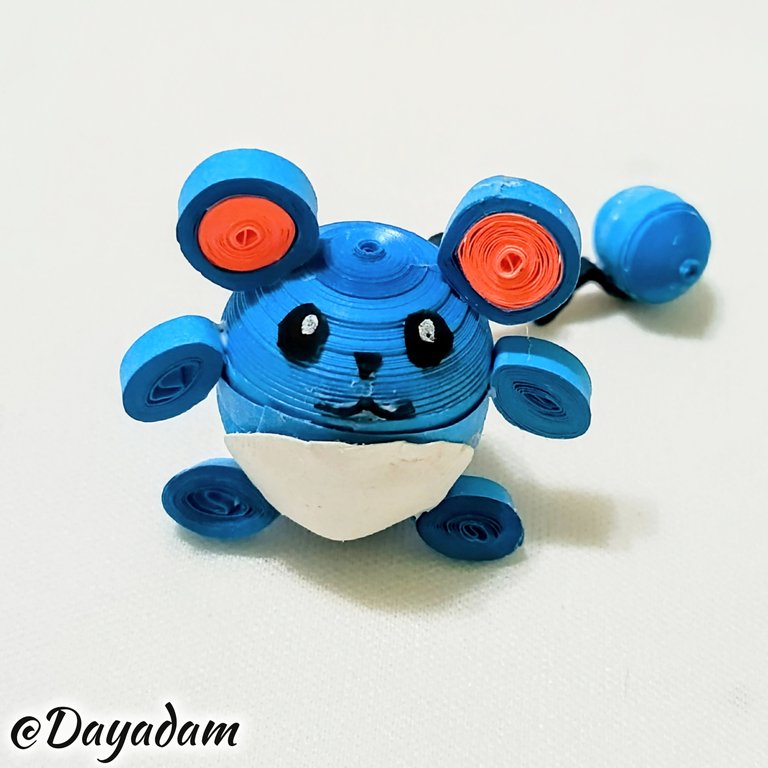
- To make the ears I made 2 closed circles with blue ribbon combined with coral color of 3mm wide, flattened a little the circles and glued in the corresponding place.
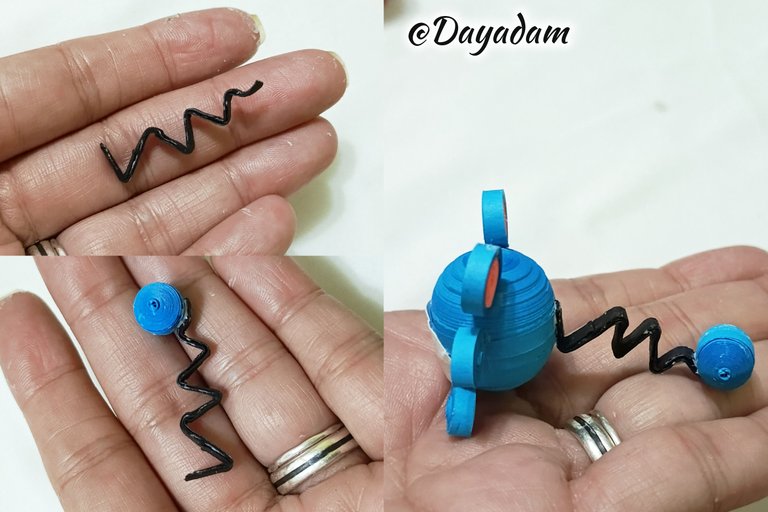
- For the tail I took a piece of black cardboard to which I made several folds to make it thicker and stronger, molded as a kind of Zig zag.
- For the tip of the tail I made a smaller sphere following the same parameters with which I made the body of the character, I glued from the tip of the zig zag and then to the back of the body.
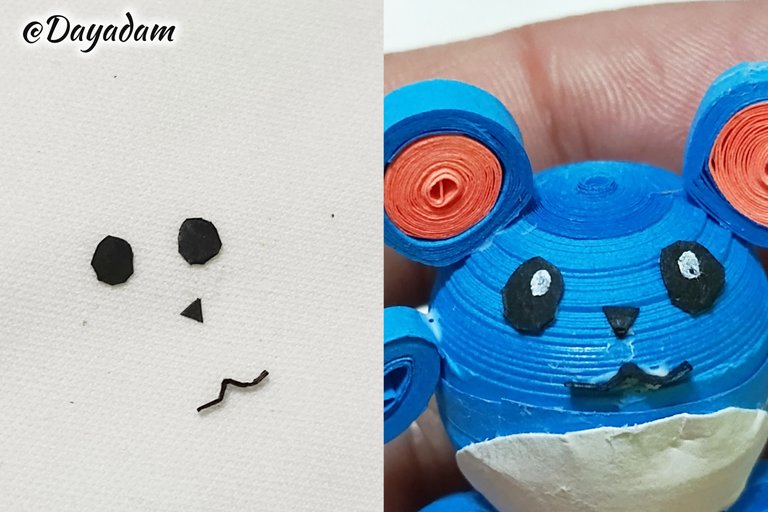
- Finally, I cut out the eyes, nose and mouth from a black cardboard, glued the face of the character and made 2 small lights in the eyes with a white pencil.
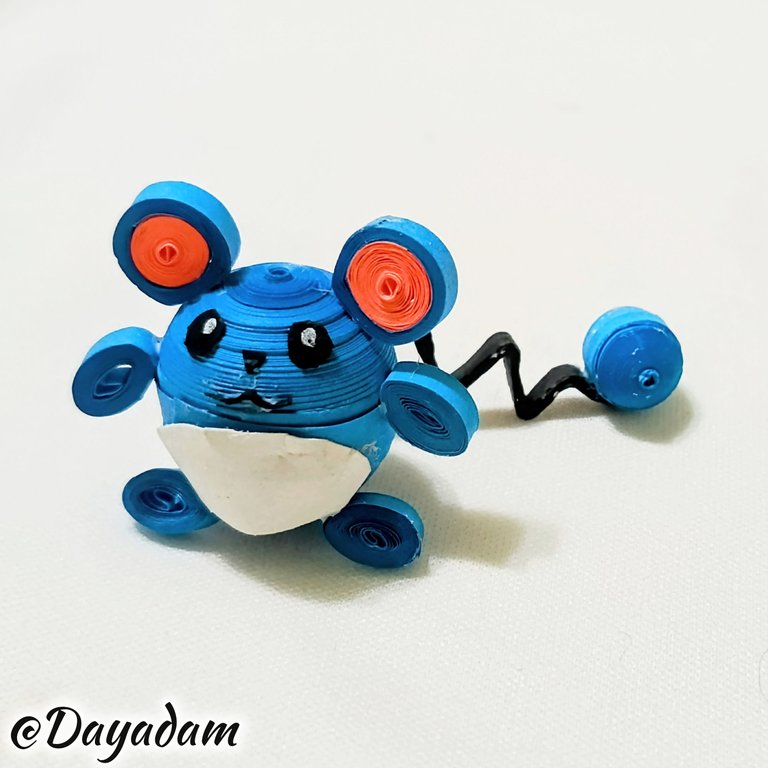
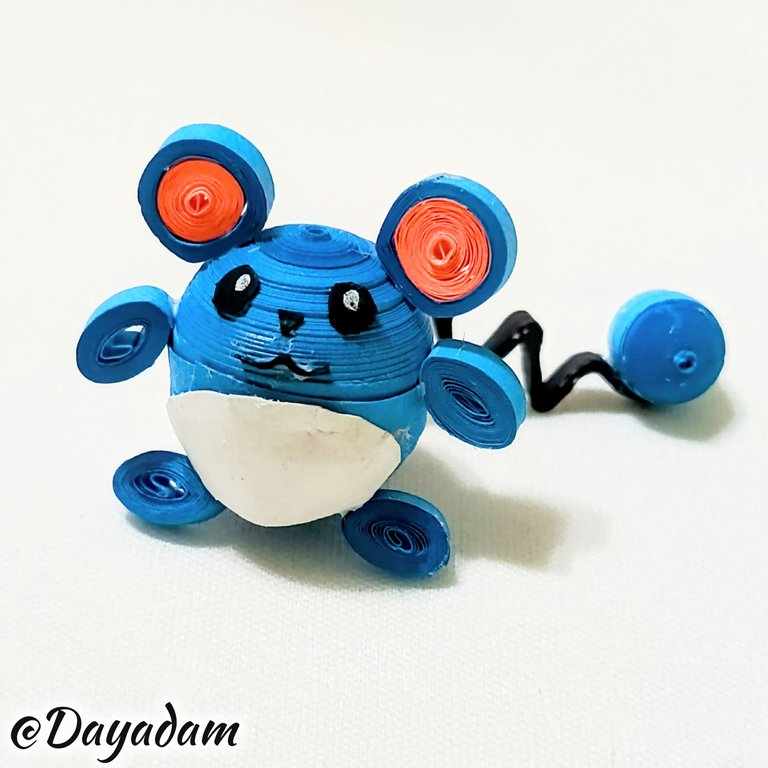
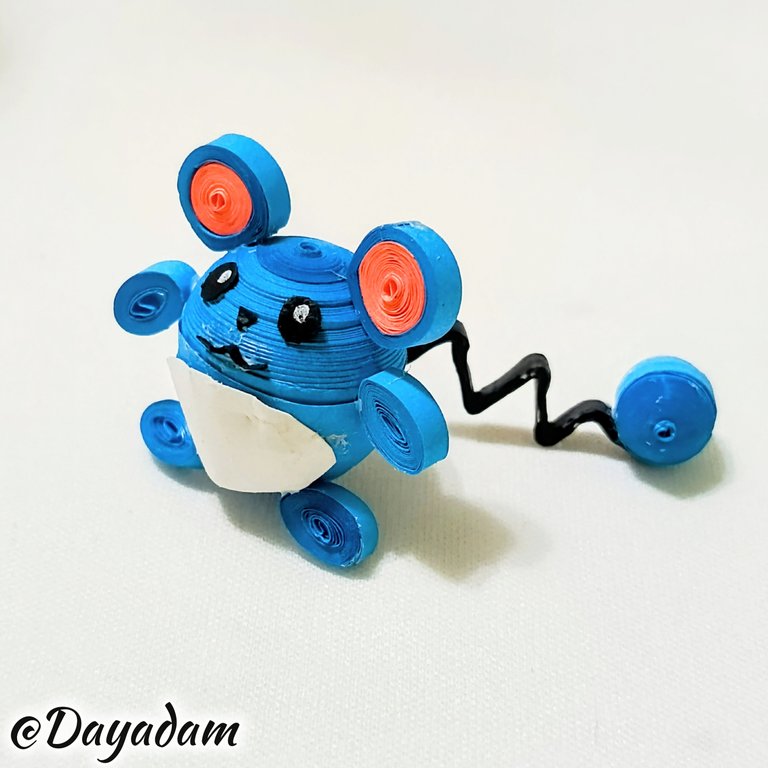
In this way I finished this Pokémon character called Marill in 3D, in the quilling technique.
• Para realizar las orejas realicé 2 círculos cerrados con cinta azul combinada con color coral de 3mm de ancho, aplane un poco los círculos y pegué en el sitio correspondiente.
• Para la cola tomé un trozo de cartulina de color negro a la cual le hice varios pliegues para hacerlo más grueso y resistente, moldee como una especie de Zig zag.
• Para la punta de la cola realicé una esfera más pequeña siguiendo los mismos parámetros con los cuales realicé el cuerpo del personaje, pegué de la punta del zigzag y luego a la parte de atrás del cuerpo.
• Para finalizar recortando de una cartulina negra, procedí a realizar los ojos, nariz y boca, pegué de la cara del personaje y le realicé 2 pequeñas luces en los ojos con un lápiz de color blanco.
De esta manera finalice este personaje de Pokémon llamado Marill en 3D, en la técnica de técnica de quilling.
 |  |
 |  |

 |
 |
 |
 |
|
 |
 |
What did you think, did you like it?
I hope you did, I hope you liked my explanation, procedure and photos, I made them with love for you.
"Let out that muse that inspires you, and let your imagination fly".
Thank you all, see you next time ✨.
¿Que les pareció, les gustó?
Espero que sí, que les haya gustado mi explicación, procedimiento y fotos, los hice con mucho cariño por y para ustedes.
"Deja salir esa musa que te inspira, y deja volar tu imaginación".
Gracias a todos, nos vemos en la próxima✨
Un hermoso arte como siempre, pero hoy quiero destacar lo hermoso de tu maquetado, tu paso a paso, la calidad de tus fotos, la explicación, etc. eres un gran ejemplo como Creadora de Contenido.
Muchísimas gracias hermosa. De verdad que es un placer leer algo así de tu parte, cuando yo soy súper fan de tus post, todo lo que haces y sobre todo de la edición y el maquetado, eres genial...
!LADY
!HUG
Espectacular creación, un trabajo tan curioso y limpio , es una pasada ver tus post 😍
Pues muchísimas gracias un placer leer sus bonitas palabras con respecto a mi trabajo.
Bendiciones en su proyecto
!PIZZA
@dayadam, sorry! You need more to stake more $PIZZA to use this command.
The minimum requirement is 20.0 PIZZA staked.
More $PIZZA is available from Hive-Engine or Tribaldex
your crafts always look cool. the right choice of colors creates the right contrast. I like the expression looks adorable.
Thank you so much, my friend, always grateful for your appreciation and appreciation of my work. Thank you for your presence 💕
!HUG
!PIZZA
@dayadam, sorry! You need more to stake more $PIZZA to use this command.
The minimum requirement is 20.0 PIZZA staked.
More $PIZZA is available from Hive-Engine or Tribaldex
You're welcome, your work inspired me and made me fall in love. Now my soul wants to create a work as beautiful as yours, but I don't have an idea yet what to create. Keep creating dear♥️
What a pleasure to receive such a good quality post in our DIYHub Community! You are definitely an artist and an example for our niche on Hive, congratulations and thank you for being part of this family.
selected by @jesuslnrs
My friend @jesuslnrs, thank you so much for your appreciation and valuation, and above all for the beautiful words about my work. It is a pleasure for me to represent to the best of my ability the niche that I carry with so much pride in our beloved blockchain, and of course it will belong to a community @diyhub in which I know how to handle the DIY process very well ✨💕
que lindo, quedo increible!
How nice, it was amazing!
@dayadam Saludos cielo, como siempre muy agradables y magnìficas tus creaciones, espectaculares...un fuerte abrazo.
Que bello trabajo el que trae @dayadam hermoso😘Dios bendiga tus manos un abrazo 😘🤗
Muchísimas gracias mi linda, amén amén y amén.
Muchas bendiciones de vuelta para ti 💕
!LADY
Your LOH token balance is not sufficient to send tips. Please hold a minimum of 25 LOH tokens to send tips.
Wow, quedó azuladamente hermoso. Al principio pensé que era más grande, pero es una cosita chiquitica. Lo amé.
Jajajaja, muchas gracias amigo ame eso de azuladamente, un Pokémon muy azul pero bastante tierno. Y sí, los hago pequeñitos asi la colección va creciendo, y hay espacio para ella.
Saluditos ✨
!LUV
@edeyglezsosa, @dayadam(1/3) sent you LUV. | tools | discord | community | HiveWiki | <>< daily
La muchacha de la filigrana... Excelente trabajo 👏🏻👏🏻👏🏻