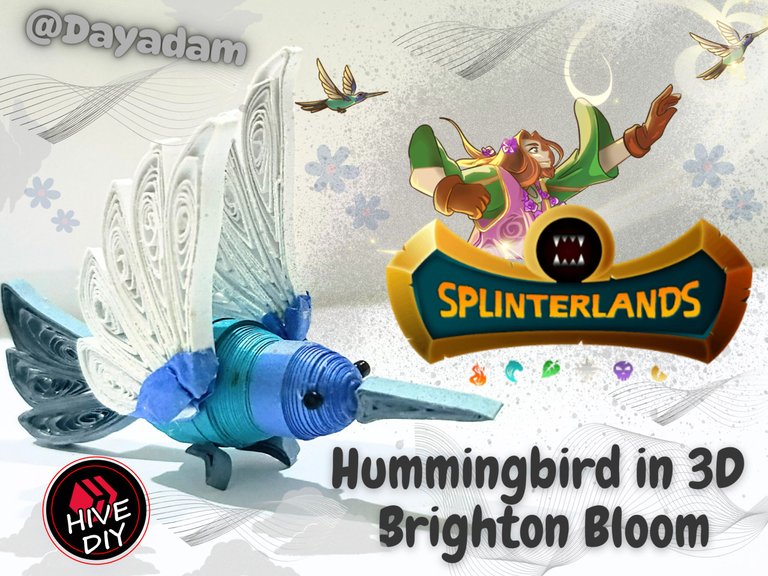
Brighton Bloom// Decorative 3D Hummingbird Quilling Technique [Eng-Esp]
Hello everyone... ✨
Hello to my dear Hivers and the dear community of artists #HiveDIY, as always very pleased and excited to be here again, showing you my work made with love and especially for you.
Greetings to the Splinterlands community, and everyone who lives there, I'm here to join the Splinterlands Art Contest
Today I am with you again to show you my art, I love every week to go through this wonderful world of magic, color, and lots of Splinterlands characters to look for new elements or characters to build different crafts such as jewelry, accessories, 3D figures and other things that motivate me, inspire me and activate my creativity and thus be able to create for you.
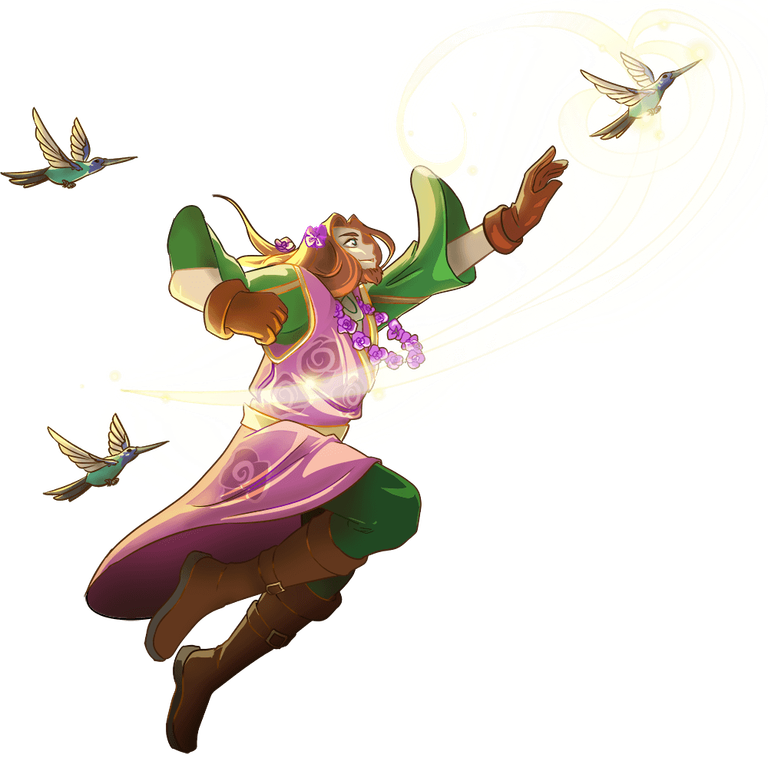
Today I bring you a new piece of art. I loved the card I've been working with for the last two weeks, as I base my work on elements from it to give you whatever comes to me as inspiration. So I wanted to make one of the beautiful hummingbirds that fly around the character on the card, " Brighton Bloom" in 3D using the quilling technique.
Here are my two previous works inspired by that card. I made a pair of dangling earrings and then completed the accessory set by making a necklace pendant.
“Brighton Bloom” dangling earrings:
https://peakd.com/hive-189504/@dayadam/brighton-bloom-earrings-quilling-technique
“Brighton Bloom” accessory set (necklace charm):
https://peakd.com/hive-130560/@dayadam/brighton-bloom-set-of-accesories
If you want to know more about the game, I leave you my reference link to enter it and navigate through this wonderful world: https://splinterlands.com?ref=dayadam
Hoping you like my work, without further ado, I leave you with my creative process.
Let's start:😃

Hola a Todos...✨
Hello to my dear Hivers and the dear community of artists #HiveDIY, as always very pleased and excited to be here again, showing you my work made with love and especially for you.
Un saludo para la comunidad de Splinterlands, y todos los que hacen vida por allí, estoy por acá para unirme al reto Splinterlands Art Contest
Hoy estoy con ustedes nuevamente para mostrarles mi arte, me encanta semana a semana pasar por ese maravilloso mundo de magia, color, y muchísimos personajes de Splinterlands para buscar nuevos elementos o personajes para construir diversas manualidades bien sean bisutería, accesorios, figuras en 3D entre otras cosas que me motiven, inspiren y activen mi creatividad y de esa manera poder crear para ustedes.
Para hoy les traigo un nuevo trabajo de arte, me encantó la carta con la cual he vendido trabajando en las últimas 2 semanas ya que me baso en tomar elementos de las mismas para regalarles lo que venga a mí musa inspiratoria, entonces quise realicé uno de los hermosos colibríes que sobrevuelan al personaje de la carta, "Brighton Bloom" en 3D en la técnica de quilling.
Por acá les dejo mis dos trabajos anteriores en los cuales me inspire en dicha carta, realicé un par de zarcillos colgantes y luego complete el set de accesorios haciendo un dije para collar.
Zarcillos colgantes "Brighton Bloom":
https://peakd.com/hive-189504/@dayadam/brighton-bloom-earrings-quilling-technique
Set de accesorios (dije para collar) "Brighton Bloom":
https://peakd.com/hive-130560/@dayadam/brighton-bloom-set-of-accesories
Si quieren saber más con respecto al juego les dejo mi enlace de referencia para que ingresen en él, y naveguen por este maravilloso mundo: https://splinterlands.com?ref=dayadam
Esperando les guste mi trabajo, sin más preámbulos, les dejo mi proceso creativo.
Comencemos:😃
 |
 |
 |

• Cintas para quilling de diversos colores.
• Aguja para quilling.
• Cartulina blanca.
• Canutillos de bisutería.
• Plantilla para moldear círculos.
• Pega blanca extra fuerte (de carpintería).
• Tijera.
• Pincel.
• Quilling strips in various colors.
• Quilling needle.
• White cardstock.
• Jewelry tubes.
• Template for shaping circles.
• Extra-strong white glue (carpentry glue).
• Scissors.
• Paintbrush.

• Take a 3 mm wide turquoise quilling strip and use the quilling needle to make two closed circles of the same size.
• Then we will shape both circles, one into a rounded shape and the other into a cone shape. We will apply glue to the inside to prevent them from deforming, and we will finish by joining both pieces with turquoise tape in the middle. This will be the body of the hummingbird.
• We will proceed to make other closed circles a little smaller than the previous ones with dark blue tape 4 mm wide. We will shape them as you can see in the image, apply glue to the inside, and attach them to the hummingbird's body. This will be the head.

• Tomaremos cinta para quilling de color turquesa de 3 mm de ancho, con la aguja para quilling procederemos a realizar 2 círculos cerrados del mismo tamaño.
• Luego moldearemos ambos círculos, uno en forma redondeado y en uno en forma de cono, aplicamos pega por su parte interna para evitar que se deformen, terminamos uniendo ambas piezas con una cinta turquesa en el medio. Este será el cuerpo del colibrí.
• Procederemos a realizar otros círculos cerrados un poco más pequeño que los anteriores con cinta de color azul oscuro de 4 mm de ancho, vamos a moldear como pueden ver en la imagen, aplicamos pega por su parte interna y pegaremos del cuerpo del colibrí. Esta será la cabeza.
 |  |
 |  |
• Now we will make three open circles with 3 mm wide gray tape. We will shape them and join the three together with extra-strong white glue, sticking them to the back of the body.
• We will make the hummingbird's beak by making a small open circle with gray tape 3 mm wide, which we will shape into an elongated triangle and glue to the head.
• Ahora realizaremos tres círculos abiertos con cinta de color gris de 3 mm de ancho, está las moldearemos y uniremos las 3 con pega blanca extra fuerte, pegaremos en la parte de atrás del cuerpo.
• Haremos el pico del colibrí realizando un pequeño círculo abierto de color gris con cinta de 3 mm de ancho, el cual moldearemos en forma de triángulo alargado, pegaremos de la cabeza.
 |  |  |
• We will proceed to make the wings on the sides. We will make 10 open circles, which we will shape as you can see in the image. We will place them in groups of five and join them together with extra-strong white glue. Once they are ready, we will take two pieces of blue tape and stick them to one side of the wings, then stick both to the body of the hummingbird.
• For the claws, we will make 4 closed circles, which we will shape into a crescent. We will glue them to the bottom of the hummingbird's body.
• For the eyes, I glued two small black beads to the sides of the hummingbird's head.
• To finish, I applied several layers of extra-strong white glue, allowing each layer to dry before applying the next, to protect the piece.
And now we have finished the hummingbird I made, inspired by the hummingbirds that fly around the character on the “Brighton Bloom” card.***
• Procederemos a hacer las alas de los lados, realizaremos 10 círculos abiertos, estos los moldearemos tal y como pueden ver en la imagen. Colocaremos en grupos de cinco y las iremos uniendo con pega blanca extra fuerte, una vez listas tomaremos 2 trozos de cinta azul y las pegaremos a un lado de las alas, luego pegaremos ambas del cuerpo del colibrí.
• Para las garras realizaremos 4 círculos cerrados los cuales moldearemos en forma de media luna, pegaremos en la parte de abajo del cuerpo del colibrí.
• Para los ojos pegué dos pequeñas mostacillas negras a los lados de la cabeza del colibrí.
• Para finalizar apliqué varias capas de pega blanca extra fuerte dejando secar entre una capa y otra, esto para proteger la pieza.
De esta manera tenemos listo este colibrí que elabore, inspirado en los colibrís que sobrevuelan al personaje de la carta "Brighton Bloom".
 |  |
 |  |

 |
 |
 |  |
 |  |
 |
 |
What did you think, did you like it?.
I hope you did, I hope you liked my explanation, procedure and photos, I made them with love for you.
"Let out that muse that inspires you, and let your imagination fly".
Thank you all, see you next time.
¿Que les pareció, les gustó?
Espero que sí, que les haya gustado mi explicación, procedimiento y fotos, los hice con mucho cariño por y para ustedes.
"Deja salir esa musa que te inspira, y deja volar tu imaginación".
Gracias a todos, nos vemos en la próxima.

Banner y separador hecho por mí en Canva
Thanks for the support @splinterboost ✨
Thanks for the support to my work ❤️
Bellísimo y tan lleno de detalles. Gran habilidad amiga, la reina del Quilling
Gracias hermosa me encanta que te haya gustado este colibrí, me llegó trabajo para disfrutar bastante haciéndolo me gustó mucho el resultado final.
!PIZZA
@dayadam, sorry! You need more to stake more $PIZZA to use this command.
The minimum requirement is 20.0 PIZZA staked.
More $PIZZA is available from Hive-Engine or Tribaldex
Congratulations @dayadam! You have completed the following achievement on the Hive blockchain And have been rewarded with New badge(s)
Your next target is to reach 210000 upvotes.
You can view your badges on your board and compare yourself to others in the Ranking
If you no longer want to receive notifications, reply to this comment with the word
STOPGracias @hivebuzz 😊
Qué hermoso quedó... Siempre me ha llamado la atención esa técnica, pero nunca recordaba el nombre, debe ser relajante como hacer mandalas ♥️
Bienvenida a mi blog, gracias por tus palabras, es muy gratificante que te guste mi trabajo. Y si, está técnica es un reto dadas las cosas que me invento, pero a la vez es muy pausada y relajante, por eso la amo...
Saluditos 💖
Your Decorative 3D Hummingbird looks breathtaking friend. Great quilling skills friend, you did a great job.
selected by @ibbtammy
Thanks for the support 💓
Ha quedado bellísimo, me encanta, un excelente trabajo 👍🏻
Gracias mi linda.
Bello día para ti...
Thanks for sharing! - @cieliss

Thanks for the support 💞
Omg this is really beautiful 😍😍😍
https://www.reddit.com/r/quilling/comments/1o9n3y9/hummingbird_in_quilling/
This post has been shared on Reddit by @dayadam through the HivePosh initiative.