Decorando bolsos||Decorating bags

Saludos miembros de la comunidad @hivediy.
Esta es mi primera publicación en la comunidad, me da mucho gusto hacerlo, aunque se sale un poco de mi nicho en hive, ya que me muevo entre el crecimiento personal y el emprendimiento.
Digo que se sale un poco porque de muchas maneras cualquier actividad manual que realizamos con entusiasmo y cariño, aparte de estimular nuestro cerebro, también en su hacer vamos encontrando espacios de tranquilidad y sosiego, sin dejar de lado la satisfacción que sentimos cuando lo culminamos, pues no hay nada más gratificante que el demostrarse a uno mismo el “Yo si puedo”.
Decorar estos bolsos fue una actividad placentera y tiene un fin que me ilusiona mucho, regalarle, a mis nietas, algo bonito hecho por mí. Cando le envié una foto a mi hija del primer bolso decorado, le encantó y me pidió uno con gatos, lunas y estrellas, con inmenso gusto se lo hice.
La idea de decorar estos bolsos playeros de lona la tomé de un breve tutorial en Intagram. La chica hace bellezas, es fácil de hacer y resultan económicos. Sin más preámbulos les comparto el tutorial con sus detalles.
Greetings, members of the @hivediy community.
This is my first post in the community, and I am very pleased to do so, even though it is a little outside my niche on hive, as I move between personal growth and entrepreneurship.
I say it's a little outside my niche because, in many ways, any manual activity that we do with enthusiasm and love, apart from stimulating our brain, also allows us to find moments of tranquility and calm, without neglecting the satisfaction we feel when we finish it, because there is nothing more rewarding than proving to ourselves that “I can do it.”
Decorating these bags was a pleasant activity and has a purpose that excites me a lot: to give my granddaughters something beautiful made by me. When I sent my daughter a photo of the first decorated bag, she loved it and asked me for one with cats, moons, and stars, which I made with great pleasure.
I got the idea to decorate these canvas beach bags from a short tutorial on Instagram (https://www.instagram.com/p/DHgKuKvuwO4/). The girl makes beautiful things, they are easy to make, and they are inexpensive. Without further ado, here is the tutorial with all the details.
Materiales/Materials
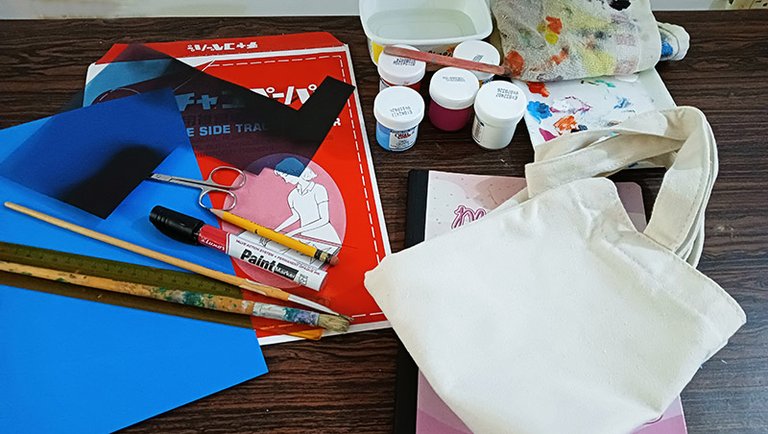
1 bolso de lona tipo playero (los conseguí en Mercado Libre)
1 hoja de papel de transferencia para telas
1 lámina de acetato que puede ser una radiografía
Imágenes impresas
Pinturas sobre telas
Marcador negro para tela
Pinceles, lápiz, tijera escolar y de punta fina, cinta adhesiva (tirro), un trozo de cartón que entre en el bolso, agua, pañito y un plato o paleta donde mezclar las pinturas.
1 canvas beach bag (I got mine on Mercado Libre)
1 sheet of fabric transfer paper
1 sheet of acetate, which can be an X-ray
Printed images
Fabric paints
Black fabric marker
Paintbrushes, pencil, school scissors and fine-tipped scissors, adhesive tape (scotch tape), a piece of cardboard that fits inside the bag, water, a cloth, and a plate or palette for mixing the paints.
Paso a paso/Step by step
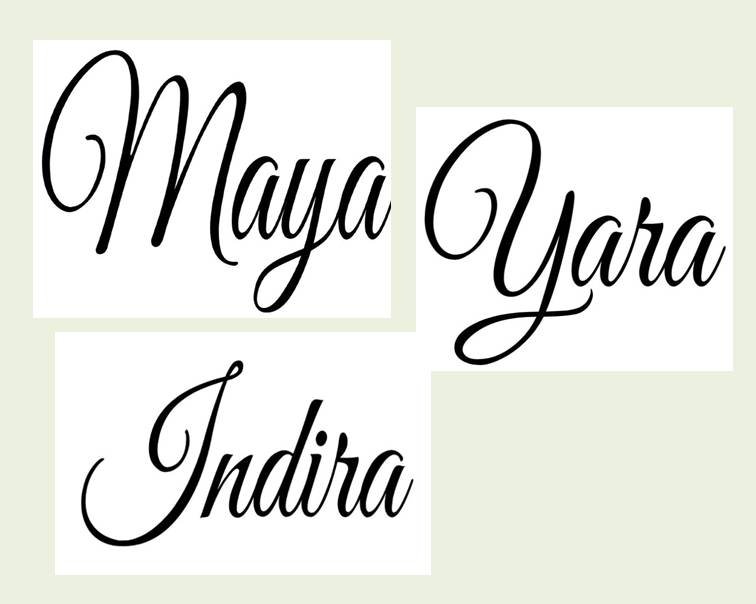
1.- Como los quería personalizados, comencé escribiendo los nombres con un tipo de letra que me gustara. Para la tipografía usé la aplicación Canva y para llevarla al tamaño requerido usé Photoshop, seguí el mismo procedimiento para las figuras que quería utilizar.
1.- Since I wanted them to be personalized, I started by writing the names in a font that I liked. For the typography, I used the Canva app, and to resize it to the required size, I used Photoshop. I followed the same procedure for the figures I wanted to use.
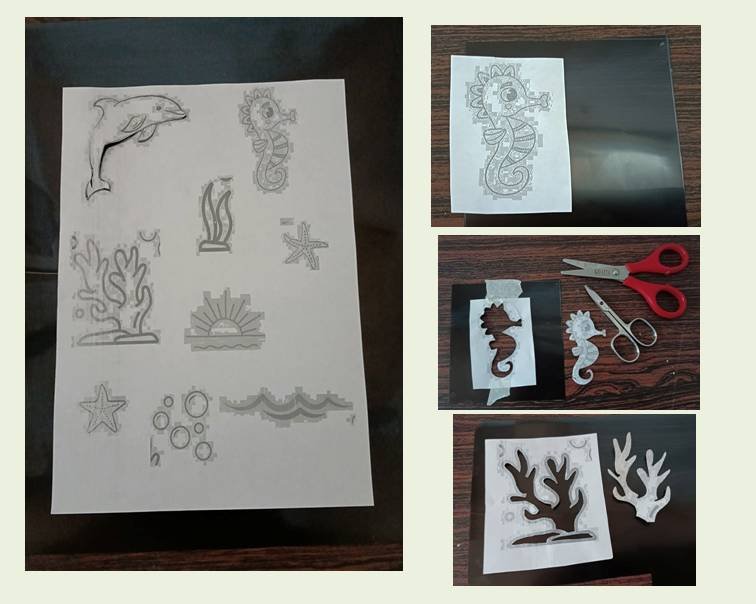
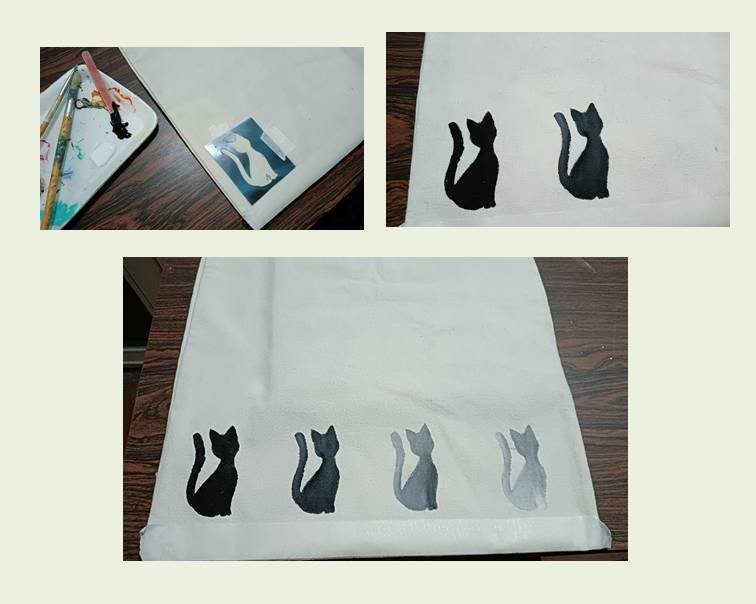
2.- Ya con el material impreso comencé a sacar las plantillas. Para ello, colocamos la imagen sobre el acetato, asegurándolo con la cinta adhesiva o tirro y recortamos, cuidando de no dañar el fondo que es lo que utilizaremos.
2.- Once I had the printed material, I started to make the templates. To do this, we placed the image on the acetate, securing it with adhesive tape or sticky tape, and cut it out, taking care not to damage the background, which is what we will use.
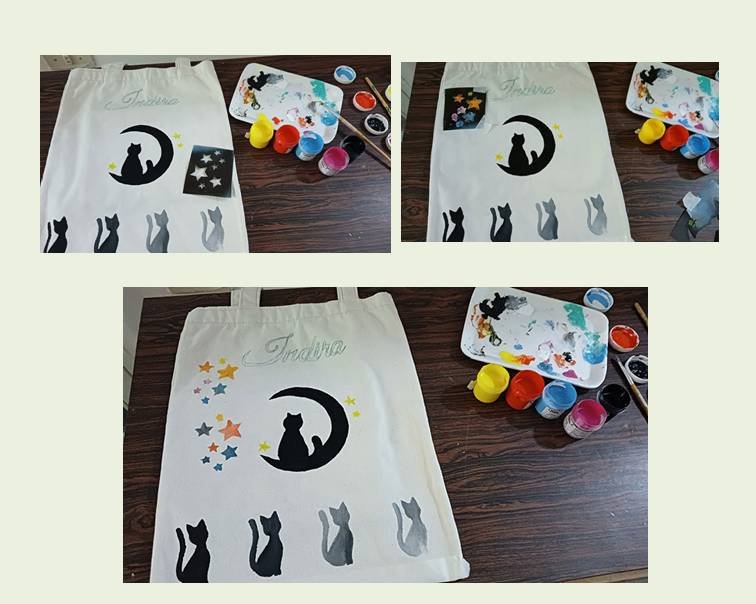
3.- Con las plantillas elaboradas lo primero que hice sobre el bolso fue transferir el nombre. Lo ubicamos en el lugar deseado y según el diseño que vamos a realizar, para ello aseguramos el papel con el nombre por la parte superior y luego, por debajo de este, el papel de trazado. Con un lápiz remarcamos muy bien las letras.
4.- Retiramos los papeles, introducimos en el bolso el cartón (yo usé una libreta), para pintar con el marcador las letras y que no manche el material por debajo.
3.- Once the templates were ready, the first thing I did on the bag was to transfer the name. We placed it in the desired location and according to the design we were going to make, securing the paper with the name on top and then the tracing paper underneath. We traced the letters carefully with a pencil.
4.- Remove the papers, insert the cardboard into the bag (I used a notebook) to paint the letters with the marker so that it does not stain the material underneath.
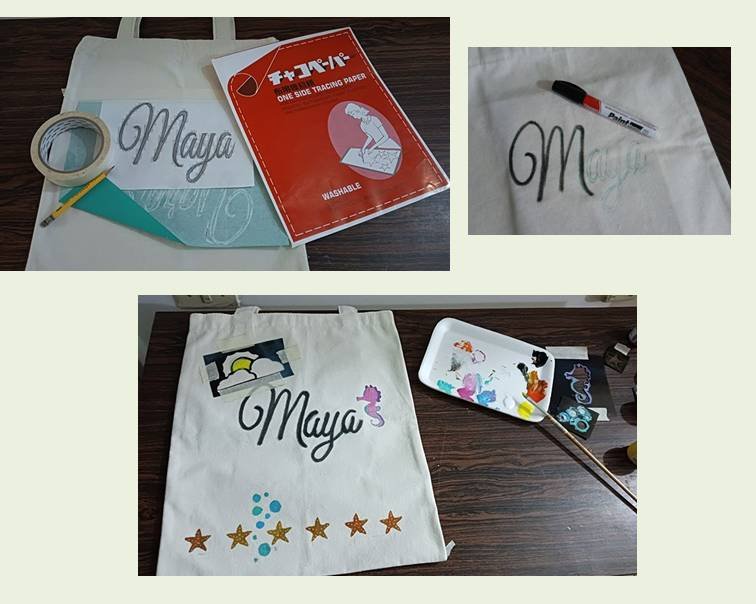
5.- A continuación les muestro todo el procedimiento seguido con uno de los bolsos. Con la cinta adhesiva, marcamos la línea que nos servirá de guía, sujetamos la plantilla a la tela y comenzamos a pintar, aquí fui haciendo un degradado.
5.- Next, I will show you the entire process I followed with one of the bags. Using adhesive tape, mark the line that will serve as a guide, attach the template to the fabric, and begin to paint. Here, I created a gradient effect.
6.- Ubicamos sobre la tela la figura central y pintamos.
6.- Place the central figure on the fabric and paint.

7.- Le agregué una lluvia de estrellas coloridas, para darle luz y un toque alegre al diseño.
7.- I added a shower of colorful stars to give the design light and a cheerful touch.
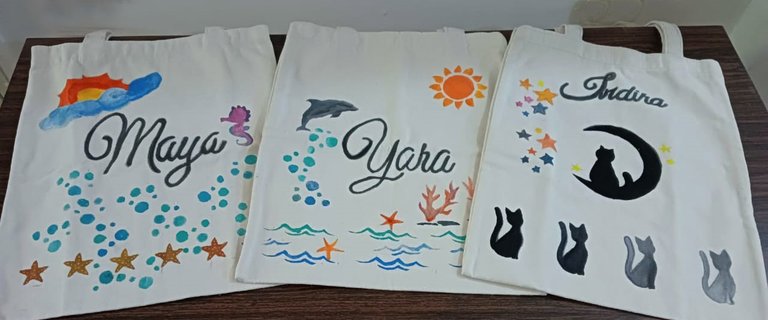
¡Listo!, aquí les muestro los tres bolsos decorados con esta técnica sencilla que se presta para hacer un trabajo hermoso y utilitario.
Done! Here are the three bags decorated with this simple technique that lends itself to beautiful and useful work.

Translated with www.DeepL.com/Translator (free version)
Fuente de imágenes: Archivo personal

MIS REDES SOCIALES


Be Entrepreneur
Posted Using INLEO
Excelente post amiga, saludos y exitos. Tiene una creatividad impresionante 😃
Hola, gracias por pasar y comentar. 🙂
Me fascina ese tipo de bolsos!!!
Hermoso emprendimiento!!
Gracias por tu comentario, hoy en día no emprendo en artesanía, durante dieciséis años trabajé la orfebrería y a veces mis manos me piden algún trabajo manual, sale a flote la maestra que fui y me pongo manos a la obra. 😀 Saludos.
You decorated the bags so well, they all look beautiful. Great work and thanks for walking us through the process.
selected by @ibbtammy
Thanks for the support.😃
Hola bella @damarysvibra, que hermosuras de bolsos, imaginé a las nietas esa sonrisa linda al recibir sus bolsos. Amé el de los gatos.
Hola @dorytagil2022, gracias por tu lindo comentario, de verdad espero que a ellas les guste y lograr motivarlas a pintar algo sobre tela, pues vamos a estar juntas varios meses. 🙃🙂
Wuao! imagino la emoción. seguro que si. Los momentos que compartimos con nuestros seres queridos en especial con los niños quedaran grabados en su memoria para toda su vida.
Ful disfrute y a consentirla!
Hello damarysvibra!
It's nice to let you know that your article will take 7th place.
Your post is among 15 Best articles voted 7 days ago by the @hive-lu | King Lucoin Curator by keithtaylor
You receive 🎖 0.8 unique LUBEST tokens as a reward. You can support Lu world and your curator, then he and you will receive 10x more of the winning token. There is a buyout offer waiting for him on the stock exchange. All you need to do is reblog Daily Report 690 with your winnings.
Buy Lu on the Hive-Engine exchange | World of Lu created by szejq
STOPor to resume write a wordSTART