DIY: Transform Larvie from Holozin into a Fantasy Butterfly Step-by-Step Tutorial
¡Hola, comunidad de Hive! 🌿 Para los amantes de las manualidades y la creatividad, hoy les traigo un proyecto especial: transformaremos a Larvie de Holozin de tierna oruga ¡a una mariposa de fantasía!
Hello, Hive community! 🌿 For all the craft and creativity lovers out there, today I bring you a special project: we'll transform Larvie from Holozin from a cute caterpillar into a fantasy butterfly!

A continuación les mostré paso a paso la realización de mi trabajo. Comenzaré mostrando los materiales
Next, I'll show you step by step how I made my project. I'll start by displaying the materials.

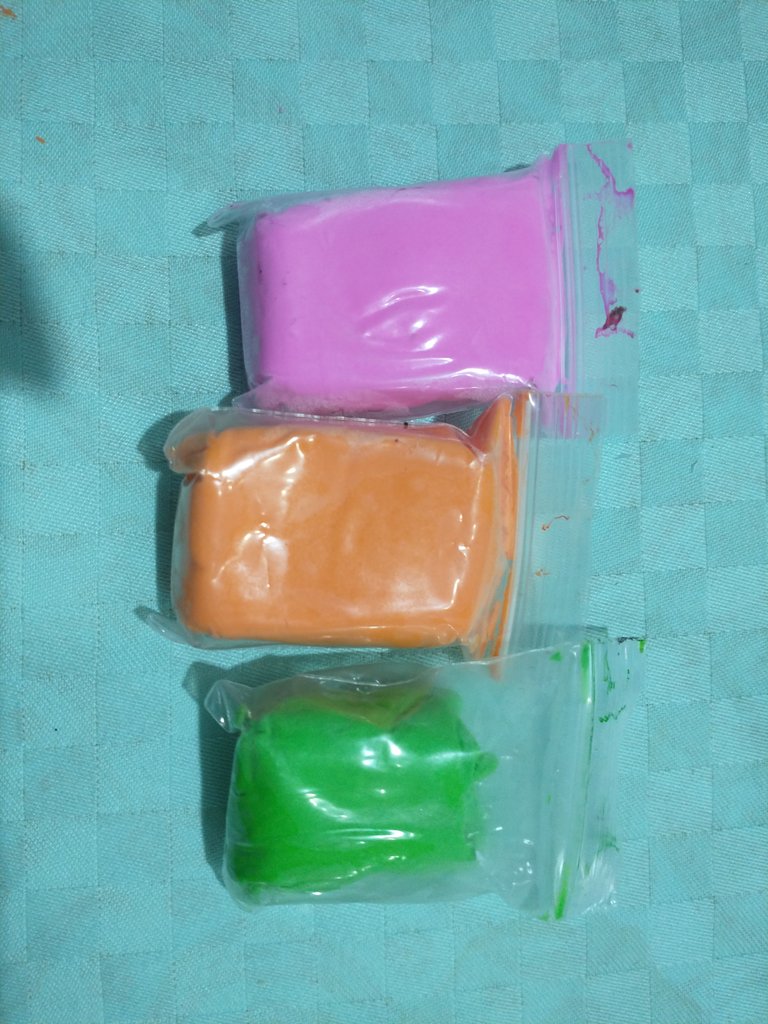
MATERIALES/ MATERIALS
Step / Paso 1
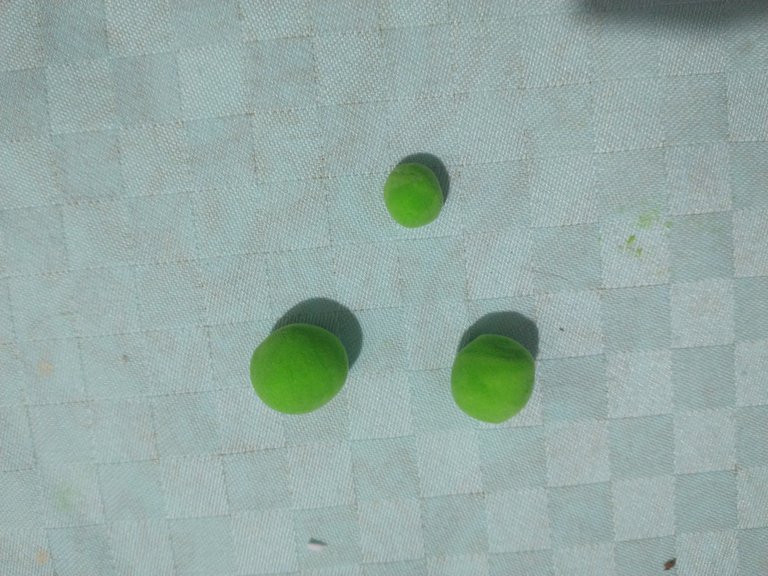
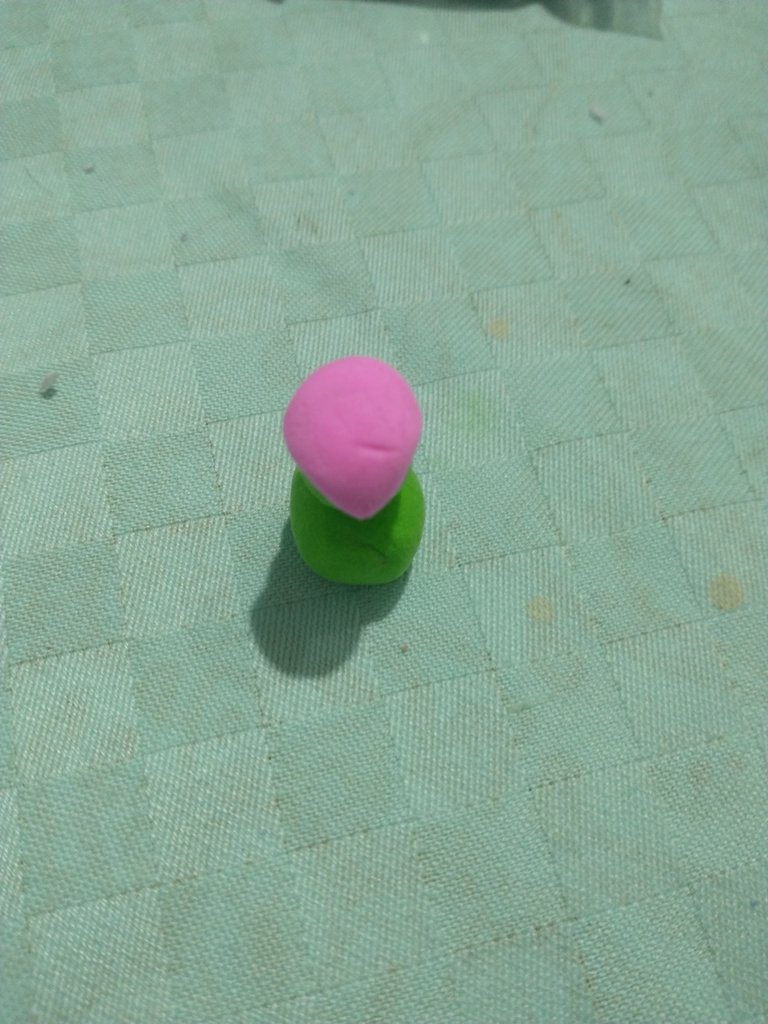
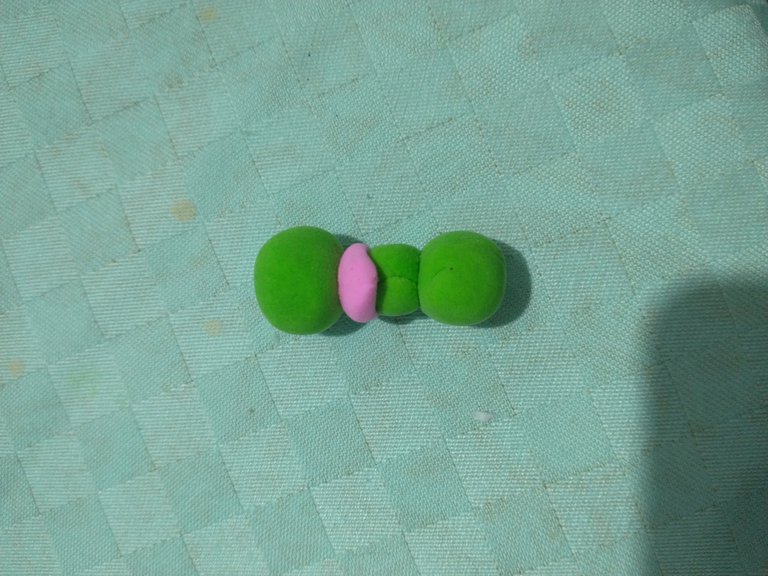
Comenzamos por el cuerpo. Hacemos tres esferas verdes, una un poco más pequeña que las otras dos. Luego, en color rosado, formamos una figura de lágrima, la aplanamos y la colocamos entre la parte que será la cabeza y el torso.
We start with the body: we make three green spheres, one slightly smaller than the other two. Then, using pink, we shape a teardrop, flatten it, and place it between what will be the head and the torso
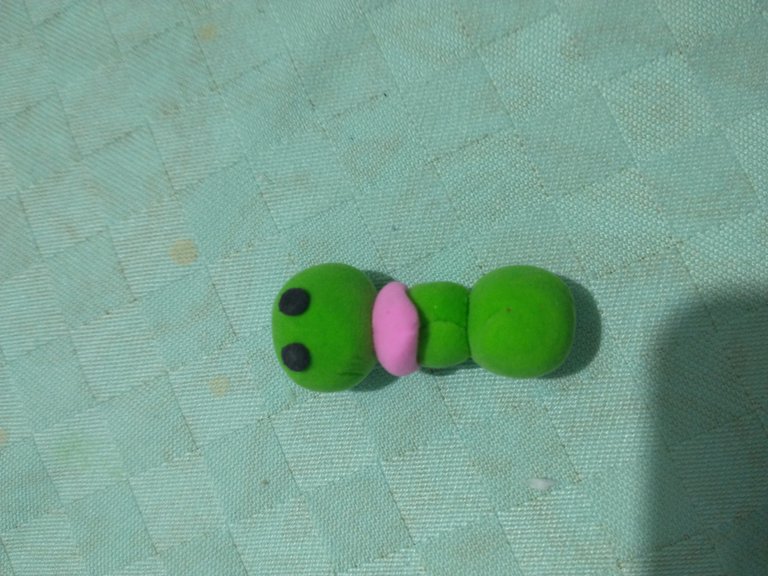
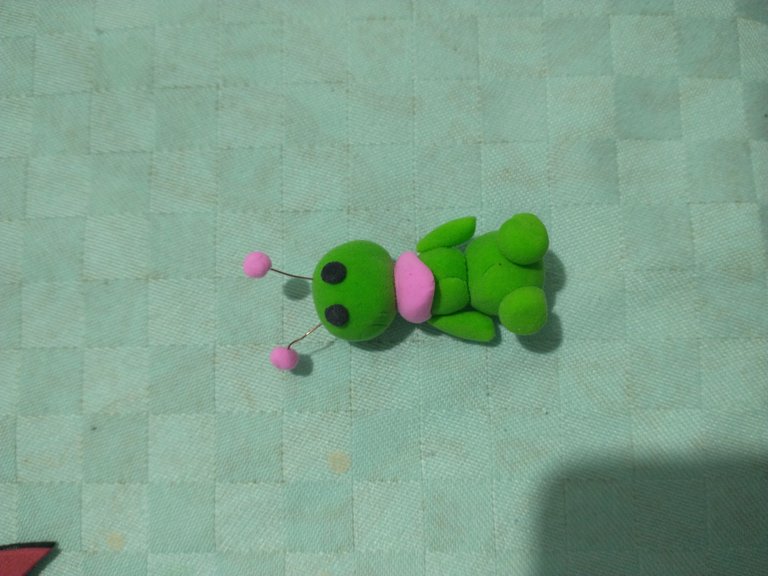
Con dos pequeños círculos negros hacemos los ojos. Para las antenas, tomamos dos trozos pequeños de alambre, les ponemos dos bolitas en la punta y las colocamos en la cabeza.
With two small black circles, we make the eyes. For the antennas, we take two small pieces of wire, attach two tiny balls at the tips, and place them on the head.
Step / Paso 2
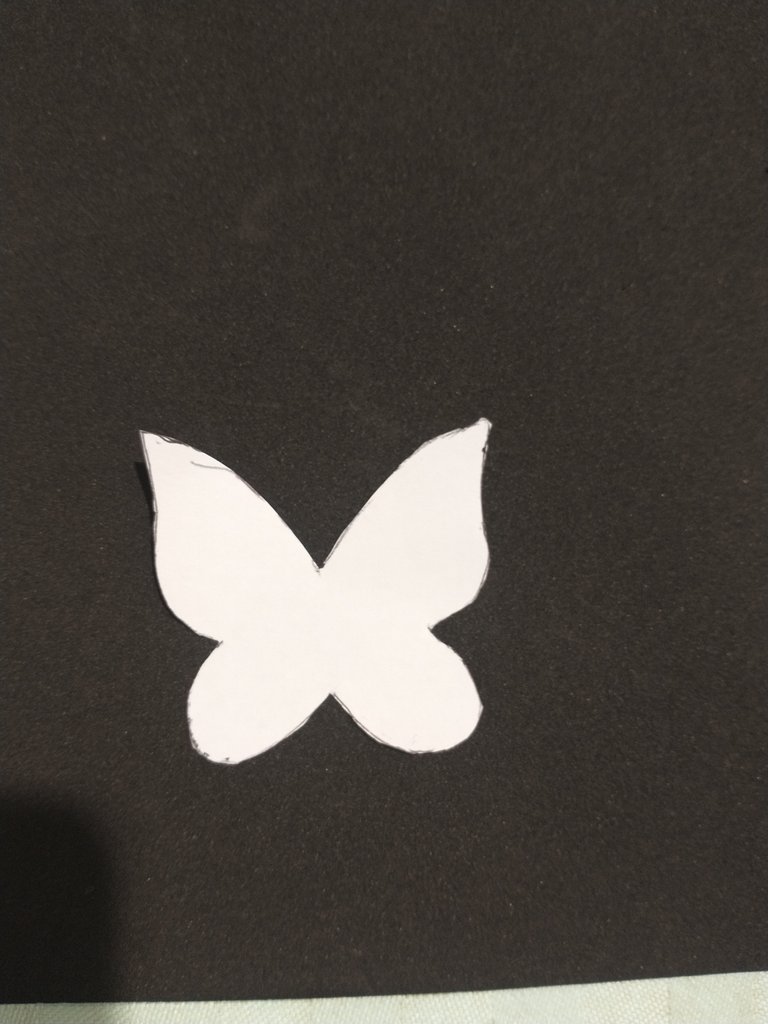
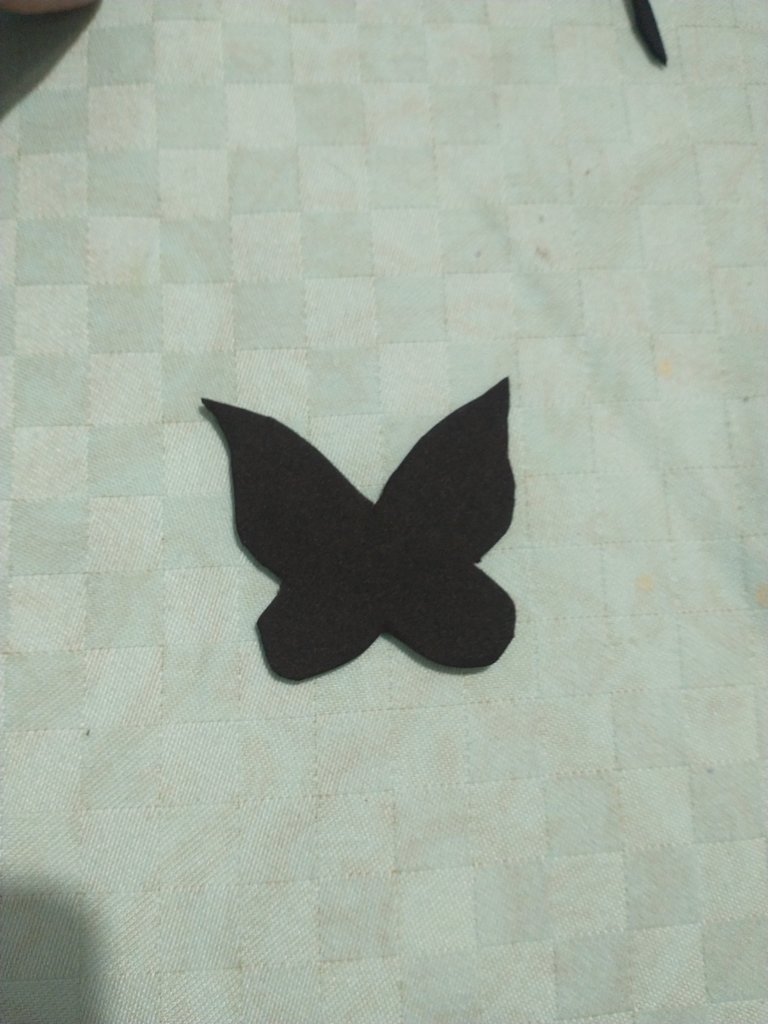
Para las alas marcaremos en foami negro el diseño y recortamremos
For the wings, trace the pattern onto black foam and carefully cut it out.
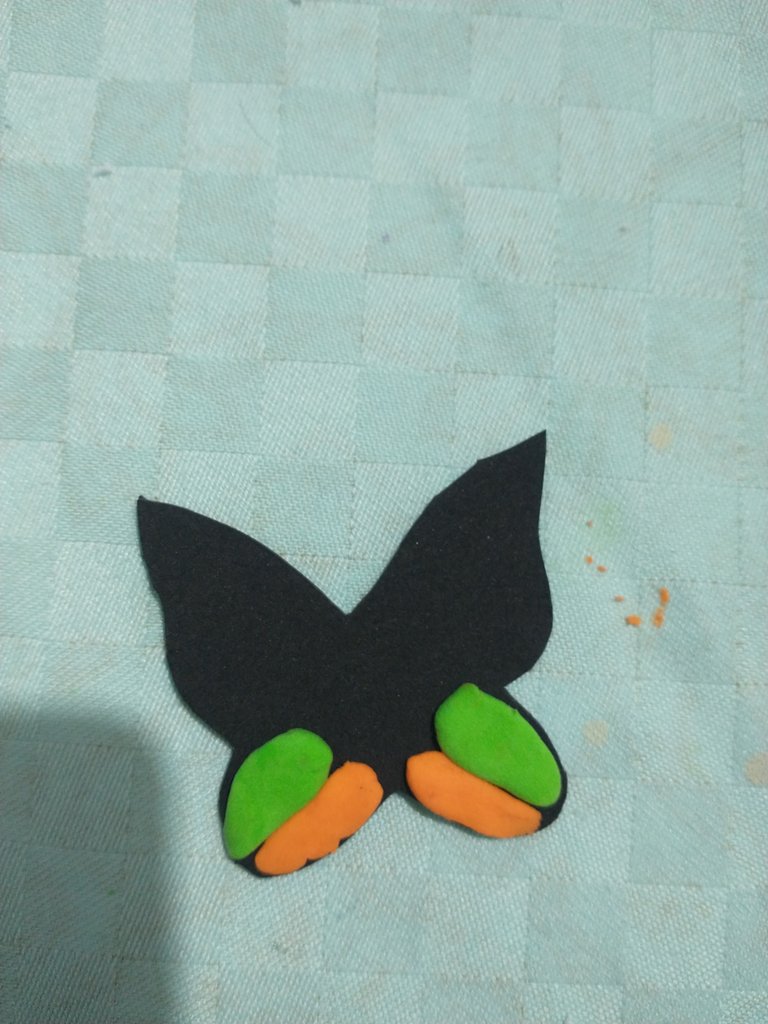
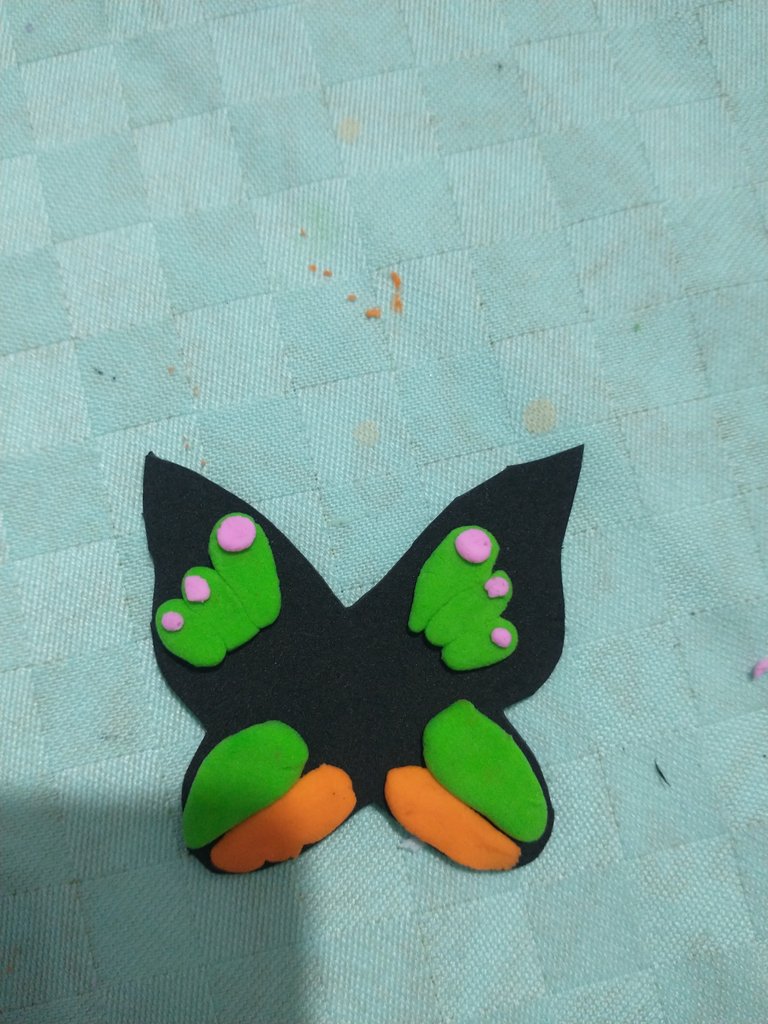
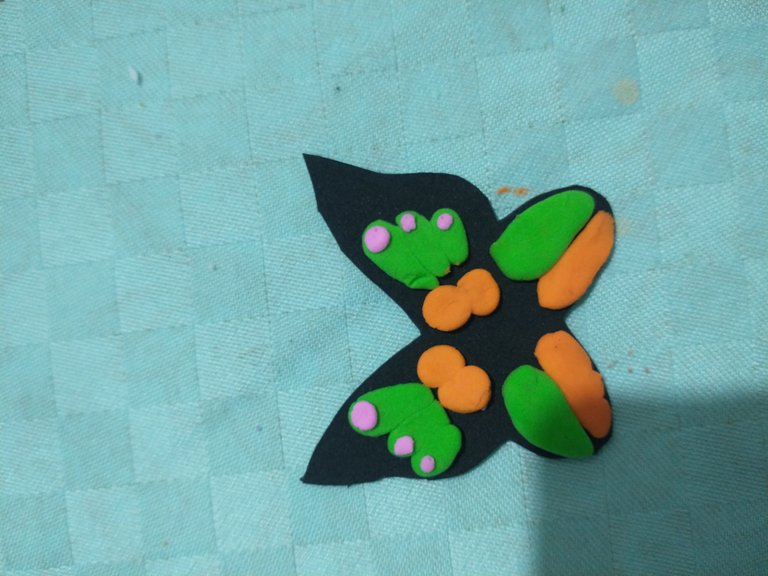
En la parte superior de las alas, hacemos tres lágrimas verdes unidas por la parte fina y las presionamos. Sobre estas, colocamos tres pequeños puntos rosados. En la parte media, ponemos dos círculos naranjas, y en la inferior, hacemos dos lágrimas (una naranja y otra verde), colocando las naranjas cerca del borde y las verdes encima. Por último, uniremos las alas al cuerpo.
On the top part of the wings, we make three green teardrops joined at the thin end and press them down. On top of these, we place three small pink dots. In the middle section, we add two orange circles, and at the bottom, we make two teardrops (one orange and one green), placing the orange ones near the edge and the green ones on top. Finally, we attach the wings to the body
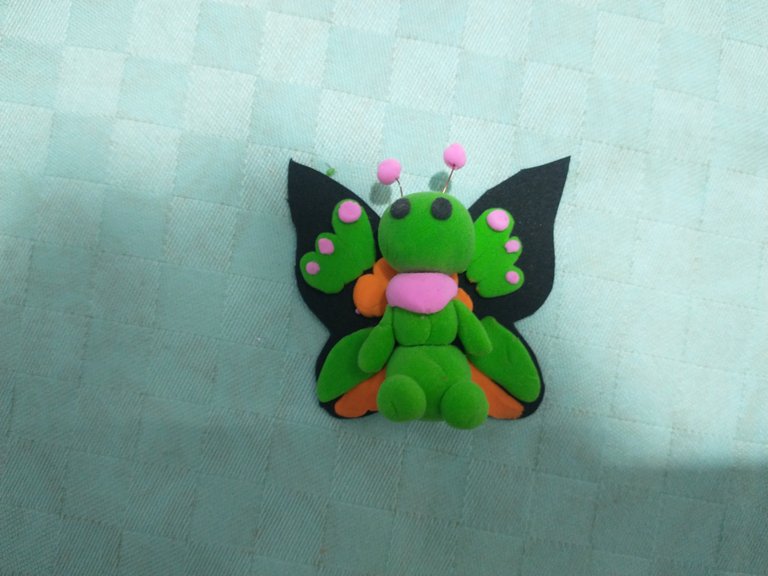
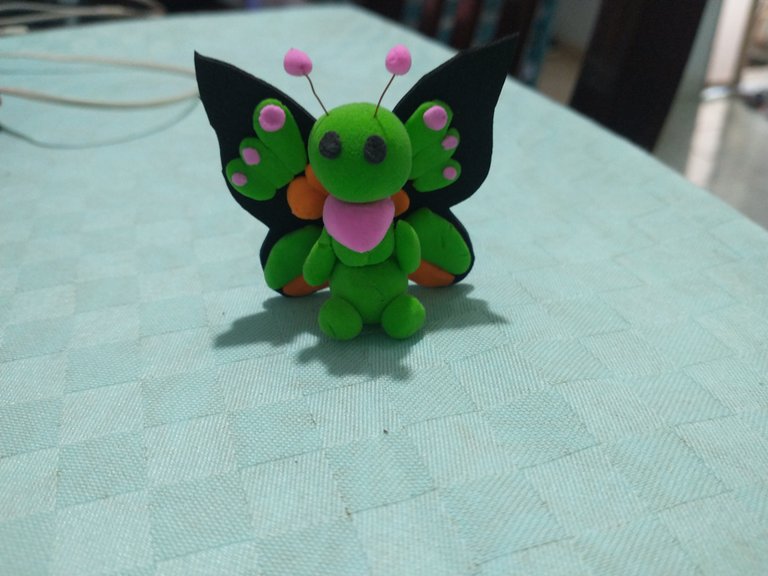
Resultado / Result
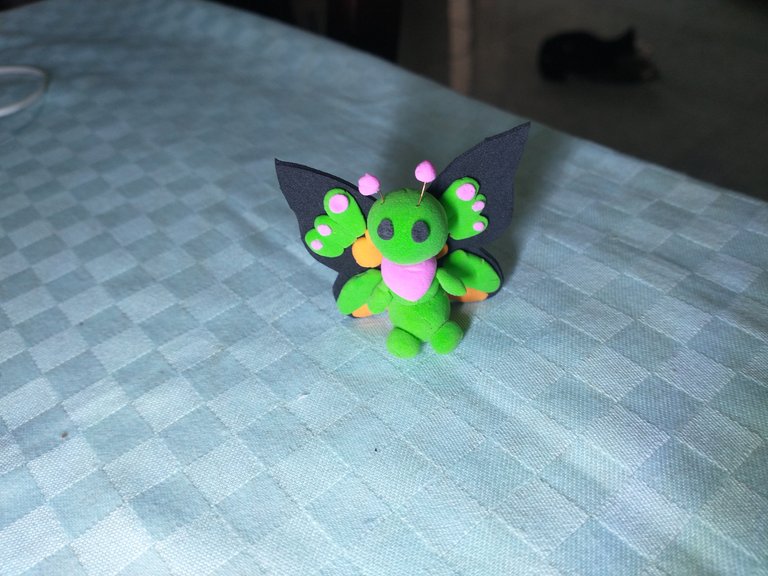
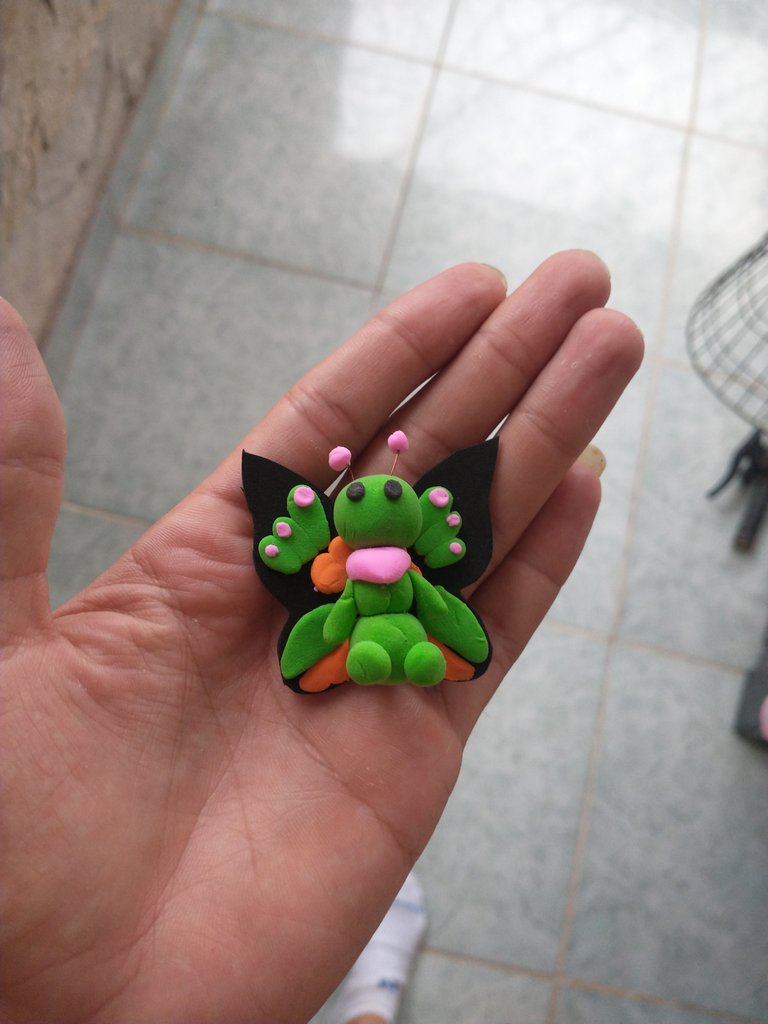
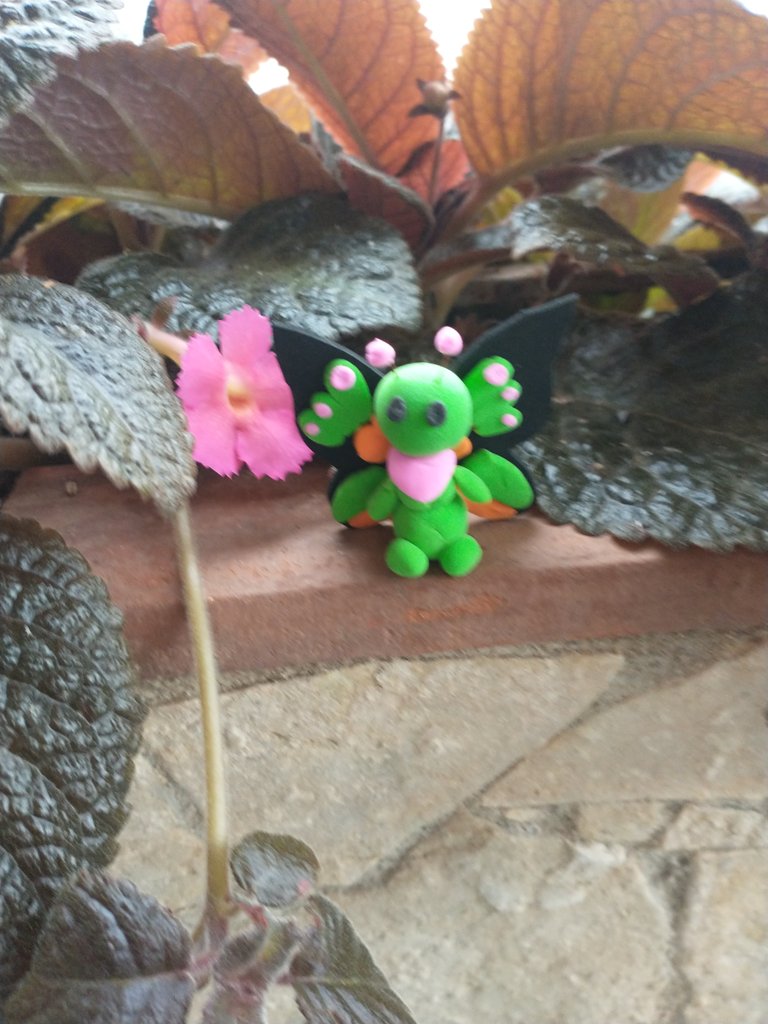
El diseño fue buscado en la comunidad de holozing, pero la creación de la figura y fotos del proceso fueron realizados por mi
The design was sourced from the Holozing community, but the figure's creation and process photos were made by me
Si te ha gustado el post, no olvides dejar tu comentario y seguirme para próximas publicaciones. Me encantaría saber tu opinión e ideas para el siguiente. Saludos 😊
If you liked the post, don't forget to leave a comment and follow me for future posts. I'd love to know your opinion and ideas for the next one. Regards
¡Enhorabuena!
✅ Has hecho un buen trabajo, por lo cual tu publicación ha sido valorada y ha recibido el apoyo de parte de CHESS BROTHERS ♔ 💪
♟ Te invitamos a usar nuestra etiqueta #chessbrothers y a que aprendas más sobre nosotros.
♟♟ También puedes contactarnos en nuestro servidor de Discord y promocionar allí tus publicaciones.
♟♟♟ Considera unirte a nuestro trail de curación para que trabajemos en equipo y recibas recompensas automáticamente.
♞♟ Echa un vistazo a nuestra cuenta @chessbrotherspro para que te informes sobre el proceso de curación llevado a diario por nuestro equipo.
🏅 Si quieres obtener ganancias con tu delegacion de HP y apoyar a nuestro proyecto, te invitamos a unirte al plan Master Investor. Aquí puedes aprender cómo hacerlo.
Cordialmente
El equipo de CHESS BROTHERS