The Journey Of A Hivean Task 7 - Master Posting Short Content
POSTING SHORT CONTENT ON HIVE - THE JOURNEY OF A HIVEAN
INTRODUCTION
The beauty of hive is in its uniqueness. On Hive, we get to experience everything that web2 has to offer and more.
It is worth noting that every hive user is at the top of the pyramid when it comes to harnessing the full benefit of the web. While this is so, not everyone is fortunate to grasp all that this decentralised platform has to offer.
Thus, the Journey of a Hivean was born. A journey with several tasks where fellow hive enthusiasts come together in areas of strength to enlighten hiveans on all that the hive web3 blockchain has to offer.
I will be giving tutorials on task 7, where we will explore posting short content on Hive under the following itemisation:
Log in to Inleo and post.
Log in to Waves and create a post.
Interact with the waves feed.
Post a short video on 3shorts
Log into Liketu and post a moment.
Let's begin
LOG IN TO INLEO AND POST
As a newbie and various hive users, we all have our areas of interest here. One which I'm sure is majorly influenced by our experiences on web2.
That being said, the question becomes, what area does your interest lie in? Is it to learn, to connect or both? Are you a tweet guru? One who yearns for the X experience outside of the box of a centralized system?
Well, welcome aboard Inleo, a frontend (platform) where you can thread just like you tweet on X. You can even change to the X theme, making you feel at home while on Hive.
So for our first tutorial, we are going to learn how to log in and post on Inleo using the Inleo frontend.
The following steps are easy guides on how to get into Inleo and make your first thread.
For this tutorial, the steps are in mobile format. If you want to use a desktop, do not fret, just log in via your explorer or any browsing app, it's the same step.
Steps to login to inleo
- Open Safari or any other web browser that you might have.
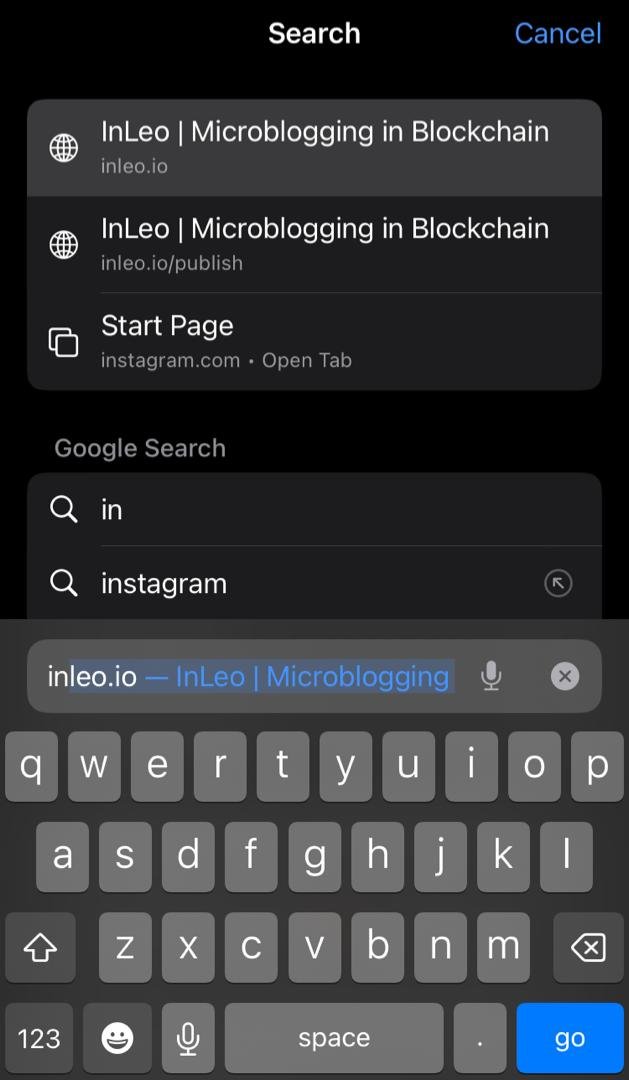
Type on the search bar inleo.io as shown in the picture above.
Click Enter or Go, as shown in the blue colored keypad in the far right below in the picture, and you will be directed to the Inleo login page as seen below.
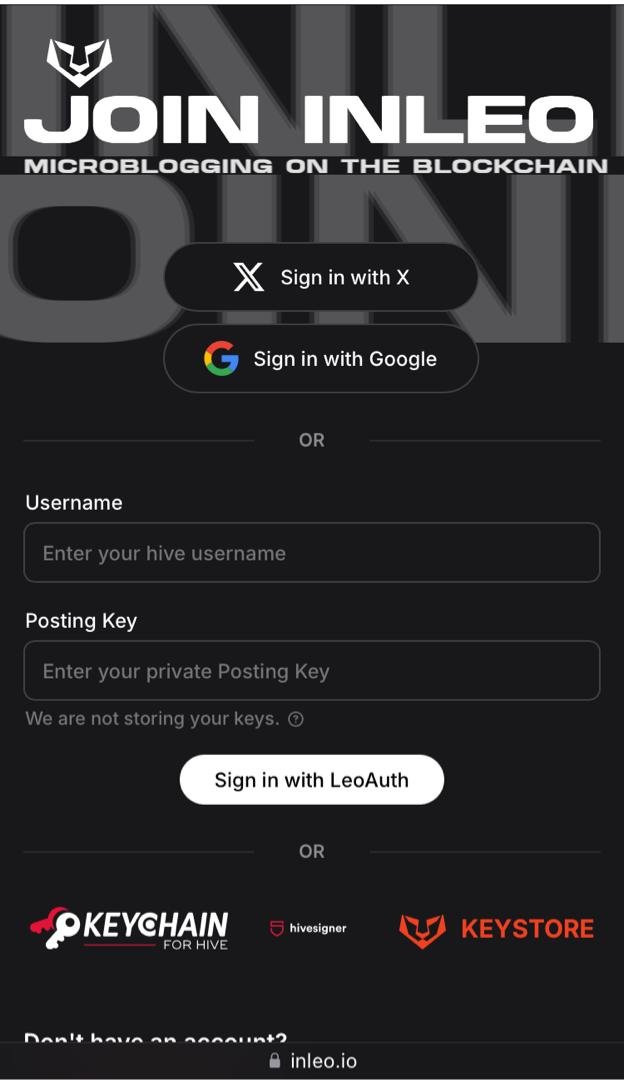
Looking at the login page on the picture above, we could see that there are multiple login options for a seamless operation.
They include:
signin with X
signin with google
signin with LeoAuth
signin with keychain for hive
signin with hivesigner
signin with keystore
For this tutorial, using the steps below as a guide, we logged into inleo, using the LeoAuth option
STEPS
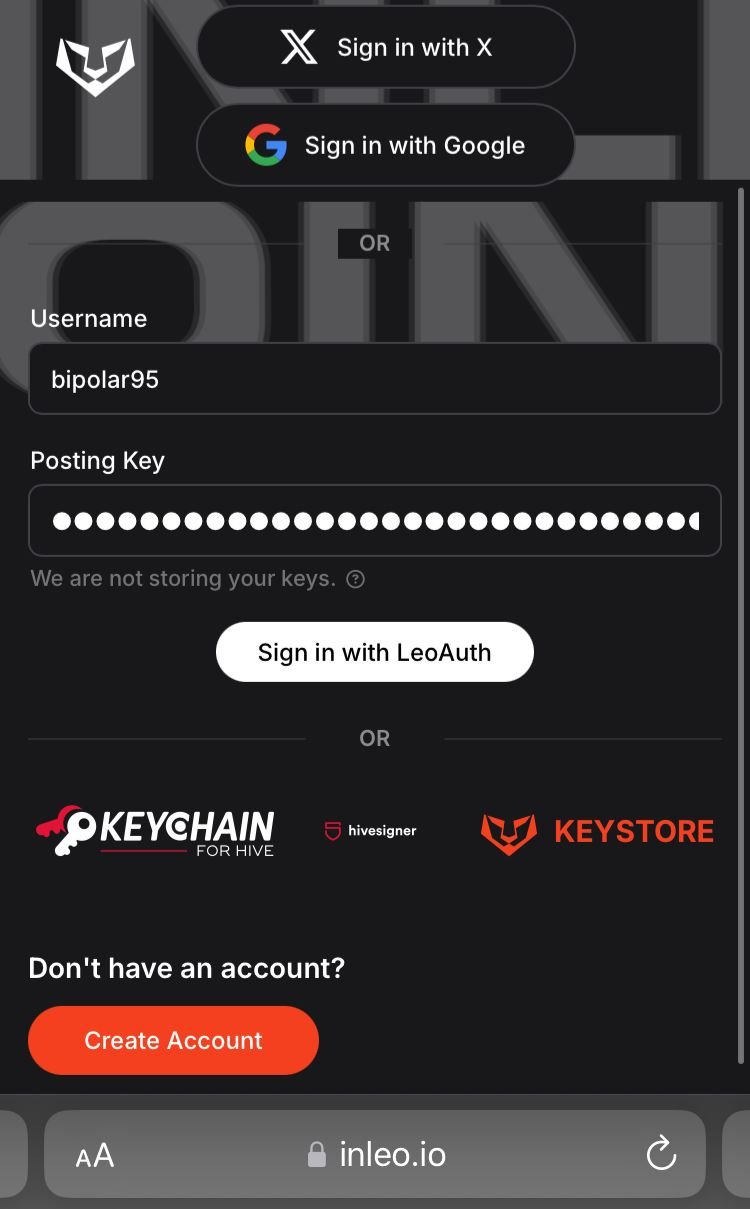
Input your hive username and your private posting or active key as stated on the respective spaces on the screenshot above.
Click on the sign in with LeoAuth space afterwards.
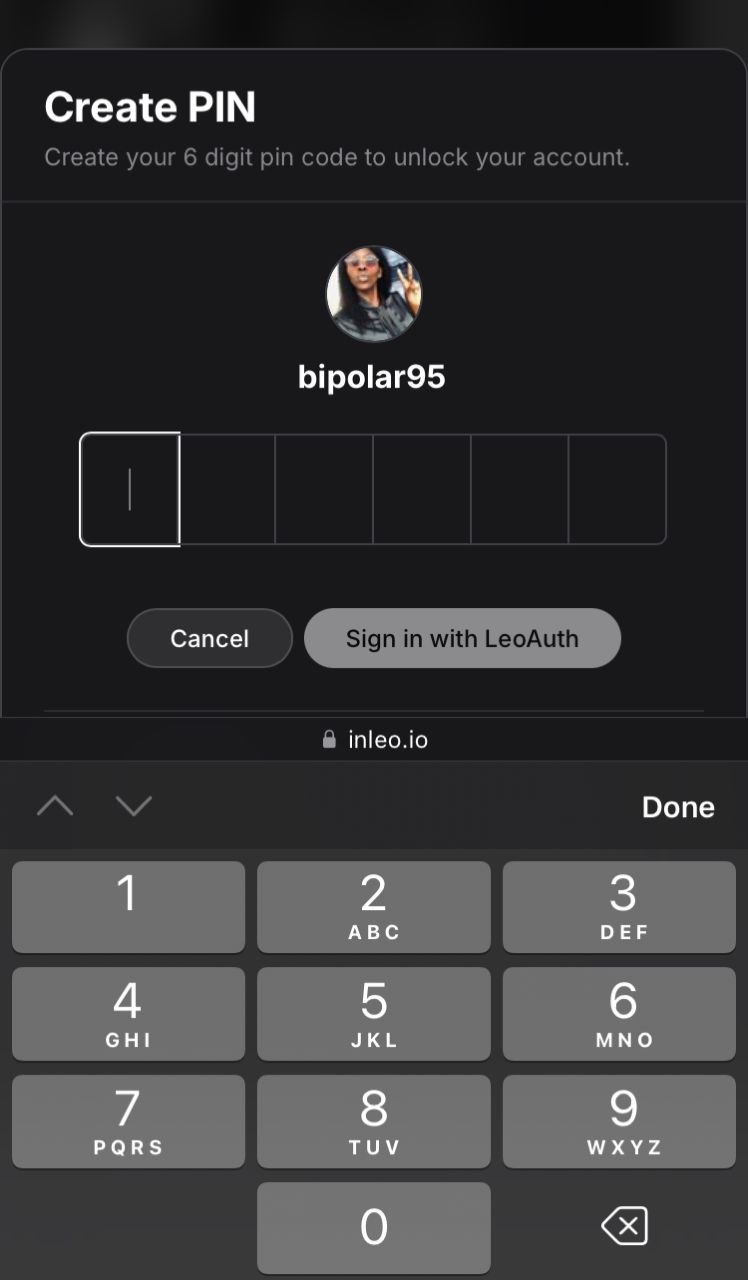
You will be instructed to create your PIN which you will be using to log in subsequently
HOW TO CREATE LEOAUTH PIN
From the picture above, in the six spaces (boxes) after my hive username, input any six digits that you can easily remember.
Click on the Sign in with LeoAuth space.
You are in and ready to make your first thread

STEPS TO POSTING YOUR FIRST THREAD
- From the screenshot below, click on the first space with the faint catch phrase start roaring.
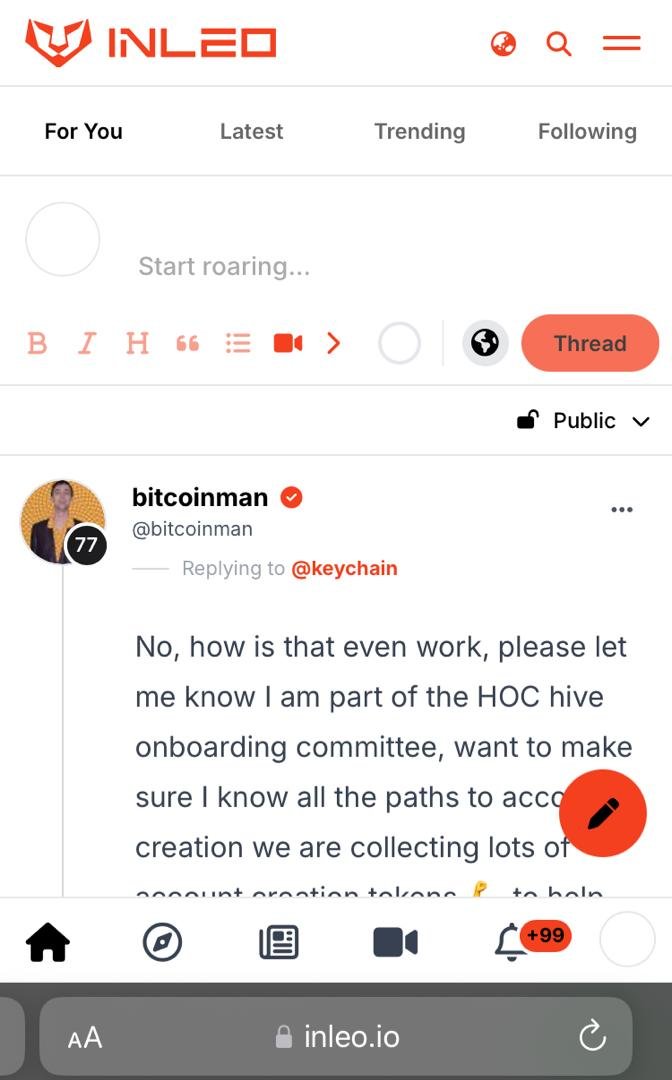
It will enlarge and grant you access to type whatever short thread that you please as seen from the screenshot below.
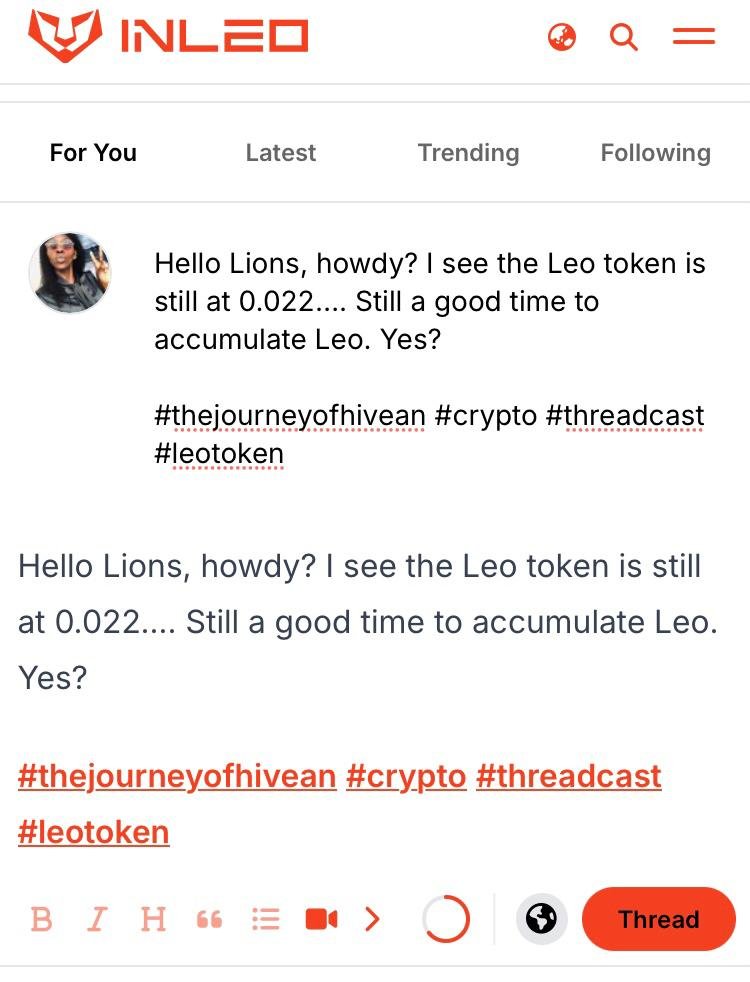
- From the screenshot above, click on the orange space below that states thread, at the right corner underneath the space box of your short written thread and hashtags
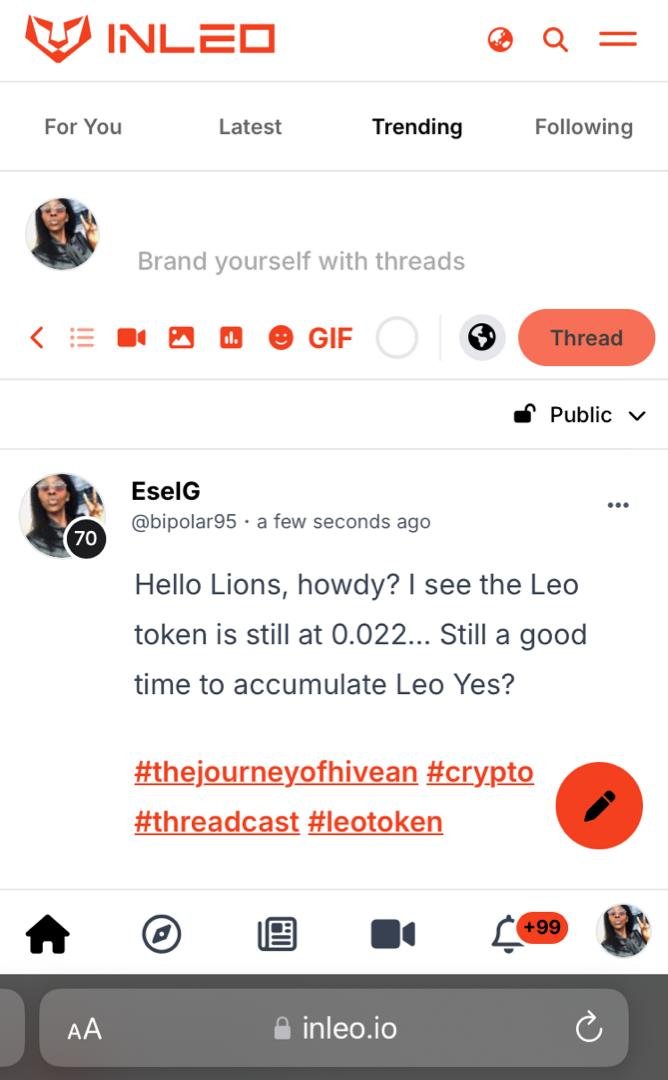
There you have it, folks, our thread is live below
Remember to include your hashtags like I did in my thread for a wider reach. Also, do note that the first space comes with different short catch phrases as seen in the various screenshots above. So when you want to try it out, yours most likely won't show, "start roaring"
LOG IN TO WAVES AND CREATE A POST
I earlier described Hive as a decentralized platform. What this means is that we have different but similar initiatives come alive on different frontends to enhance our preferences and choices. On Hive, there is no limit to what you can do or experience. Thus, apart from Inleo, you can also enjoy the whole tweeting experience via Ecency Waves.
Here, we will not only learn how to create a post using waves, but we will also interact because that's one of the mantras for Hive: Engagement.
So, for this tutorial, I made use of the Ecency app. If you don't already have the Ecency app installed on your phone, head on out to your app store or Google Play Store and search for Ecency to download the app.
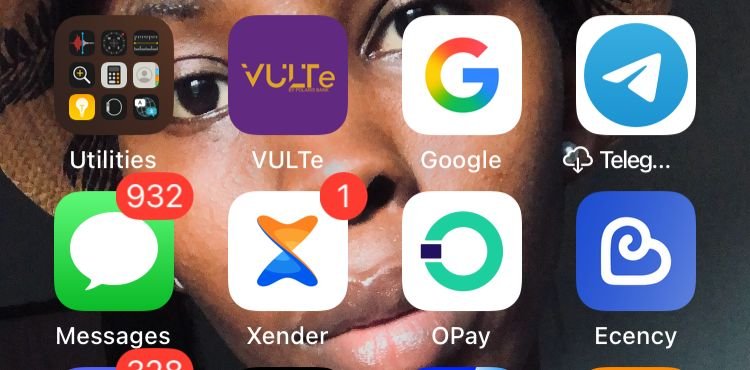
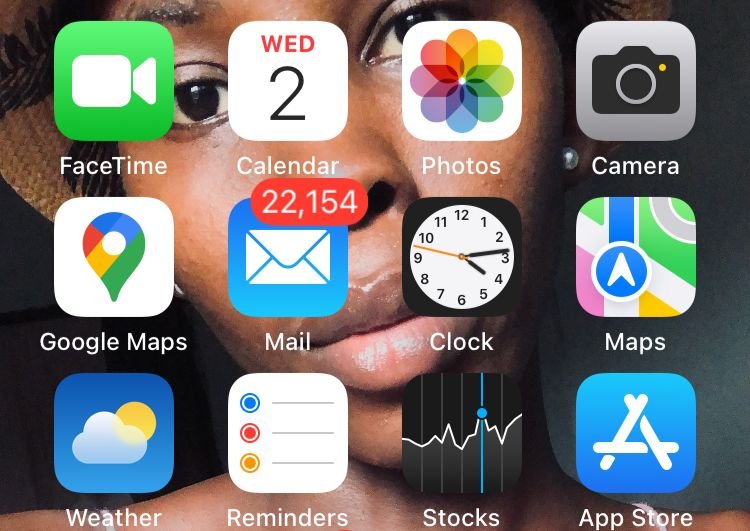
- From your gallery, open the ecency app. That is the last app on the second row in the screenshot below.
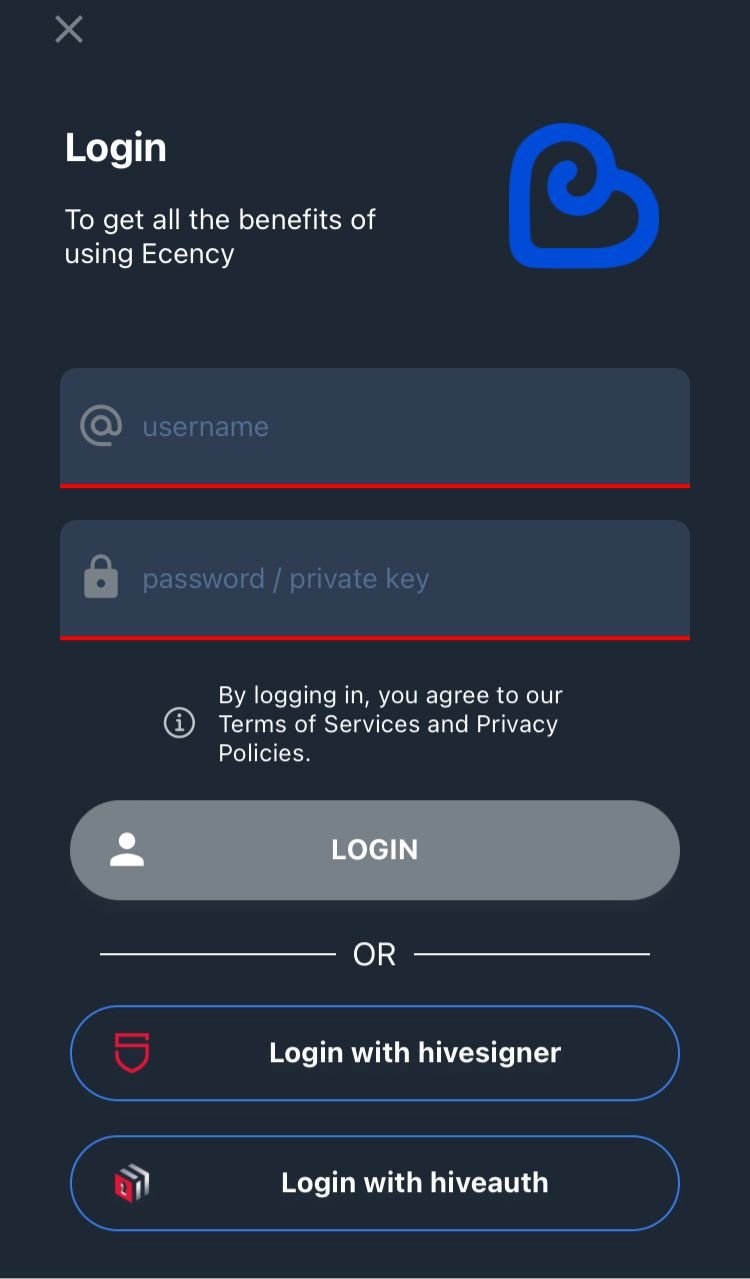
You will be directed to the login page, as seen below, where you input your Hive username and posting key.
I didn't have difficulty with this as the login was seamless. After inputting your details, click the login, and you are in. If the login method does not work, go on to use the other login options available, like the HIVESIGNER OR HIVEAUTH.
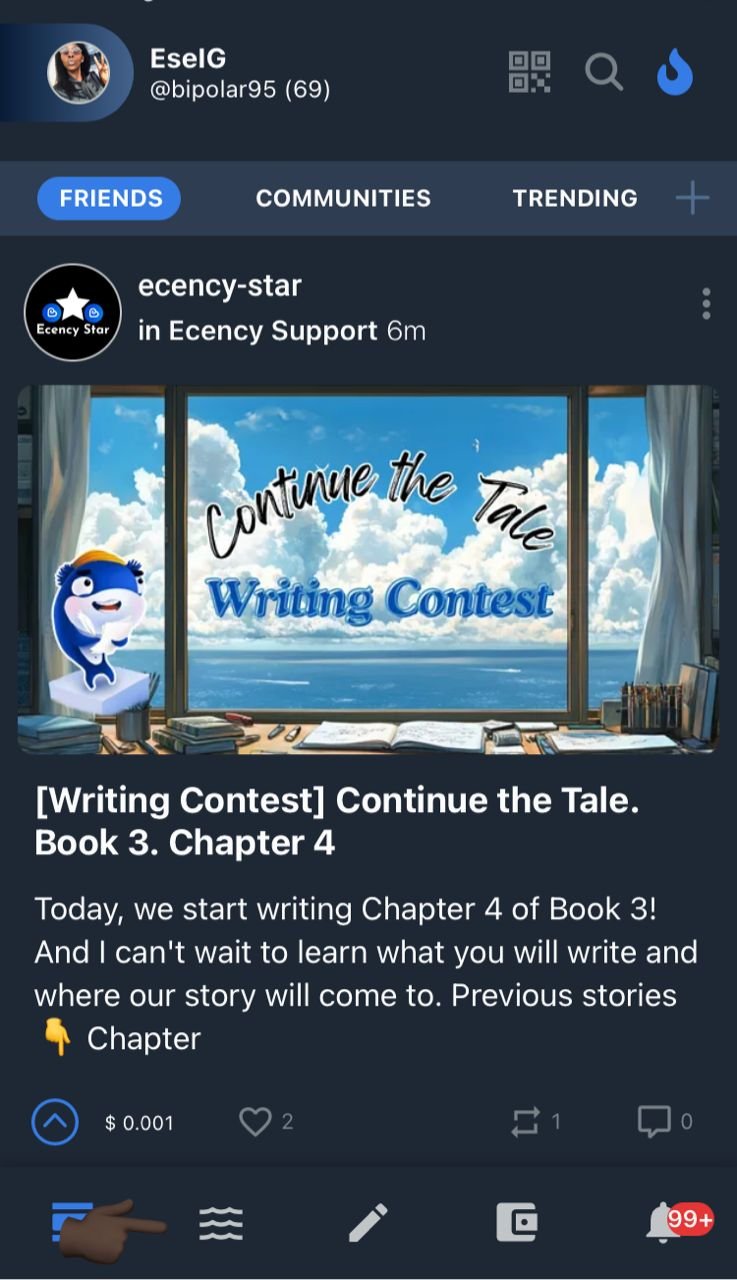
- Click on the second icon at the end of the ecency page in the screenshot below. To easily locate it, look out for the direction of the pointing finger below. This will take you to ecency wave where you can post your short content and engage other users.
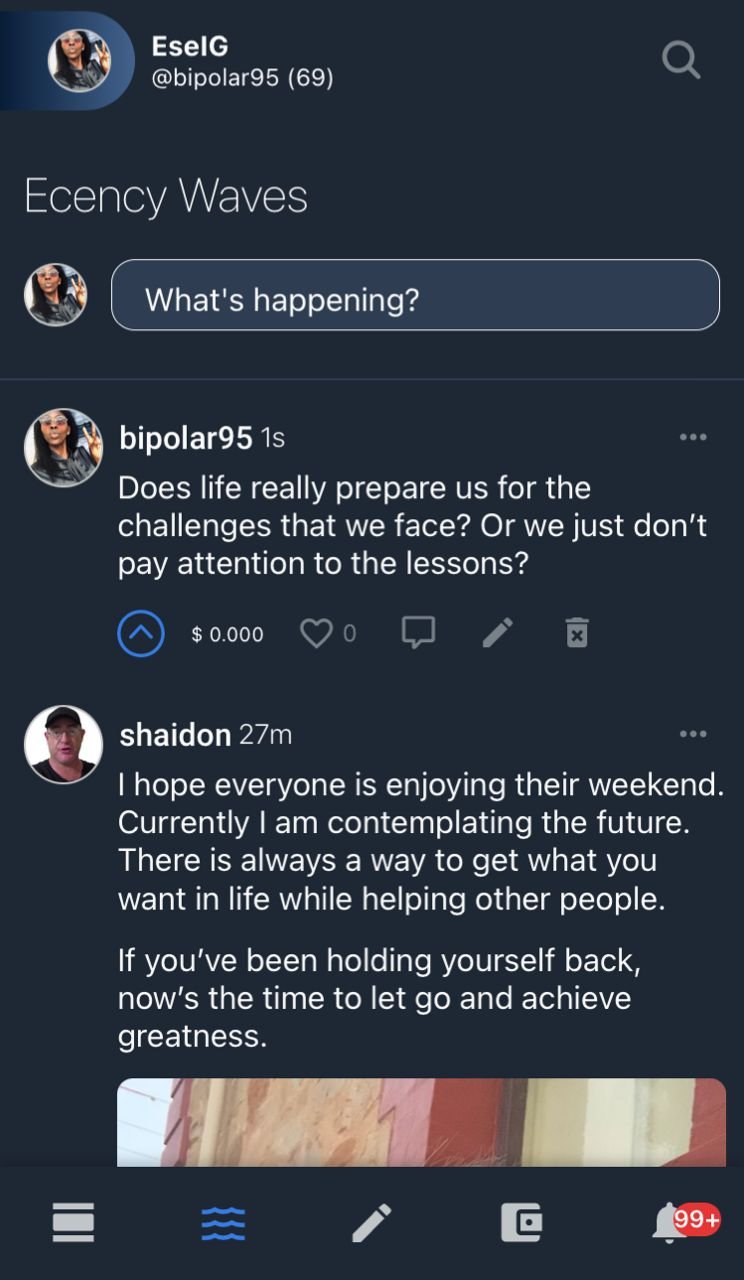
- From the page on the screenshot below, after the wording ( ECENCY WAVE) click on the space written, what's happening and share your short content with us.

- Click on the publish space underneath once you are done typing.

Congratulations your wave is live 🙂
INTERACT WITH THE WAVE FEED
It is worth noting that Hive is not a dumping ground, and that's one of the things that made me fall inlove with this amazing platform.
The thing is, you cannot just drop a post and ignore the comments or not comment on other hiveans' content.
Basically, with Hive, engagement is a must, and if you are one who is not sociable, then I'm sorry because you will have a hard time getting along on Hive.
So, let's learn how to interact.
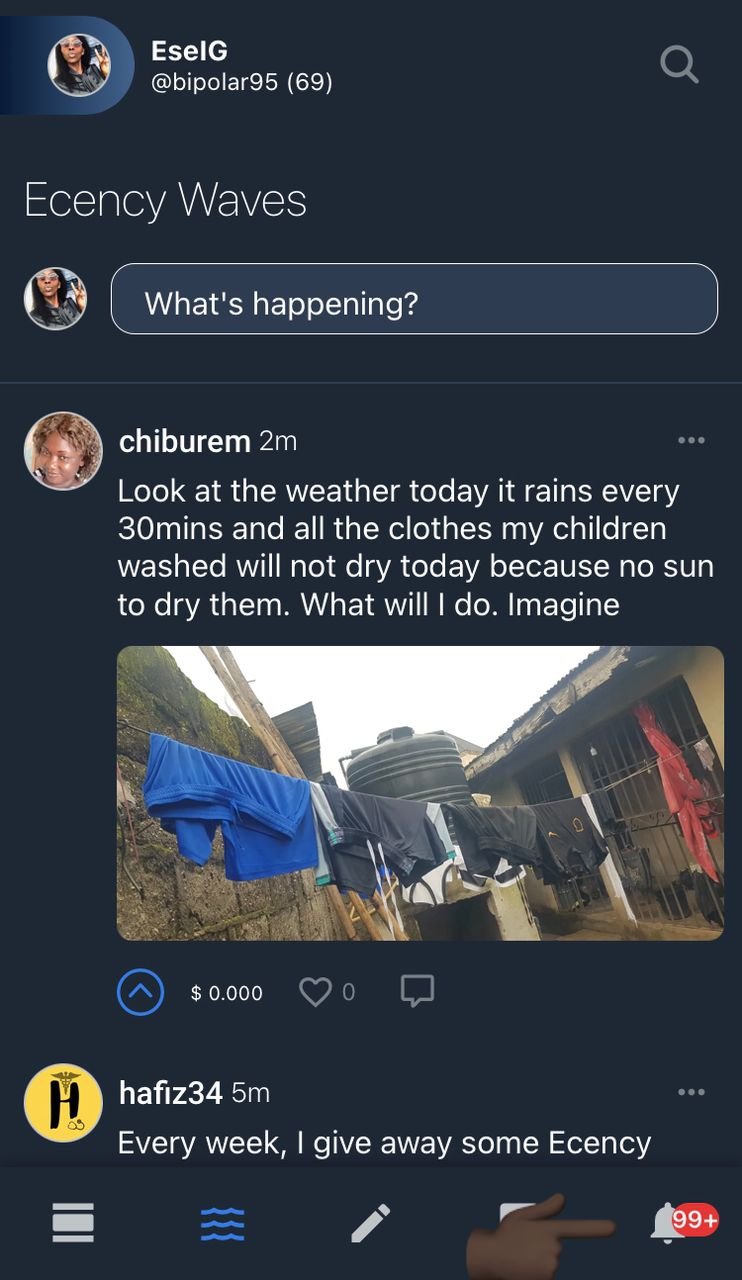
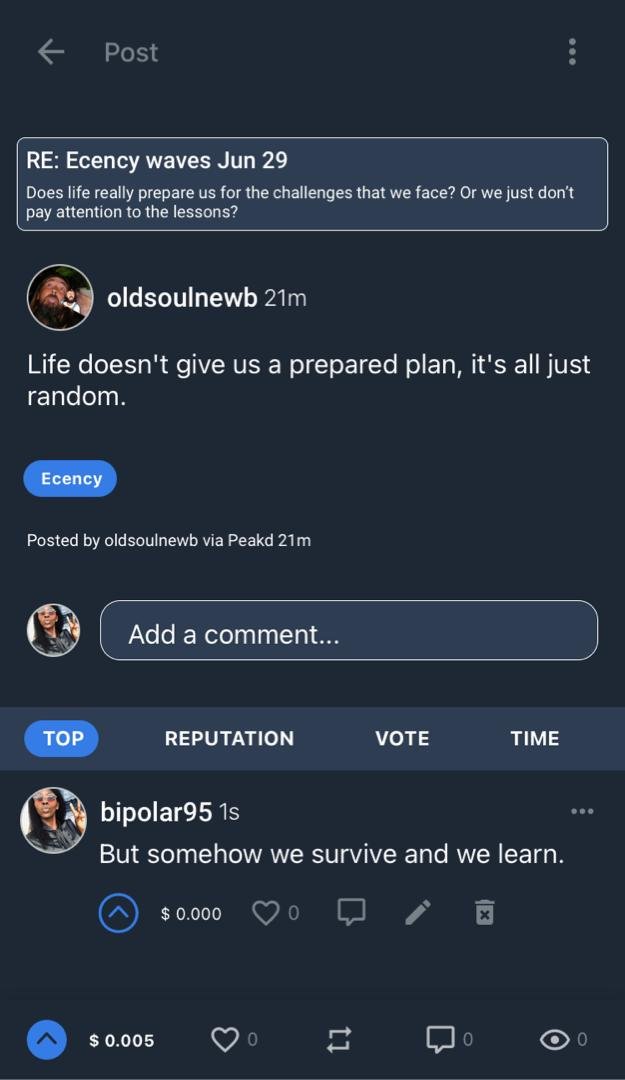
From screenshot below, when I entered the wave section, Shaidon's post was the first message that I saw and I quite resonate with it.
So, after posting my wave, I dropped a comment, sharing my thought concerning the post.
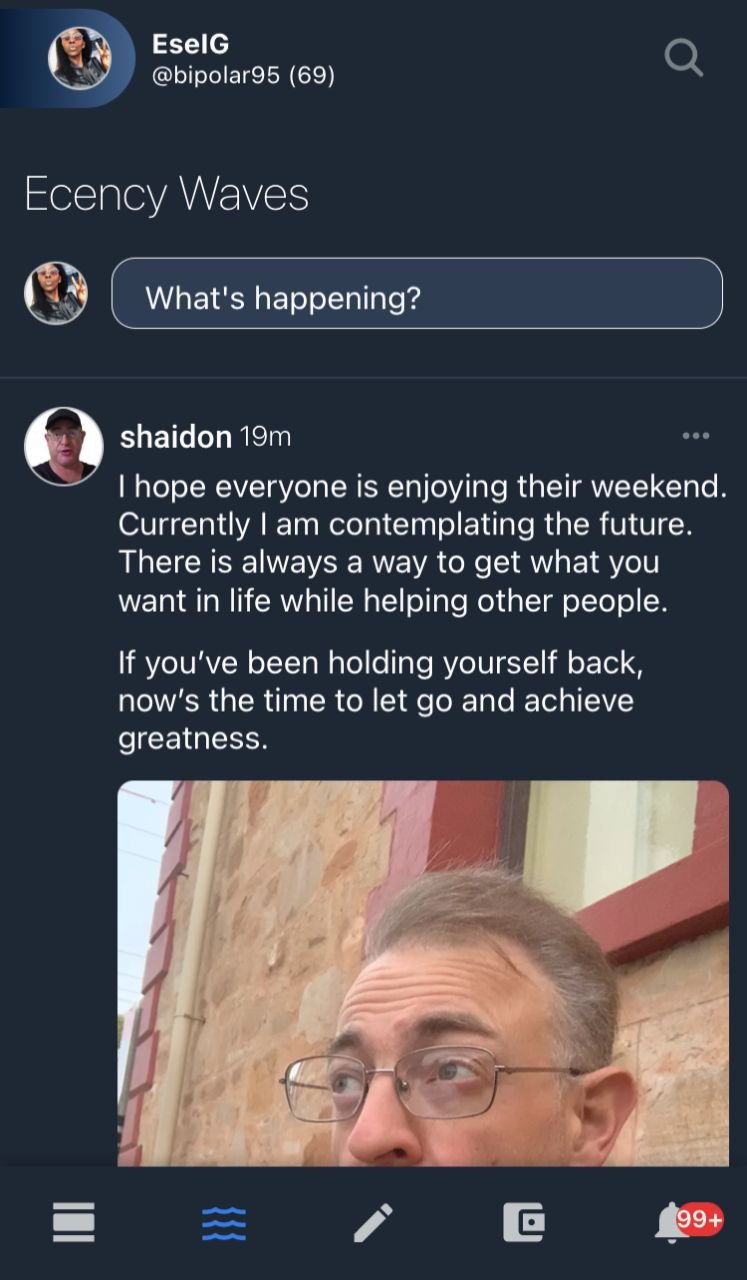
The following screenshots below, are guides to interacting on wave
- Underneath the picture on the screenshot below, click on the last tiny icon in the shape of a chat box.

From the screenshot below, the comment section will appear for us to share our thoughts on the post just like I did.
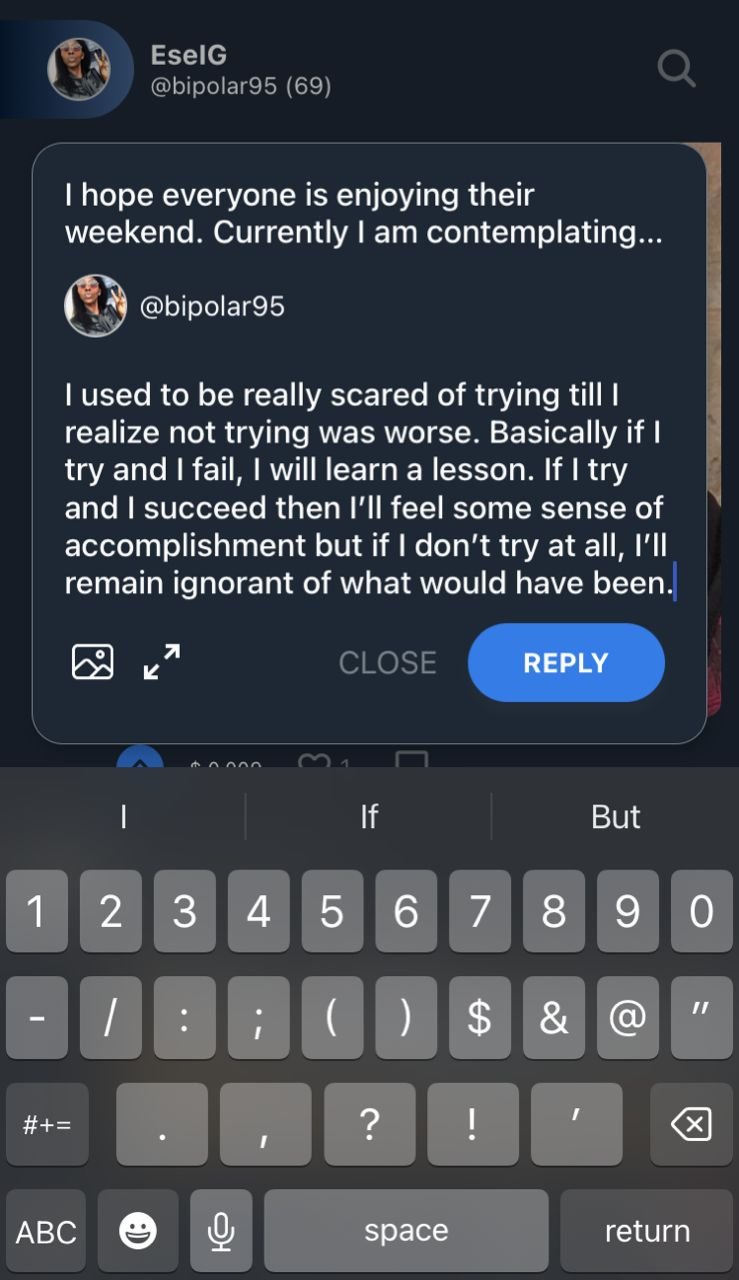
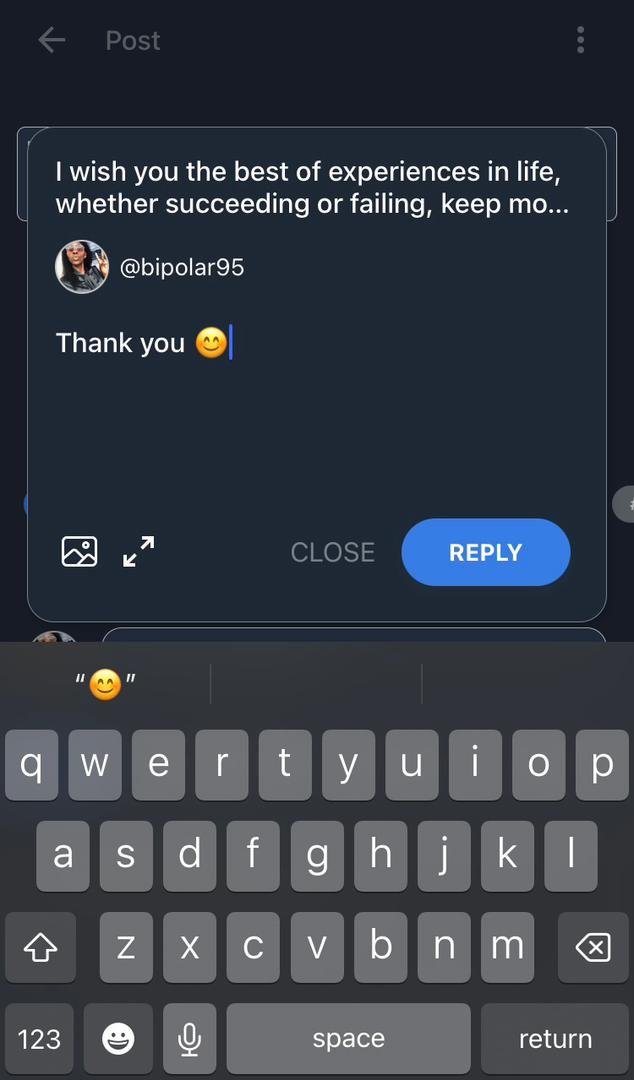
- After putting down our thoughts, click on the reply page to post your comment.
My comment is live 🙂
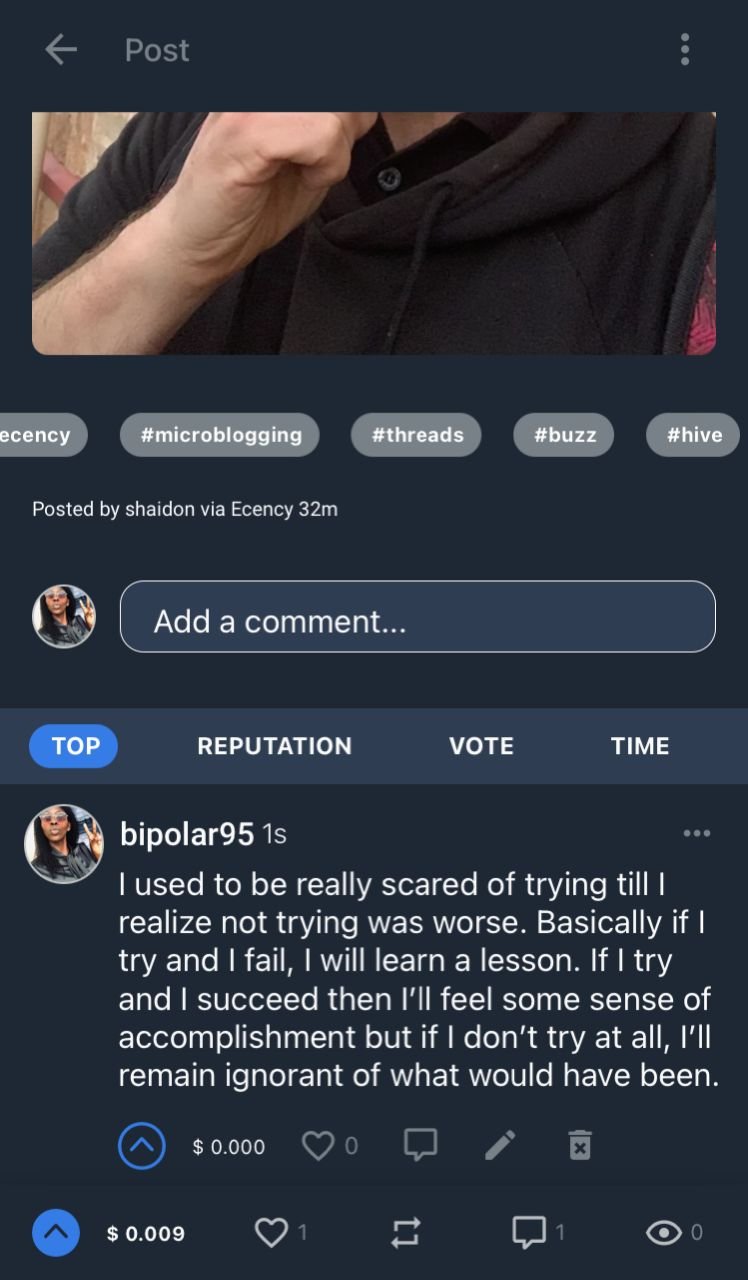
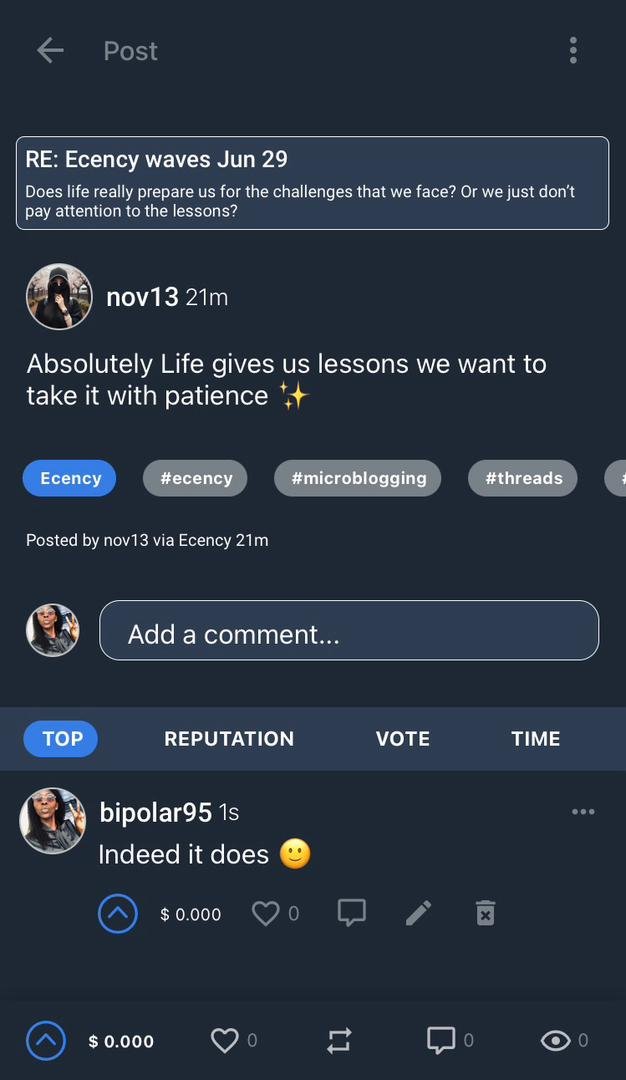
Trust that I got a response from the author too.
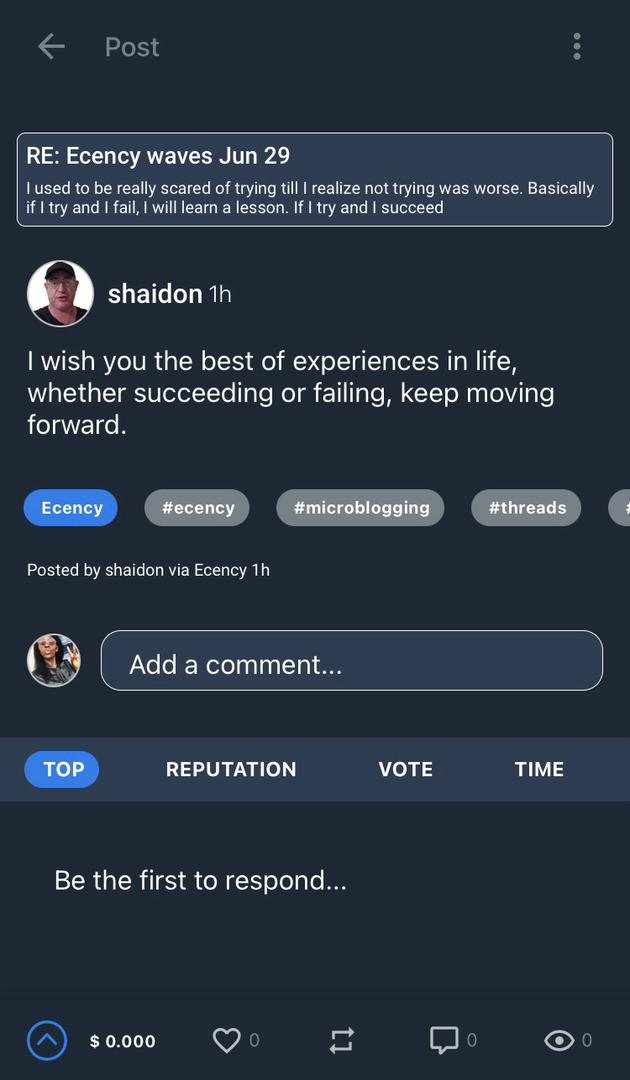
And of course I responded back 🙂
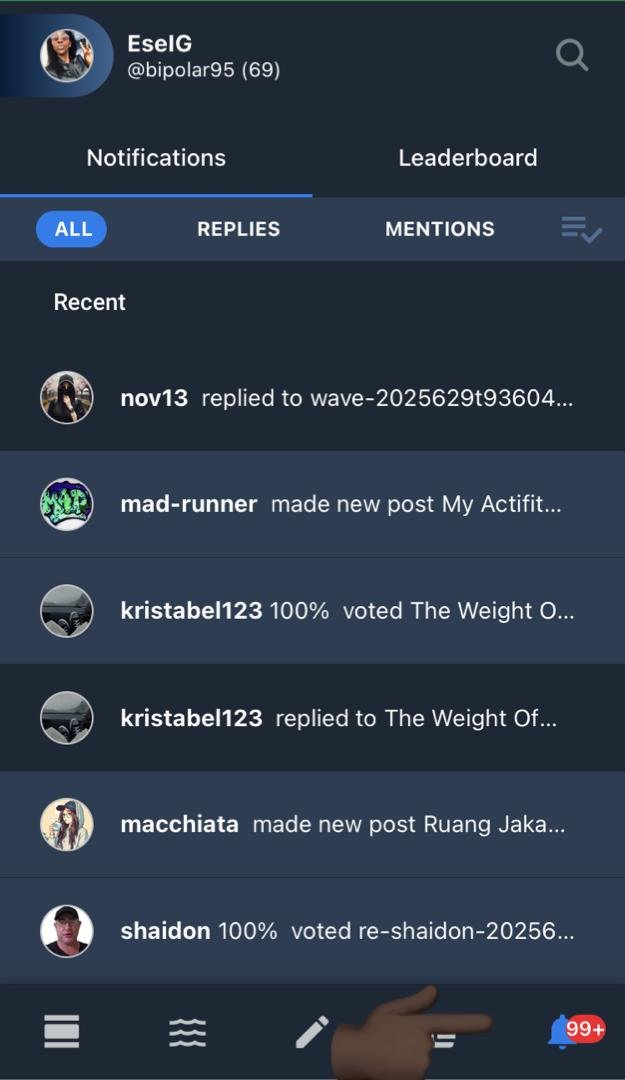
To check your notifications for a response, go to the icons at the bottom of the page on the screenshot below.
Click on the tiny bell icon at the bottom right of the page to check for notifications and who might have responded to your wave to spark up an interaction.
For easy identification, look out for the directions of the pointing finger at the bottom of the page
Notice the first notification? That's someone responding to wave
I got more responses and they all got a reply from me 😊🙂
POST A SHORT VIDEO ON 3SHORT
Are you a vlogger? who came looking for the TikTok and Instagram experience on Hive? Do you love to share your captured moments via pictures and videos? Well, you are in for a treat as both 3speak and Liketu got you covered.
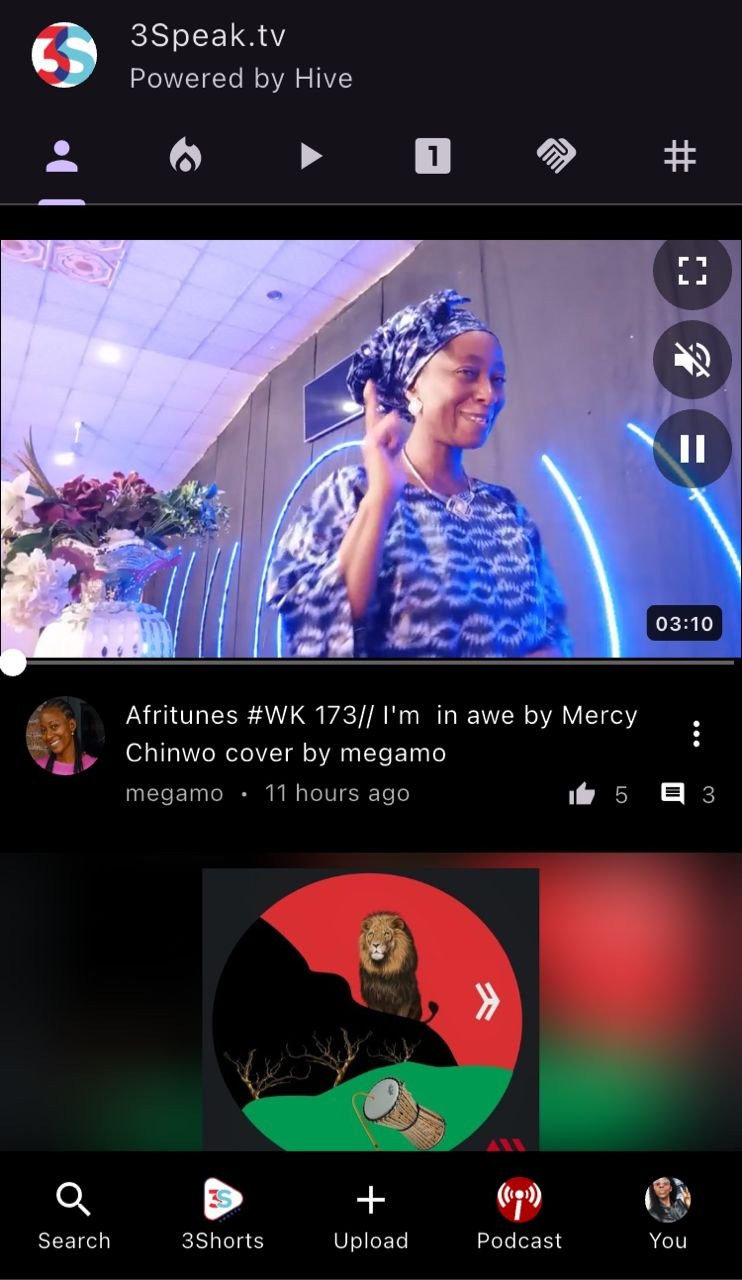
So, for this tutorial, we will be learning how to upload shorts via the 3speak APP to the 3Shorts community.
In case you are wondering what shorts are, they are brief videos in seconds that are not up to a minute.
***Now, let us download the three speak app from our app store or Google Play Store ***
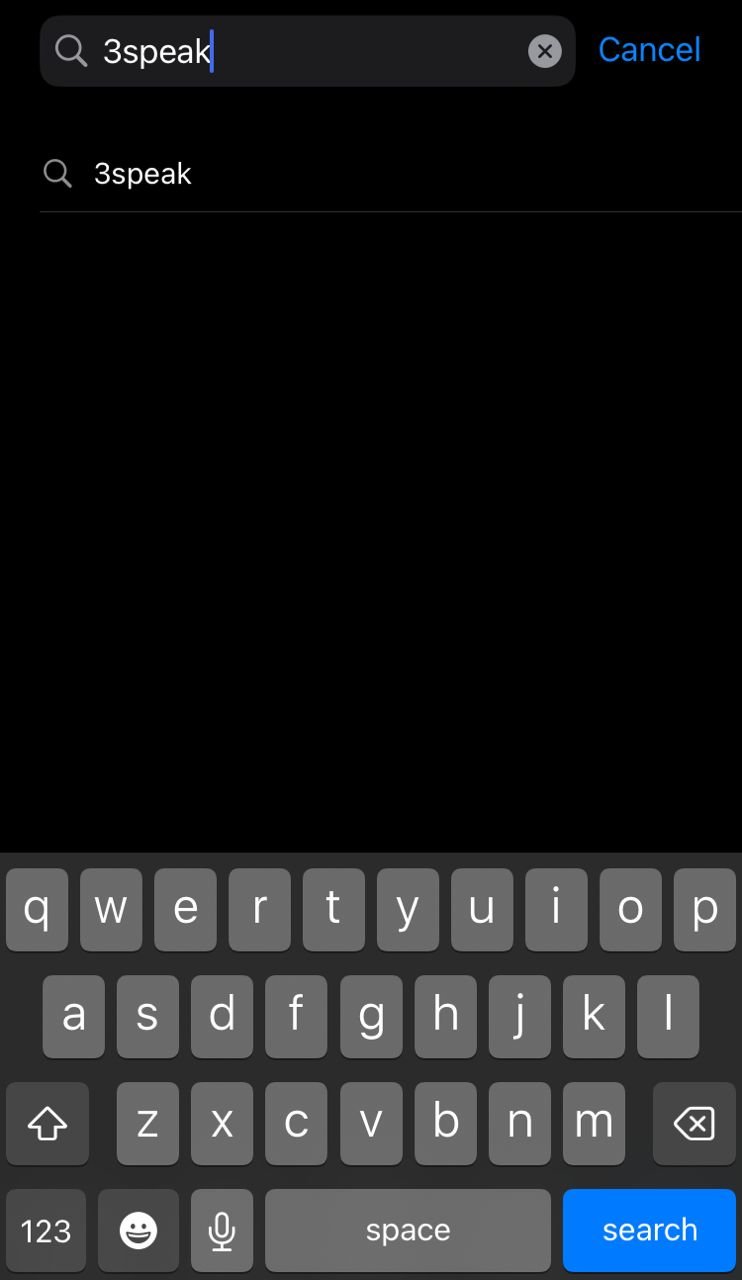
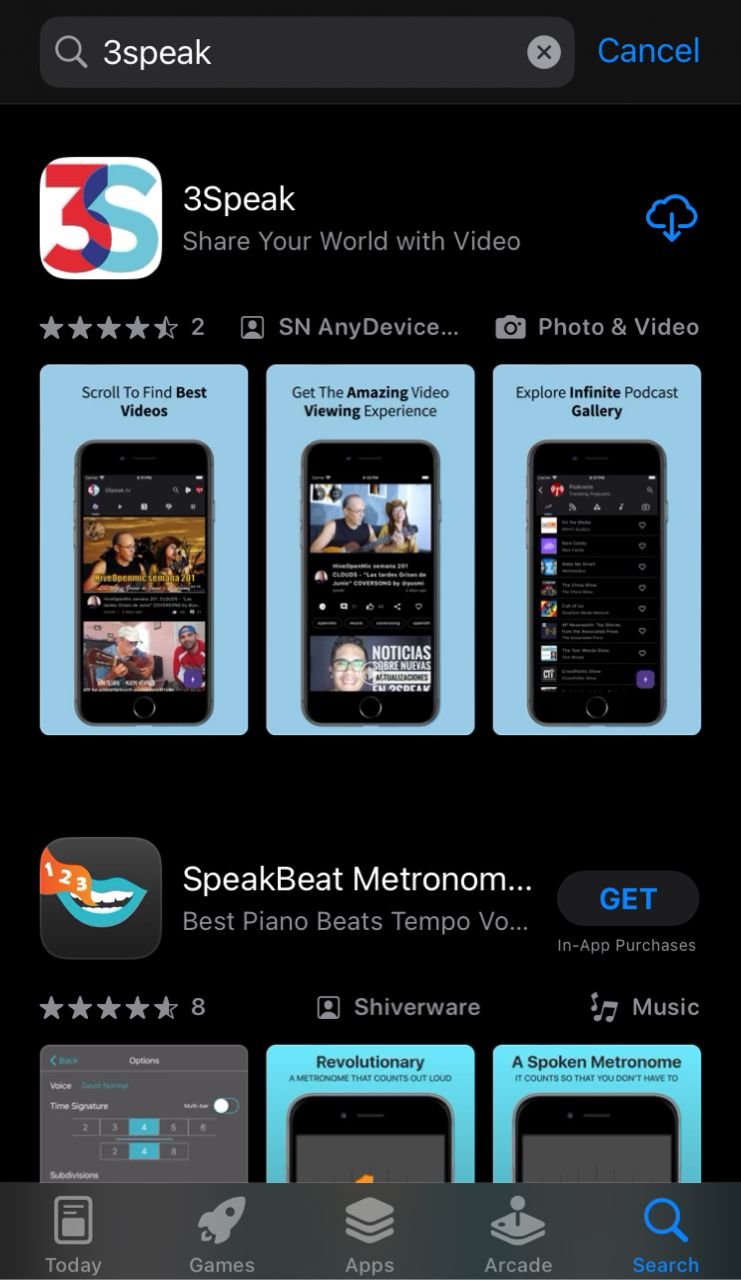
- On the screenshot below, click on the last app stated underneath APP STORE
You will be directed to the explore page below.
- Underneath it, click on the search icon
- As seen on the screenshot below, type in the name of the app 3SPEAK and click search underne
The dApp will pop up as seen on the screenshot below
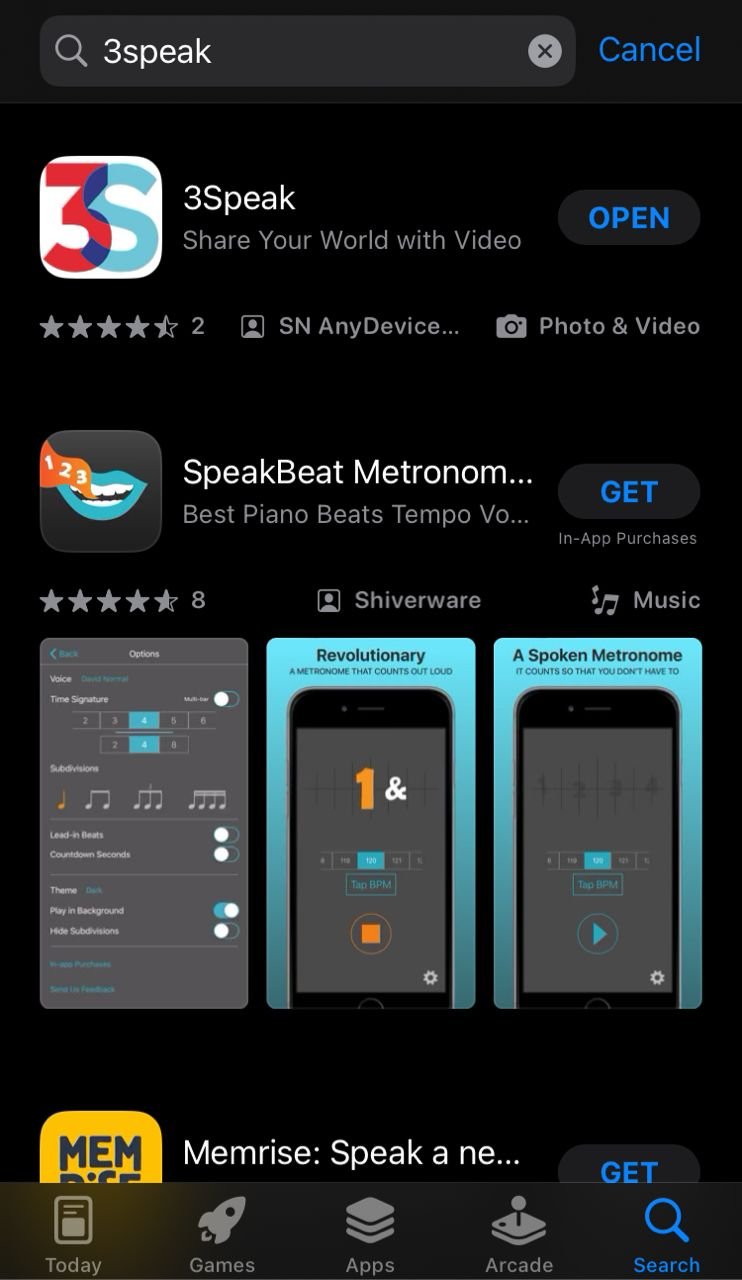
- Click on the cloud and arrow icon to download the dApp.
- Click Open
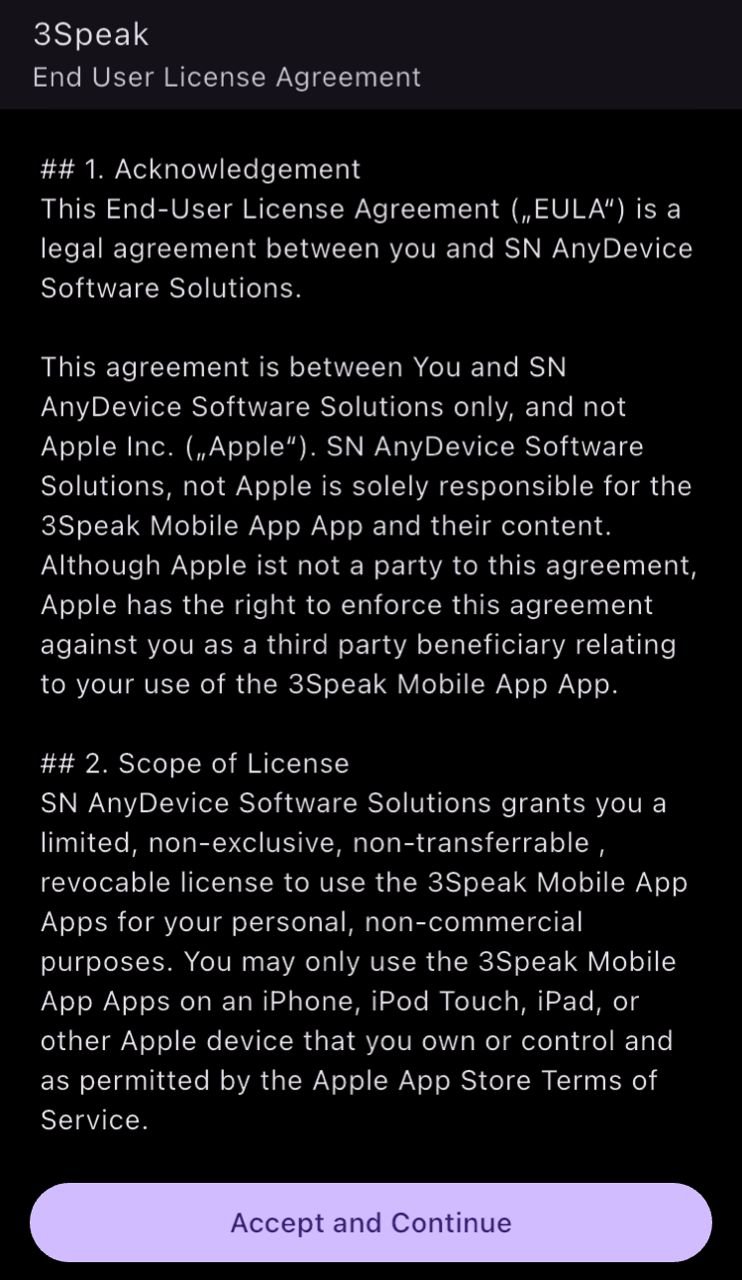
An agreement form will pop up.
- Read and scroll down. if you agree to the written terms, then click on the accept and continue space underneath the written agreement
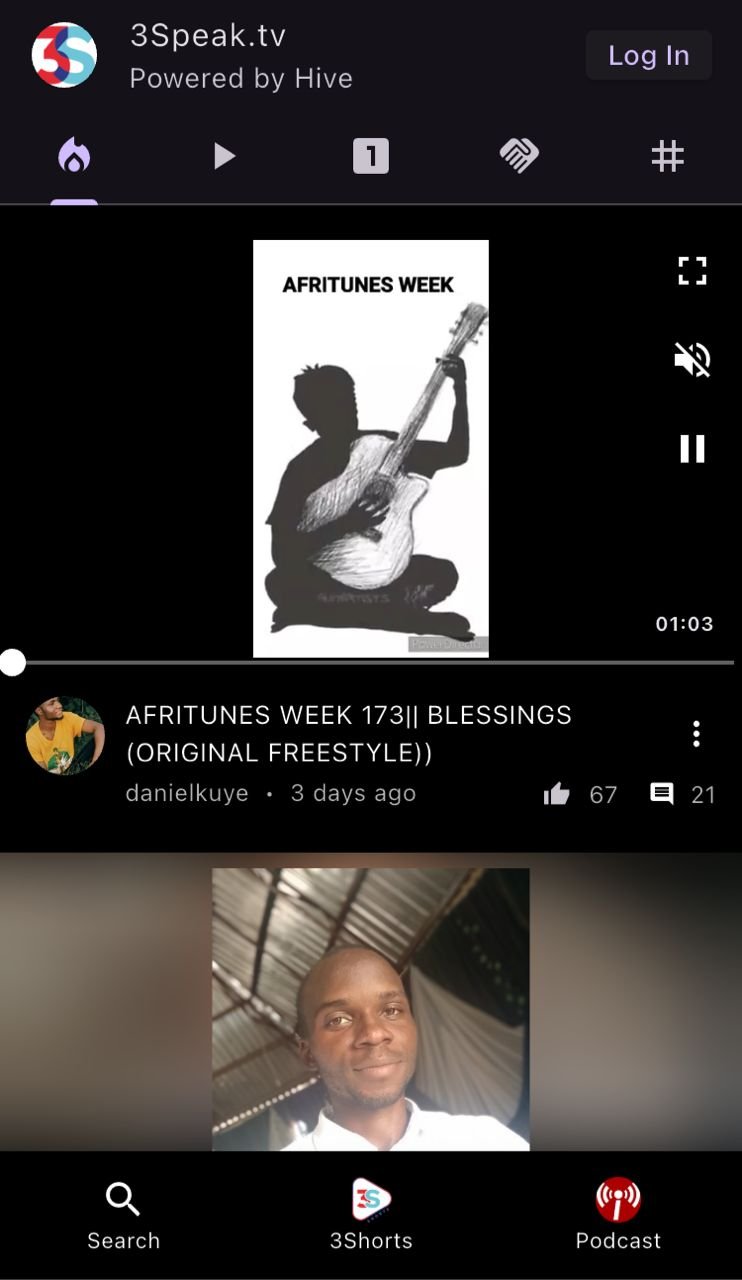
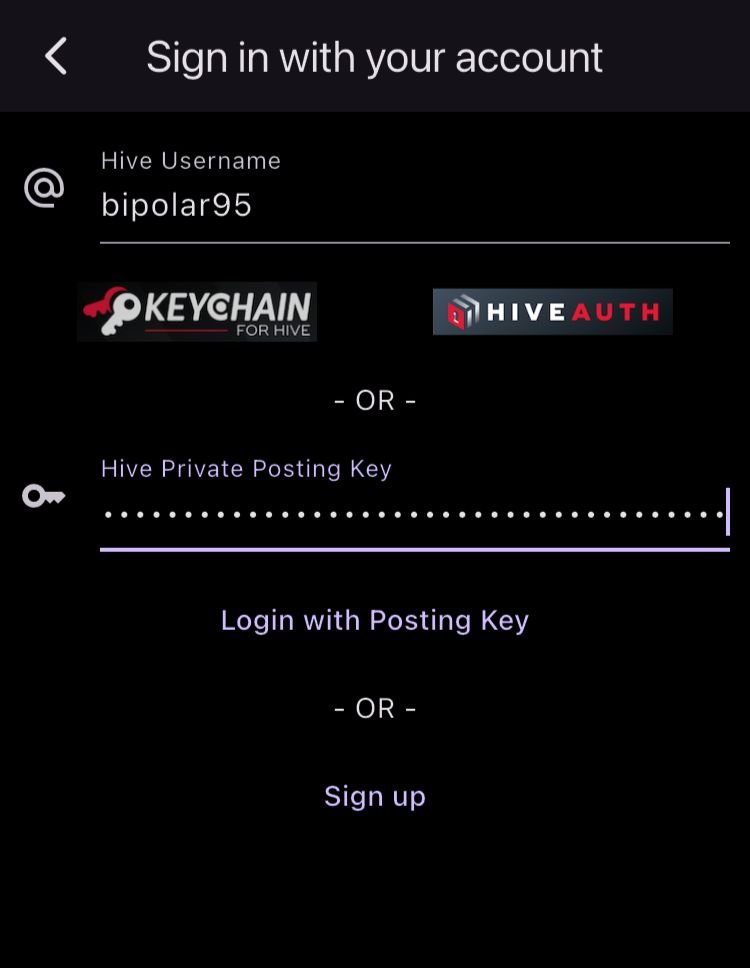
You will be directed to the login page
- Click log in as seen at the top right of the screenshot below
You will be directed to the log in page where you will input your log in details as seen on the screenshot below.
- Click Login with posting key
The next page will have your profile picture as the last icon underneath the screenshot, as seen below
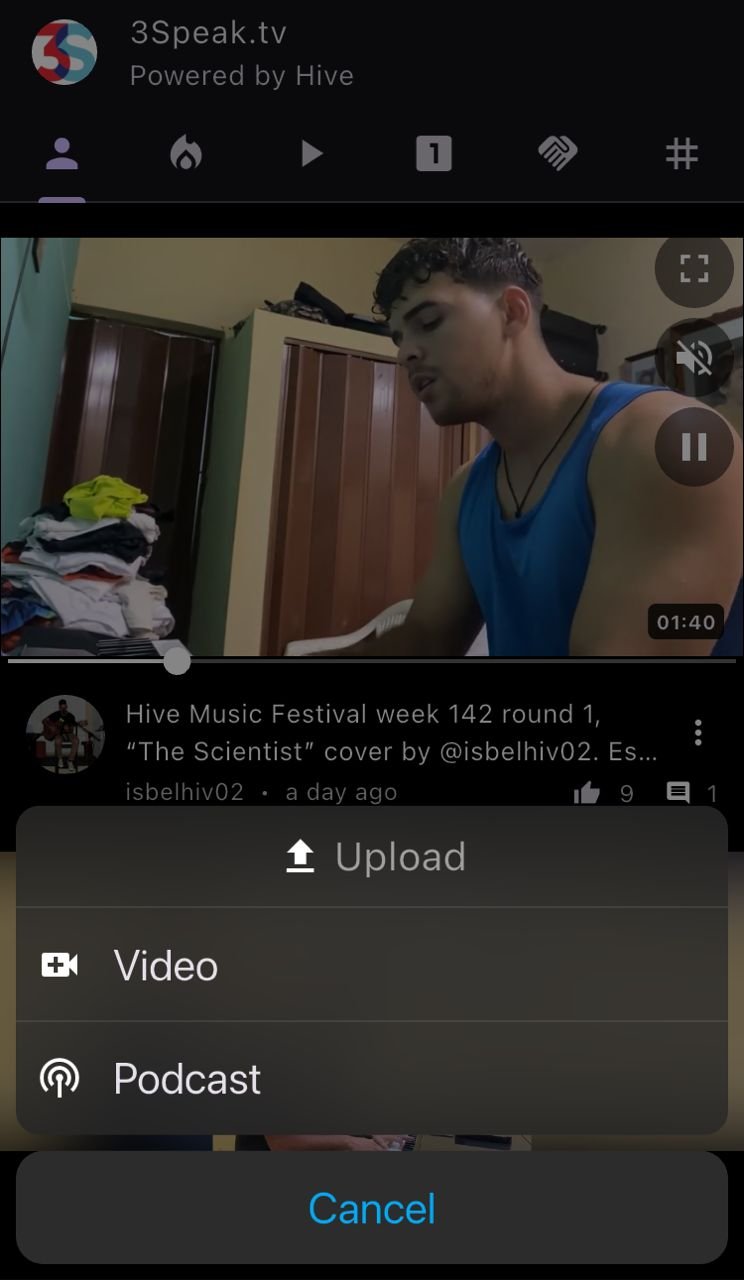
- Among the icons underneath, click on upload to upload a short.
Since we are uploading a video, I picked the first upload option on the screenshot below
From the screenshot below, there are two icons beside pick video.
These are;
To upload a video recorded from camera, click the first icon
To upload a video from gallery, click on the second icon
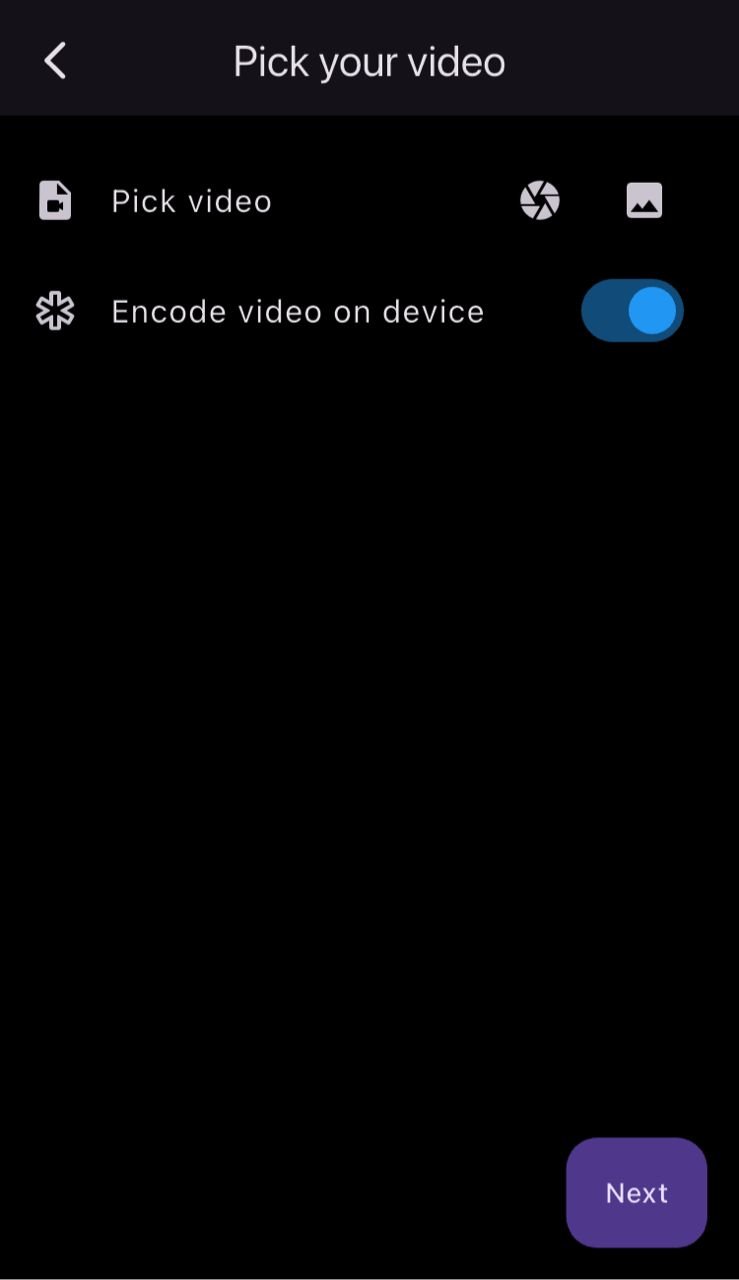
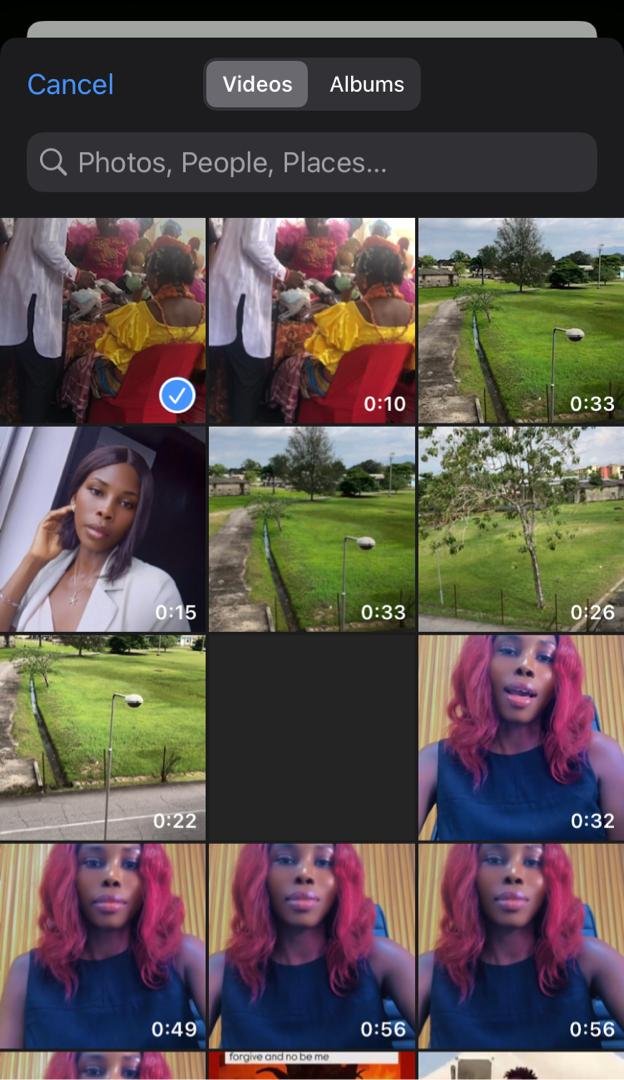
For this tutorial, the Short video was taken from my gallery as seen in the screenshot below
You will be directed to the video option on your gallery.
- Select Video of choice as seen on the screenshot
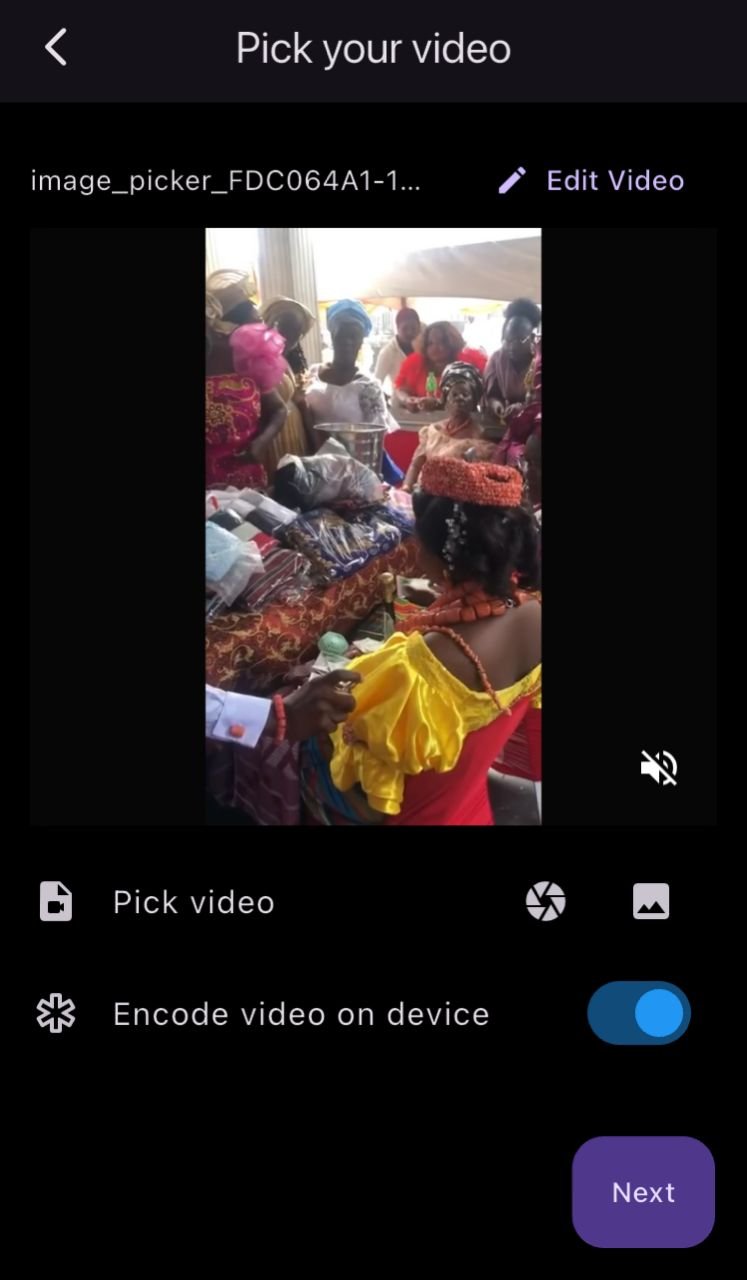
- From the screenshot below, click chose video

I already edited and reduced the length of my video, so I didn't bother with the edit video option
- Scroll to the bottom of the page and click next
Set your thumbnail

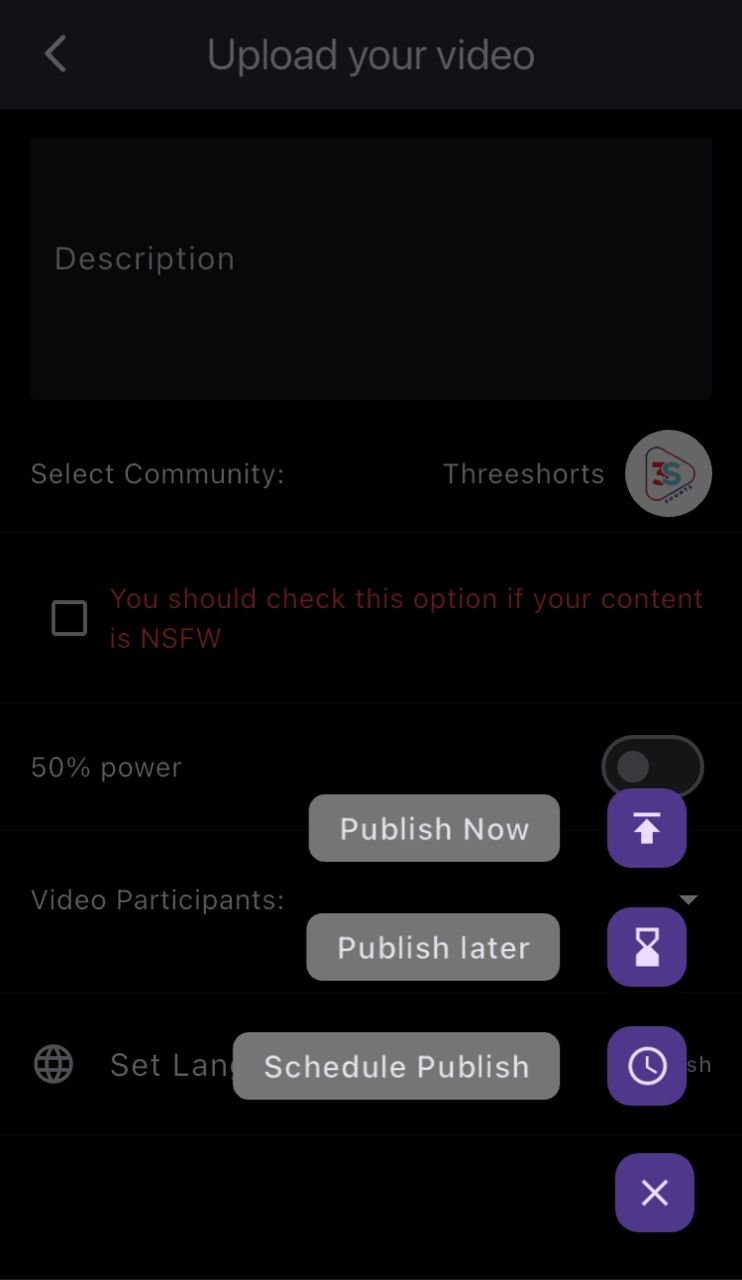
From the screenshot below, click on the dropdown beside select community, to choose a community where your short fits in
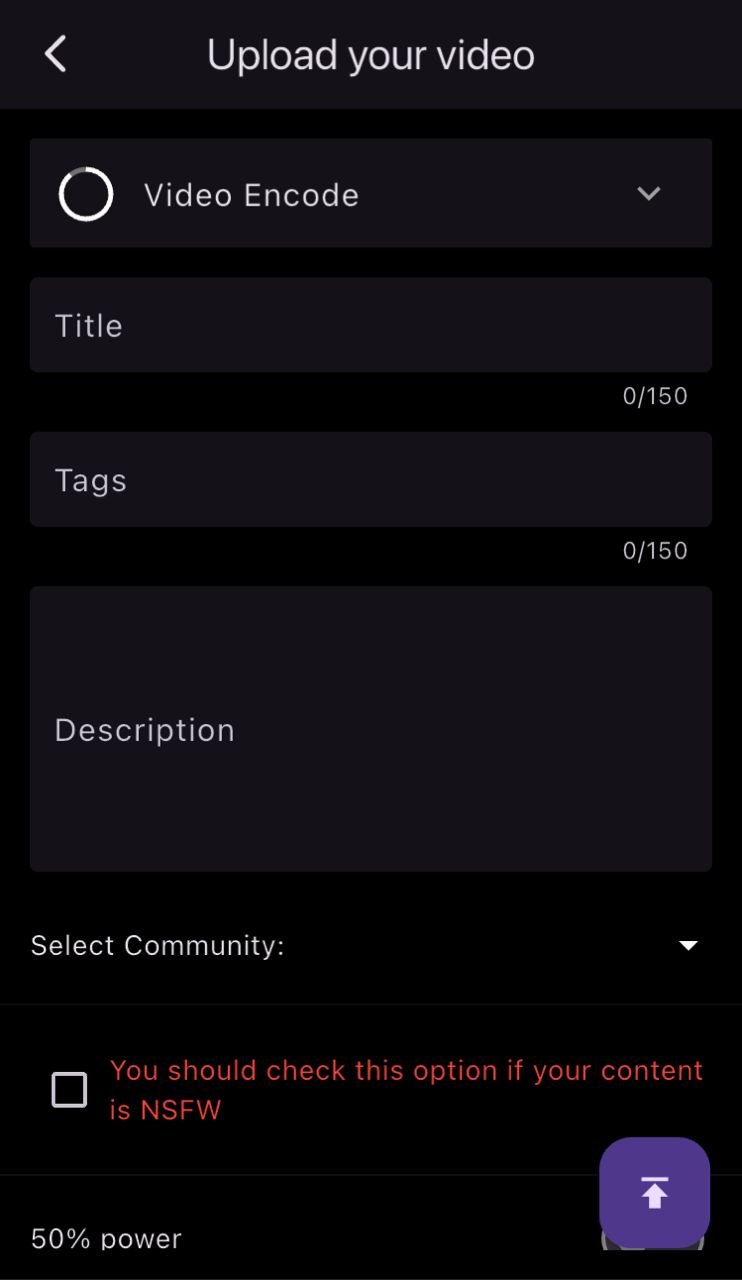
On the search space in the screenshot below, type the name of the community. For this tutorial, we uploaded to the threeshort community

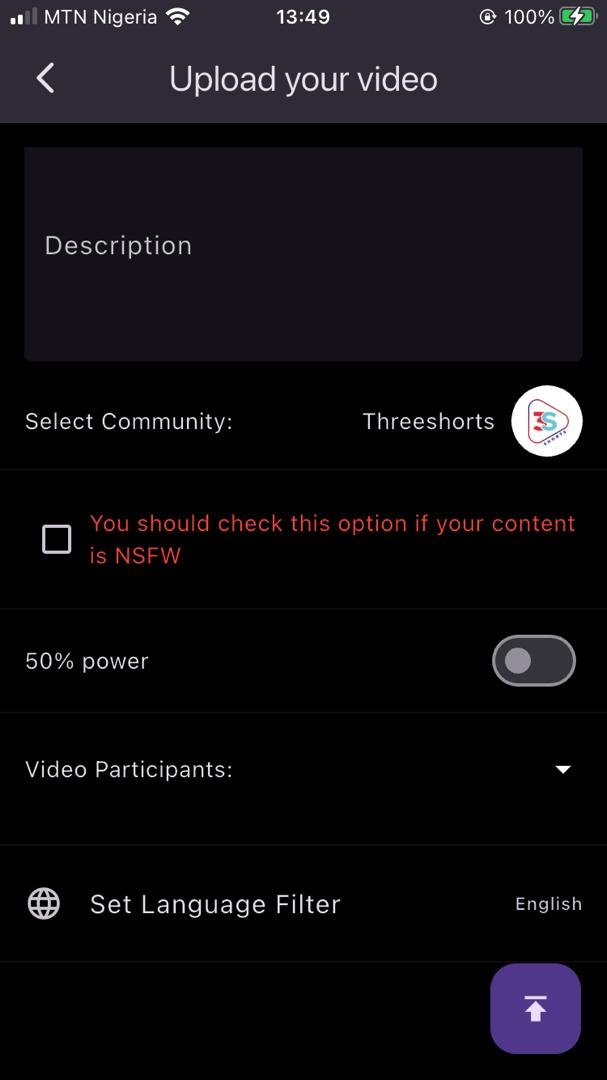
After choosing the community to upload to, tick the NSFW box if the video contains violence or contents.
If you want to power up all your rewards, click on the icon by the 50% power to change it to 100%.
Click on the drop-down icon by video participants to add a beneficiary or featured vlogger in the video
To change the language from English, click on the space written in English and select the preferred language
To upload your short, click on the upload box at the bottom right of the screenshot
From the screenshot below, select any of the upload options of choice to get your video live
LOG INTO LIKETU AND POST A MOMENT
Posting a moment on liketu is just like the instagram thrills where you post your quality pictures and share your captured moments with friends.
This is a very simple and straightforward tutorial where you are going to learn how to upload your moments and be a part of the liketu community.
Like every of these frontends where I do not have the app, the login process are the same.
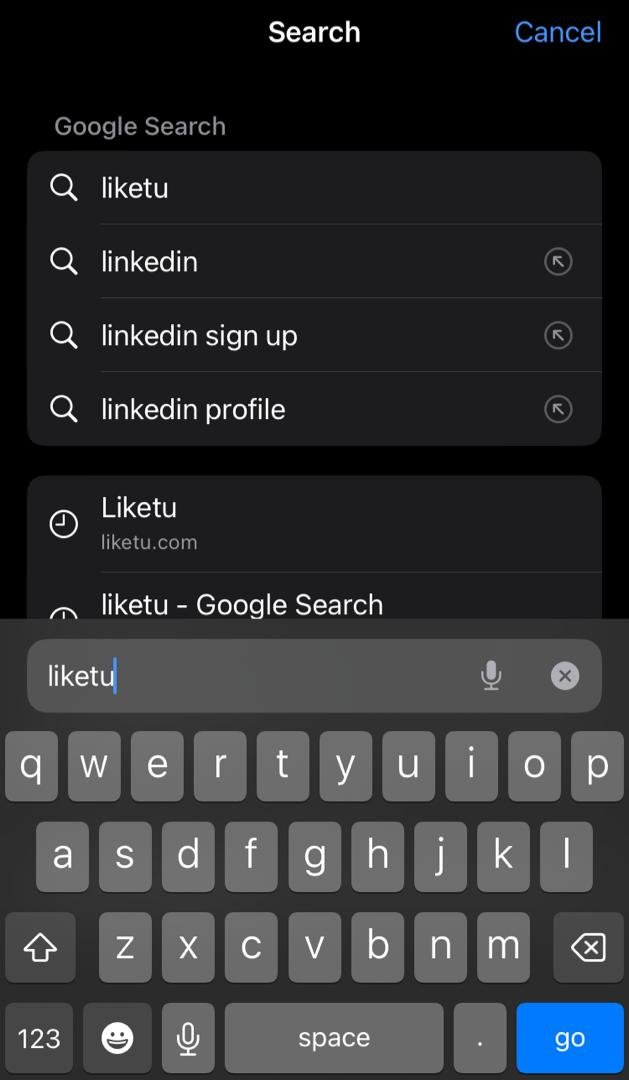
From any browser of choice, go to the search bar and type liketu.com
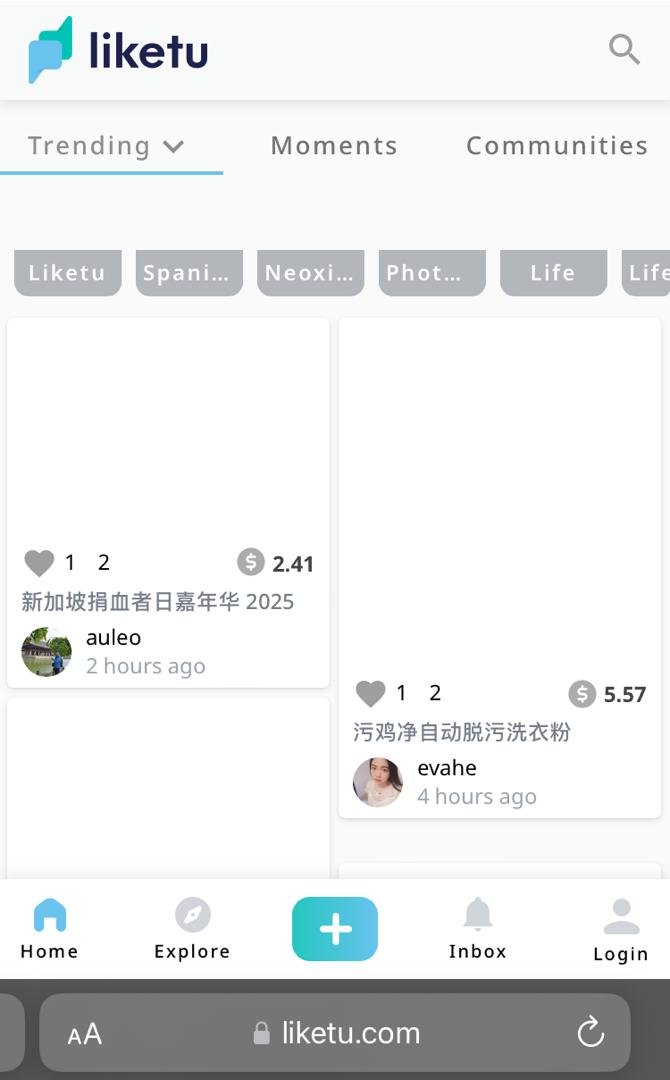
- From the screenshot below, click on the login icon underneath the explore page.
I already have a Hive account, which grants me access to all frontends or dApp linked to the Hive blockchain. So I went with the second option.
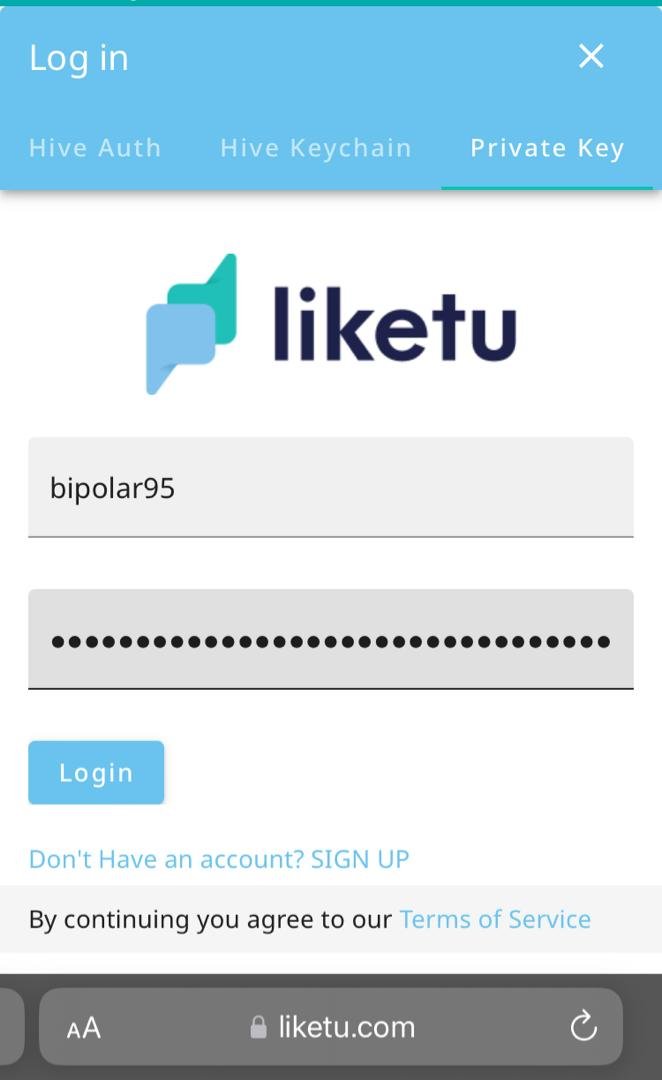
Input your hive username as shown in the space on the screenshot.
There are three login options as seen at the top of the screenshot. I went with the private key option. Feel free to try others out.
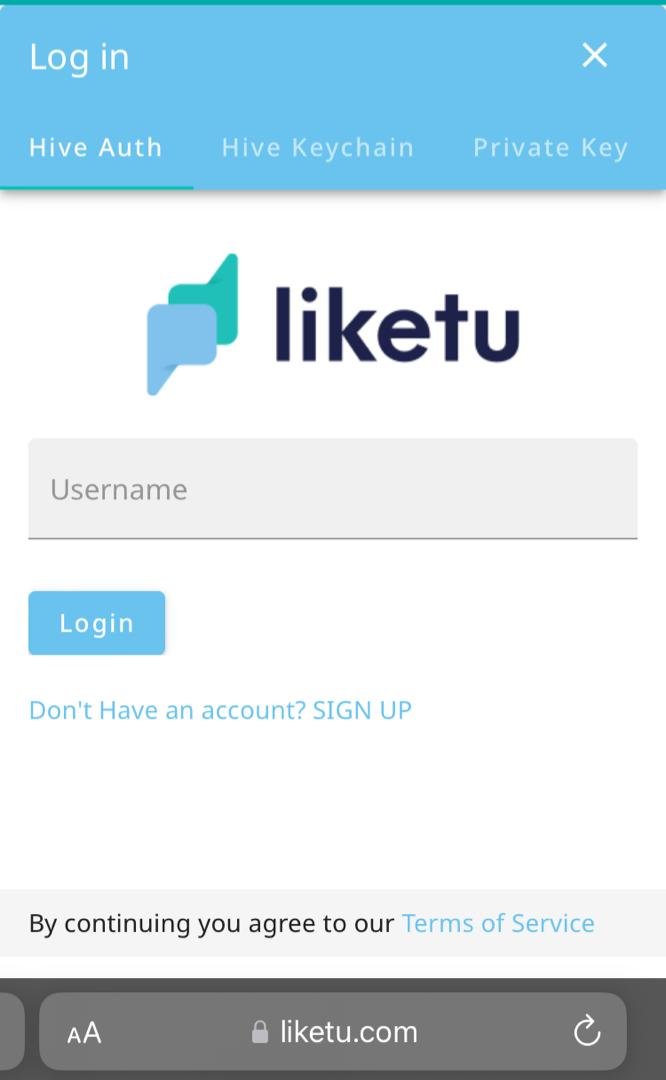
I input my hive user name and private posting key
- Click login afterwards
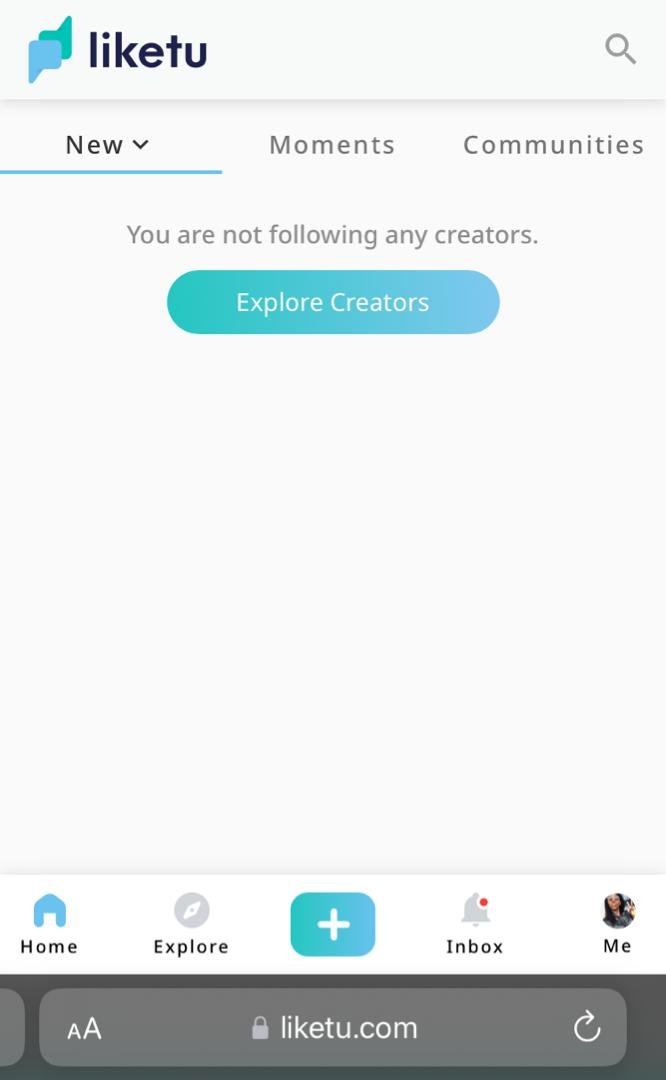
I'M IN.
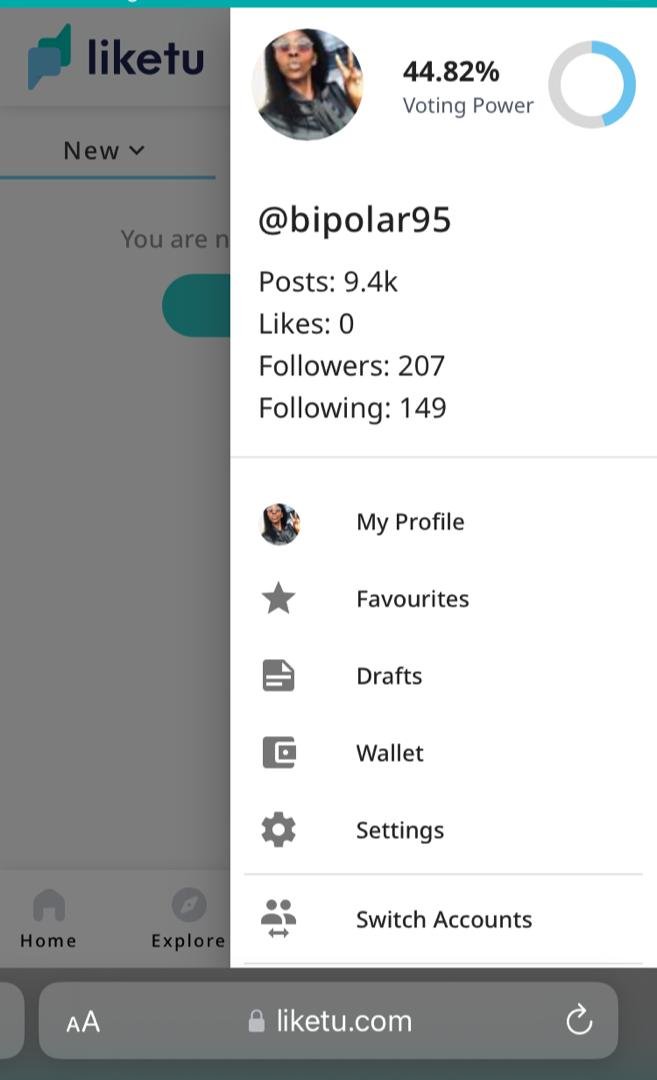
Spot my profile picture underneath the page at the far right
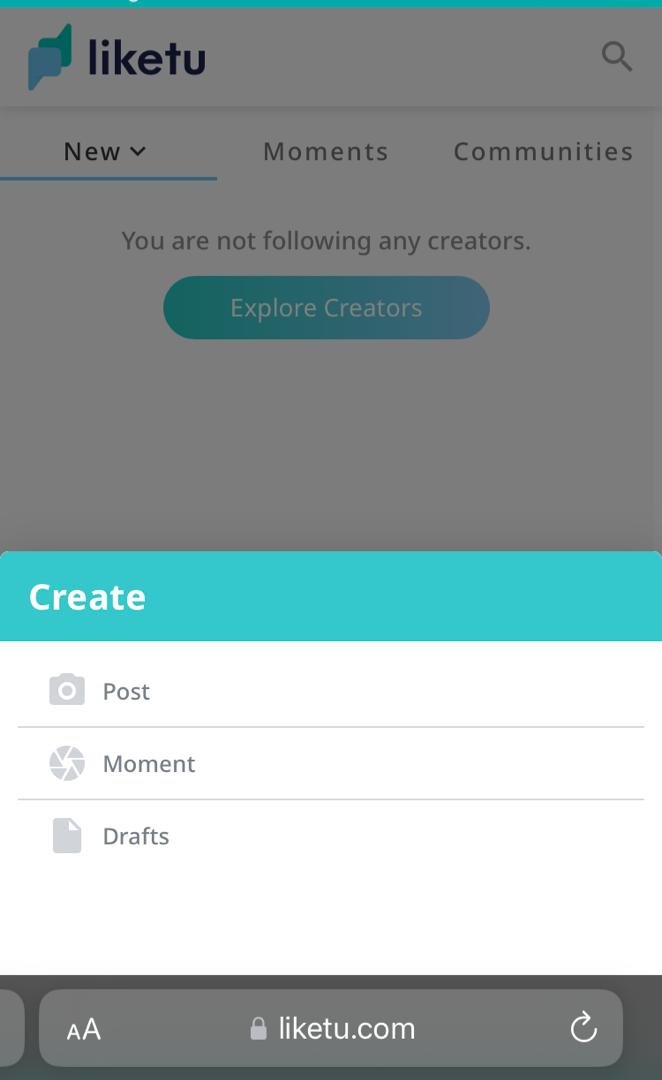
- Click on new, which is the first option at the top of the page.
The drop box containing post, moment and draft will appear.
- Click on moment.
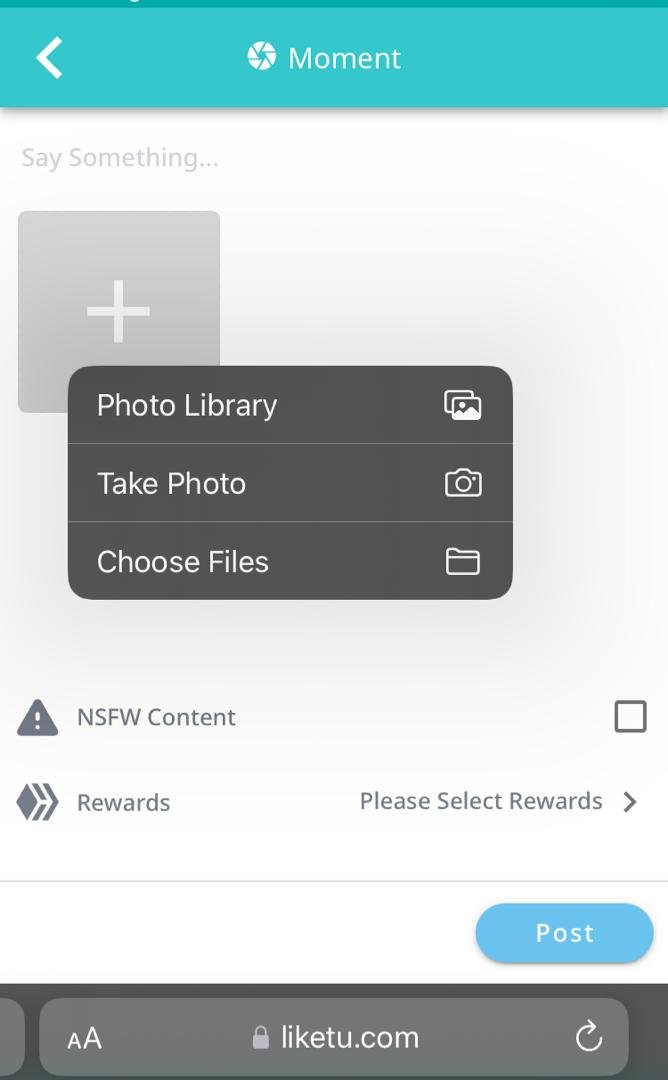
On the screenshot, after the say something space, select the box with the navigation sign. The drop box with Photo library as seen on the screenshot below will appear.
Click Photo library.
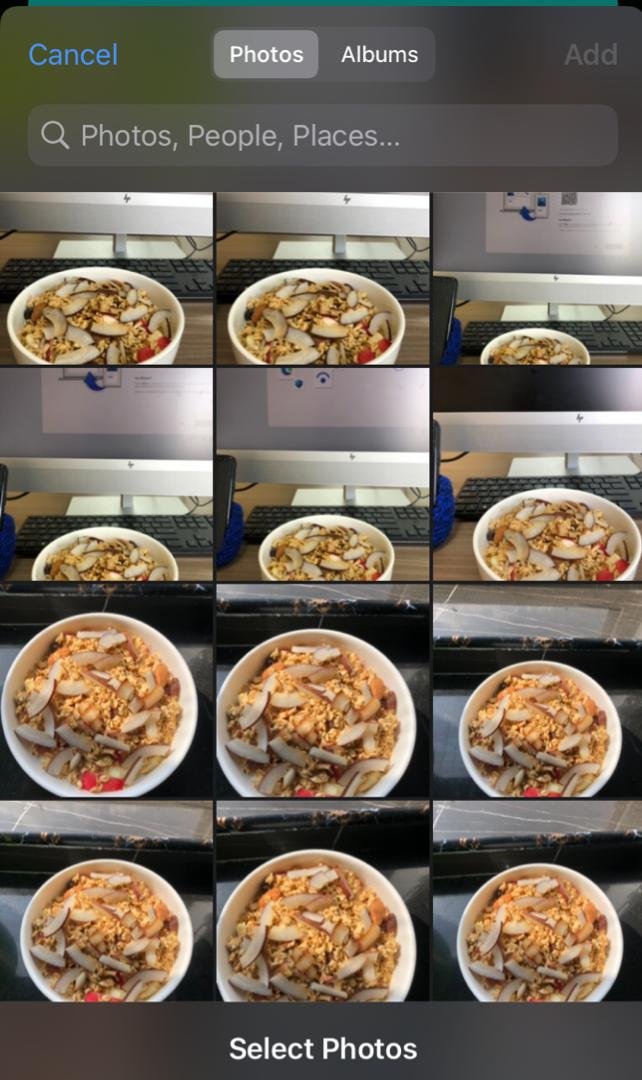
Your gallery will come up
- Select your photo of choice
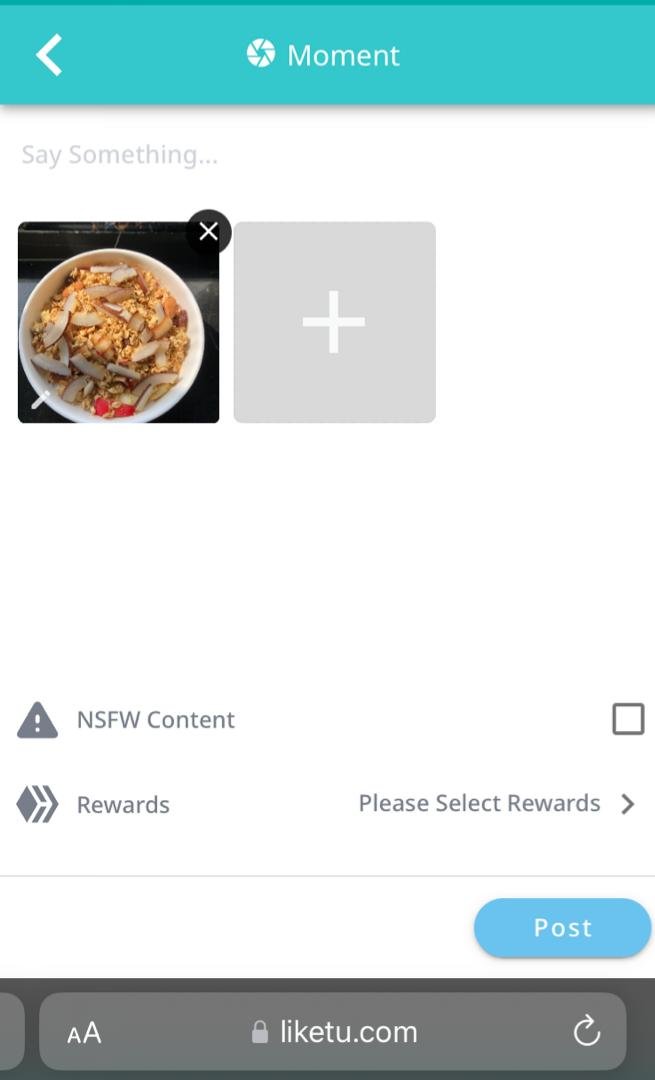
From the screenshot below;
To say something about the photo or put up a short write up, use the say something space
Like we learned on shorts tutorials, click on the NSFW box to serve as a warning to viewers who might be triggered by sensitive contents.
Set your reward by clicking on the next option.
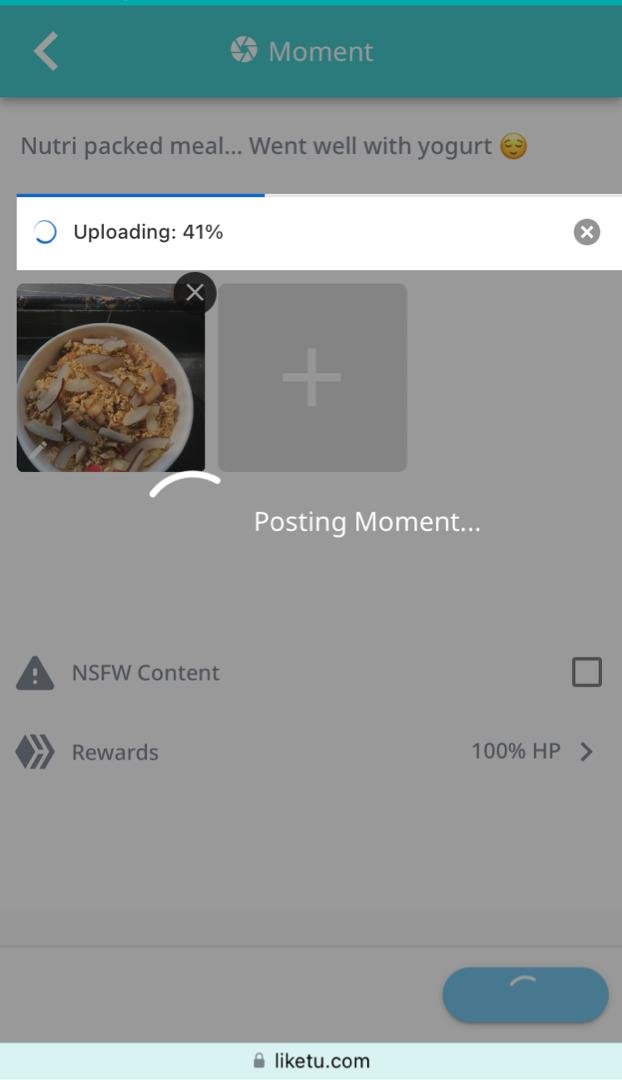
Click post to upload
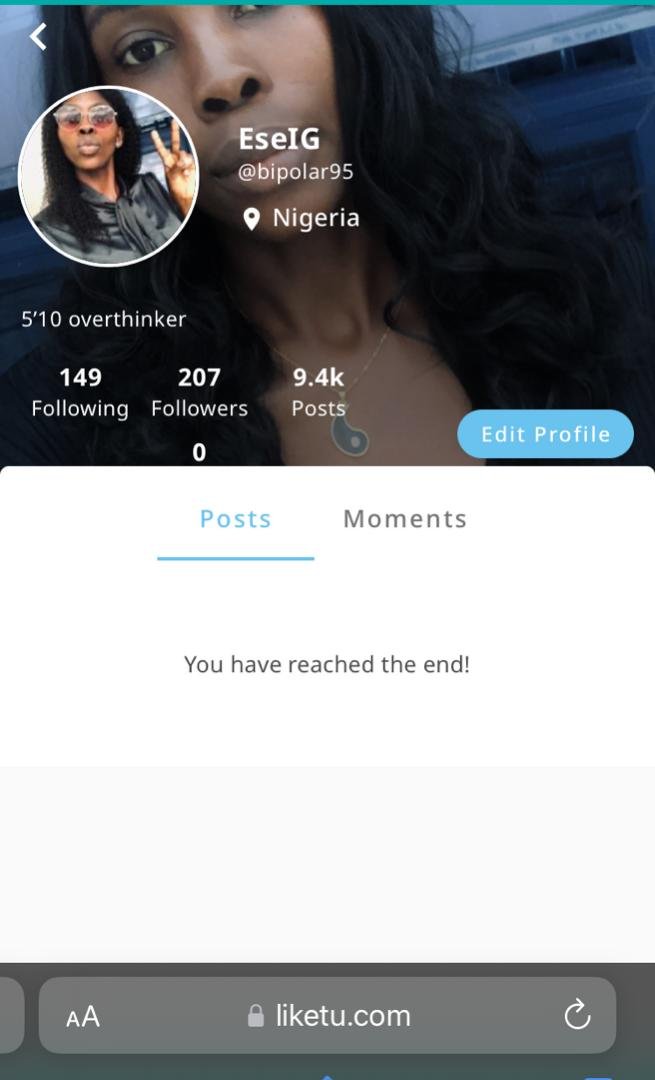
To view your moments, go back to the explore page as seen on the screenshot below.
Locate your profile picture at the bottom of the page and click

- At the menu options on the right side of the screenshot, click my profile
You will be directed to your profile
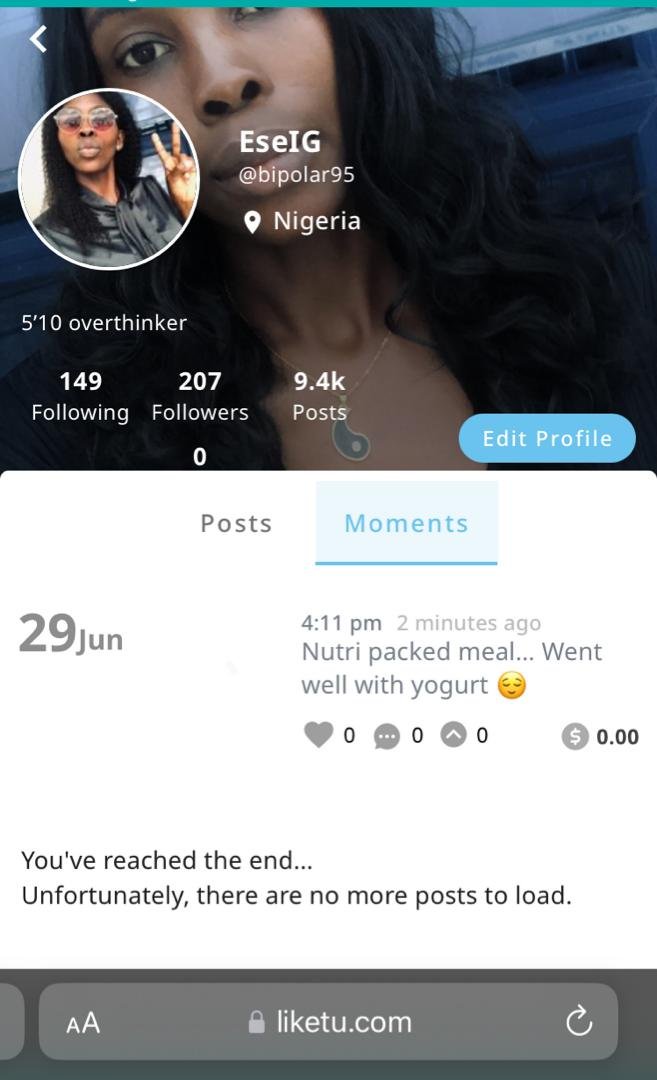
- Click on moments as seen on the screenshot below
Your moment is live
Congratulations on getting to this part, which marks the end of the tutorial.
As earlier stated in the introduction of this blog, this is an educational initiative by @starkerz for newbies and hiveans alike to keep them abreast on everything that Hive has to offer. This is my own contribution, and I hope you get to try it out and also make your own tutorials.
For more information, kindly visit
https://hive.blog/hive/@threespeak/the-journey-to-be-a-hivean
plus, you can also LEARN TO EARN by reading up on other tasks and making a tutorial on them.
An appreciation to @ravenmus1c for creating thumbnails for the various tasks. Thank you.
Posted Using INLEO
Hi @bipolar95! This is something very instructive and something not even directed to only newbies. Posting short content or using certain features like LikeTu hasn’t gotten too popular as it should. Some may shrug it as a matter of preference however many people don’t even know about it. Tutorials like this shares not just a very descriptive way on how to do it but shows that it exists and it’s another form of blogging!
Nice post!
Thank you so much 🙂
Congratulations @bipolar95! You have completed the following achievement on the Hive blockchain And have been rewarded with New badge(s)
Your next target is to reach 44000 upvotes.
You can view your badges on your board and compare yourself to others in the Ranking
If you no longer want to receive notifications, reply to this comment with the word
STOPCheck out our last posts: