My Deserves a Converted Tendril I Made for Her
Hello, great creators of the @jewelry community. I hope everything is seriously okay with you and your entire family added to your precious work. Today, I decide to make a tendril for my mother as feel she deserves to have it just the same way others are demanding for it now. After giving you more details of what made me make the tendril for my mother, I'll gladly provide below the materials and procedures I used to make the tendril.
I'll gladly thank the entire members of this community, especially the admins for guiding me through on how I'm now making a tendril why is because the demand from people is becoming more and more. It was just fewer people from my base that do understand that a skeleton earring can be converted to a newly designed tendril using beads and wire. Still, as of recently many have been asking how such an idea was generated and carried out. I know they don't know I have such a great community where ideas are shared and I have to learn from those ideas on how to be more creative by myself.
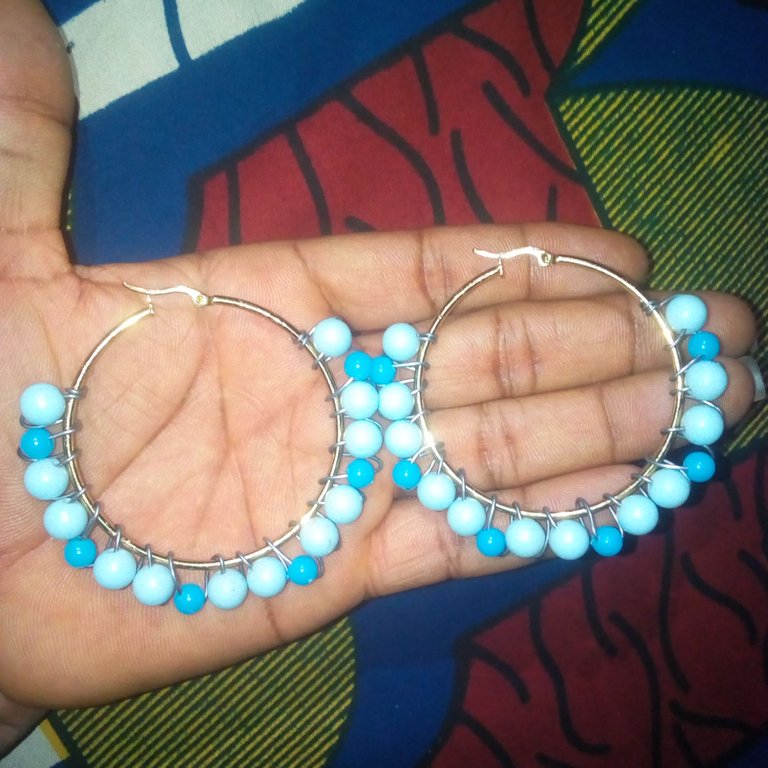
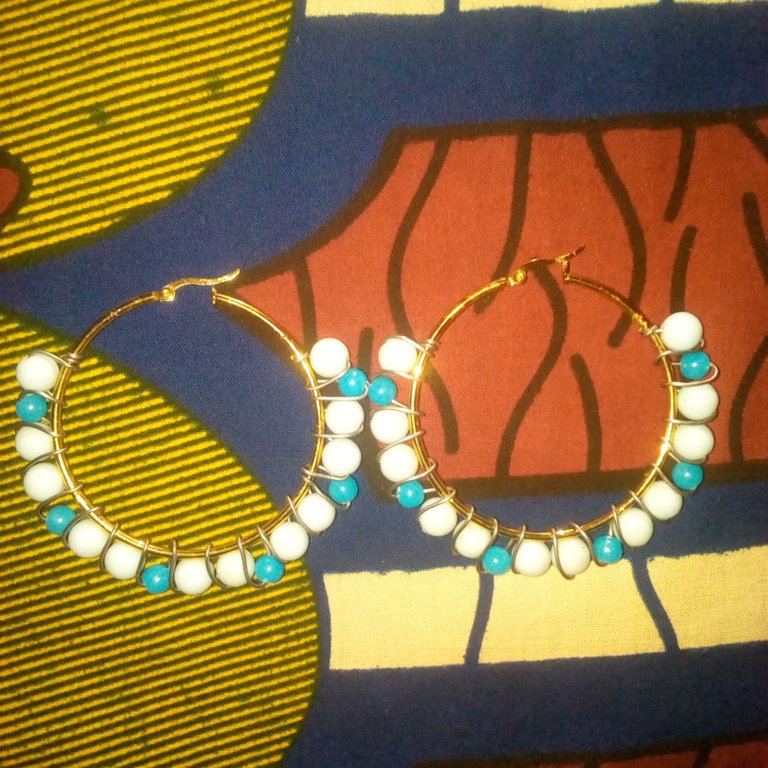
Based on people's commenting and love for my creative skeleton earring converting to a newly designed tendril, I feel my mother also deserves to be wearing it so that she can also join my people to enjoy what they're enjoying through my creative work. Before making the tendril, I asked my mother if she'd like to wear a tendril converted from a skeleton earring and she said to me if she was different from others. From there, I knew she'll like to have it.
Do you know that when I was making the tendril for my mother, a friend of my wife saw me making it and she informed me she was in love with the way I made the tendril? The comedy part of it is that she then placed a money to have it but I told her I don't have any available materials to make another one for my mother if not the one she's seeing. I then promised her before the end of the week that I'll be able to make one for her. She then told me not to fail her.
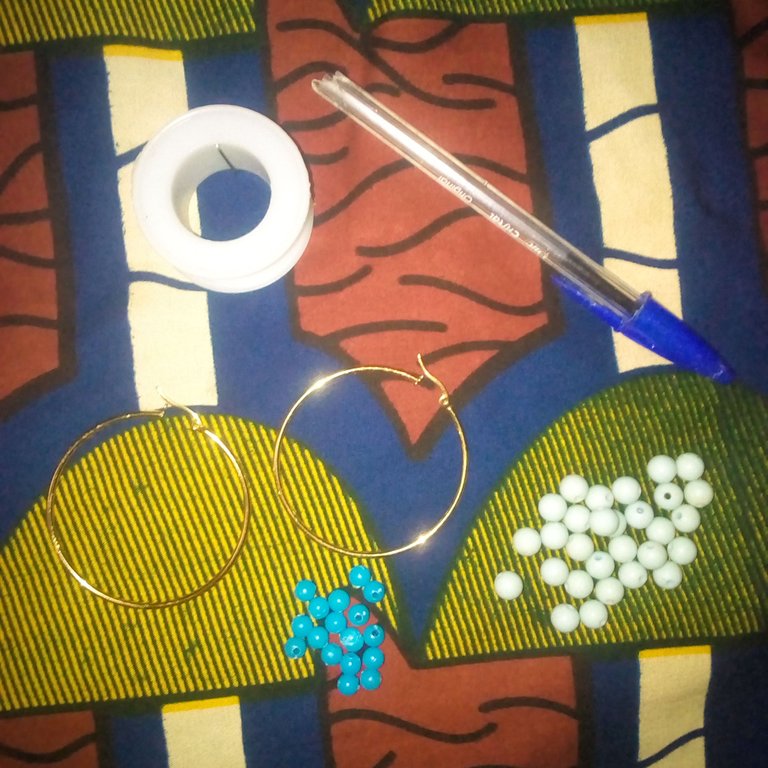
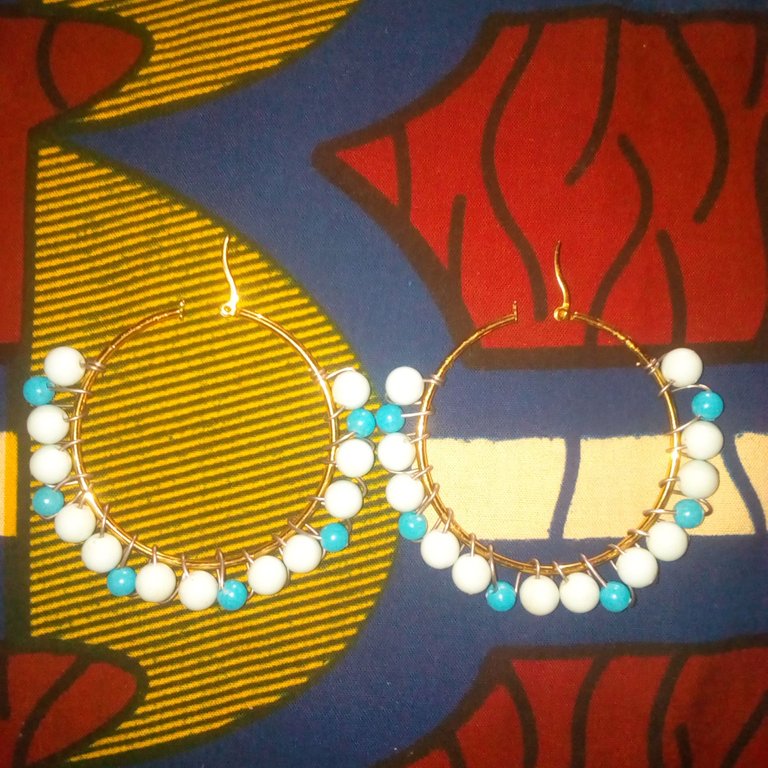
Materials that I used to make the tendril will be highlighted below:
1mm wire.
24 pieces of toque blue color pearl bead while 12 parts will be used to make each side of the tendril.
12 pieces of blue color pearl bead while 6 parts will be used to make each side of the tendril.
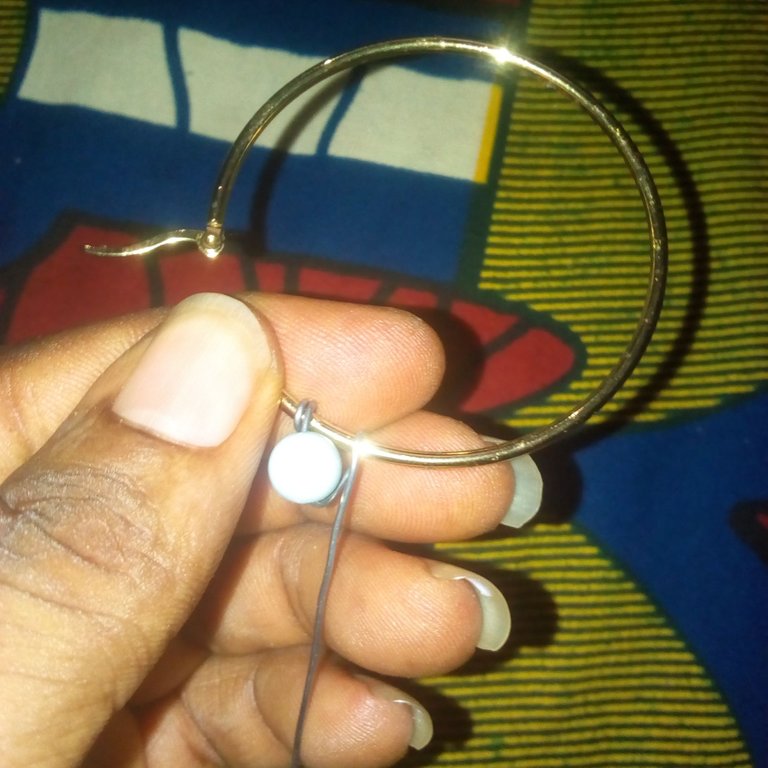
Skeleton earring.
Procedures used for the making of the tendril will also be provided below to guide you more:
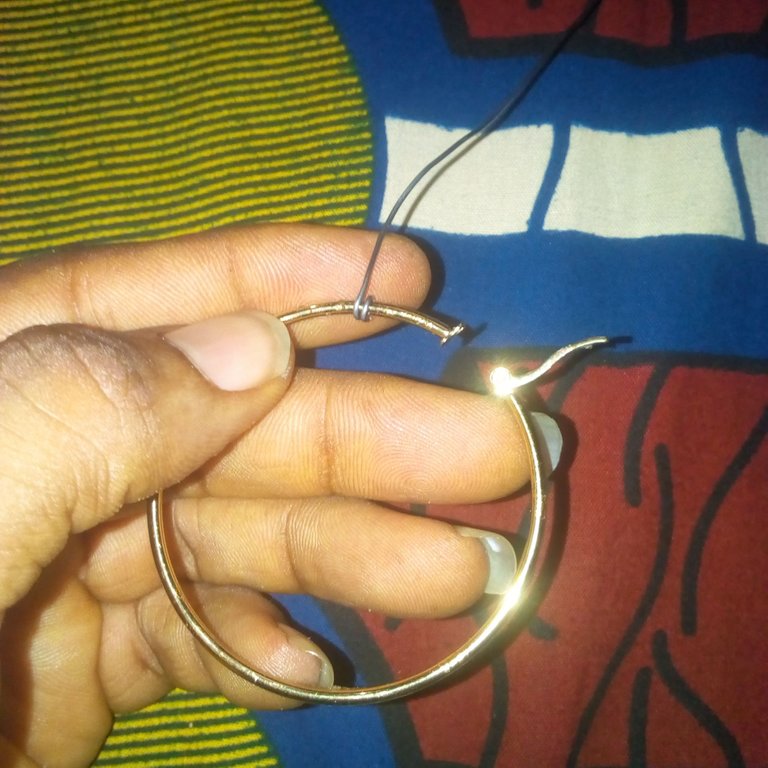
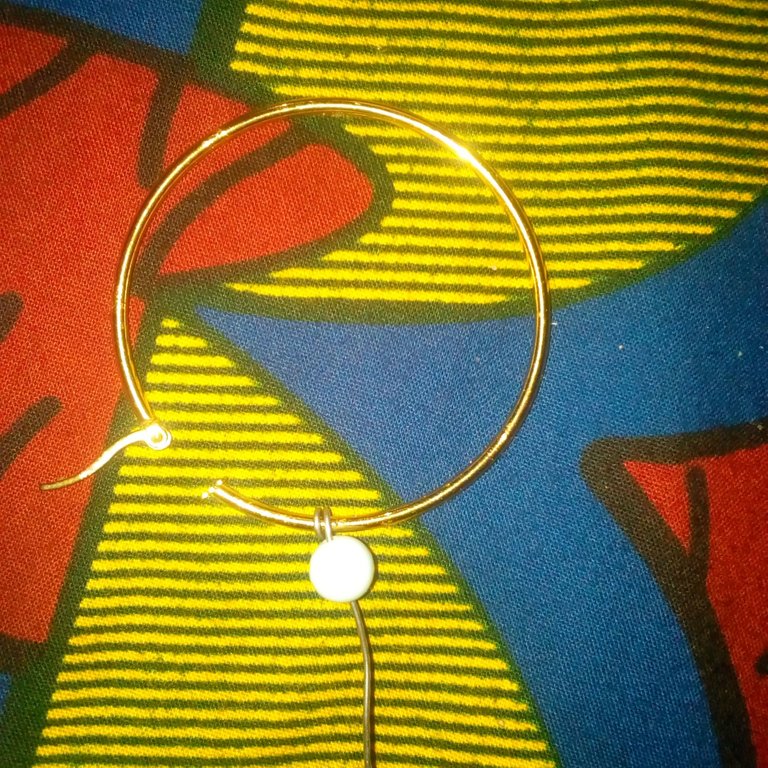
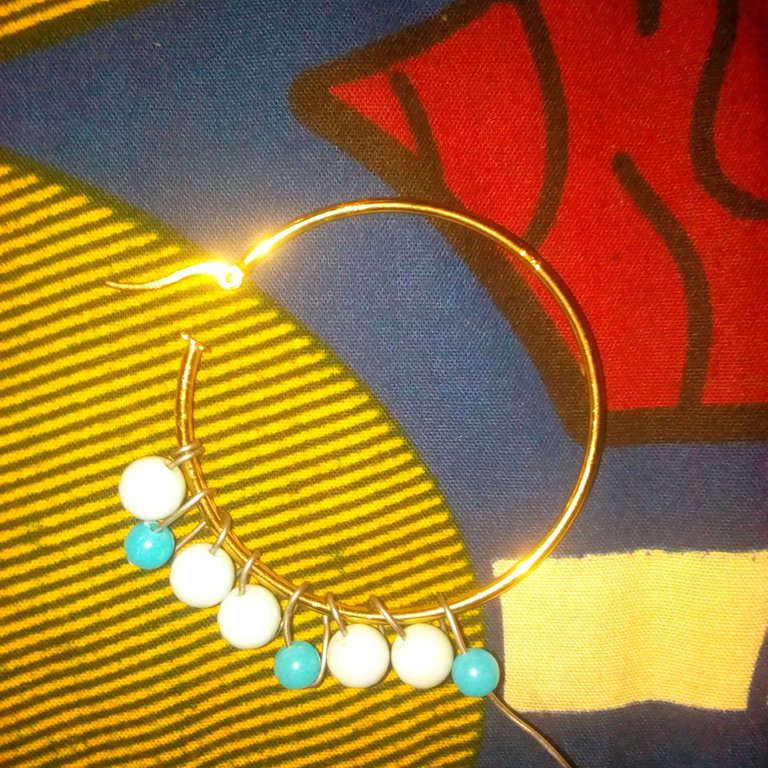
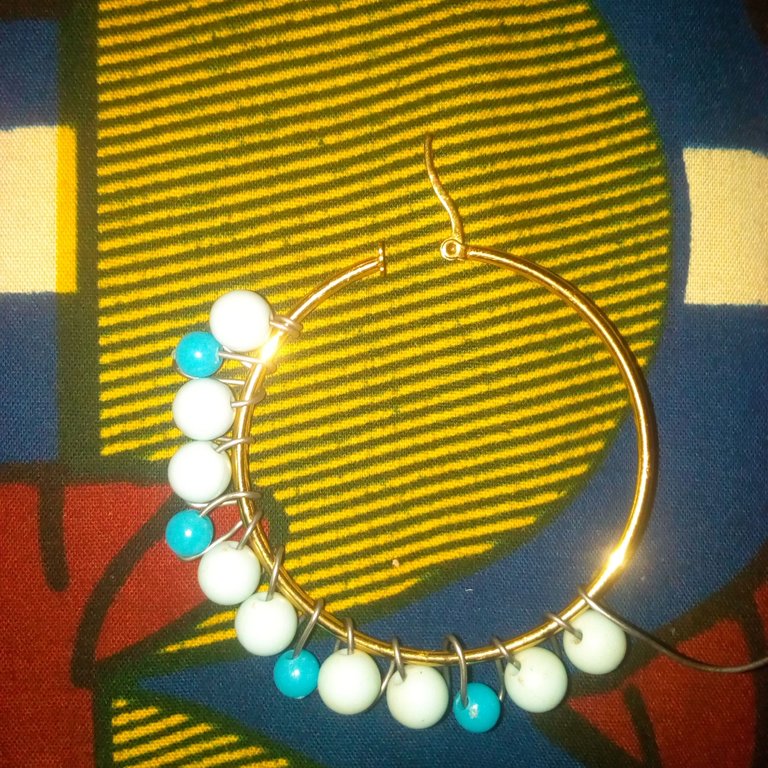
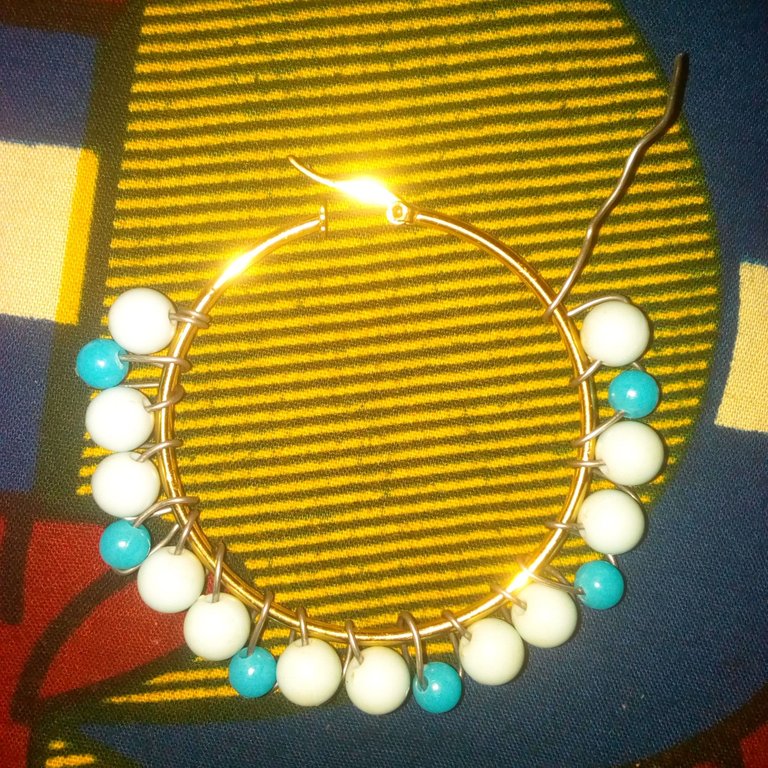
What I did was to cut a wire from its original row and then fold it two times rounded the skeleton earring from the left side. I have to insert 1 piece of toque blue color pearl bead and then fold one on the skeleton earring. I have to insert 1 piece of blue color pearl bead and then fold one.
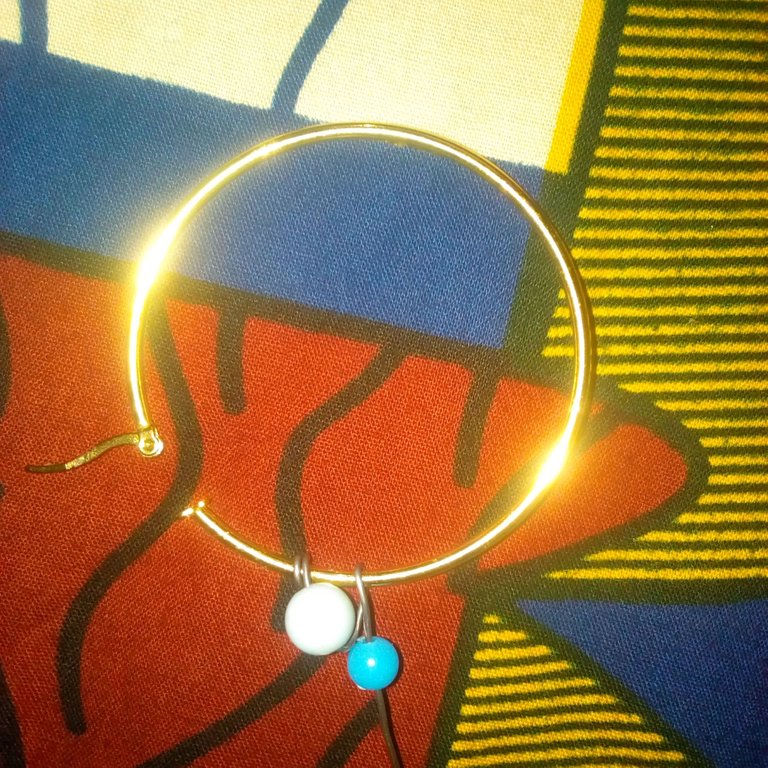
Now I have to insert 1 piece of toque blue color pearl bead and then fold one. I have to insert another 1 piece of toque blue color bead and then fold it again.
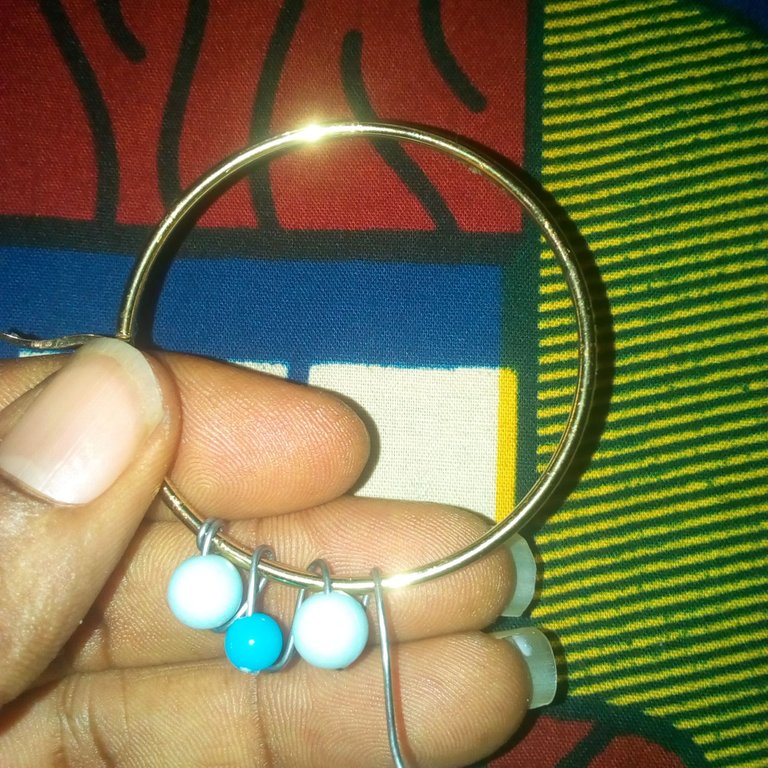
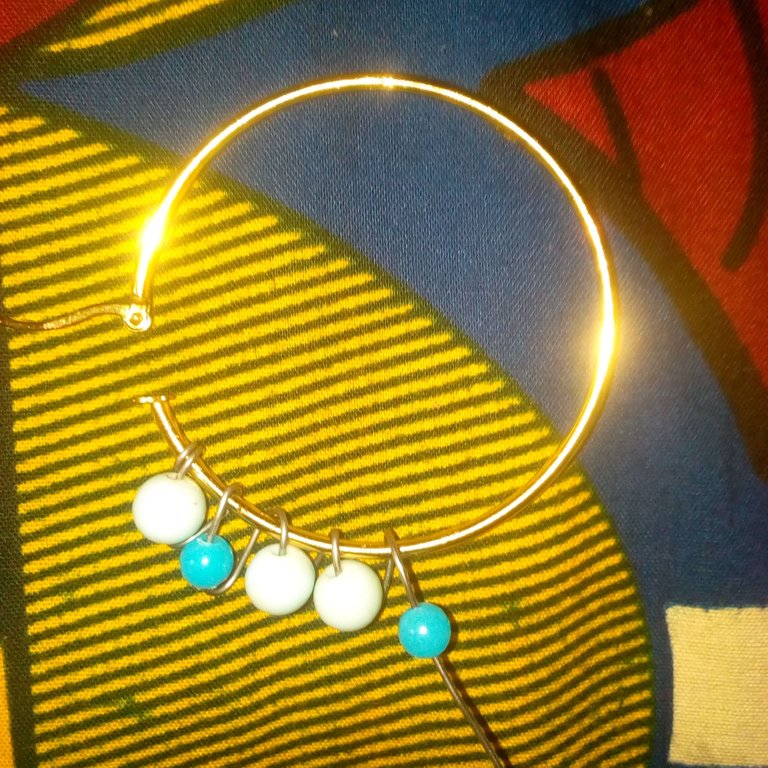
I have to follow the procedures by inserting 1 piece of toques blue color, 1 piece of blue color, 1 piece of toques blue color, and another 1 piece of toques blue color pearl bead till the completion of the beads for insertion but I also folded the last wire twice round the skeleton earring.
Ha quedado hermoso, una excelente manera de decorar las argollas 👍
Estoy muy agradecida por una comunicación tan maravillosa
Te ha quedado muy lindo querido amigo @apunawu, gracias por compartir
Esa es una palabra de aliento querida.
This is really beatiful
Thank you for such a wonderful love for my creative work dear.