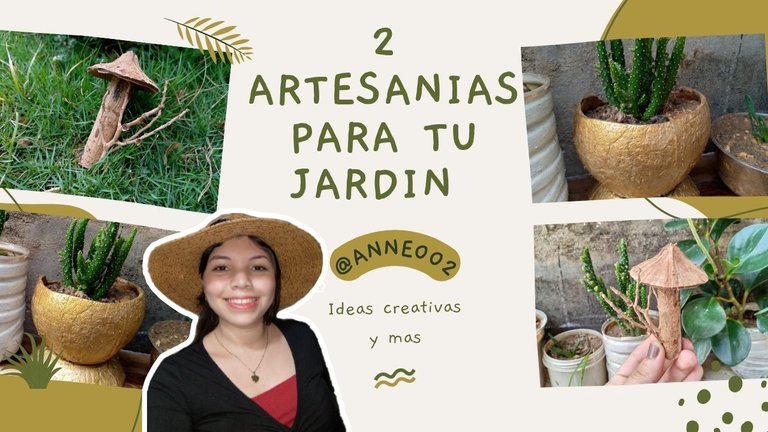
🌿🍄2 ideas for crafts with natural materials for your garden🍂[Esp~Eng]
What I like most about handmade crafts is that you can do anything creative with any little thing that nature provides us🍁, stones🪨 leaves, branches 🌱 and many more things, when I was still little I really enjoyed making🐦🪶 little birds with seeds and rocks I also used seashells🐚 to make necklaces and ornaments, they say that over time one loses the tastes that one had from an early age but in my case that was growing more and thanks to that it has helped me to learn many other things, to let my imagination fly and to be much more creative.💡
Being able to use branches and small leaves🍃 to create something that would catch your eye was not a challenge for me because I did a lot of things at home and in my free time 🕛after school, I made decorations that I placed in my grandmother's living room where she had a little table full of seats but once I became an expert at doing it, the plant that gave me the seeds to make said decorations stopped growing and the season for those fruits passed, so I stopped making them for a while, but I tried many times to make small trees 🌳with dry branches and use them to decorate spaces, I have never stopped doing it and for me it is therapeutic, apart from the fact that my small garden already needed new pots🪴 and decorations but what better way to make them with materials that nature offers us.
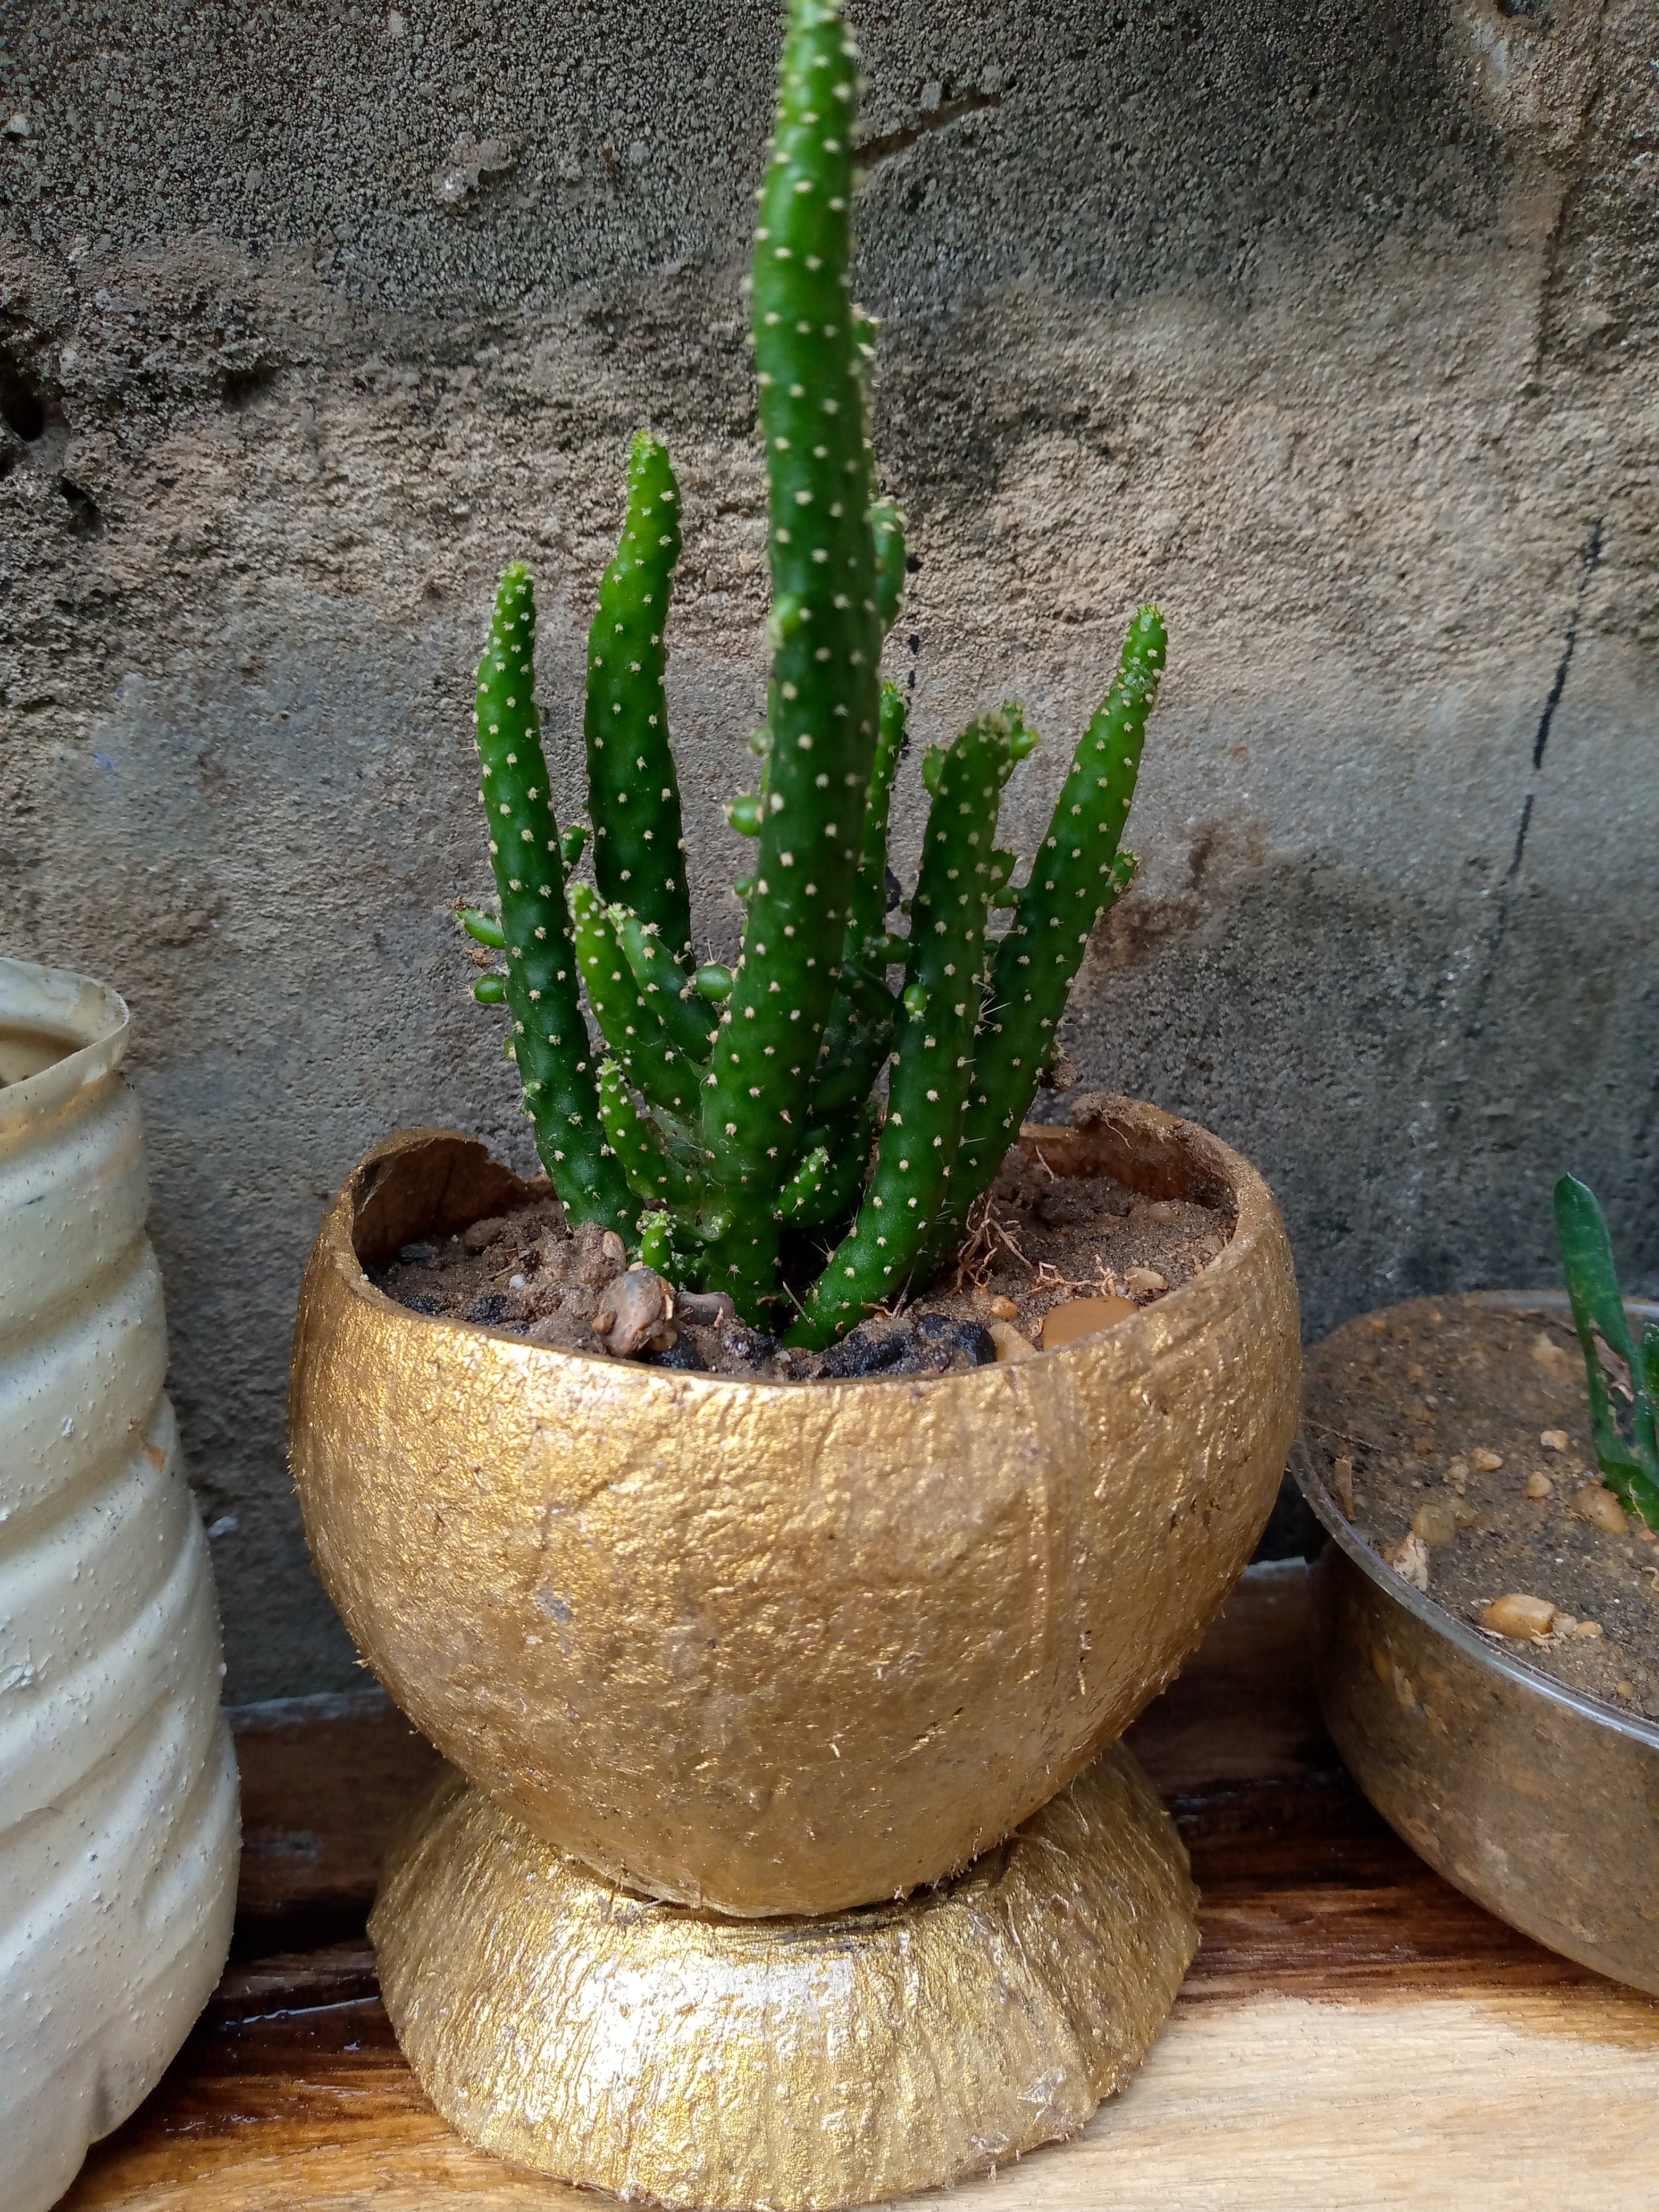
My mom makes homemade coconut oil and has left several coconut shells that I have thought about making into a nice pot for one of my beautiful cacti that has already run out of space inside another pot that was very small 🥲
But today we are going to solve that problem because we will be recycling these coconut shells🥥 to make a handmade flowerpot. We will also use part of the shell and some sticks and twigs🌿 to make a mushroom 🍄and this is all done with our hands, let's get to work🙋🏻♀️.
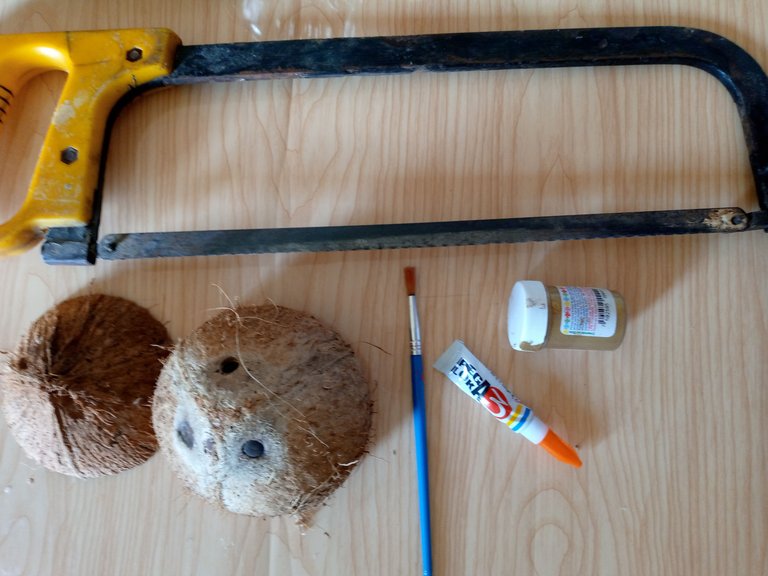
Materiales:// Materials:
| Español | English |
|---|---|
| •Cascaras del fruto del coco | •Coconut shells |
| • Pegamento resistente | •Strong glue |
| • Pinceles y pintura | •Brushes and paint |
| •Trozo de telgopor | •Piece of styrofoam |
| •Un poco de gasolina | •A little gasoline |
| •Serrucho de metal | •Metal saw |
| •Ramitas de árboles | •Tree twigs |
Pasos a seguir://Steps to follow:
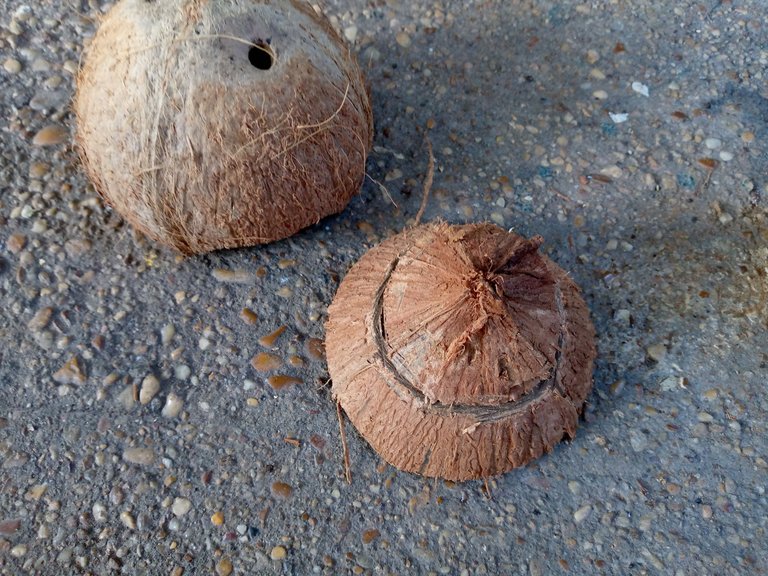
Paso 01
Step 01
The coconut shell is super strong that if you try to hit it against the floor it is almost impossible to break it but I will use the saw to cut it and with the help of gloves so as not to hurt my hands it is recommended that we do it on a hard surface like the floor, I will cut the coconut in half or a little higher if it is already cut well by you and only remains to make the base with a small part of the shell from above, we are going to mark around the entire circumference above this small part to be able to make a kind of ring with the shell and be able to insert the other part there, this is a somewhat late job because cutting this shell like this with a saw is difficult but I did it little by little.

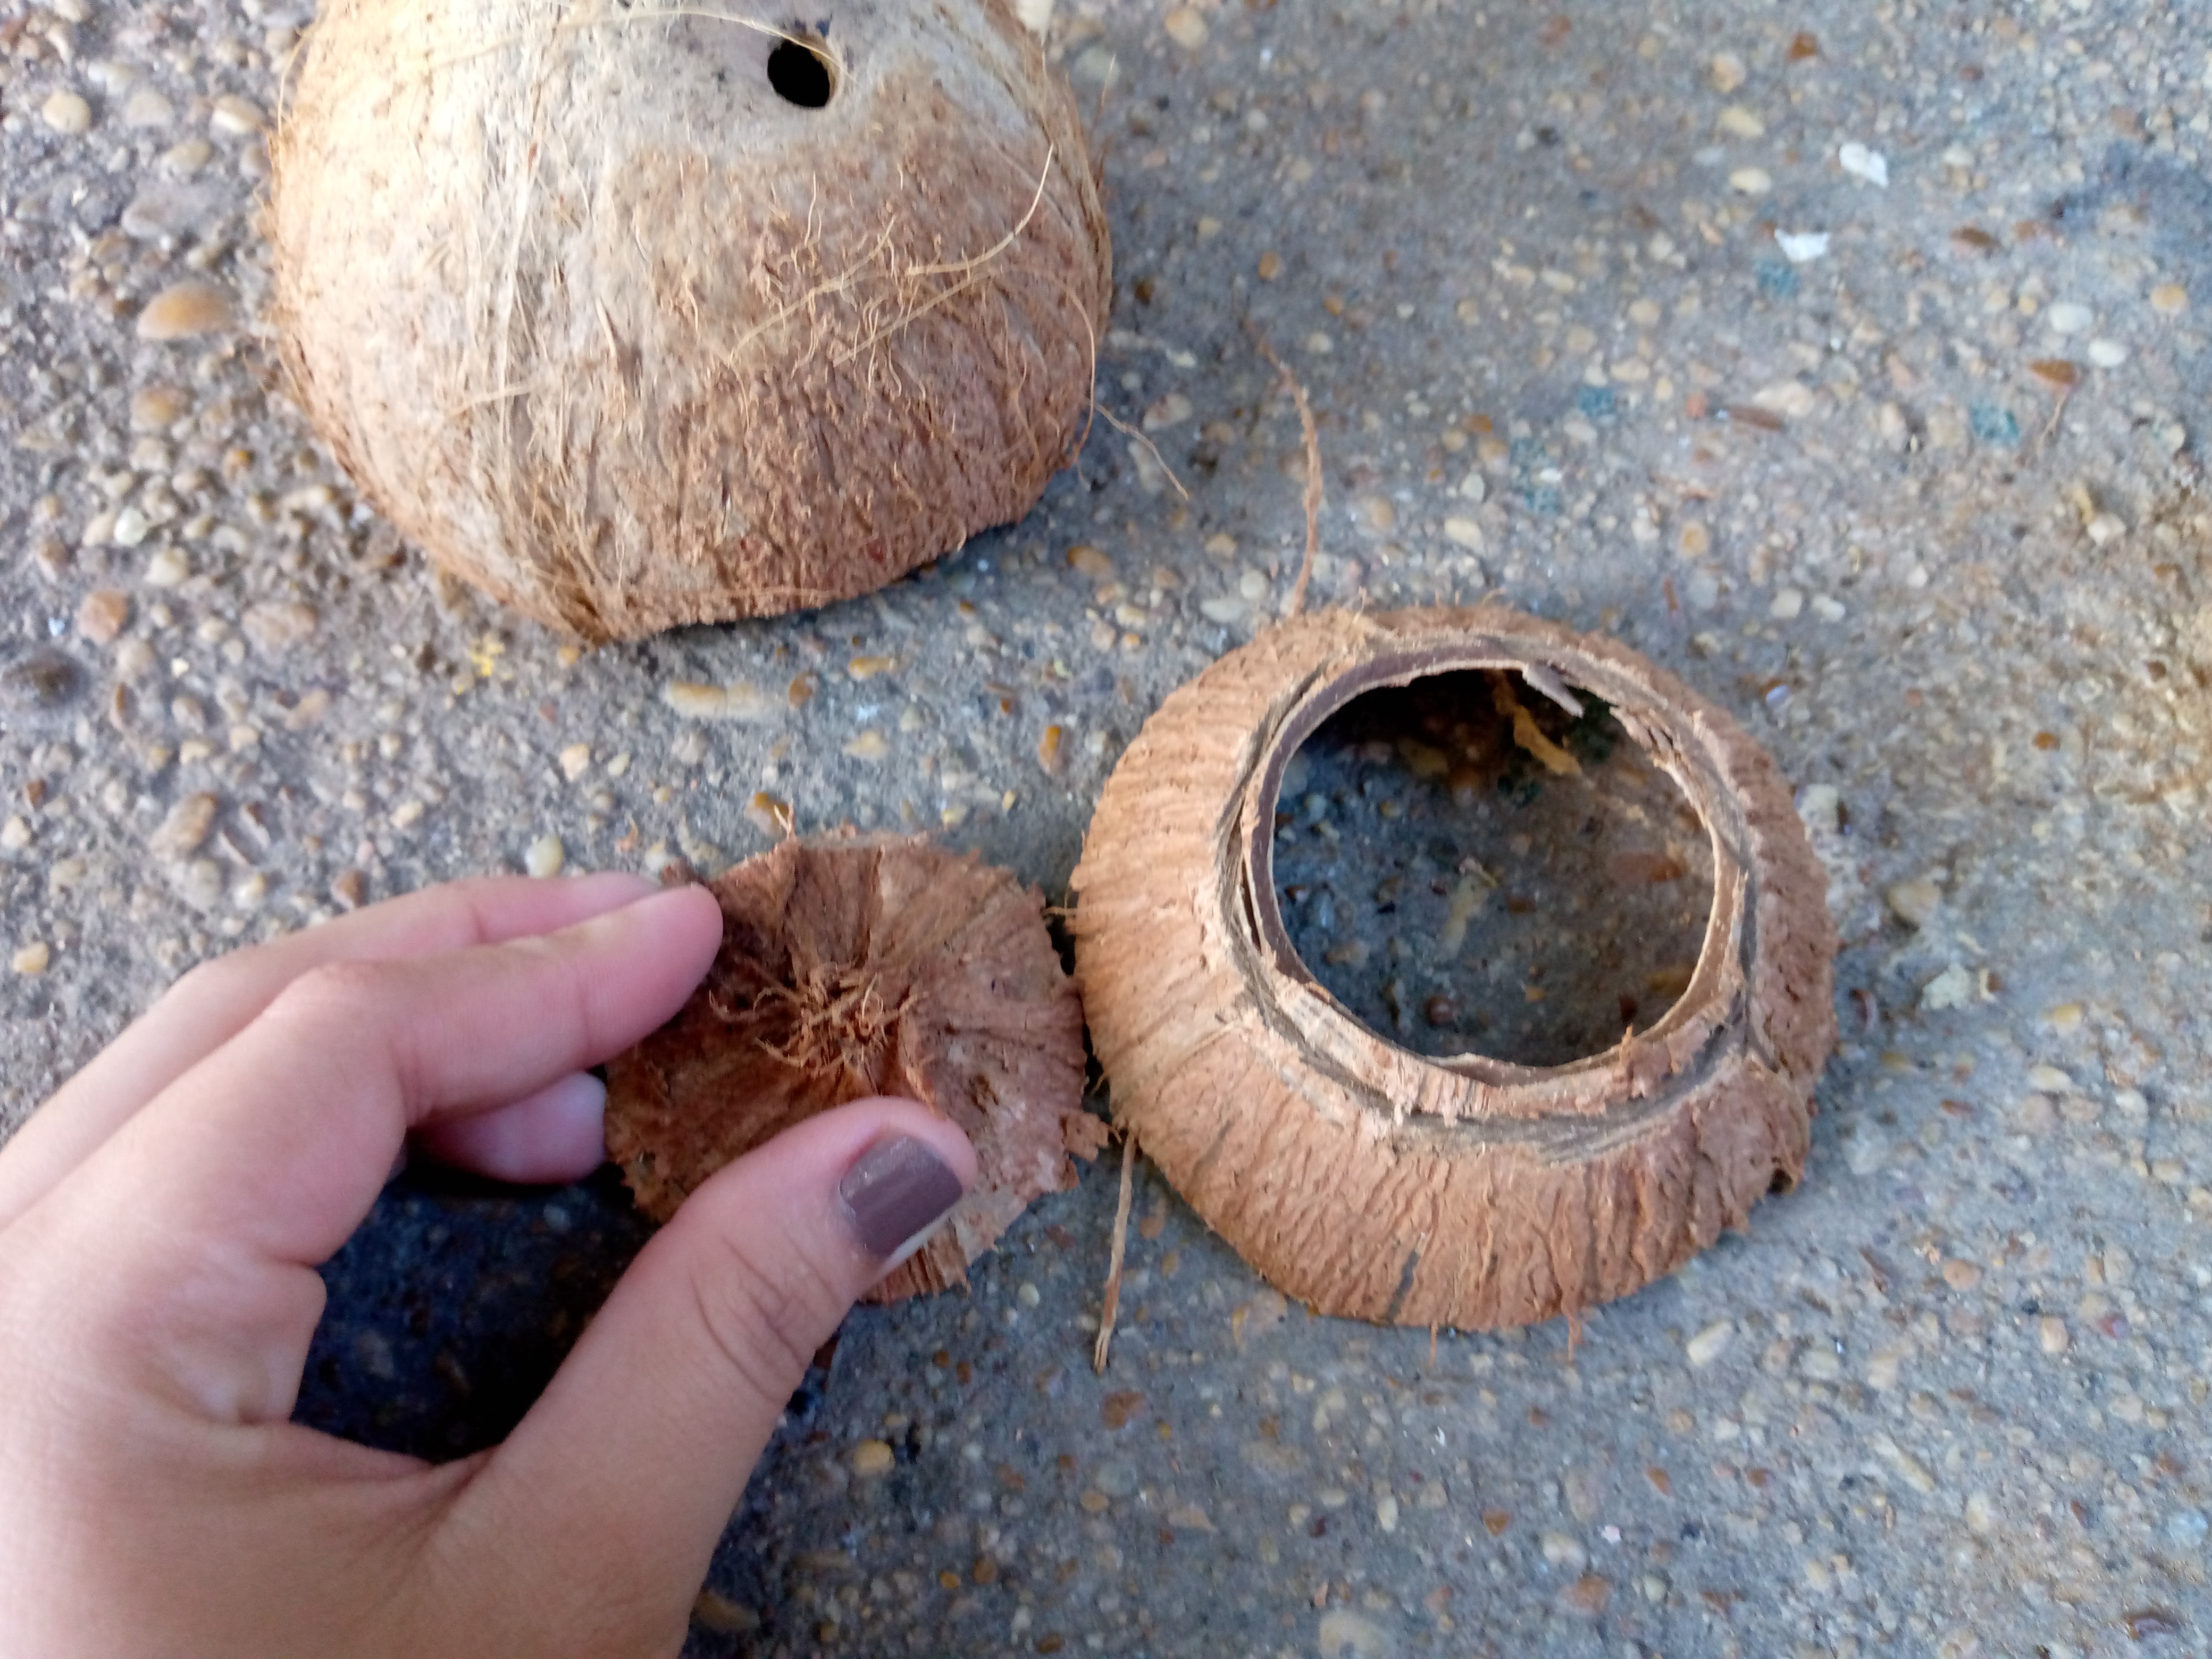
Paso 02
Step 02
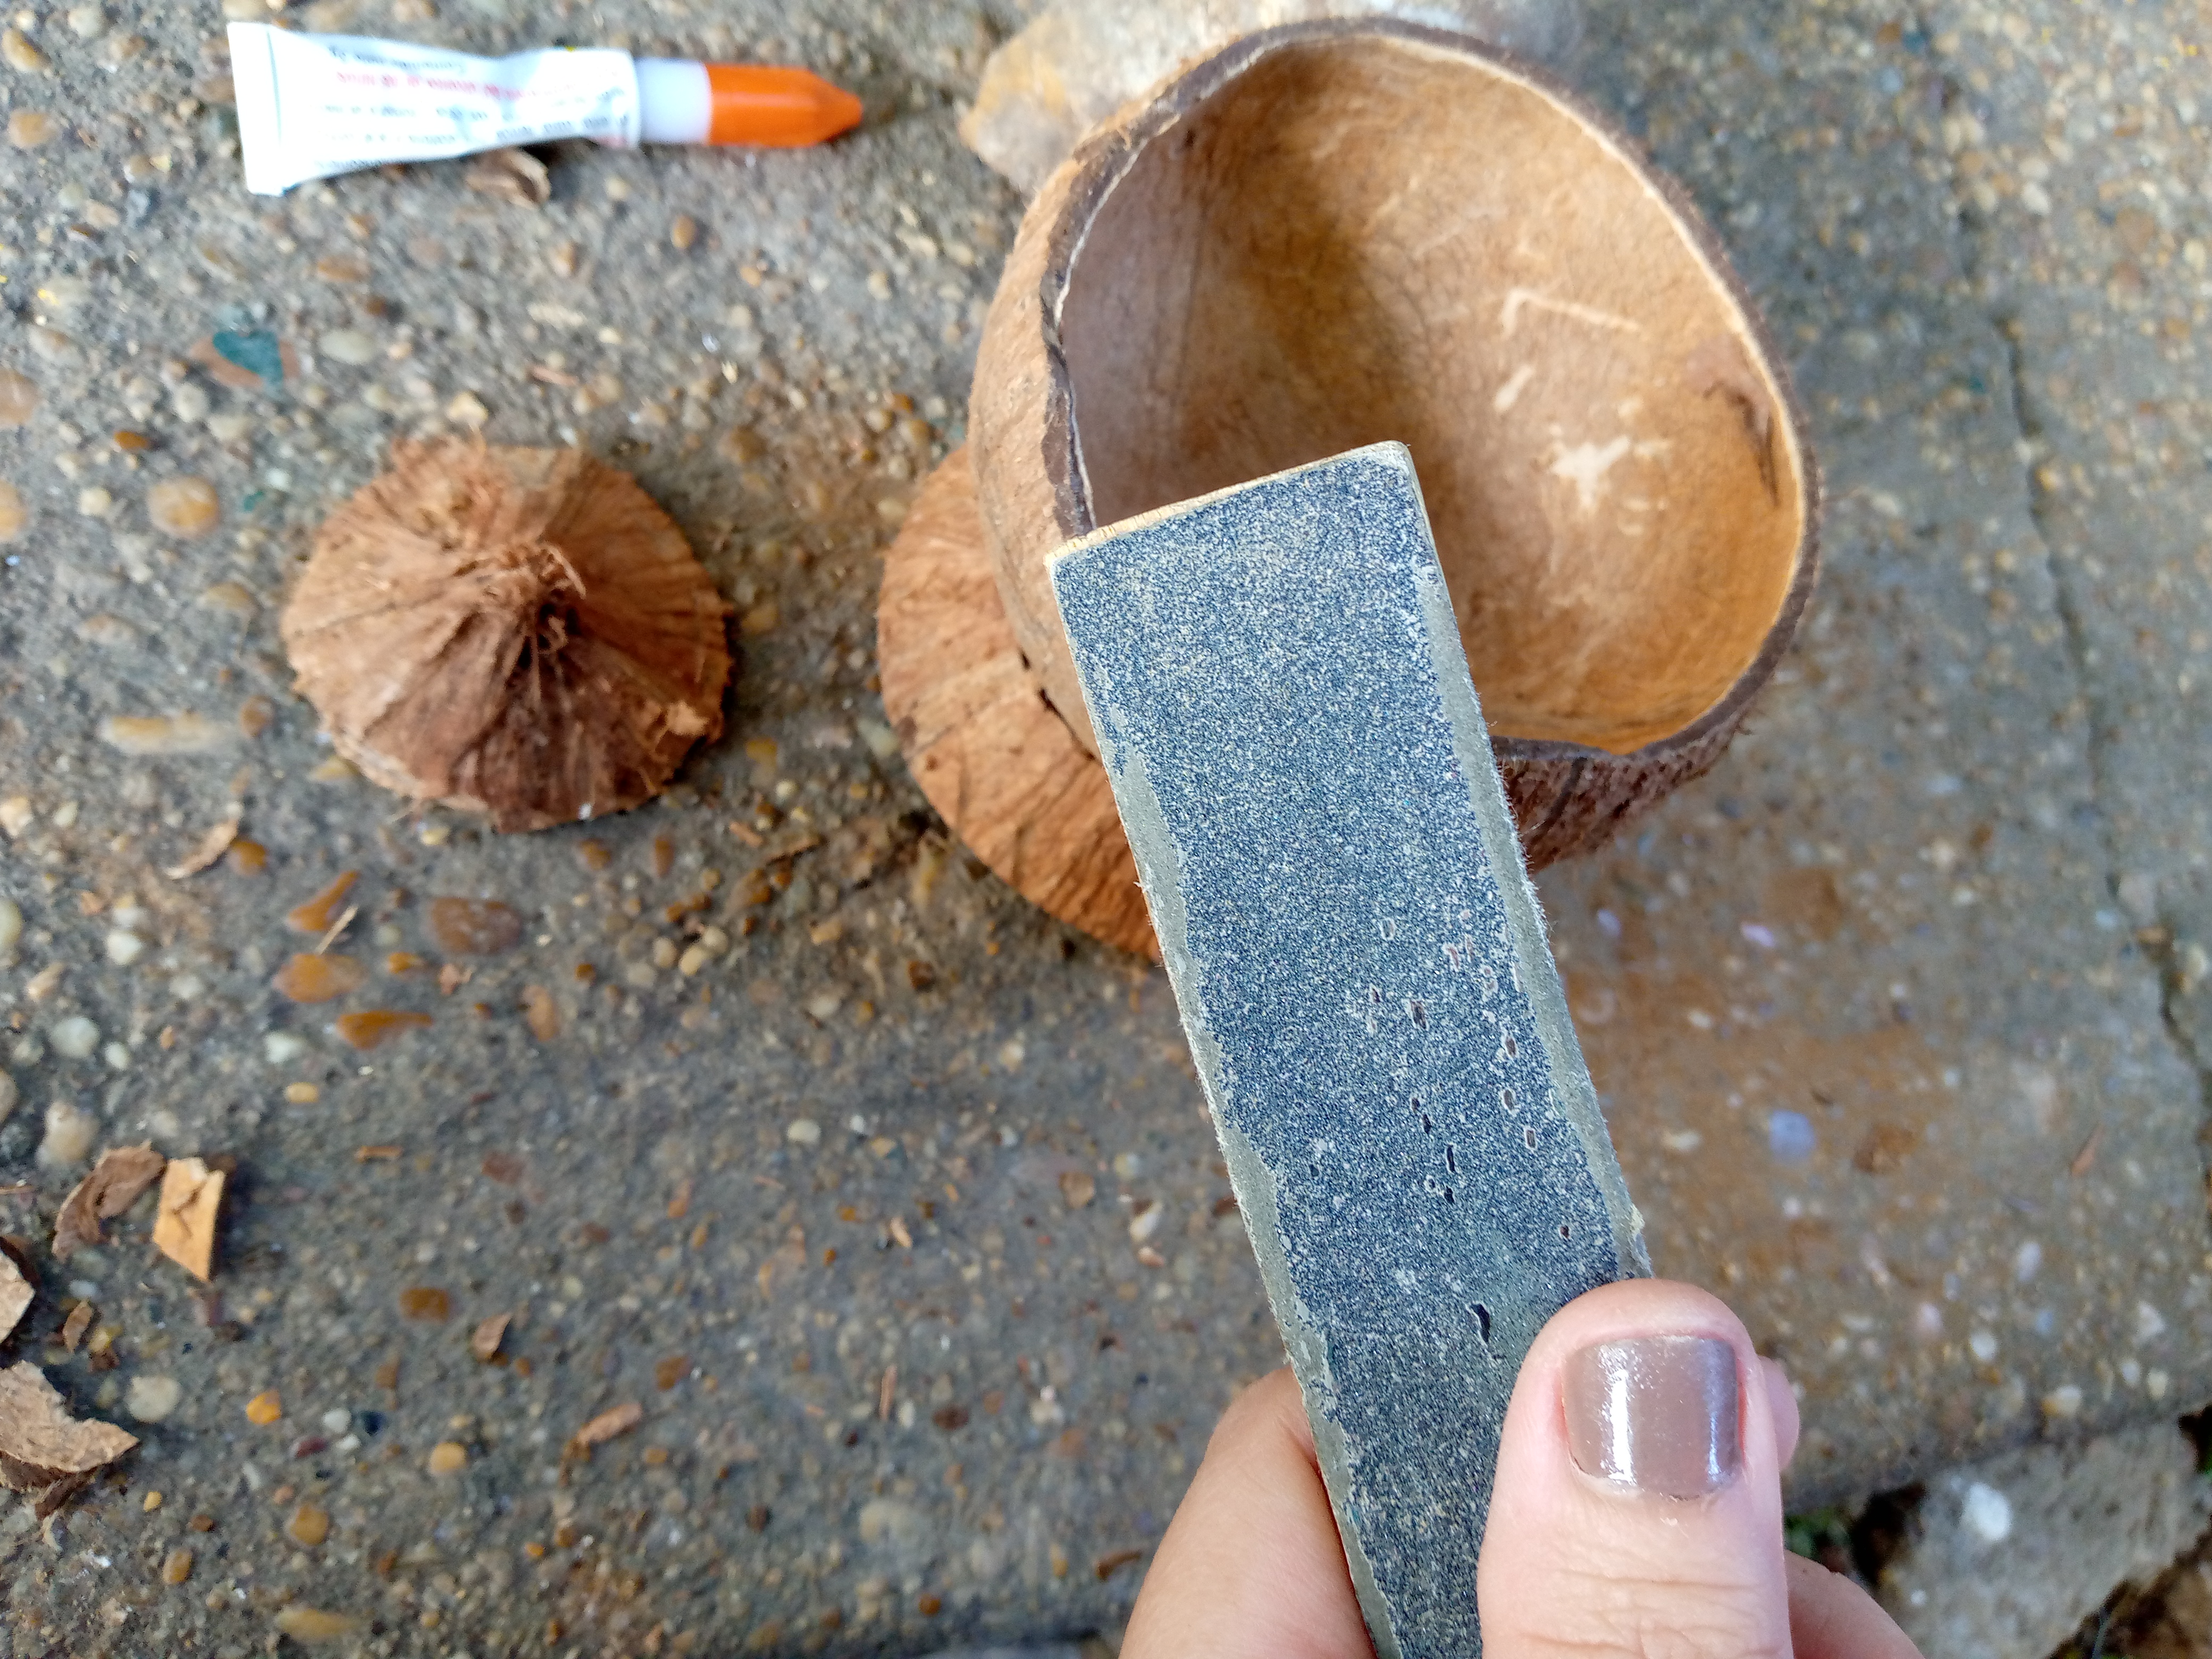
We move on to glue the ring to our other leftover part where we will insert our wave later, and with a little of the powder that was left over when we cut the shell with the saw while the glue was still dry, we add a little so that the glue adheres better and is resistant to the base, then with sandpaper we sand the sharp outline of what will be our flowerpot, we will sand it on all sides.
.jpg)
Paso 03
Step 03
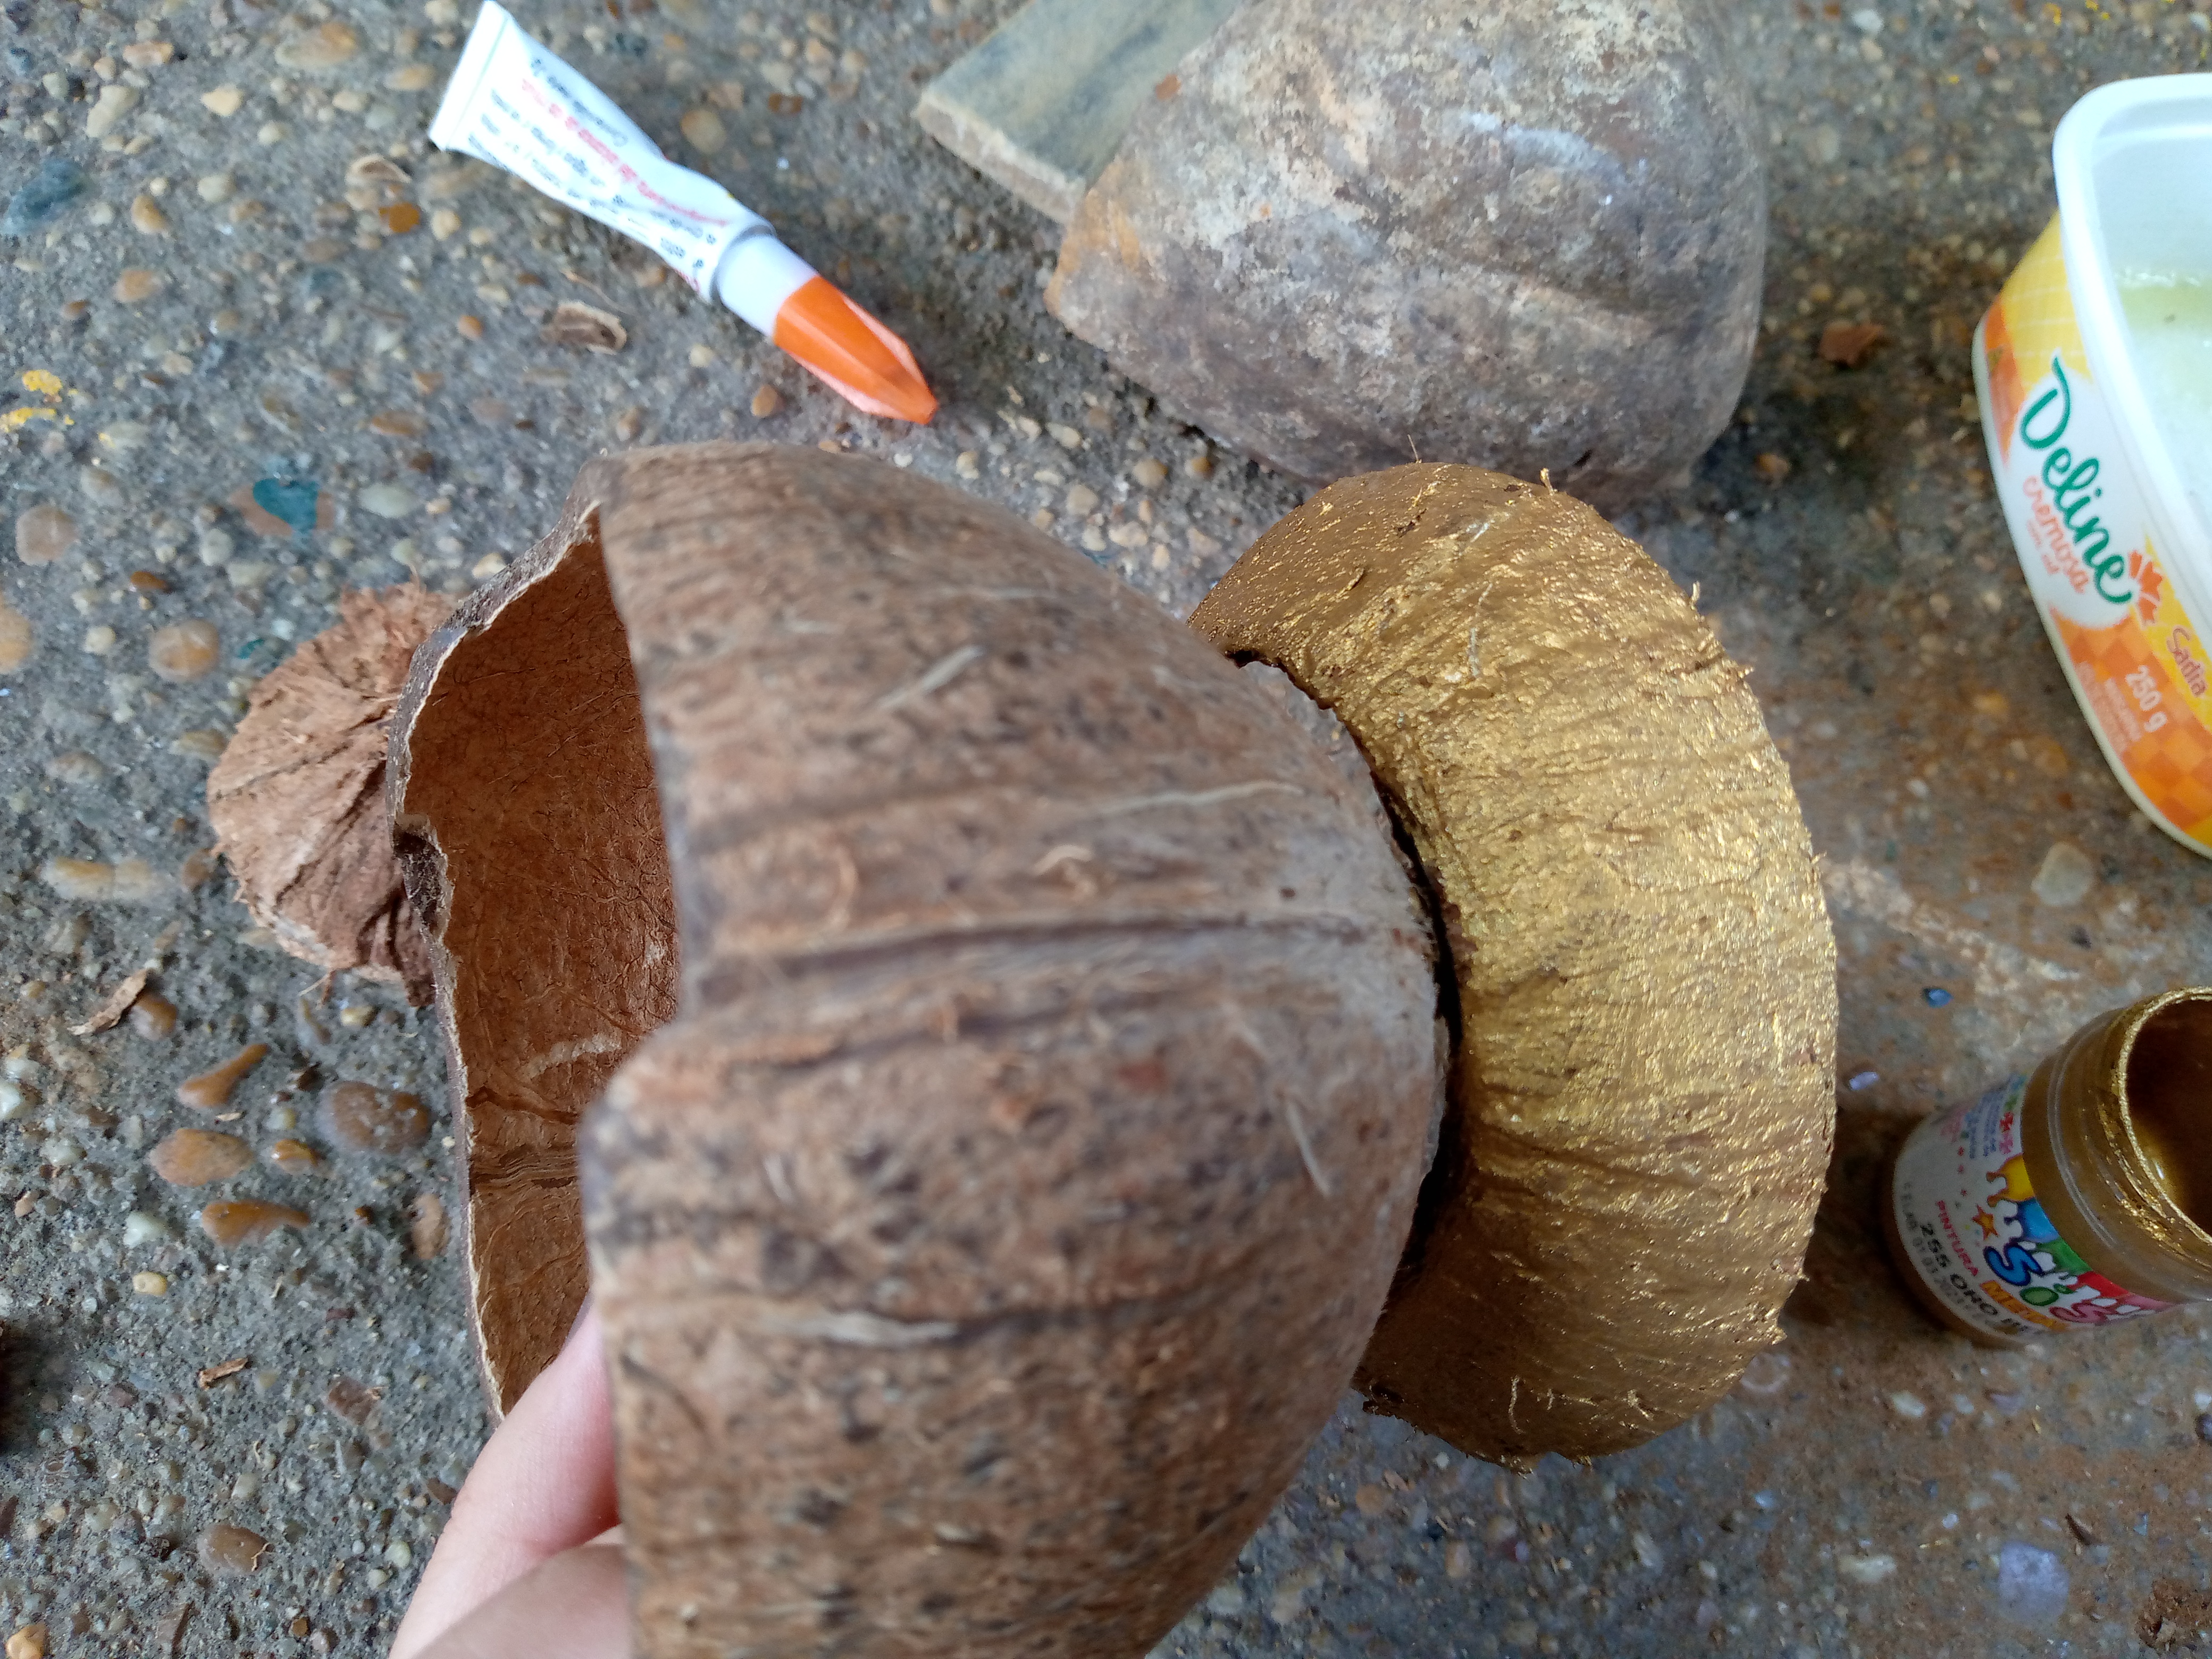
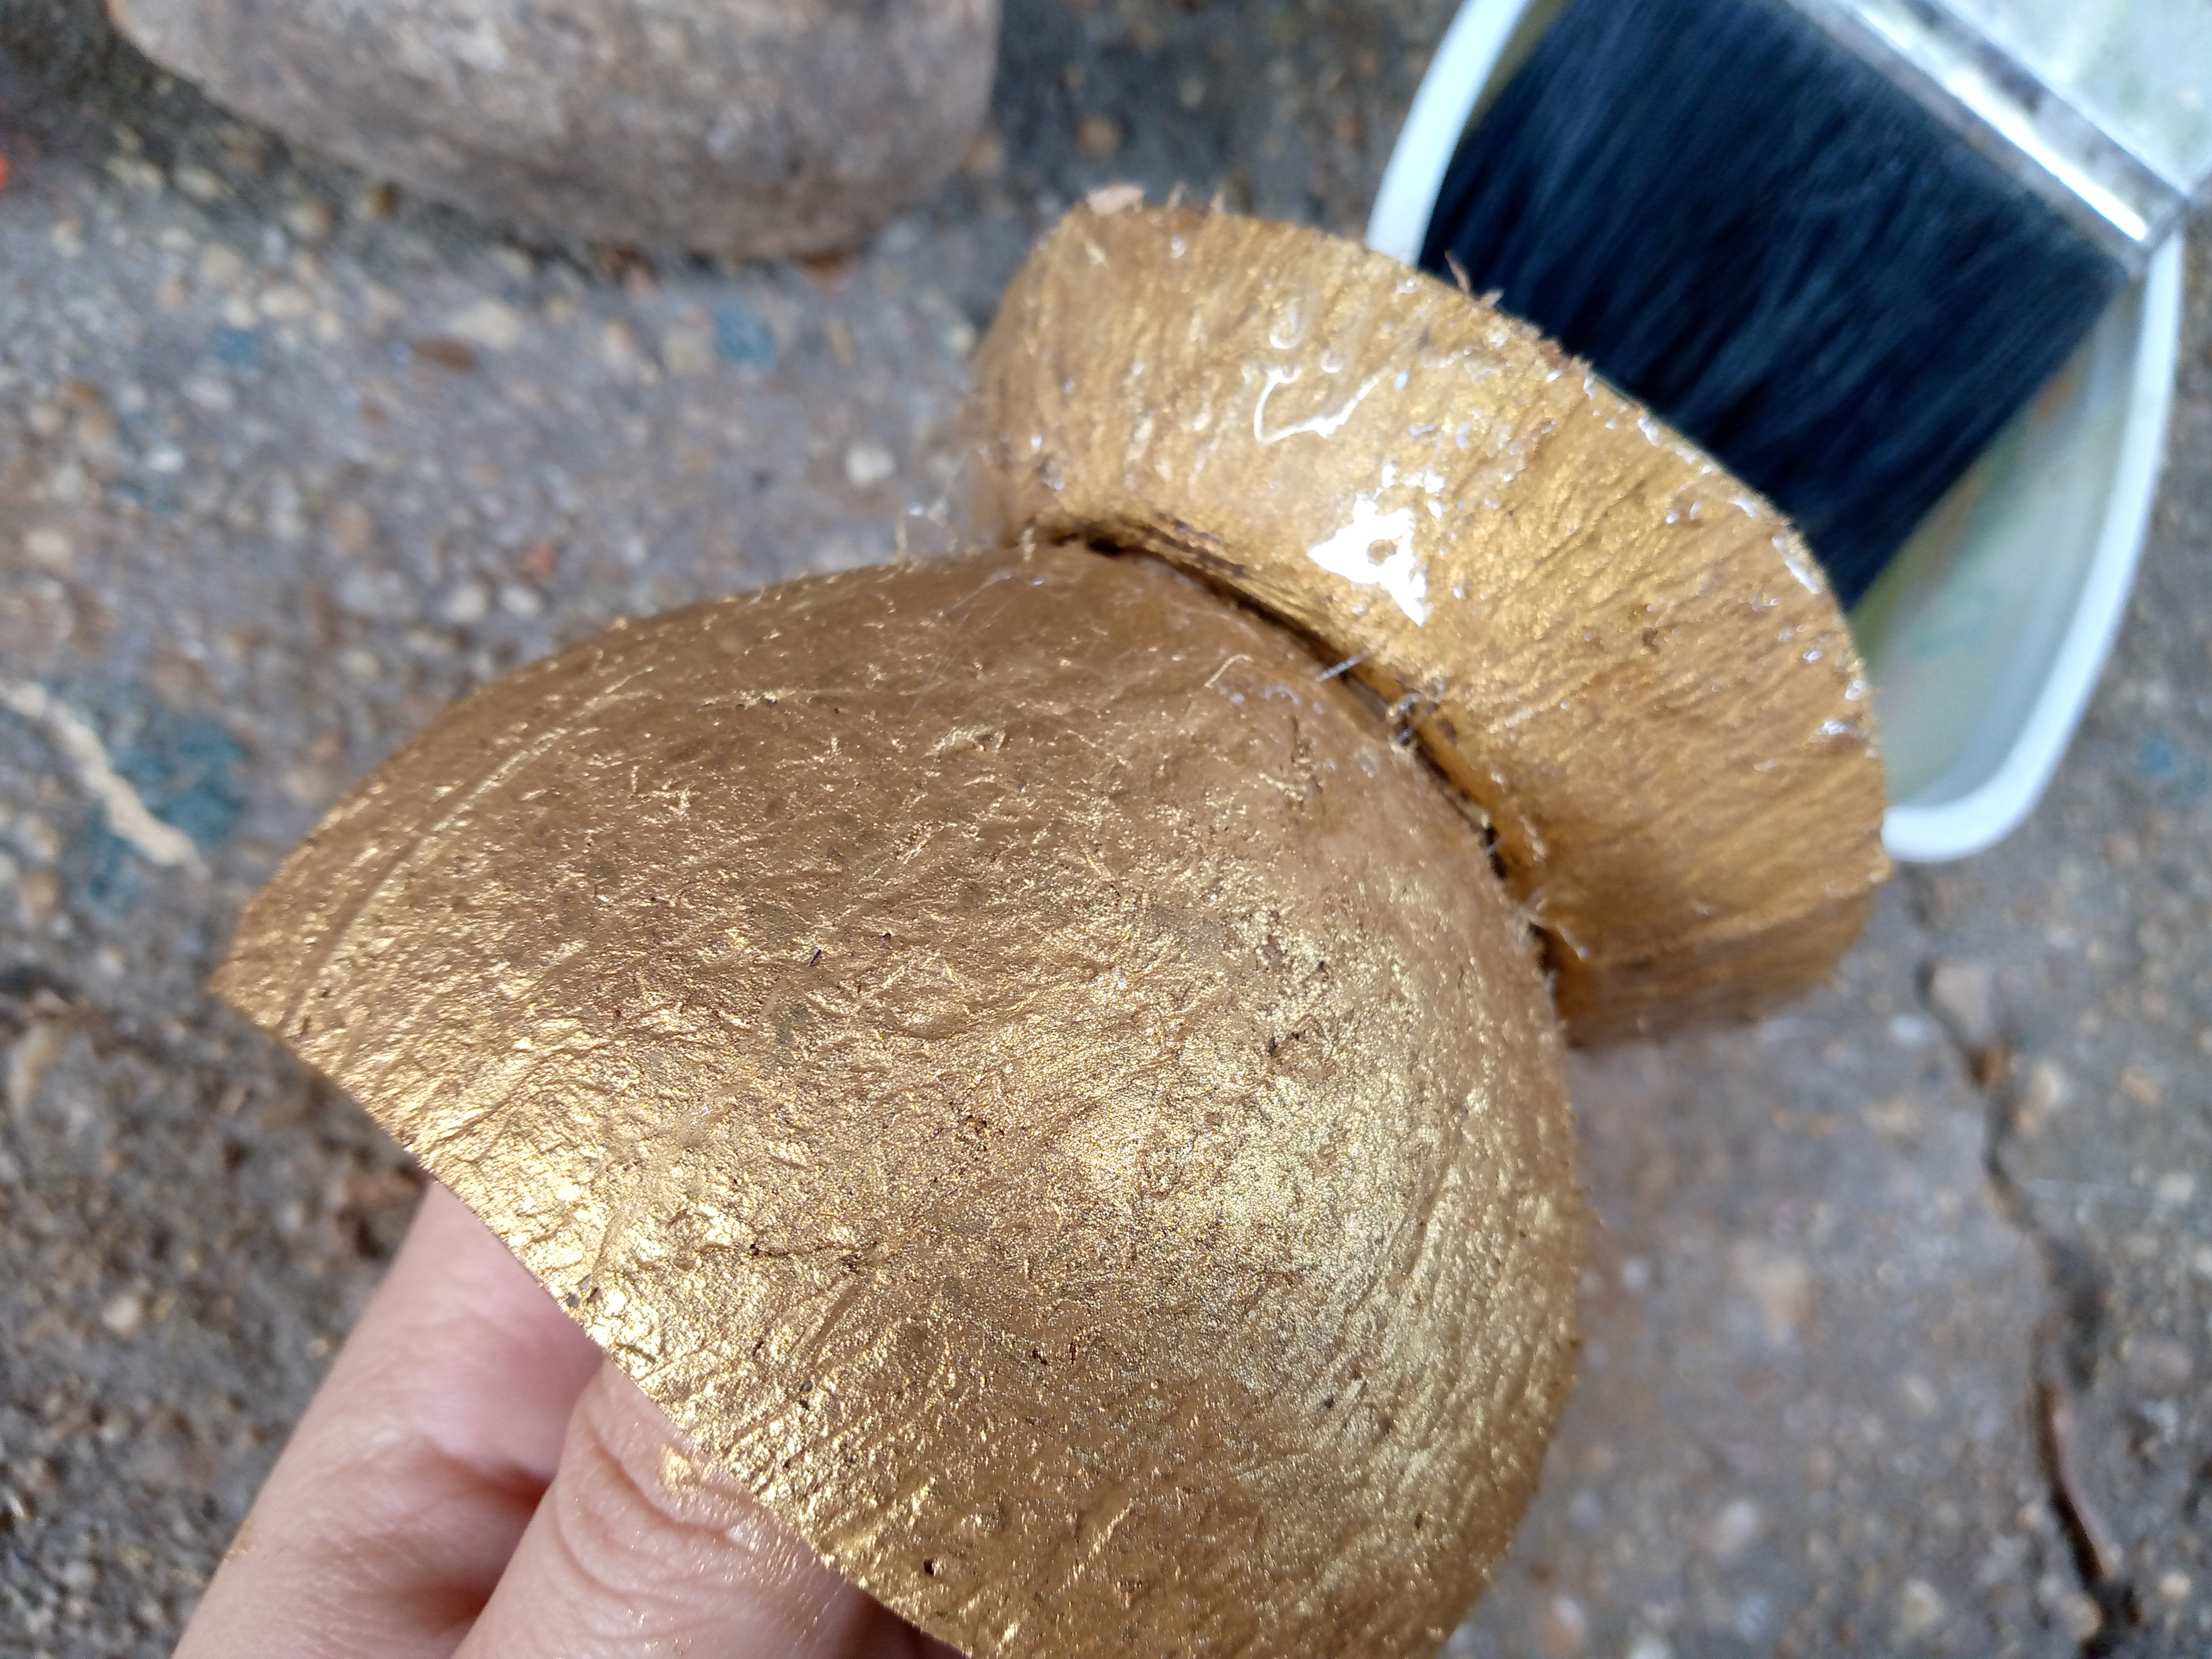
Meanwhile, we paint the bottom of the pot with paint and begin to make what will be our homemade varnish. We add a little gasoline to a separate container and we add styrofoam until we have a mixture that is somewhat thick and transparent. Then we paint what remains to be painted on the top, let it dry and apply a layer of this varnish to give a shiny effect to our pot.
Paso 04
Step 04
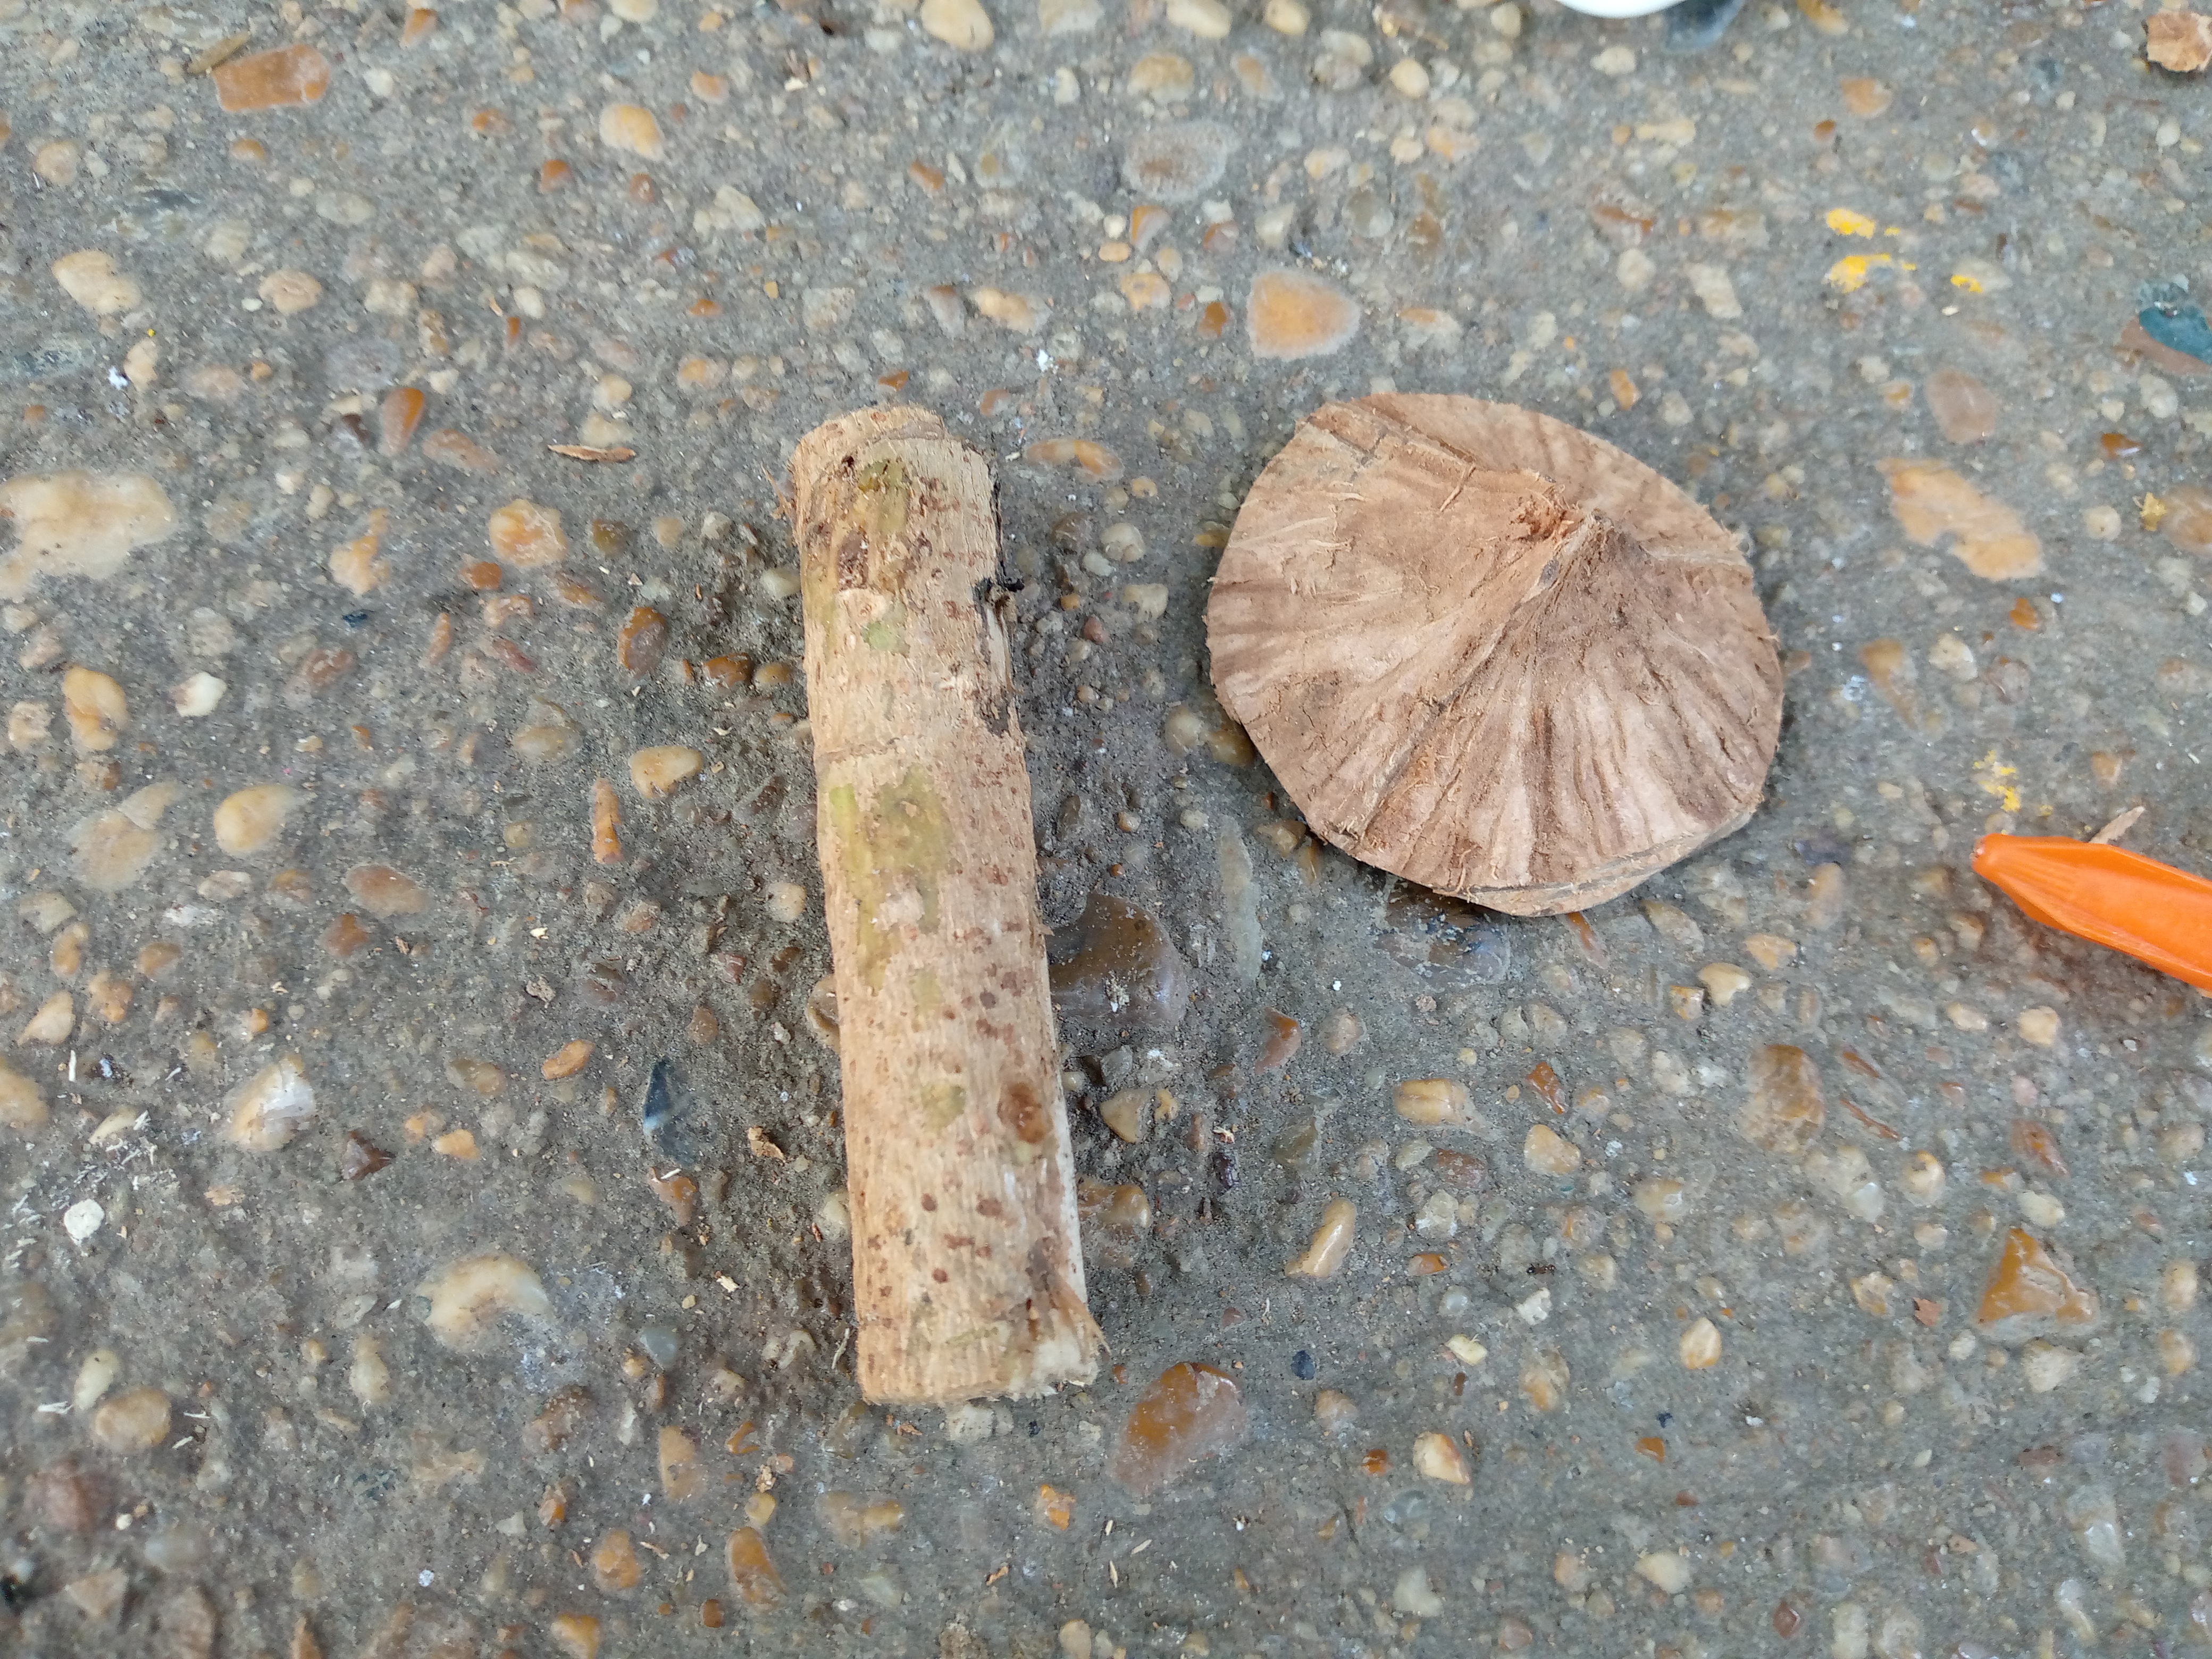
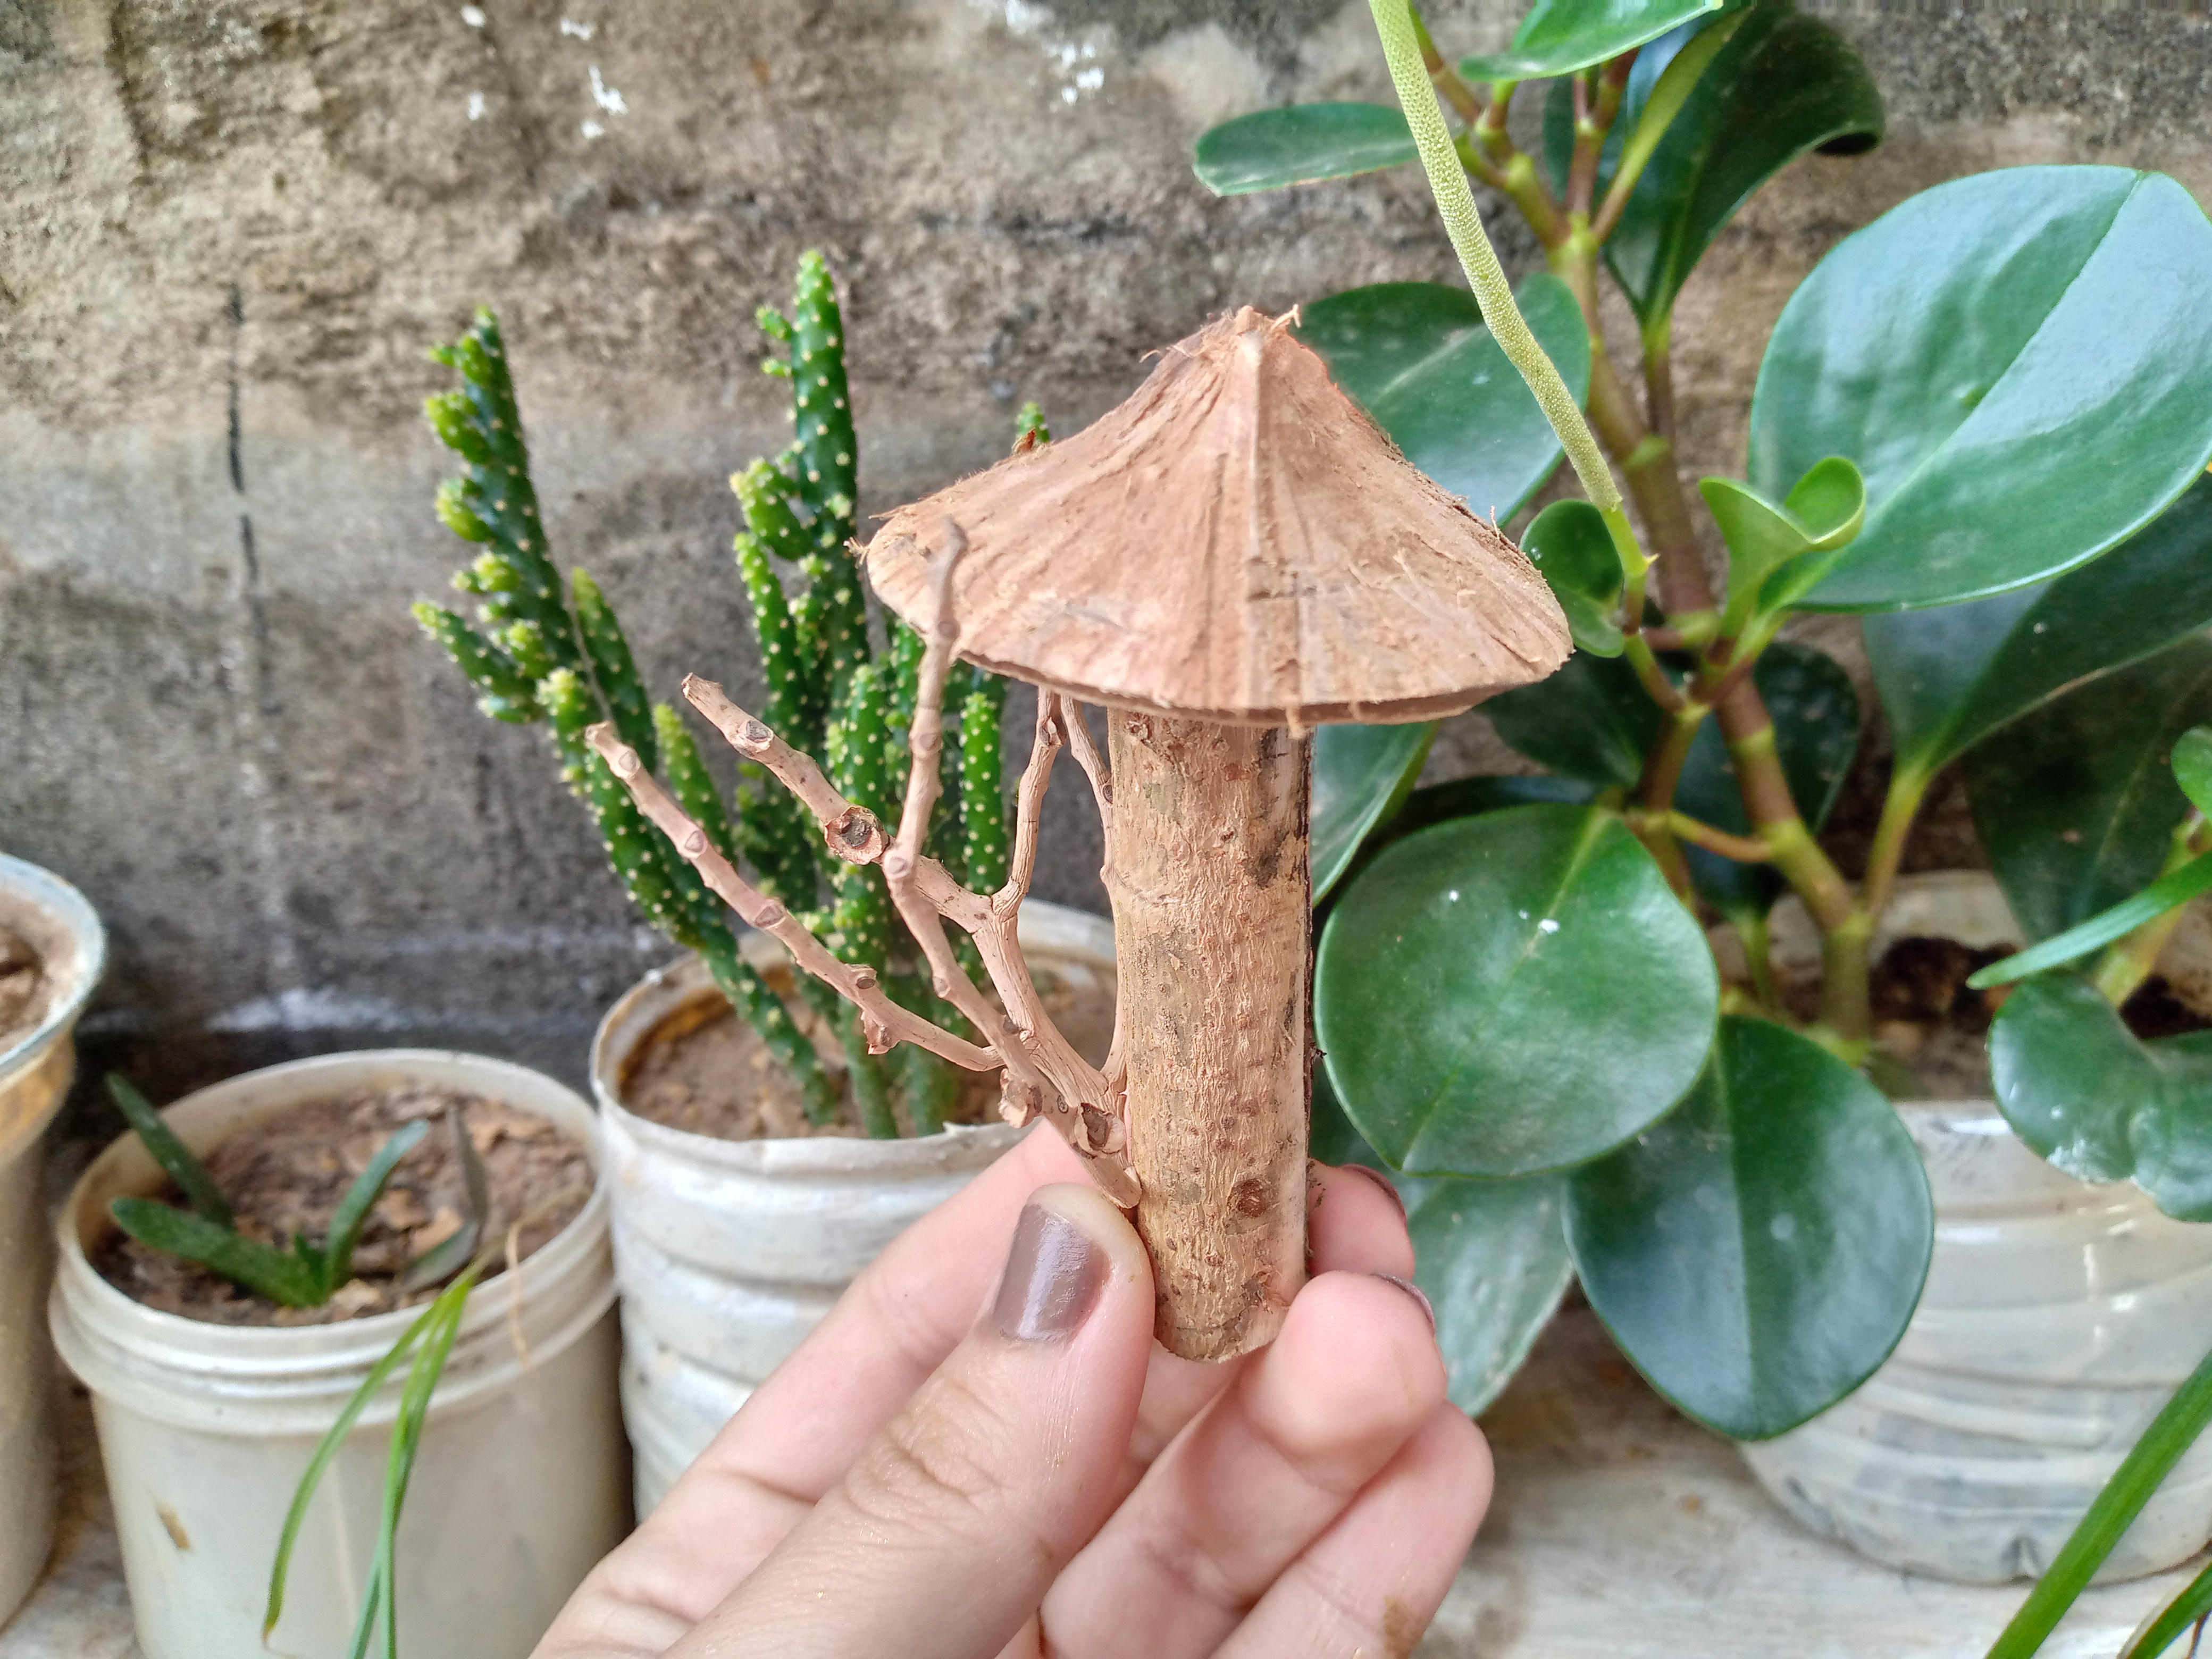
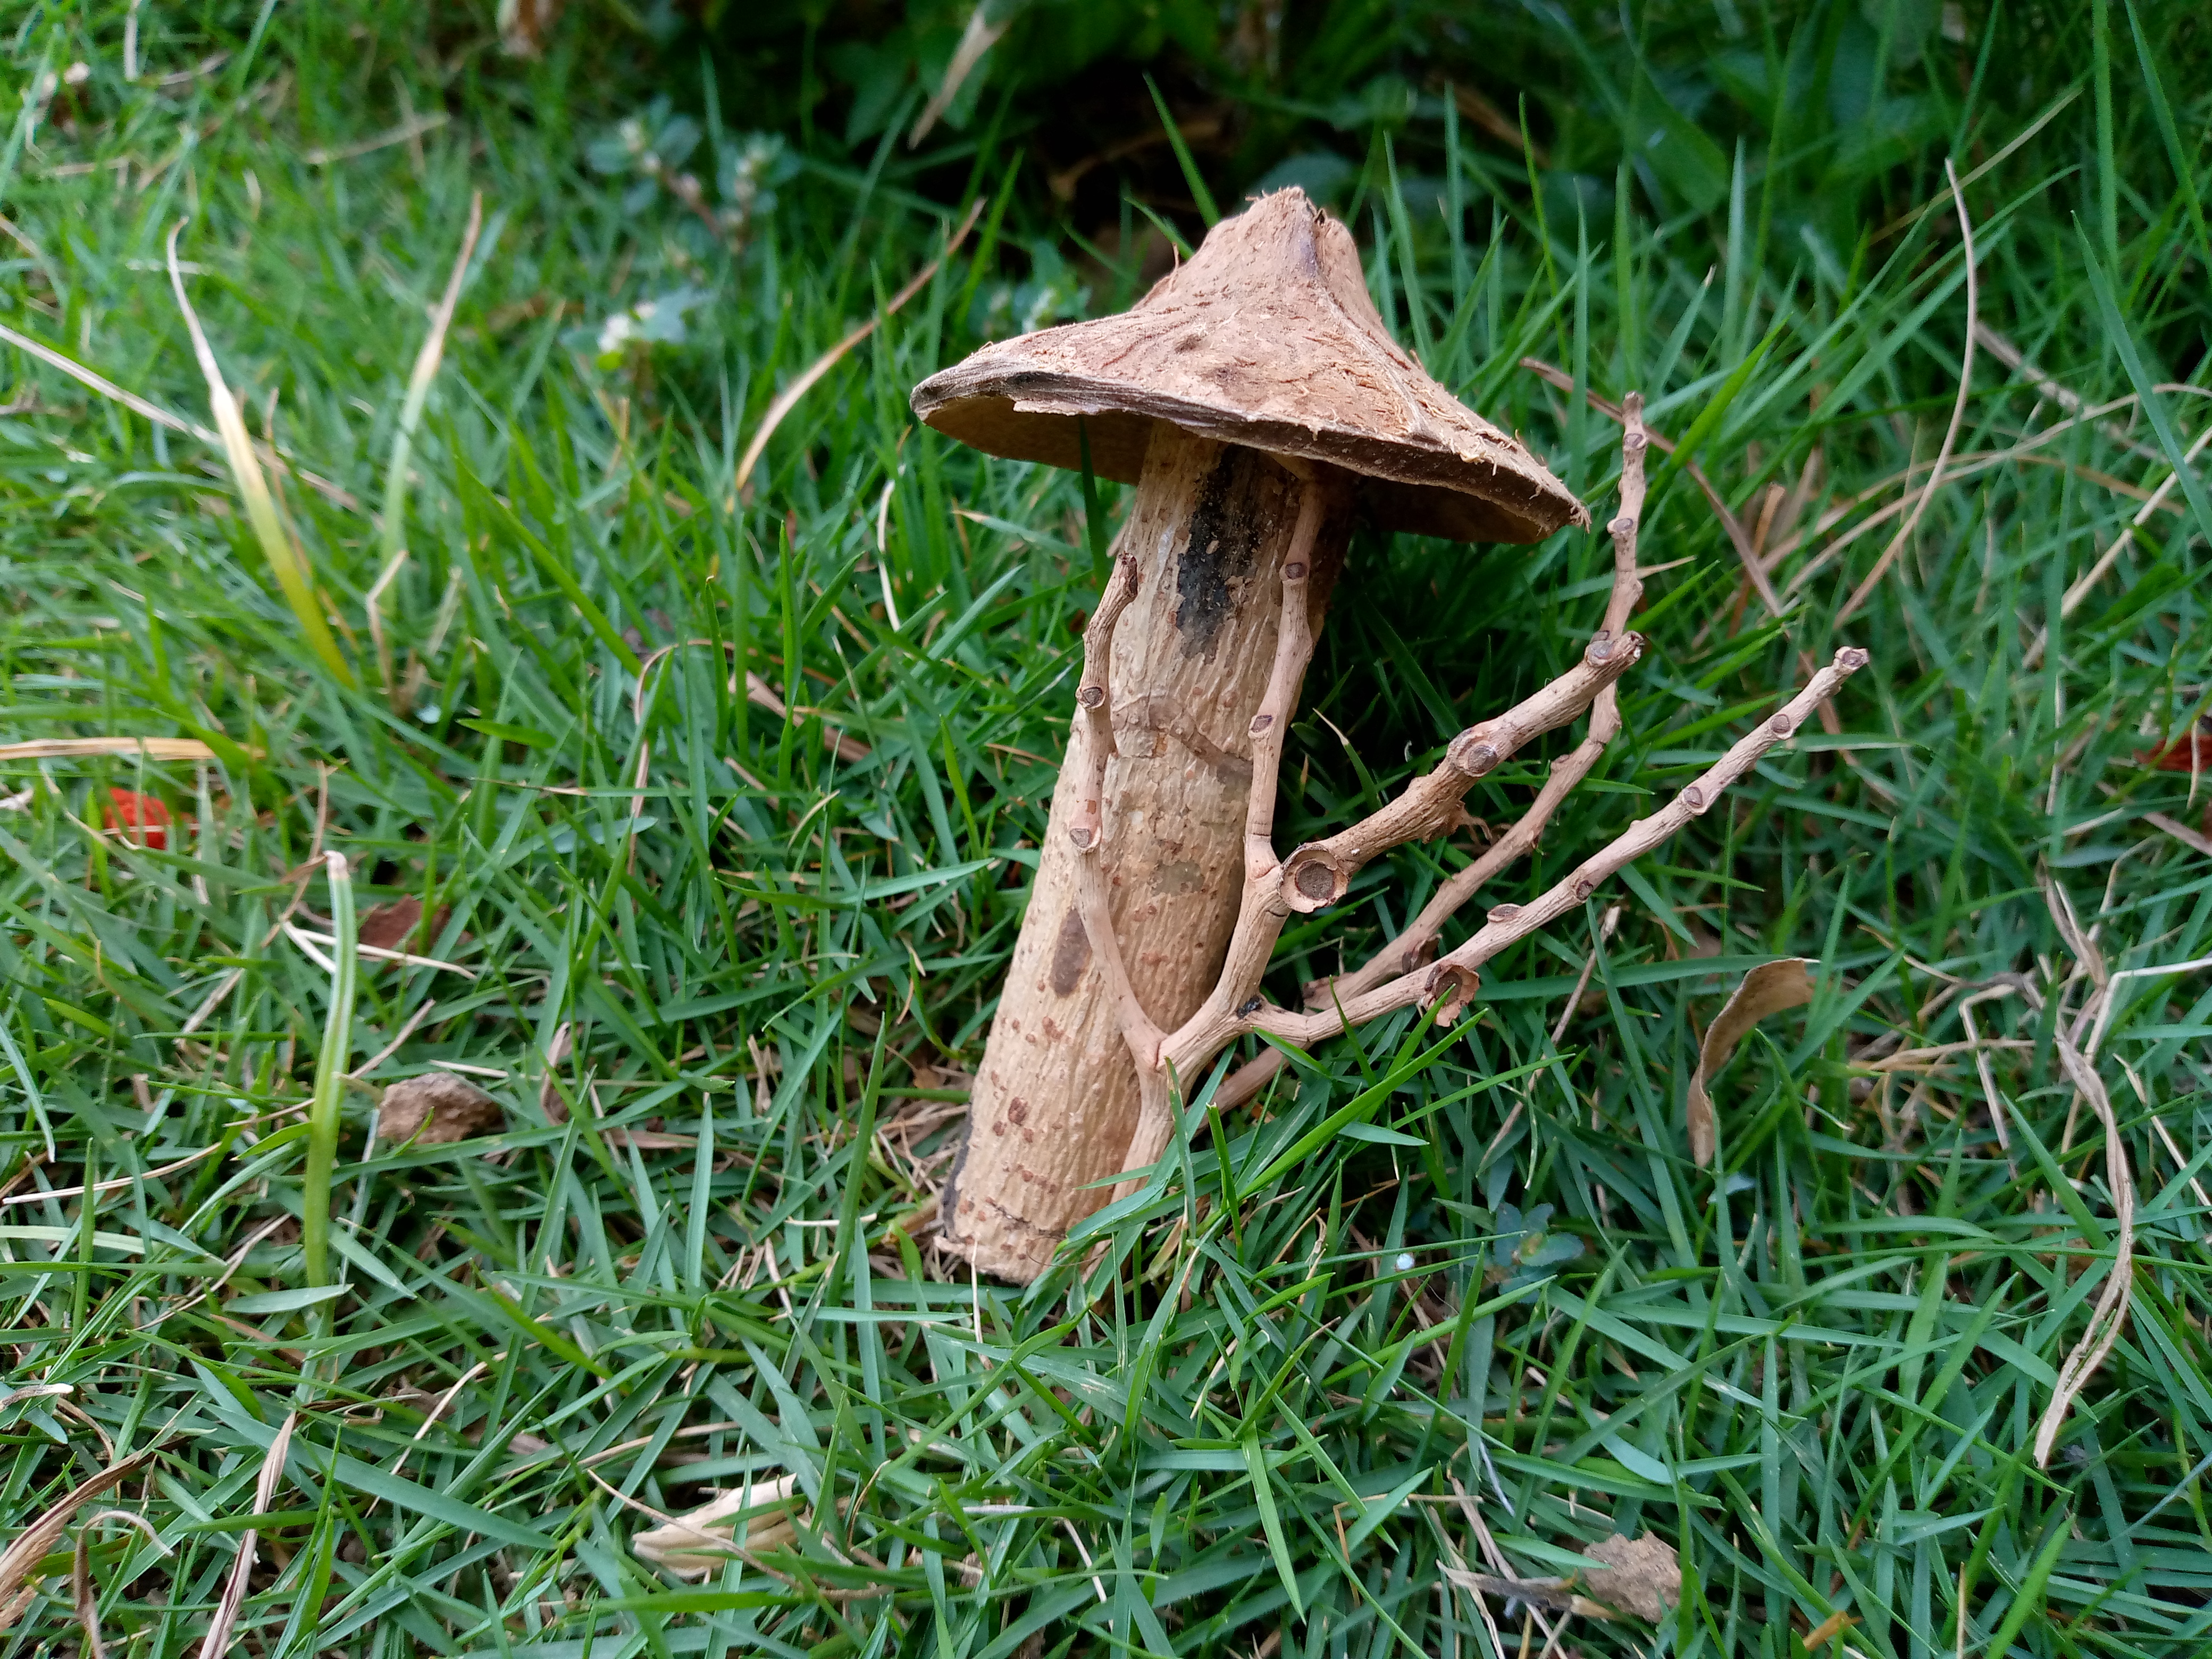
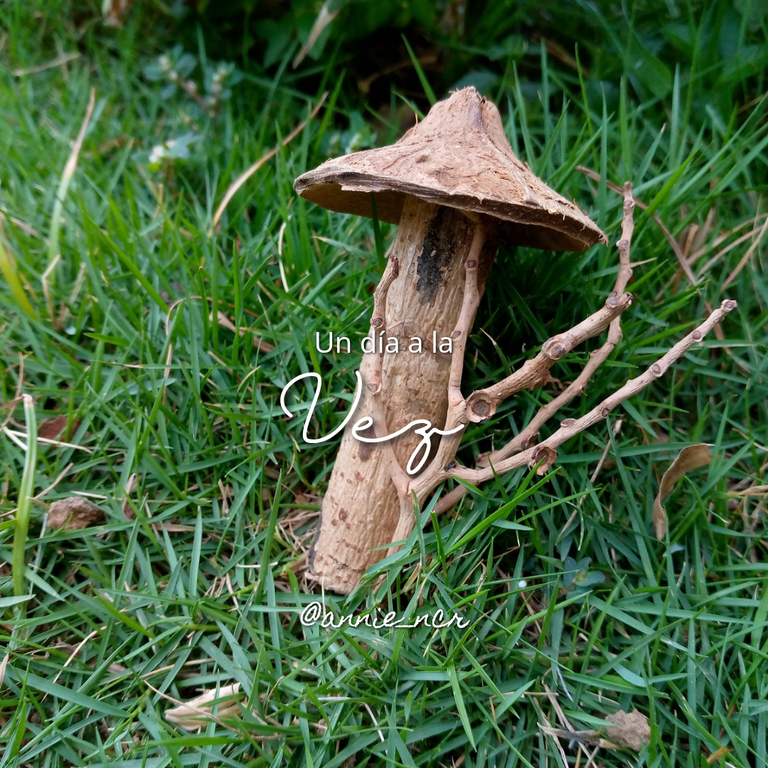
While we let the paint and varnish dry on the pot, there were some shells left over from the shell and here there were many sticks and branches left over from my garden and I wanted to make a mushroom and a twig next to it to decorate my space and my plants that are inside the pots, what I did was sand that small round shell that I used for the top of the mushroom and cut a 5 cm long stick with the saw and with the same glue I glued it to the small shell that is shaped like a mushroom then I glued the twig to the side, let it dry and voila, this beautiful little mushroom for my garden was finished. 🍄
Resultado:// Result:
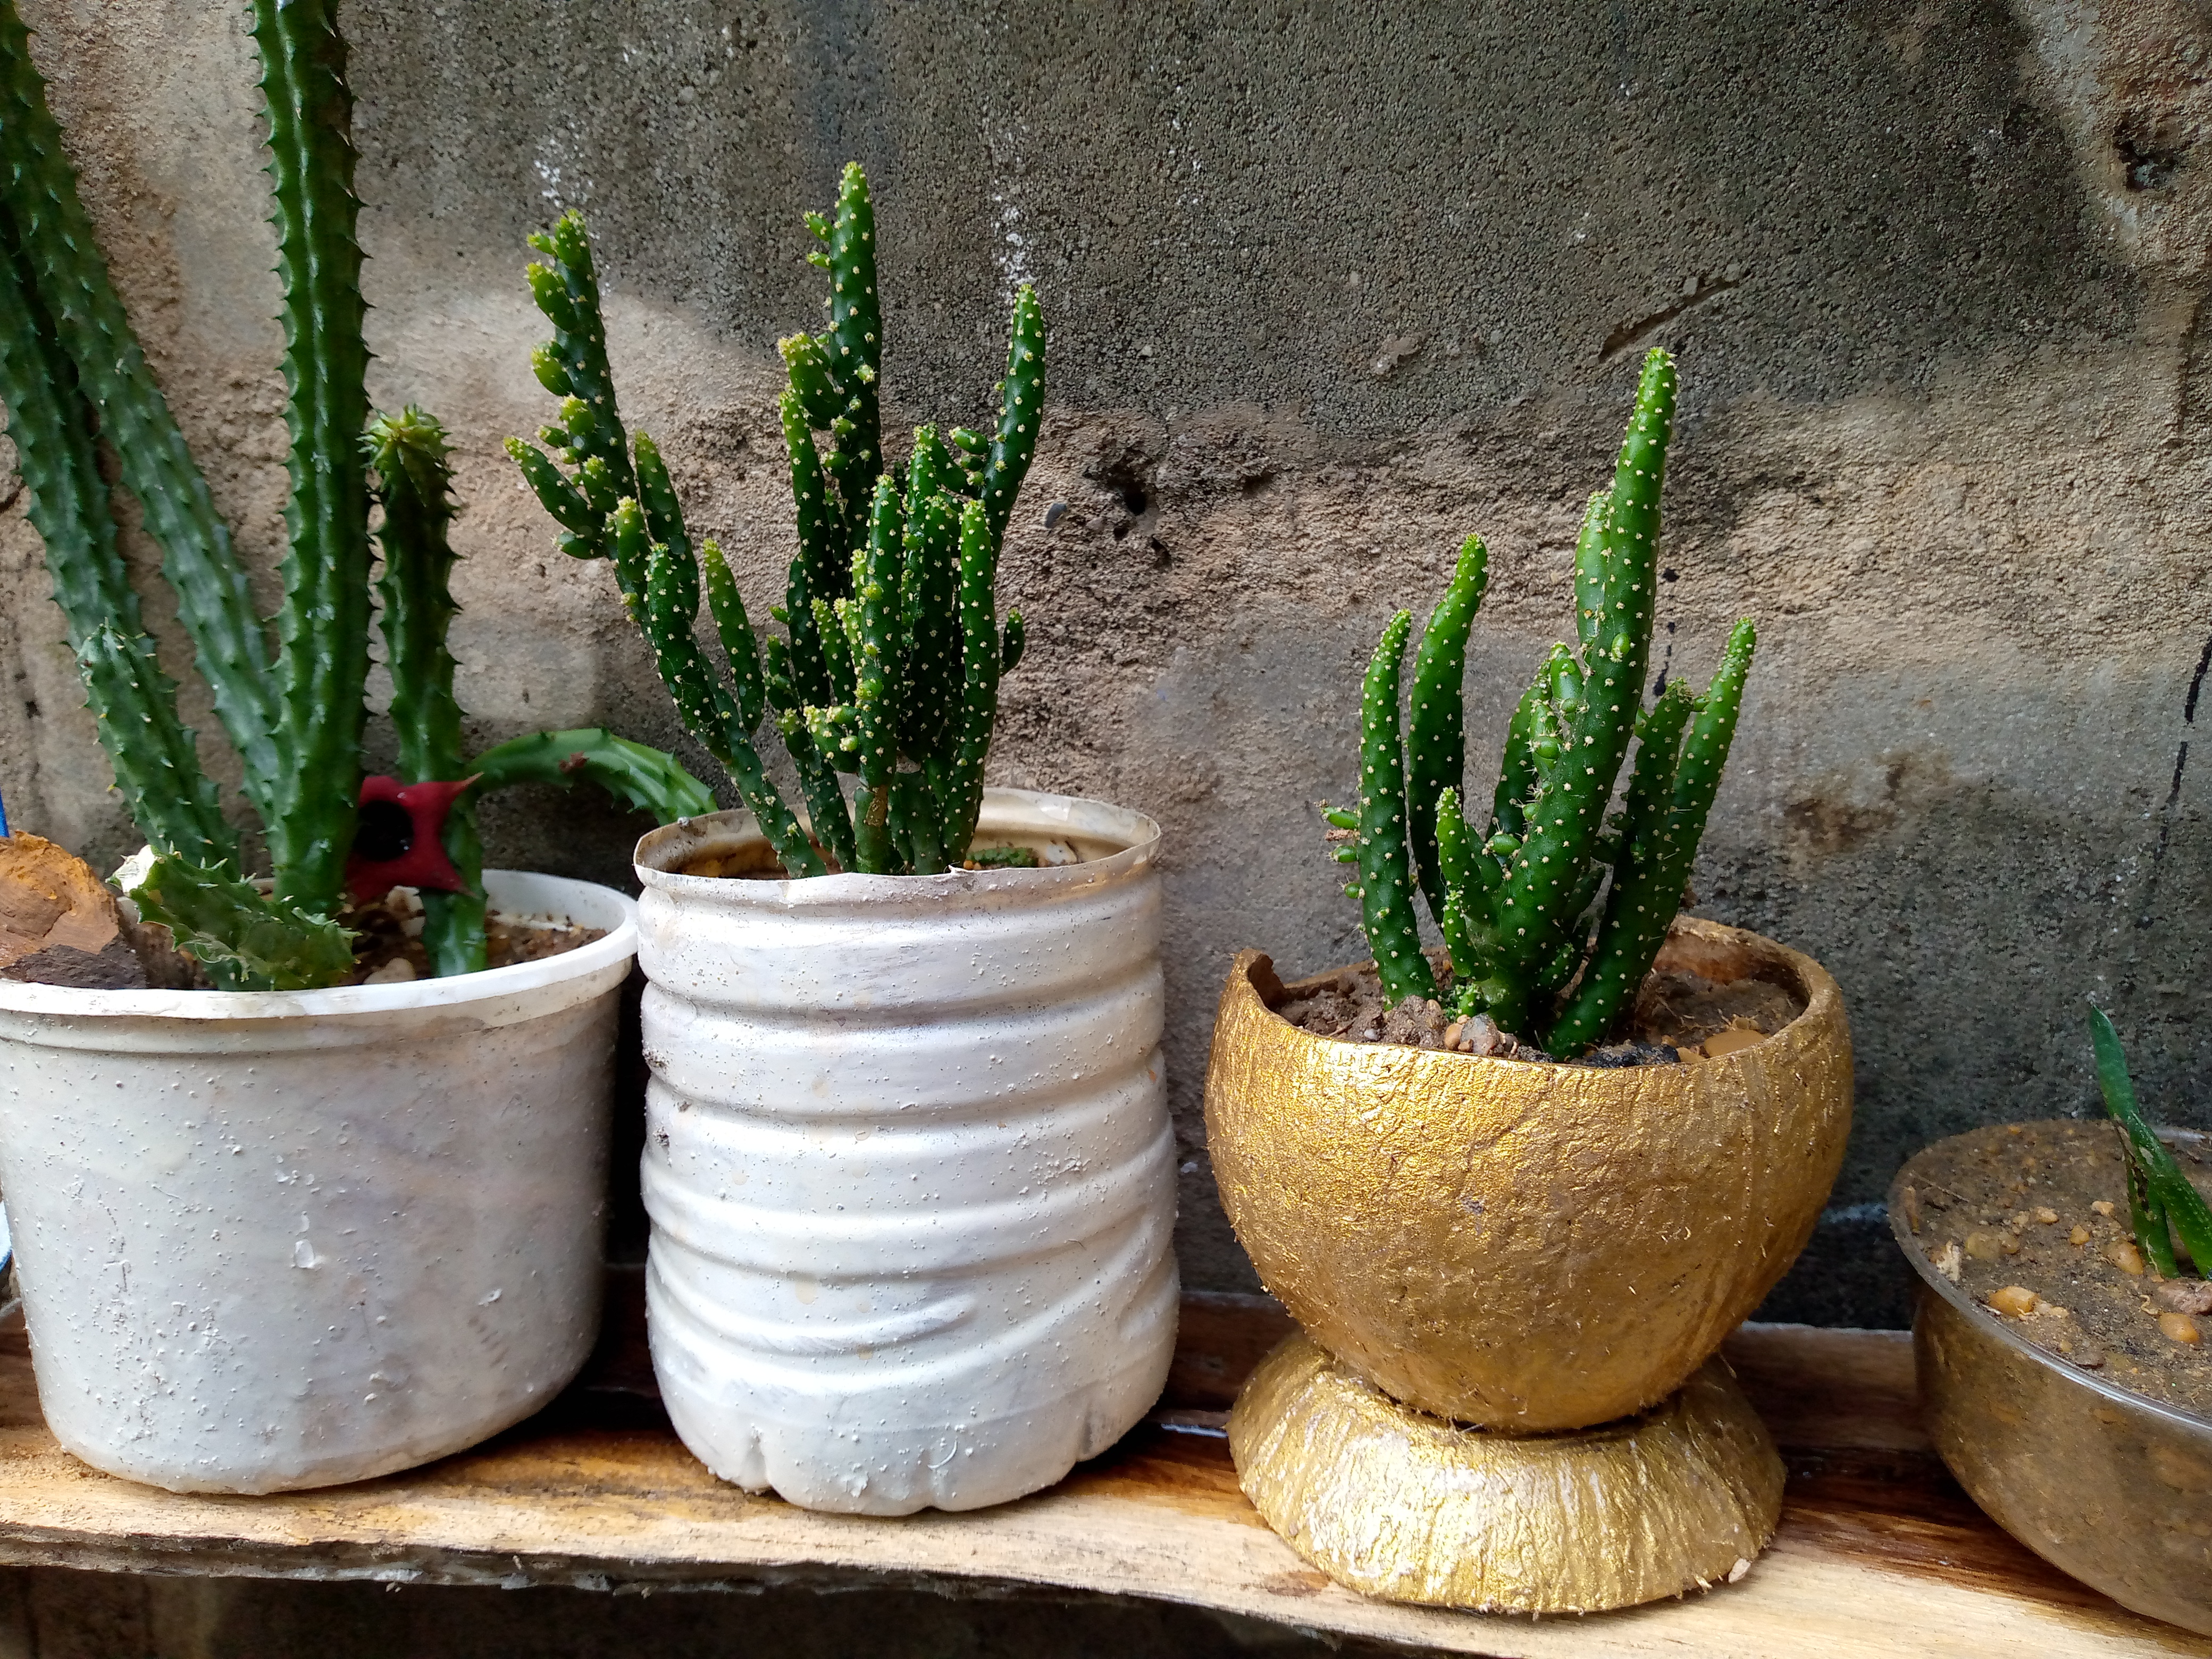
Of these crafts that I have made, I liked the idea of recycling anything that we find in nature and thus contribute to the planet. After I made the small pot for my cactus, I decided to transplant it with the substrate that the previous pot had.
I hope this little plant feels comfortable in its new home and begins to grow as well. I thank you all for once again appreciating a reusable creative project. See you until another next craft blog 👋🏻.

Creating things with love 🌷❤️
🦋✨ All the images in this publication are my author ,📱taken with my TecnoSpark8C cell phone |📸Photos edited in PicsArt and Canva. Text translated in Google Translate.
Una belleza tu obra, quedó de lujo. Muy creativo y una excelente forma de reciclaje. Imagino que puedas mejorar tu jardín creando muchas más macetas con esta técnica, así logras un contraste más natural y bello en tu estante de cactus 🌵. Saludos
Es totalmente correcto utilizar a la naturaleza para preservar a la misma naturaleza. Quedó genial
Congratulations @anne002! You have completed the following achievement on the Hive blockchain And have been rewarded with New badge(s)
You can view your badges on your board and compare yourself to others in the Ranking
If you no longer want to receive notifications, reply to this comment with the word
STOP¡Felicitaciones!
Estás participando para optar a la mención especial que se efectuará el domingo 16 de febrero del 2025 a las 8:00 pm (hora de Venezuela), gracias a la cual el autor del artículo seleccionado recibirá la cantidad de 1 HIVE transferida a su cuenta.
¡También has recibido 1 ENTROKEN! El token del PROYECTO ENTROPÍA impulsado por la plataforma Steem-Engine.
1. Invierte en el PROYECTO ENTROPÍA y recibe ganancias semanalmente. Entra aquí para más información.
2. Contáctanos en Discord: https://discord.gg/hkCjFeb
3. Suscríbete a nuestra COMUNIDAD y apoya al trail de @Entropia y así podrás ganar recompensas de curación de forma automática. Entra aquí para más información sobre nuestro trail.
4. Visita nuestro canal de Youtube.
Atentamente
El equipo de curación del PROYECTO ENTROPÍA