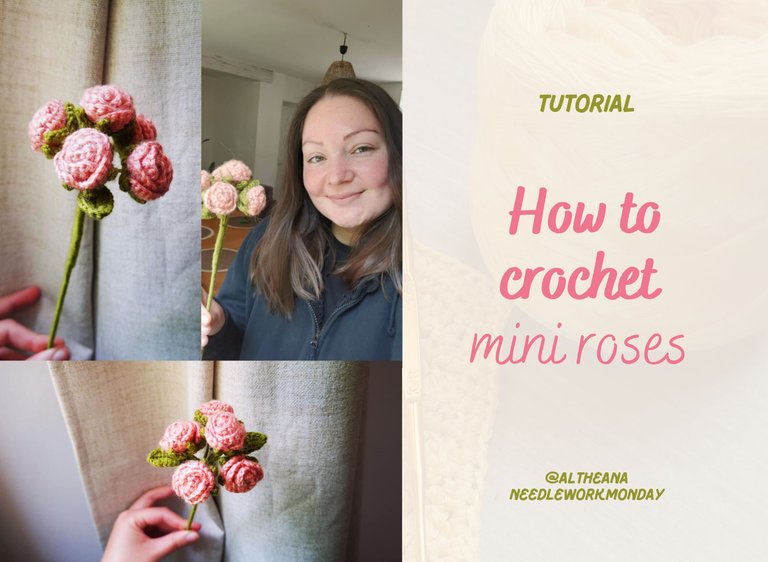
Tutorial: Crochet Mini Roses // Tutoriel : Des minis roses au crochet [EN/FR]
Hello friends and crochet lovers! I hope you're all doing well 😁
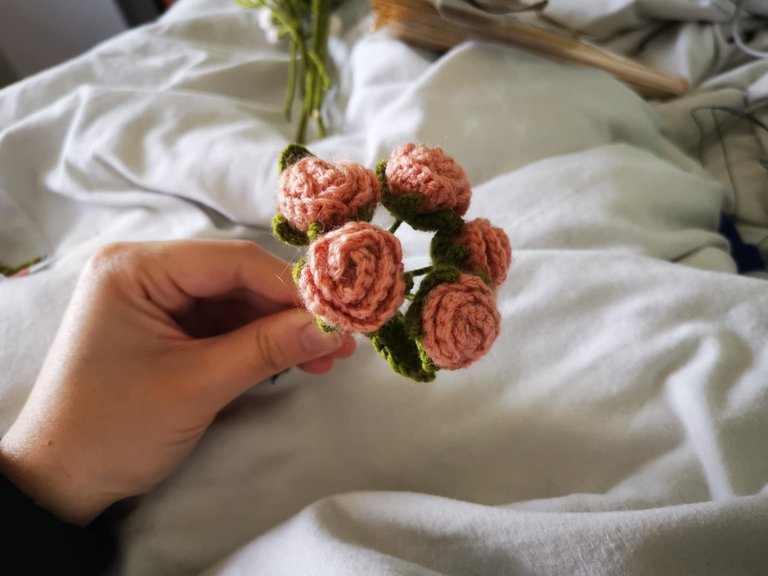
I'm still making the bouquet of flowers for my aunt's birthday, in fact, I'm almost finished! And this week, I made some mini roses! 🌹
These are very simple little flowers to make, take little time, and don't require any special skills. You just need to know the basic stitches: single crochet, chain stitch, and double crochet.
It's very enjoyable to crochet and truly satisfying to make!
Here's the tutorial 👇
Materials
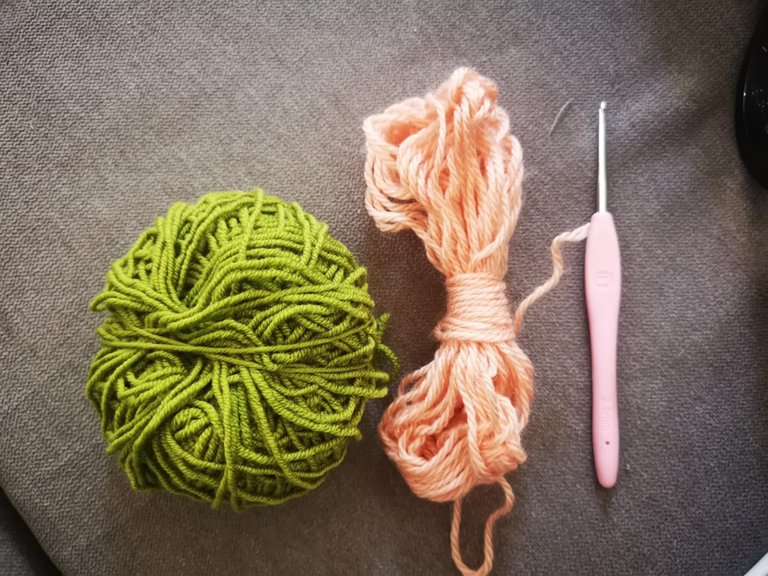
To make these mini roses, you will need:
- Yarn in the color of your choice for the roses;
- Yarn for the receptacle, leaves, and stems;
- A 2.5mm crochet hook;
- A skewer;
- Glue;
- Wire.
The steps to making the roses
👉 The roses (x5)
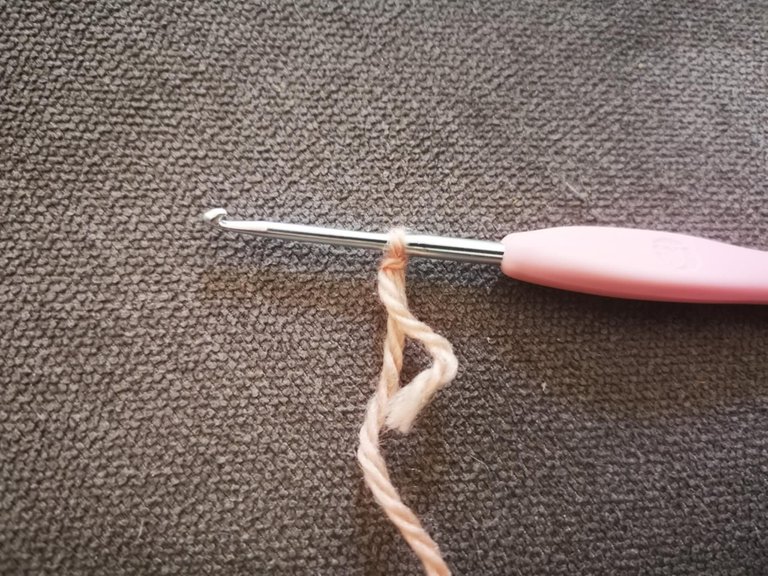
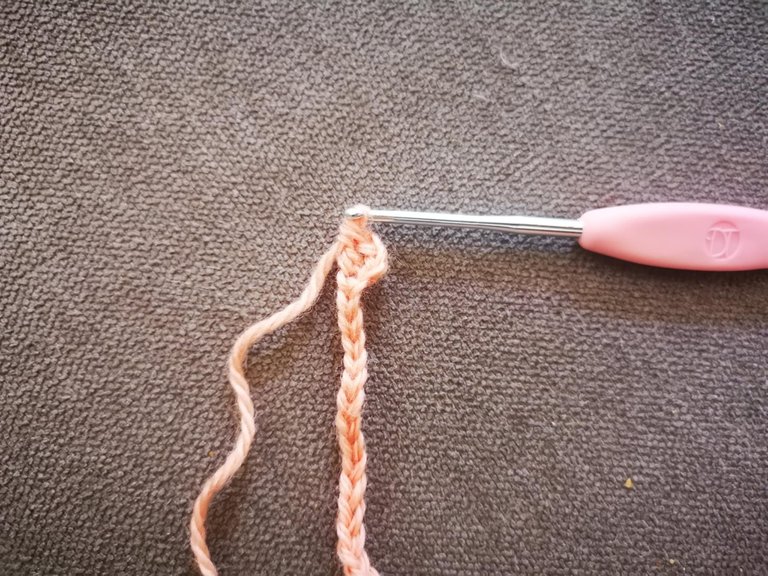
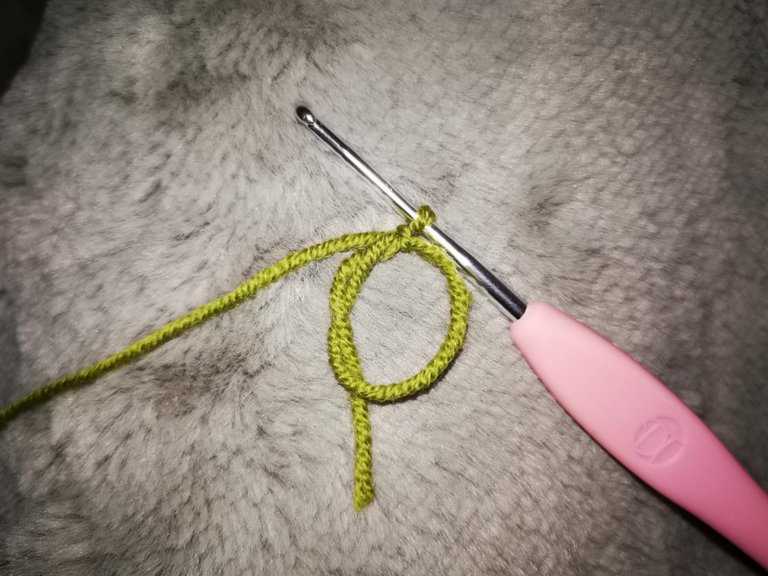
To make the roses, you'll start with a simple slip knot.
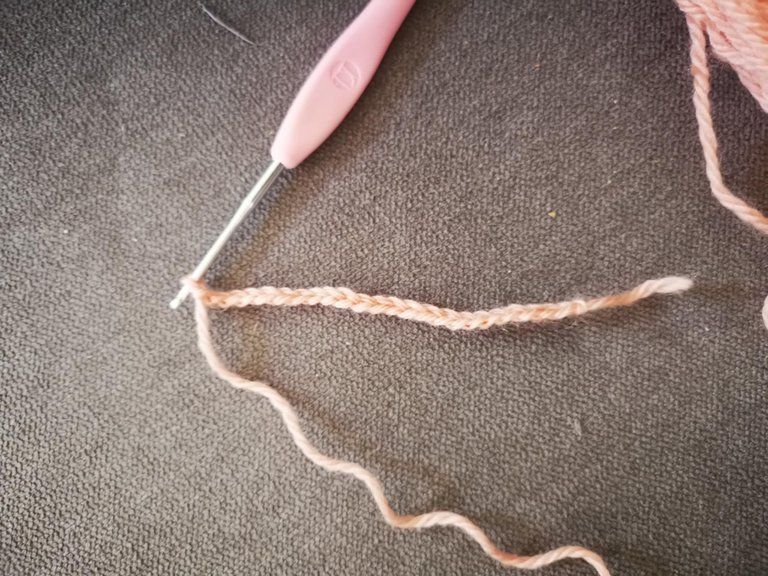
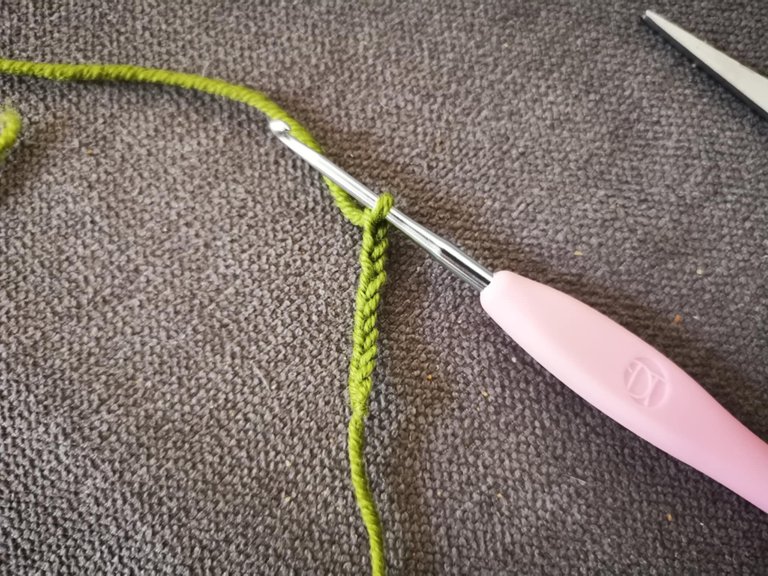
Next, you'll need to chain 23 stitches:
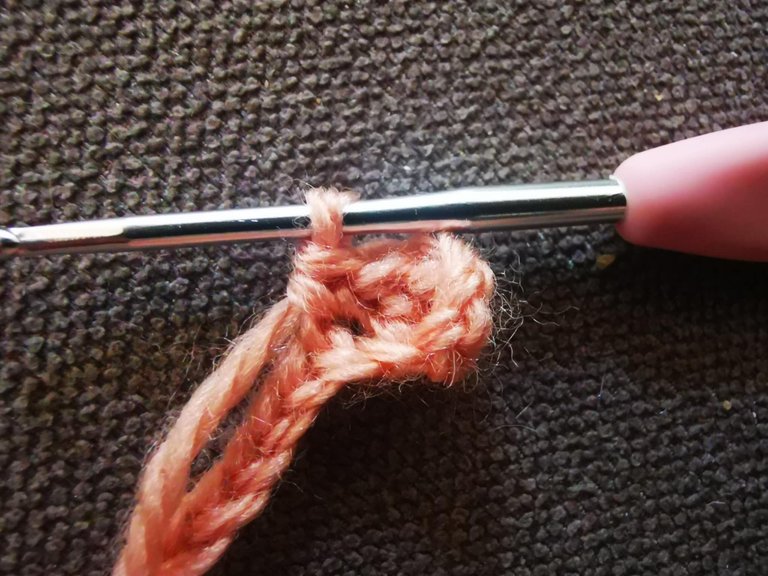
Then, you'll need to make 3 double crochets in the 4th stitch from the hook.
In the next stitch, you'll need to make 1 single crochet.
Then, you'll need to skip 1 stitch and continue the same pattern:
- 3 double crochets in the same stitch;
- 1 single crochet in the next stitch;
- skip 1 stitch;
- 3 double crochets in the same stitch;
- 1 single crochet in the next stitch;
- skip 1 stitch;
- …
Continue this pattern until you reach the end of the row.
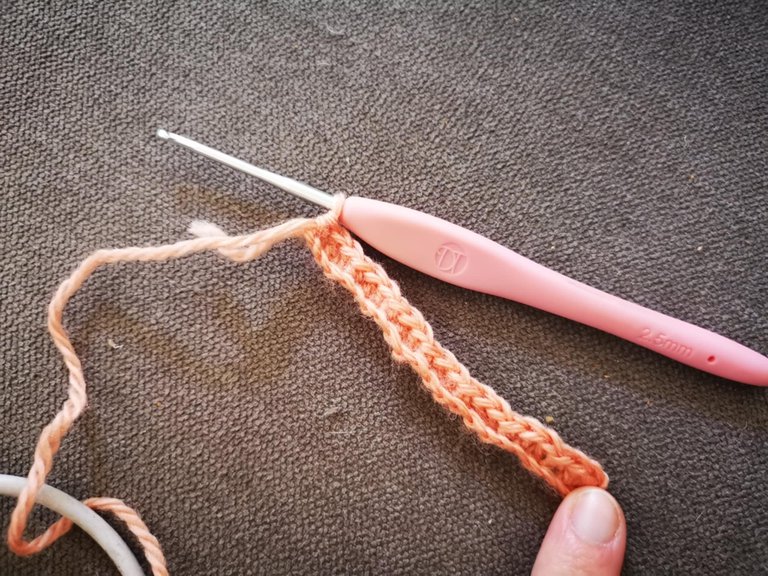
At the end of the first row, you can simply turn your project.
To begin the second row, you'll cast on 2 chain stitches.
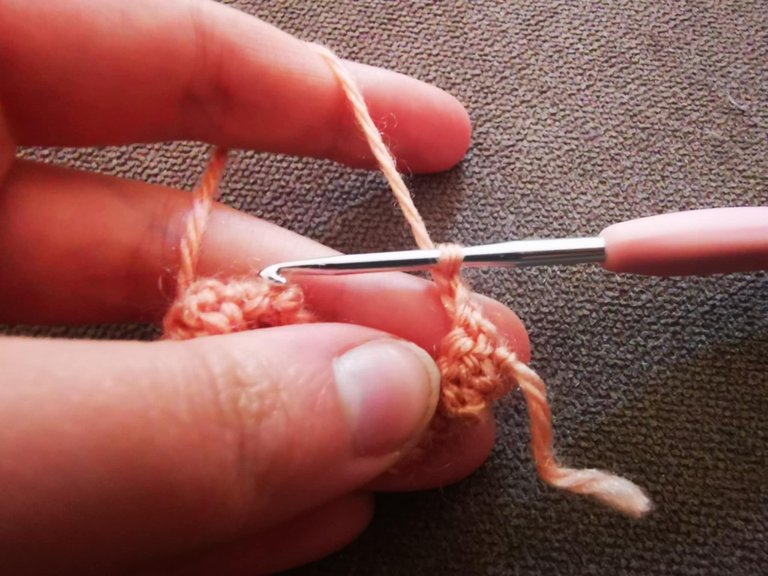
Next, you'll need to make 1 double crochet in the first stitch.
Then, in the next stitch, you'll make 2 double crochets in the same stitch.
In the next stitch, you'll make 1 double crochet, then cast on 2 chain stitches.
Then, you'll make 1 single crochet in the next stitch and cast on 2 chain stitches. Repeat this pattern until the end of the row:
- 1 double crochet;
- 2 double crochets in the same stitch;
- 1 double crochet + 2 chain stitches;
- 1 single crochet + 2 chain stitches;
- 1 double crochet;
- 2 double crochets in the same stitch;
- 1 double crochet + 2 chain stitches;
- 1 single crochet + 2 chain stitches;
- ...

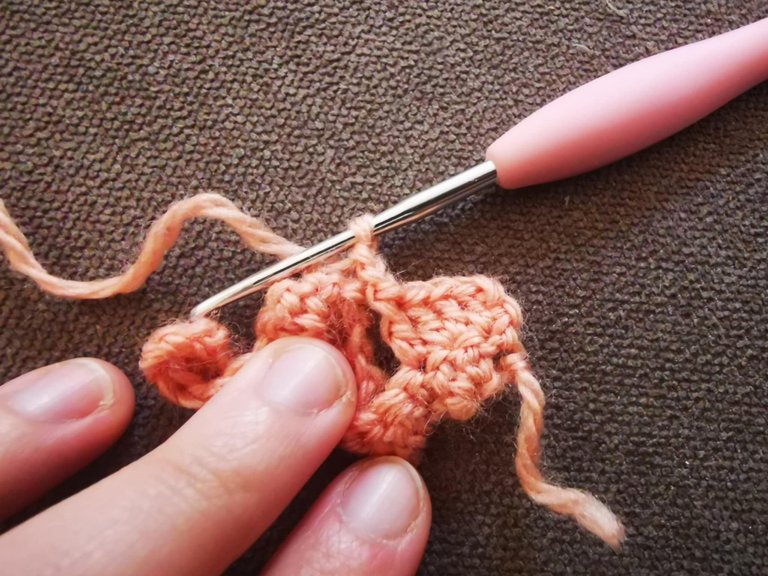
And when you reach the end of the row, you can simply make 1 chain stitch and cut the yarn; the rose is practically finished.
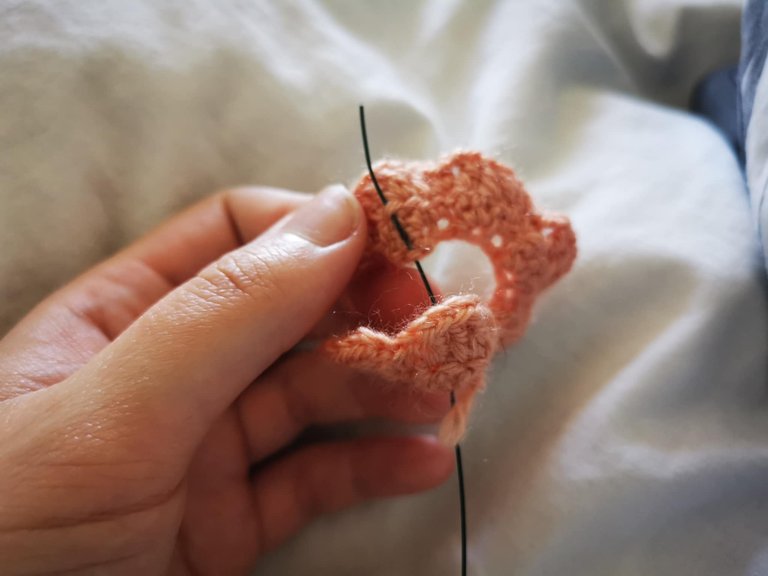
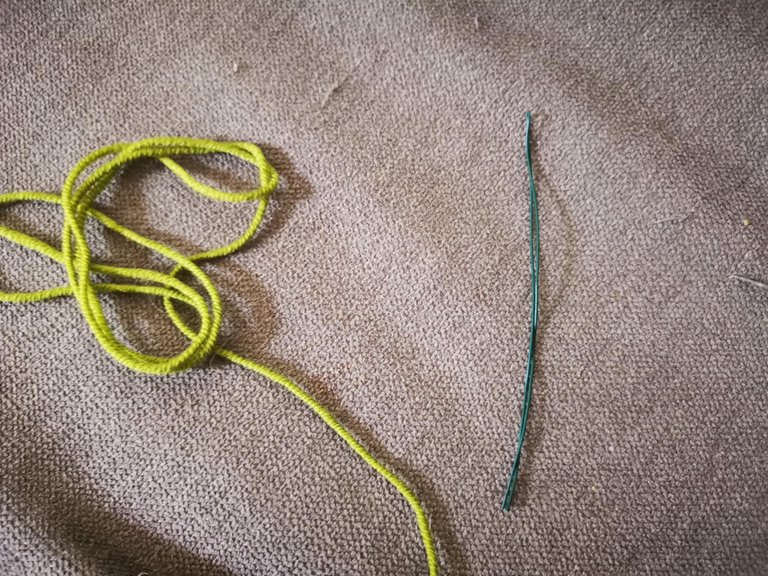
To finish the rose, you'll need to shape it. To do this, you'll need a piece of wire about 20 cm long.
And you'll position it as shown in the photo below 👇
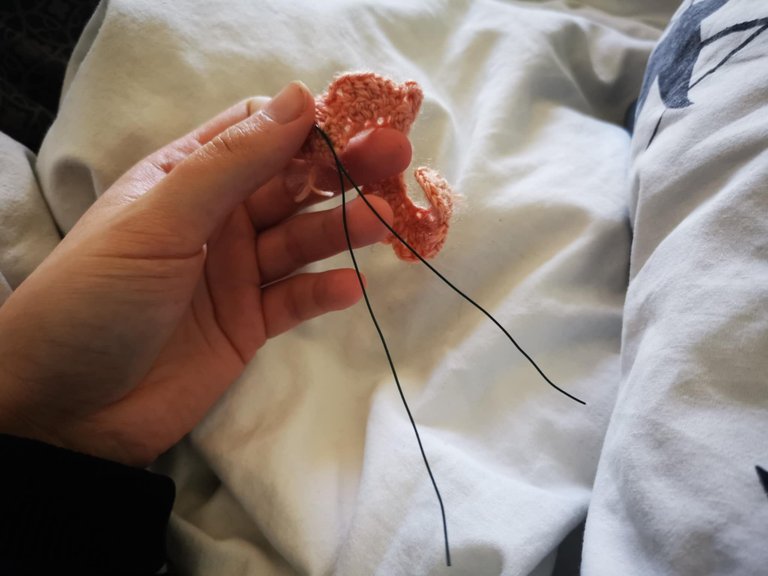
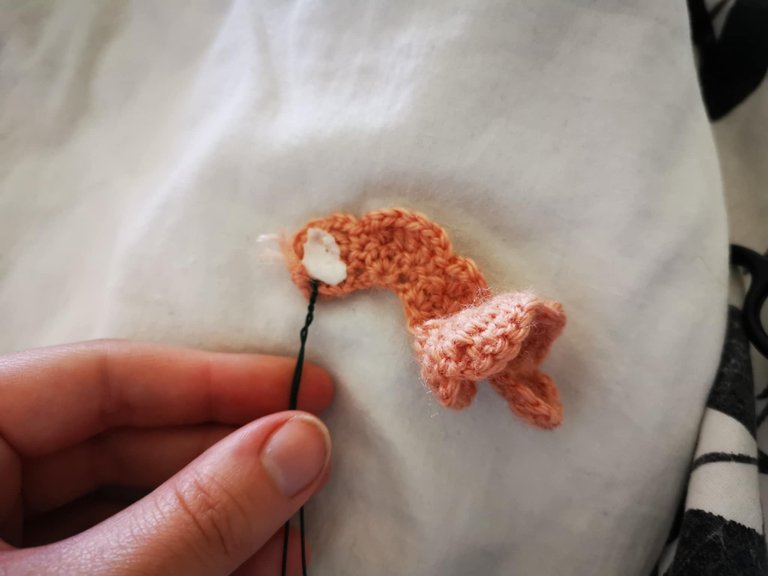
To shape the rose, you'll simply wrap the project around itself.
Don't forget to apply a little glue before you start wrapping your rose.
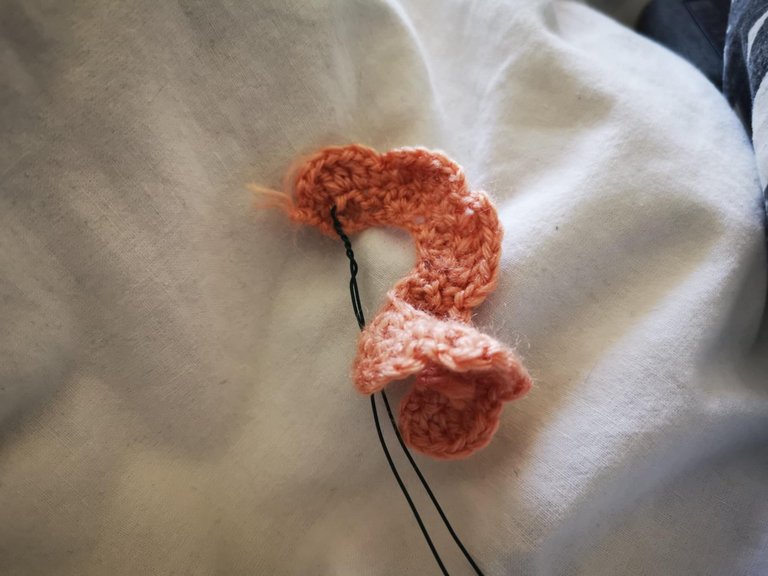
Once you're happy with the look, you can glue the ends.

You need 5 roses. 🌹
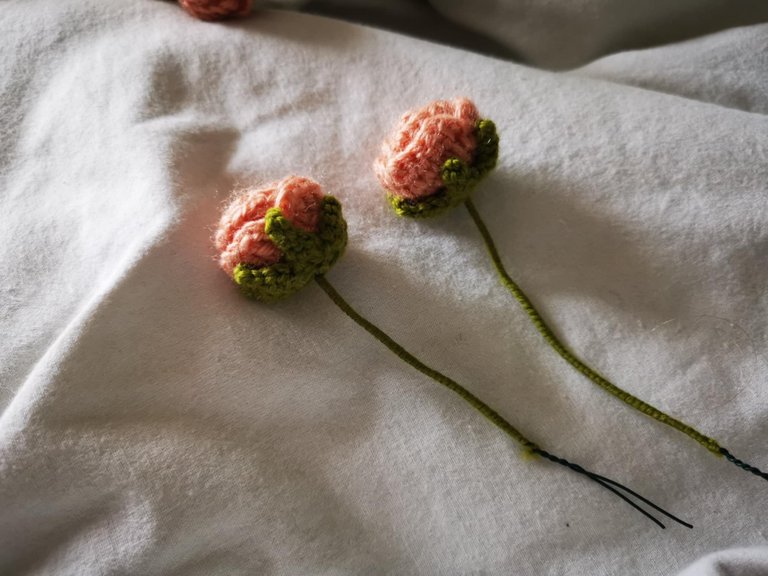
👉 The container (x5)
For the container, you'll need green yarn and a 2.5 mm crochet hook.
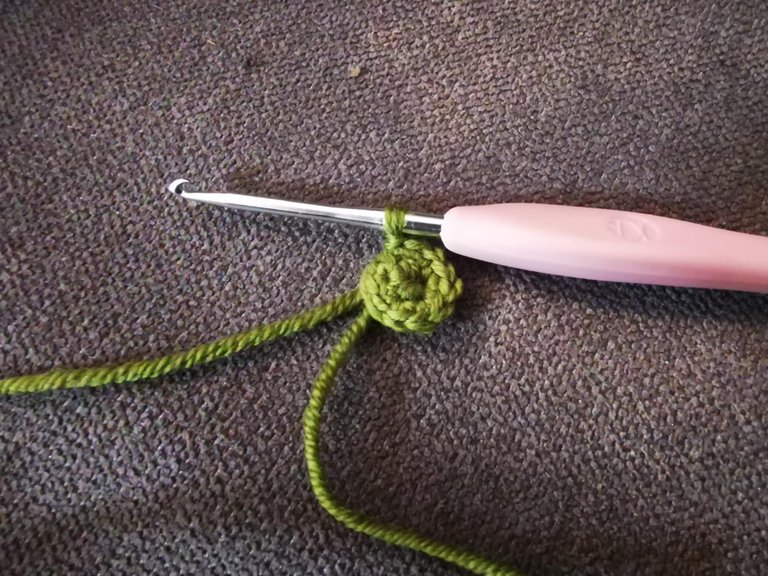
To begin, make a magic ring and cast on 5 single crochets inside before closing it. Then, you'll need a slip stitch in the first stitch to properly close the magic ring.

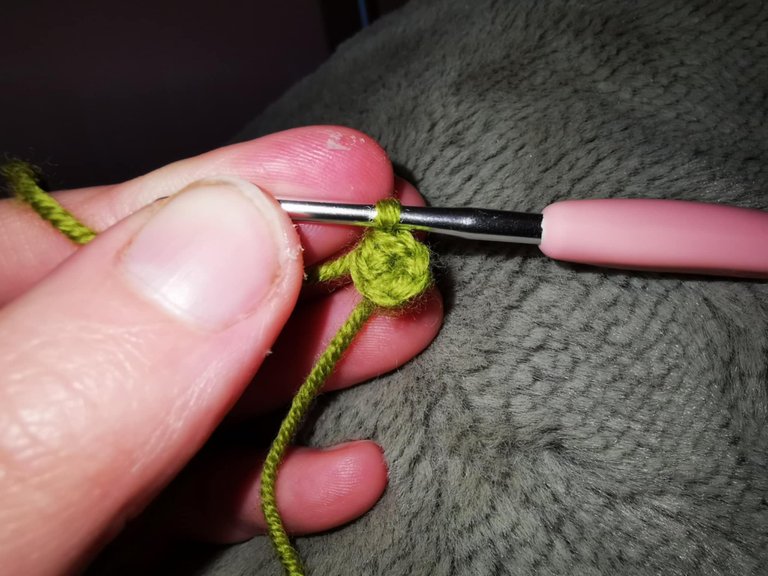
For the first row, you'll make 2 single crochets in each stitch.
Once the row is finished, you will make a slip stitch in the first stitch of the previous row.
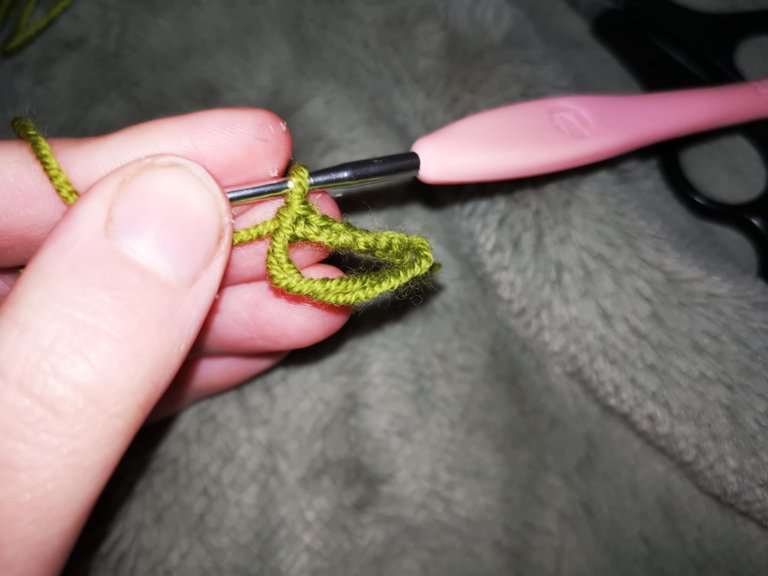
Then, you will make 5 chain stitches:
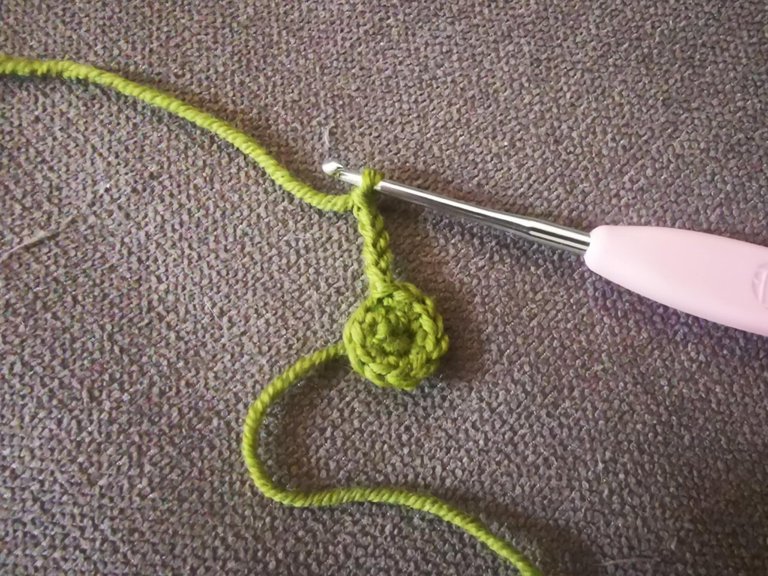
And starting from the second stitch after your hook, you will make: 1 slip stitch, 1 slip stitch, 1 single crochet, and 1 half double crochet.
Then, skip a stitch and make a slip stitch in the next stitch on the circle.
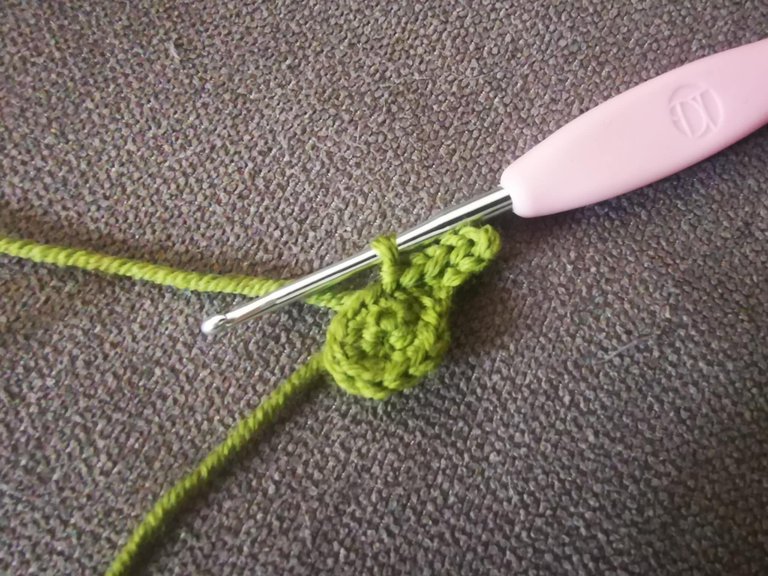
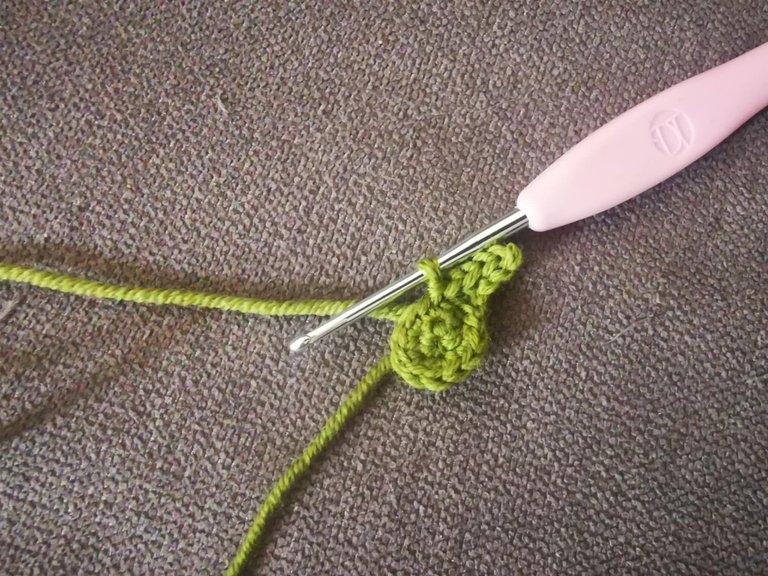
You must repeat until you have 5 branches.

And at the end, you simply make a chain stitch to cut the yarn, keeping about 30 cm, and close the receptacle.
You will need 5 receptacles.
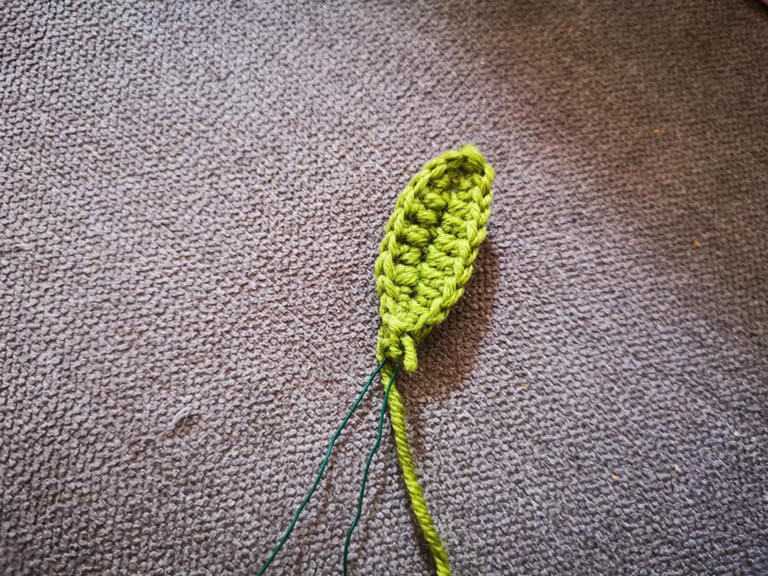
👉 The leaf (x2)
For the leaf, you will need green yarn, a 2.5 mm crochet hook, and a piece of wire about 15 cm long.
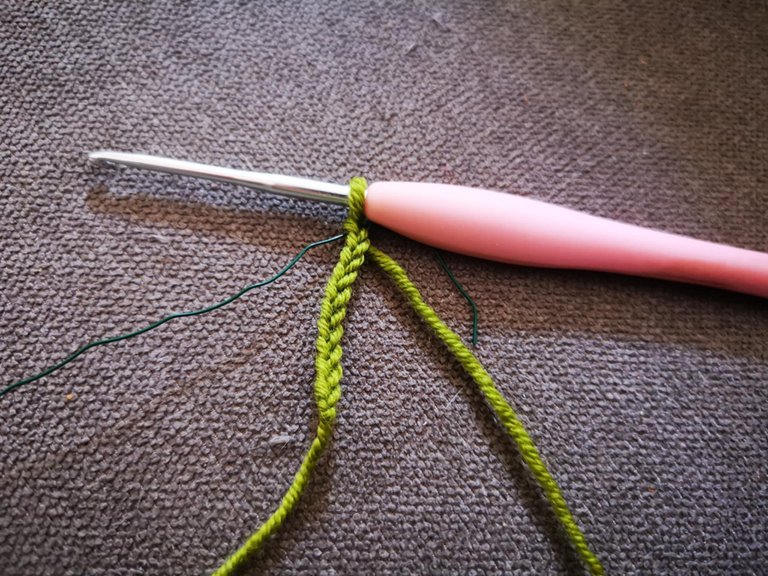
You will start by making a chain of 10 chain stitches.
Next, insert the wire into the second stitch from the hook.
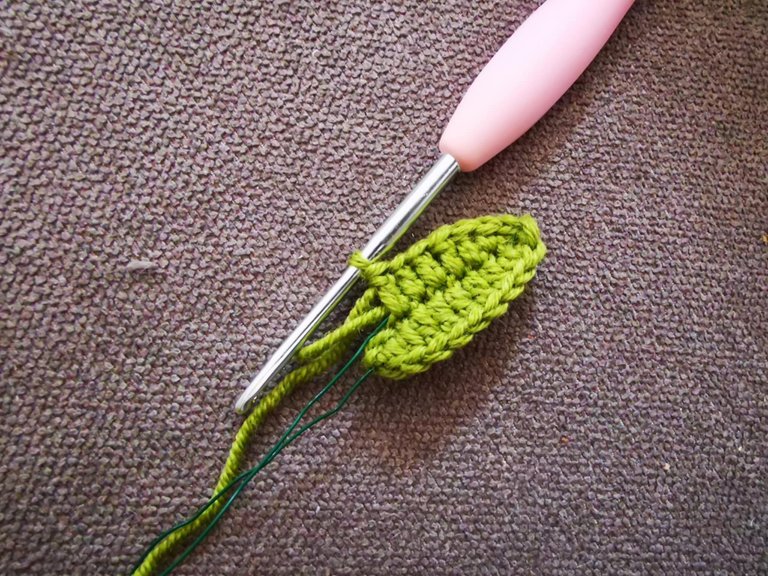
Then, while enclosing the wire, make:
- 1 single crochet;
- 1 half double crochet;
- 5 single crochets;
- 1 half double crochet;
- 3 single crochets in the same stitch.


This creates the first side of the leaf. For the second, create a symmetrical pattern:
- 1 half double crochet;
- 5 single crochets;
- 1 half double crochet;
- 1 single crochet.
And to finish the leaf, make a slip stitch in the first stitch of the previous row.
You can then cut the wire, making sure to keep enough length to wrap it all the way around the wire.

I recommend making at least two leaves. If you want to make more, that's also a good idea! 😁
Assembly
Once you have the 5 roses, the 5 receptacles, and the 2 leaves, it's time to assemble the mini roses.
To do this, you'll need a skewer, some green wire, and a little glue.
To start, I glued the receptacle to each of the roses.
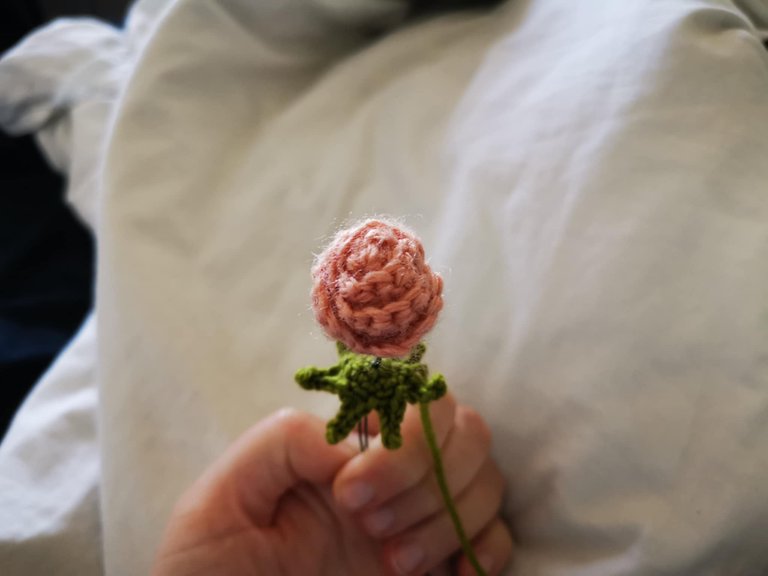
Next, I took the roses and the two leaves and formed a sort of bouquet. Then, I added the skewer in the middle. Then, I wrapped the green wire around the skewer to hold the roses and leaves in place.
Once I reached the bottom of the skewer, I applied a little glue and let it dry so the green wire couldn't move.
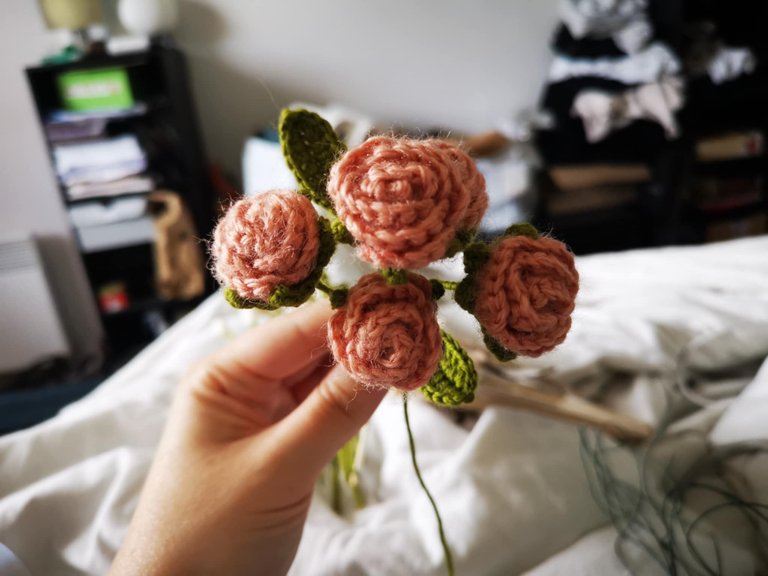
The mini roses are finished!
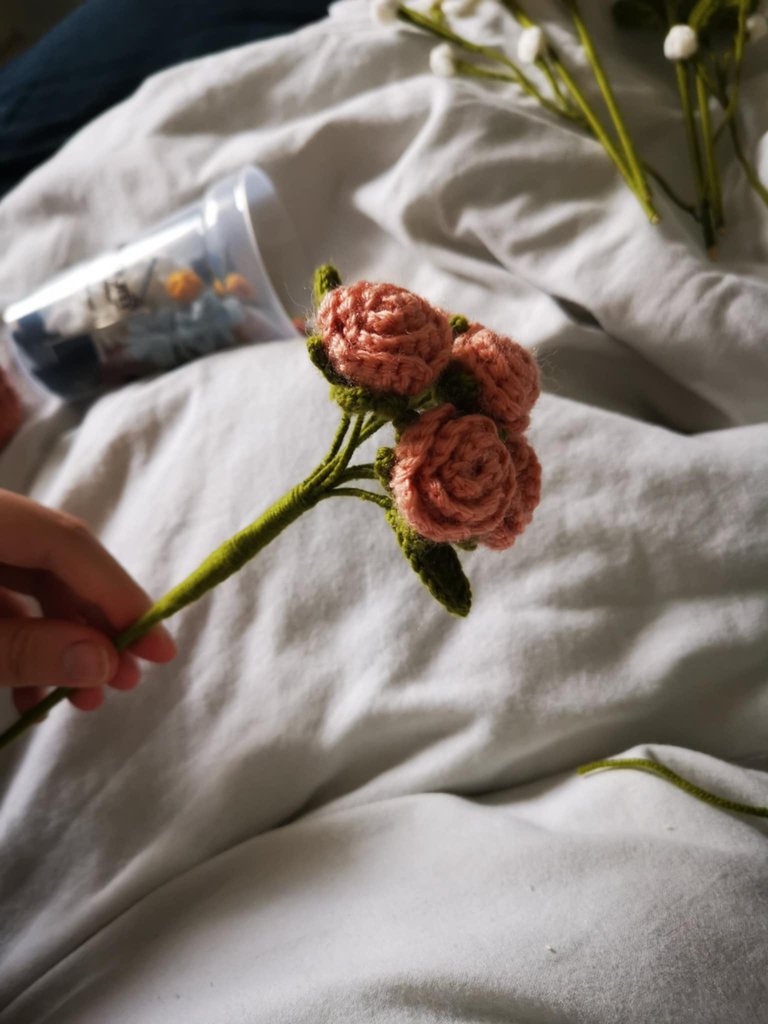
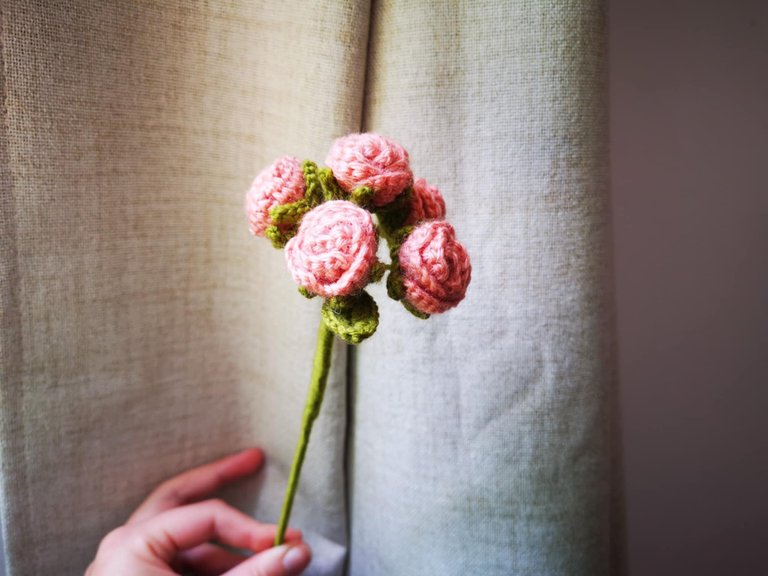
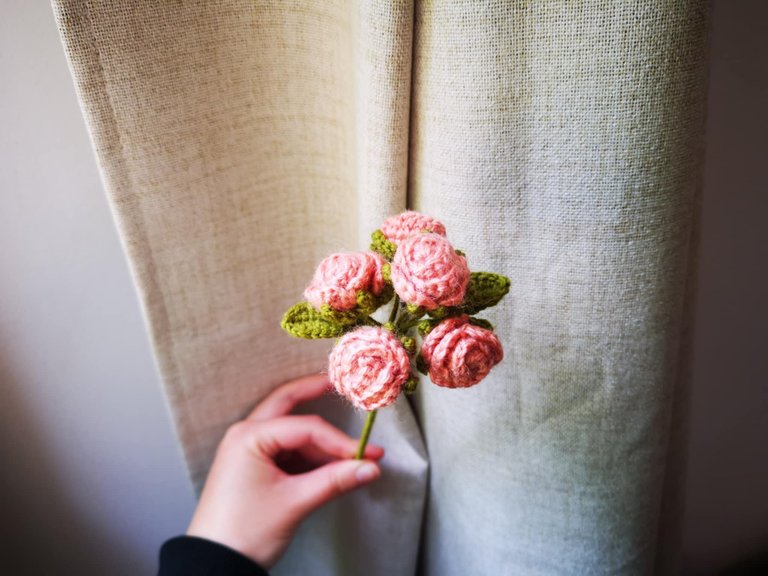
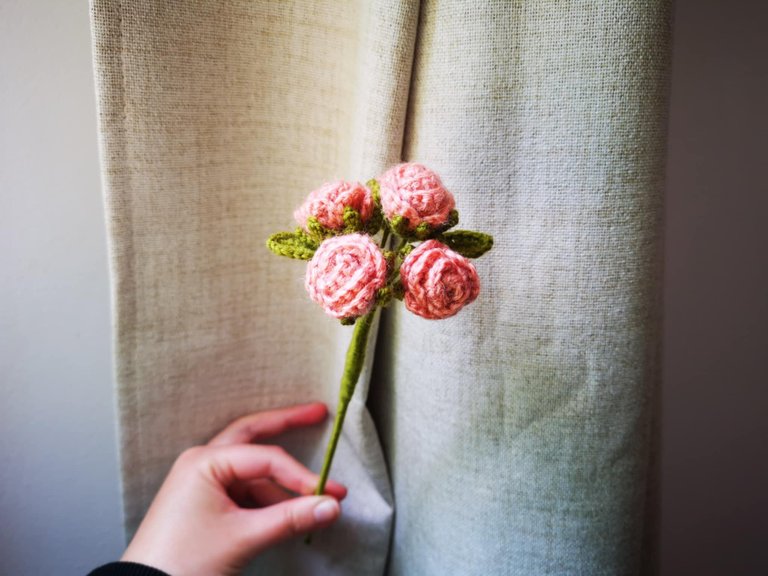
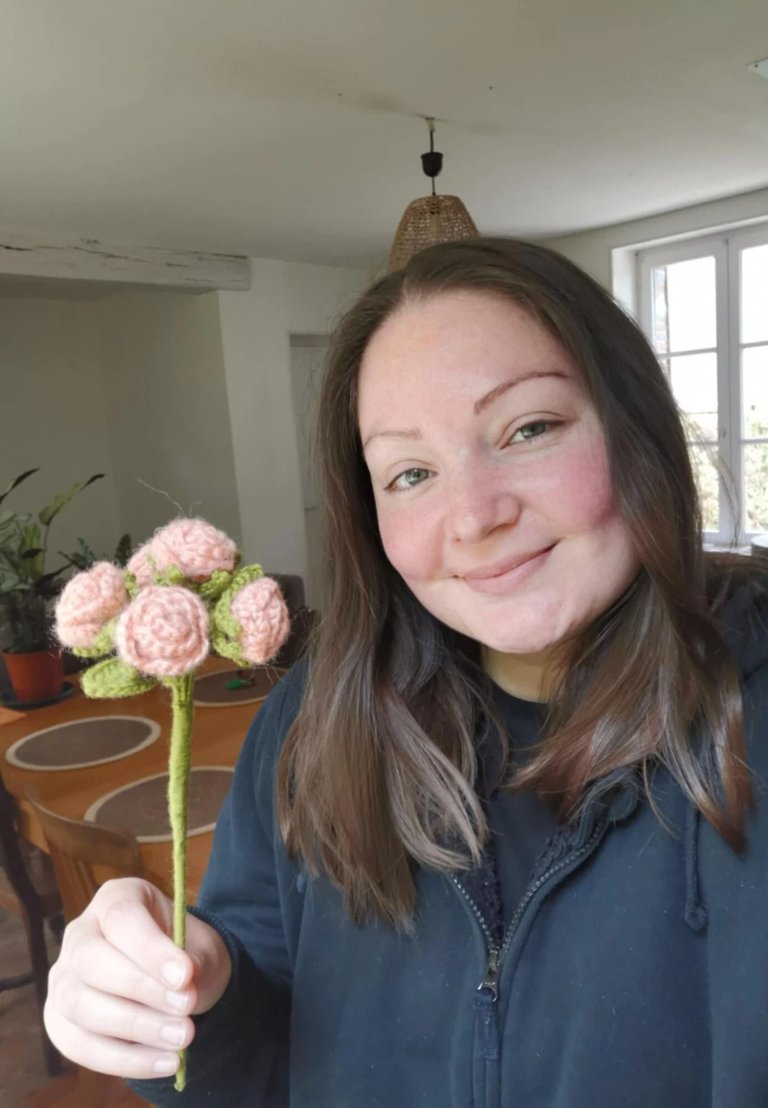
And I think they're really cute 😁
I hope this little tutorial has inspired you to make mini roses: they're quick and super easy to do!
If my explanations aren't clear enough, feel free to ask me your questions in the comments 😊
See you soon,
Johanna
PS: I used Google Translate to translate the English section.

Hello les amis et les crochet lovers ! J’espère que vous allez tous très bien 😁
Je suis toujours en train de confectionner le bouquet de fleurs pour l’anniversaire de ma tante, d’ailleurs, j’ai bientôt terminé ! Et cette semaine, j’ai réalisé des minis roses ! 🌹
Ce sont des petites fleurs très simples à réaliser, qui prennent peu de temps et ne demandent pas de compétences particulières. Il faut simplement connaître les points de base : maille serrée, maille en l’air et bride.
C’est très agréable à crocheter et vraiment satisfaisant à réaliser !
Voici le tutoriel 👇
Le matériel
Pour réaliser ces minis roses, vous aurez besoin de :
- Un fil de la couleur de votre choix pour les roses ;
- Un fil pour le réceptacle, les feuilles et les tiges ;
- Un crochet 2,5mm ;
- Un pique à brochette ;
- De la colle ;
- Du fil de fer.
Les étapes de fabrication
👉 Les roses (x5)
Pour faire les roses, vous allez commencer par un simple nœud coulant.
Ensuite, il faut faire 23 mailles en l’air :
Puis, il faut faire 3 brides dans la 4ème maille en partant du crochet.
Dans la maille suivante, il faut faire 1 maille serrée.
Puis, il faut sauter 1 maille et continuer le même schéma :
- 3 brides dans la même maille ;
- 1 maille serrée dans la maille suivante ;
- sauter 1 maille ;
- 3 brides dans la même maille ;
- 1 maille serrée dans la maille suivante ;
- sauter 1 maille ;
- …
Il faut continuer ainsi jusqu’à atteindre la fin du rang.
À la fin du premier rang, vous pouvez simplement tourner votre projet.
Pour commencer le deuxième rang, vous allez monter 2 mailles en l’air.
Ensuite, il va falloir faire 1 bride dans la première maille.
Puis, dans la maille suivante, vous allez faire 2 brides dans la même maille.
Dans la maille suivante, il faut faire 1 bride, puis monter 2 mailles en l’air.
Ensuite, il faut faire une maille serrée dans la maille suivante et monter 2 mailles en l’air. Et recommencer ce schéma jusqu’à la fin du rang :
- 1 bride ;
- 2 brides dans la même maille ;
- 1 bride + 2 mailles en l’air ;
- 1 maille serrée + 2 mailles en l’air ;
- 1 bride ;
- 2 brides dans la même maille ;
- 1 bride + 2 mailles en l’air ;
- 1 maille serrée + 2 mailles en l’air ;
- …
Et arrivé à la fin du rang, vous pouvez simplement faire une maille en l’air et couper le fil, la rose est pratiquement terminée.
Pour terminer la rose, il va falloir la former. Pour cela, vous allez devoir prendre un morceau de fil de fer d’environ 20 cm.
Et vous allez le placer comme sur la photo ci-dessous 👇
Pour former la rose, vous allez simplement enrouler le projet sur lui-même.
N’oubliez pas de mettre un peu de colle avant de commencer à enrouler votre rose.
Une fois que le rendu vous plaît, vous pouvez coller l’extrémité.
Il vous faut 5 roses. 🌹
👉 Le réceptacle (x5)
Pour le réceptacle, vous allez avoir besoin d’un fil vert et d’un crochet 2,5mm.
Pour commencer, il faut faire un cercle magique et monter 5 mailles serrées à l’intérieur avant de le fermer. Ensuite, il faut faire une maille coulée dans la première maille pour fermer correctement le cercle magique.
Pour le premier rang, vous allez faire 2 mailles serrées dans chaque maille.
Une fois que le rang est terminé, vous allez faire une maille coulée dans la première maille du rang précédent.
Puis, vous allez faire 5 mailles en l’air :
Et en partant de la deuxième maille après votre crochet, vous allez faire : 1 maille coulée, 1 maille coulée, 1 maille serrée et 1 demi-bride.
Ensuite, il faut sauter une maille et faire une maille coulée dans la maille suivante sur le cercle.
Il faut recommencer jusqu’à obtenir 5 branches.
Et à la fin, vous devez simplement faire une maille en l’air pour couper le fil en gardant environ 30 cm et fermer le réceptacle.
Il vous faut 5 réceptacles.
👉 La feuille (x2)
Pour la feuille, il vous faut un fil vert, un crochet 2,5mm et un morceau de fil de fer d’environ 15 cm.
Vous allez commencer par faire une chaînette de 10 mailles en l’air.
Ensuite, il faut insérer le fil de fer dans la deuxième maille en partant du crochet.
Puis, tout en englobant le fil de fer, il faut faire :
- 1 maille serrée ;
- 1 demi-bride ;
- 5 brides individuelles ;
- 1 demi-bride ;
- 3 mailles serrées dans la même maille.
Cela donne le premier côté de la feuille. Pour le deuxième, il faut faire la symétrie :
- 1 demi-bride ;
- 5 brides individuelles ;
- 1 demi-bride ;
- 1 maille serrée.
Et pour terminer la feuille, il faut faire une maille coulée dans la première maille du rang précédent.
Vous pouvez ensuite couper le fil, tout en veillant à garder une longueur suffisante pour l’enrouler tout autour du fil de fer.
Je vous conseille de faire au moins 2 feuilles. Si vous souhaitez en faire plus, c’est aussi une bonne idée ! 😁
L’assemblage
Une fois que vous avez les 5 roses, les 5 réceptacles et les 2 feuilles, il est temps d’assembler les minis roses.
Pour cela, vous aurez besoin d’un pique à brochette, d’un fil vert et d’un peu de colle.
Pour commencer, j’ai collé le réceptacle sur chacune des roses.
Ensuite, j’ai pris les roses et les deux feuilles et j’ai formé une espèce de bouquet. Puis, j’ai ajouté le pique à brochette au milieu. Et ensuite, j’ai enroulé le fil vert tout autour du pique pour bien maintenir les roses et les feuilles.
Une fois arrivé au bas du pique à brochette, j’ai mis un peu de colle et j’ai laissé sécher pour que le fil vert ne puisse plus bouger.
Les minis roses sont terminées !
Et je les trouve vraiment super mignonnes 😁
J’espère que ce petit tutoriel vous a donné envie de faire des minis roses : c’est rapide et ultra facile à faire !
Si jamais mes explications ne sont pas assez claires, n’hésitez pas à me poser vos questions en commentaire 😊
À bientôt,
Johanna
PS : J’ai utilisé Google Traduction pour traduire la partie en anglais.
This is so creative, and your aunt will be so happy to receive this. You did a nice job 😍
Thank you very much! I hope she'll be happy. Beautiful day to you 😁
They turned out so great! Looks like a ton of work went into it and your aunt will definitely appreciate such a thoughtful gift😊
Thank you so much! This flower is overall pretty quick to make, the assembly takes a little longer, but that's ok. I hope my aunt will be happy with the final bouquet 😁 Have a great day 😊
!HUG
Your post has been manually reviewed for curation by the Principality of Bastion.
Principality of Bastion - Our Leit Motiv? Let's Grow Together.
Principality's site | Minava NFT Market | Discord | Our Twitch Channel
You may TRAIL this account (or @hive-143869) if you like the curation we do, or join our discord to know more about what we do.
!BBH
Such a beauty in crochet charm!!! You made an amazing work 👏🏻👌🏻👏🏻👌🏻
Thank you for your witness vote!
Have a !BEER on me!
To Opt-Out of my witness beer program just comment STOP below
View or trade
BEER.Hey @maiasun84, here is a little bit of
BEERfrom @isnochys for you. Enjoy it!Learn how to earn FREE BEER each day by staking your
BEER.View or trade
BEER.Hey @maiasun84, here is a little bit of
BEERfrom @isnochys for you. Enjoy it!If you like BEER and want to support us please consider voting @louis.witness on HIVE and on HIVE Engine.
Thank you for your compliments! I'm really glad you like my crochet work 😊
Your crochet work is magnifiscent!!!
A stunning rose, the details of the petals are very neat. The color is also very sweet. Your aunt must be very happy to receive this sweet gift.
Thank you so much for your compliments! I hope she'll be happy with it 😁 Have a nice day 😊
This is very beautiful and would be nice when made into a bouquet, HONESTLY very wonderful.
In fact, I added it to a bouquet for my aunt! 💐 Thank you so much for your comment. Have a lovely day 😊
You are doing Crochet very beautifully. Your content is really great. Thanks for sharing this with us.
That's very kind, thank you for your compliments! I love sharing crochet content here 😁
These rose crochet flowers are mind blowing. You have done a very very great and amazing job.