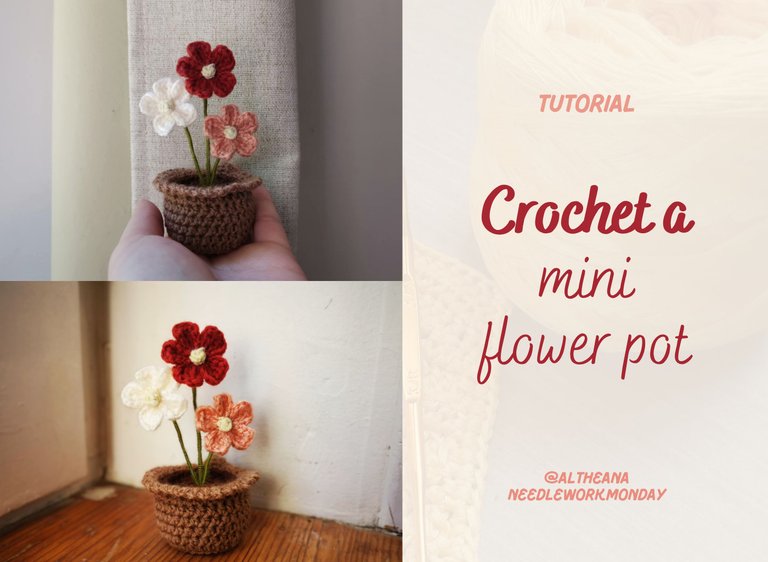
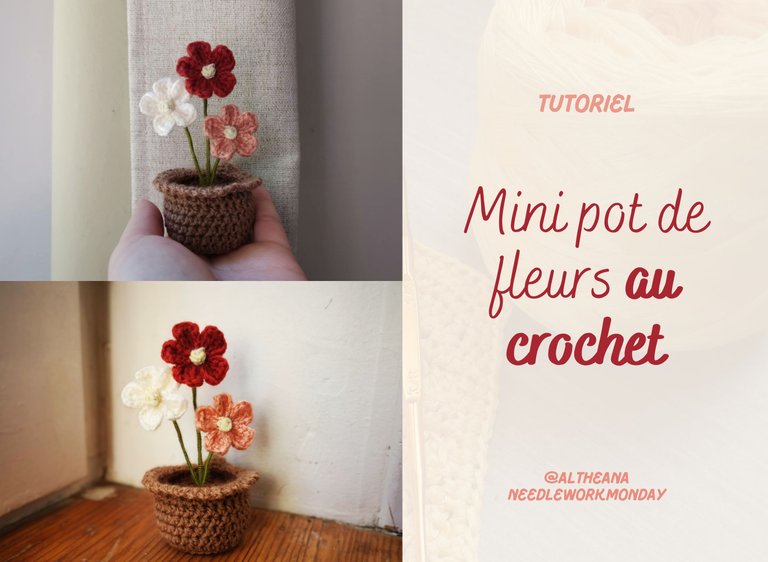
A mini crocheted flower pot // Un mini pot de fleurs au crochet [EN/FR]
Hello friends and crochet lovers! I hope everything is going well in your lives. 😁
This week, we went on a trip to visit @genesisledger's grandparents! And for the occasion, I wanted to give a little crochet creation to her grandmother. I looked for some inspiration on Pinterest and came across a mini crochet flower pot 🌸
So, I followed a tutorial to make the little pot with the soil, and then I created flowers just like I imagined them!
I love the result! It makes a pretty little decoration, floral and colorful! 😊
It's a creation that's quite simple if you know how to crochet in the round, and it's quite quick. It's quite satisfying to make; I love seeing the pot take shape and adding the flowers.
Here's the tutorial for making this mini crochet flower pot 👇
Materials

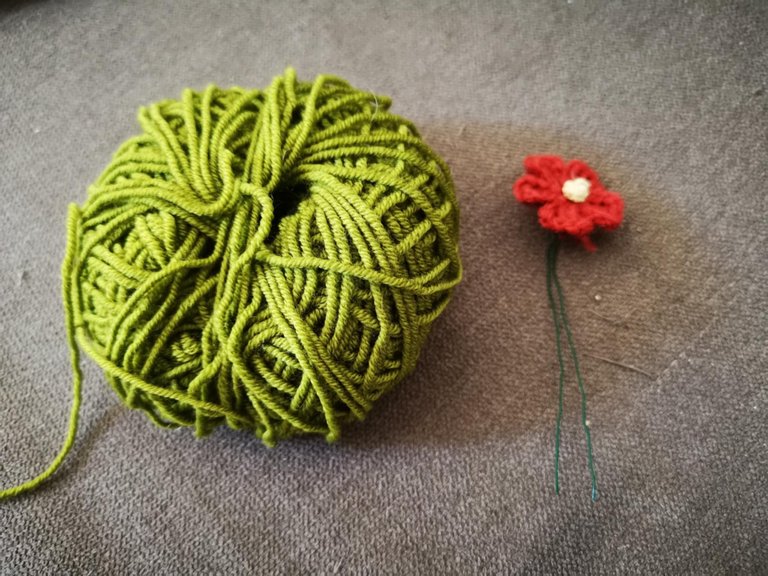
- 1 ball of yarn for the pot;
- 1 ball of yarn for the soil;
- Several colors for the flowers (your choice);
- 1 ball of yarn for the flower stems (green);
- 1 ball of yarn for the pistil (yellow);
- A 3mm crochet hook for the pot;
- A 2.5mm crochet hook for the flowers;
- Stuffing (or leftover yarn);
- A yarn needle;
- Wire (3 pieces of 15/20 cm).
Steps to make
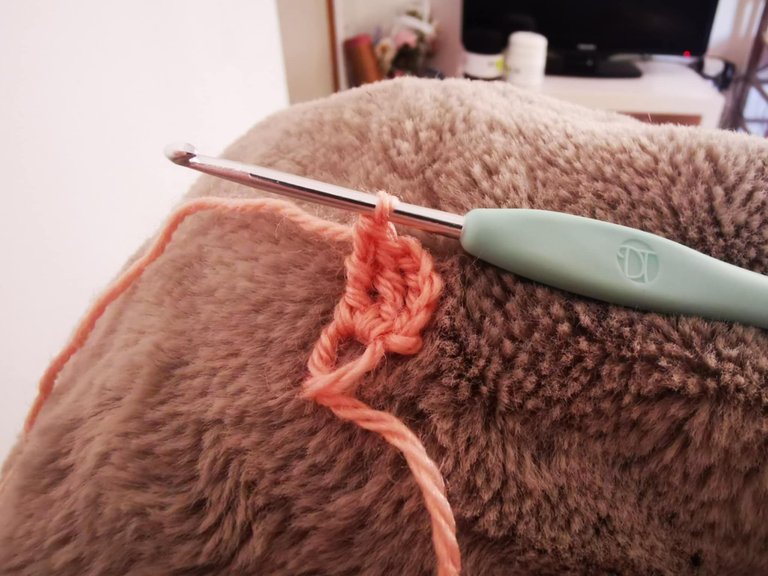
I started by making the pot; here are the steps to follow 👇
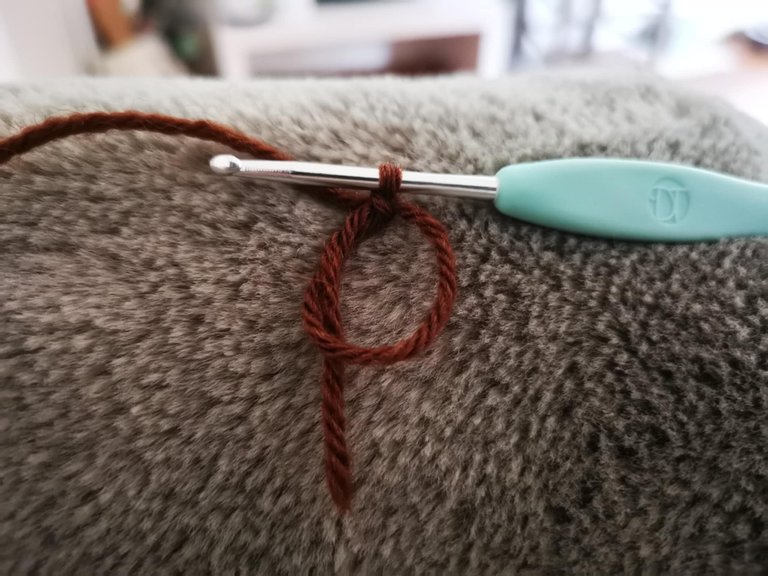
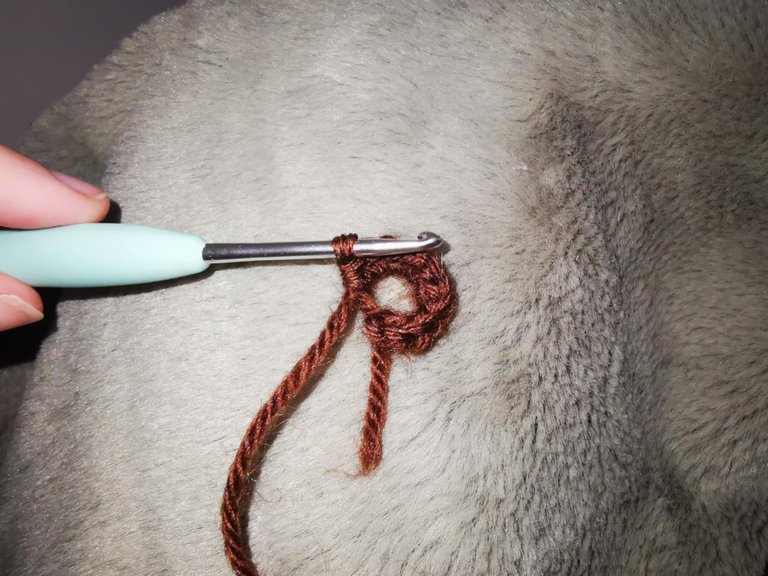
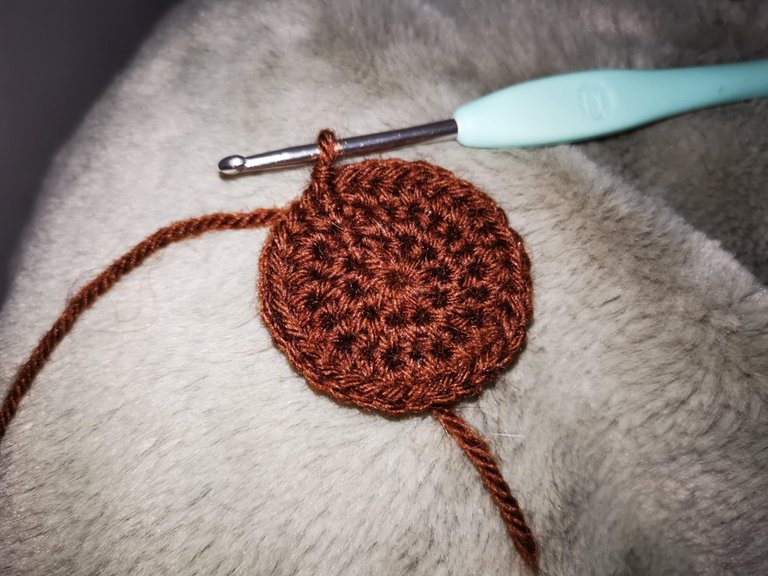
You need to start with a magic ring in which you need to make 10 half double crochets.
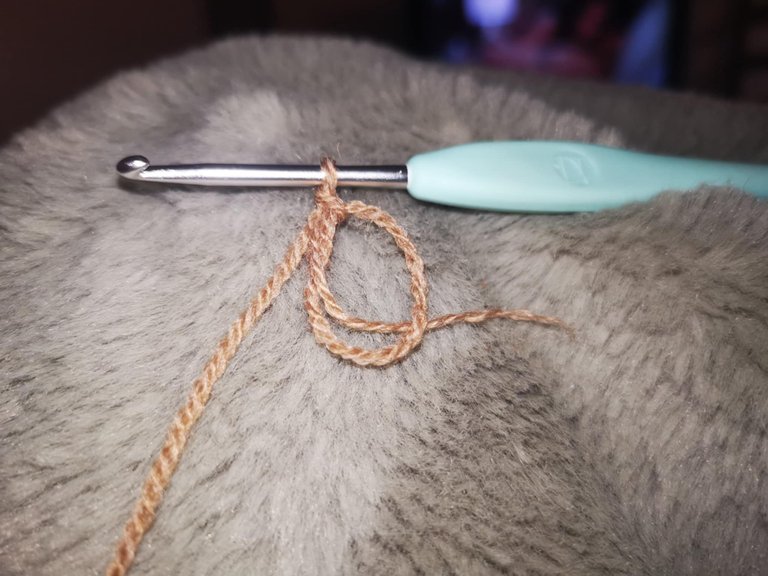

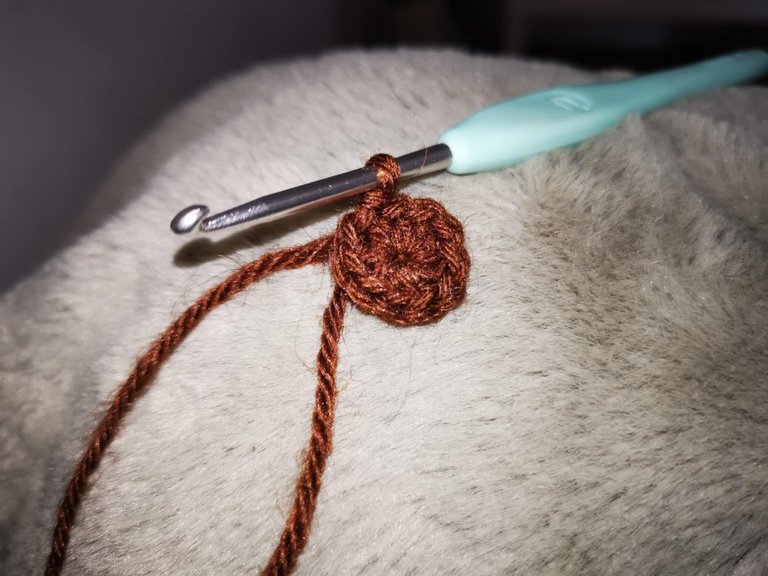
Then, you need to close the ring by pulling the yarn and making a slip stitch in the first stitch of the row.
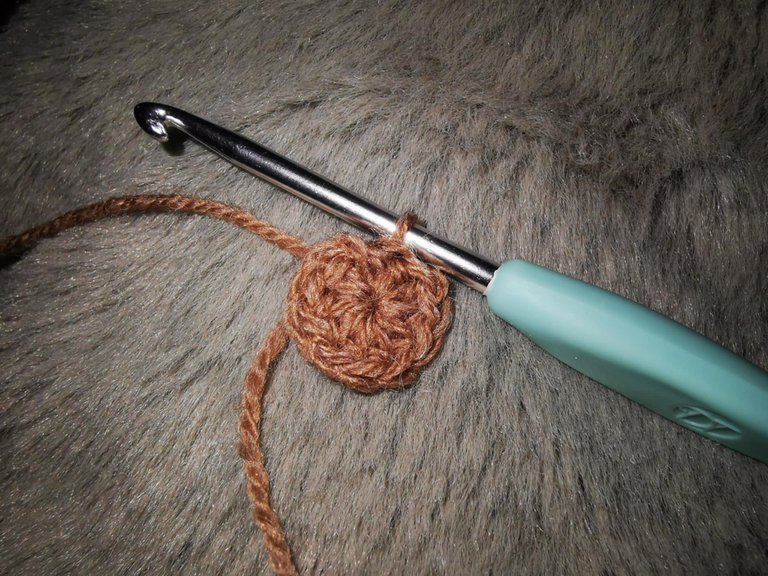

For the second row, you must start with a chain stitch, then work an increase row. This means you must make two half double crochets in each stitch. Once you reach the end of the row, you must slip stitch into the first stitch of the row.

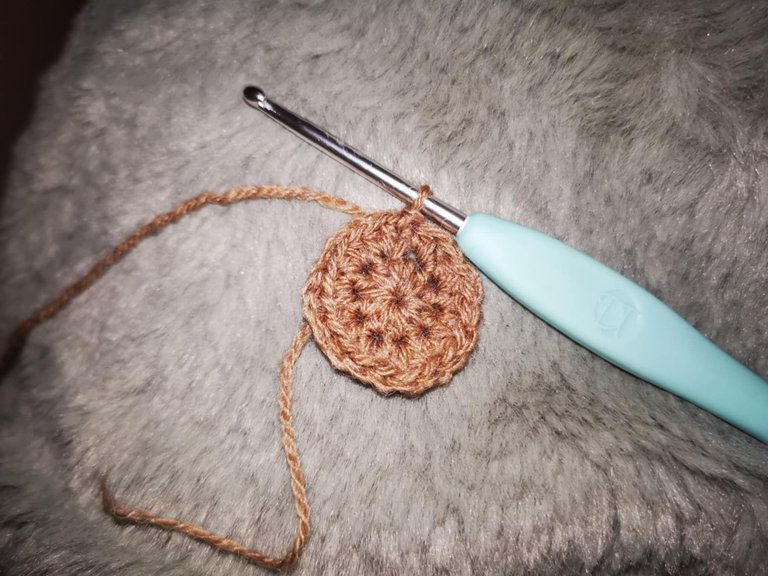
For the third row, you must start with a chain stitch, then make one half double crochet, then one increase throughout the row. So, in one stitch, you make one half double crochet, then in the next, you make two half double crochets, then in the next, you make only one half double crochet, and in the next, you make two half double crochets, and so on.
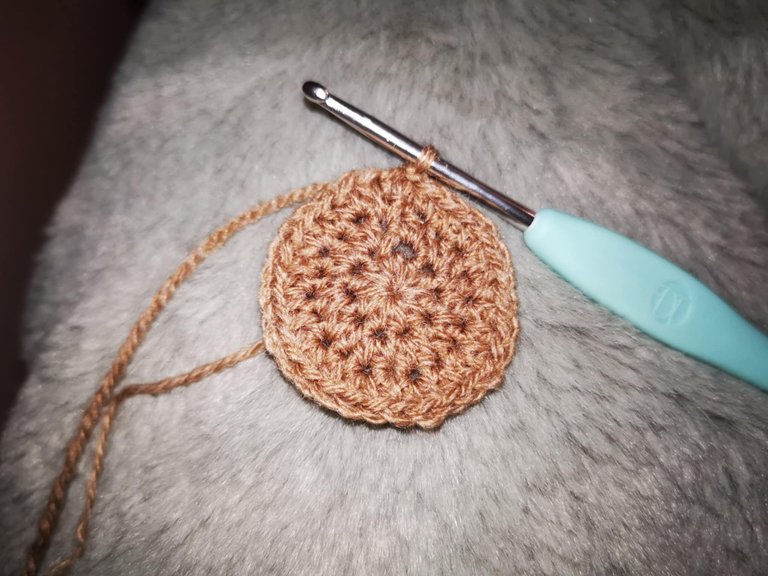
At the end of the row, you must close it by making a slip stitch in the first stitch of the row.
For the fourth row, you must make one half double crochet in each stitch of the row, but only in the back loop. And at the end of the row, slip stitch into the first stitch to close the row.

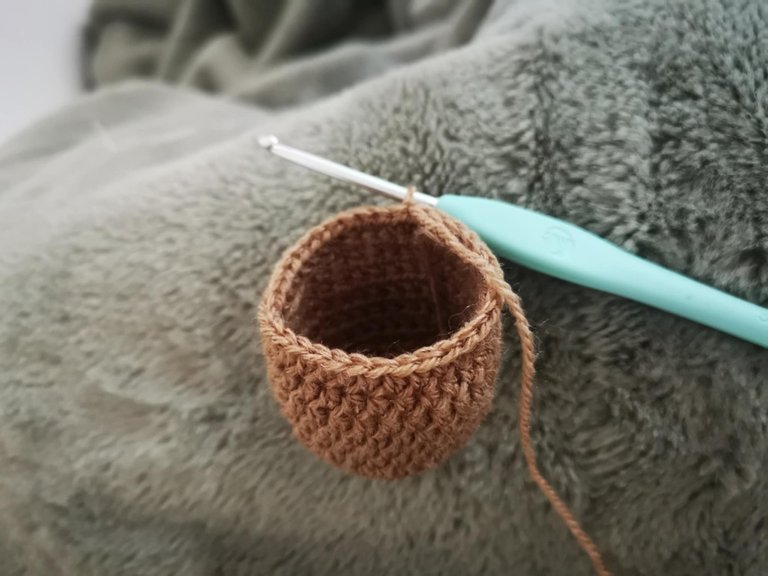
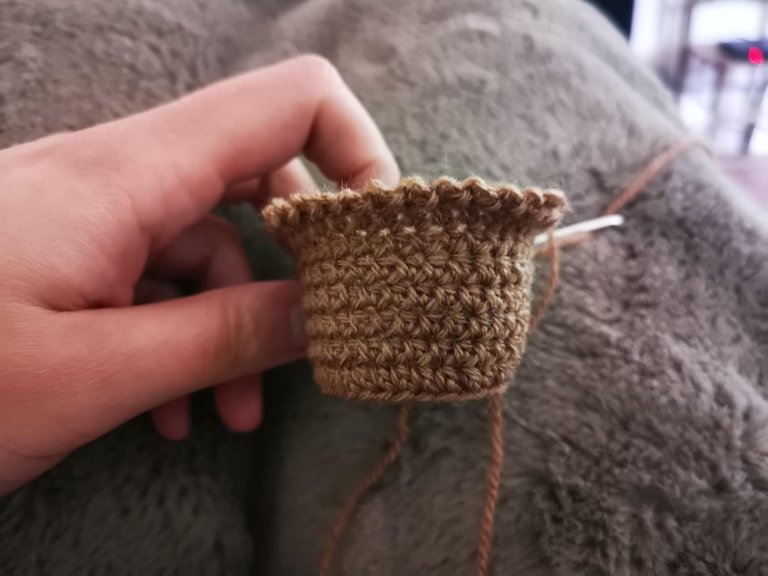
Next, turn the pot over and start working the sides.
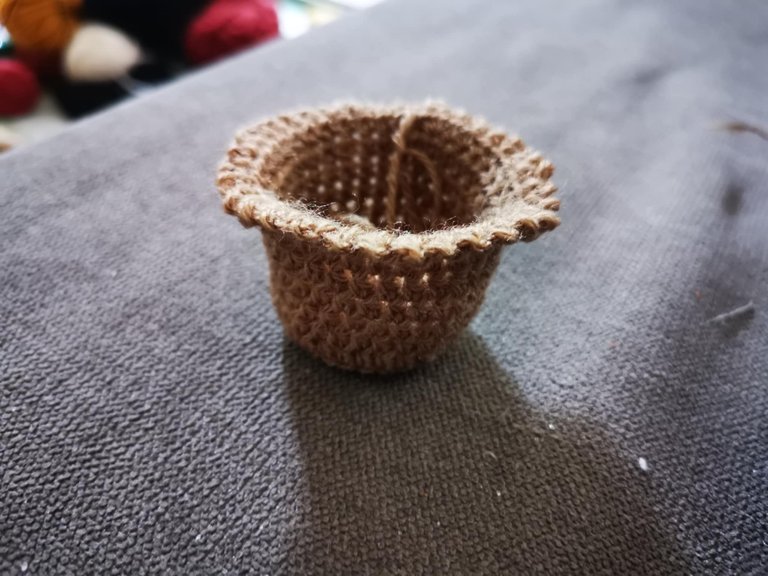
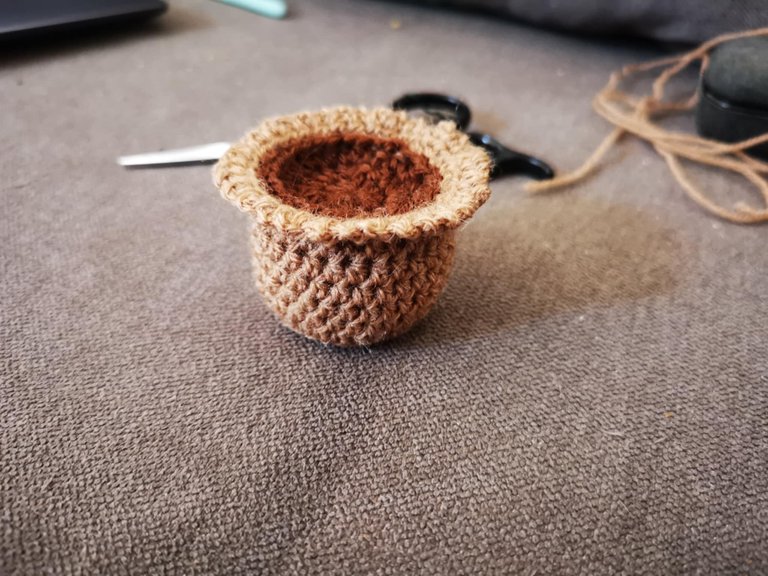
Simply work 5 rows of half double crochets in both loops (1 half double crochet in each stitch), starting each time with a chain stitch and ending the round with a slip stitch in the first stitch. The pot will look like this:


And for the last row, start with 2 chain stitches, then make a slip stitch + 2 chain stitches throughout the row. So: 1 slip stitch, chain 2, 1 slip stitch in the next stitch + chain 2, then 1 slip stitch in the next stitch + 2 chain, etc.

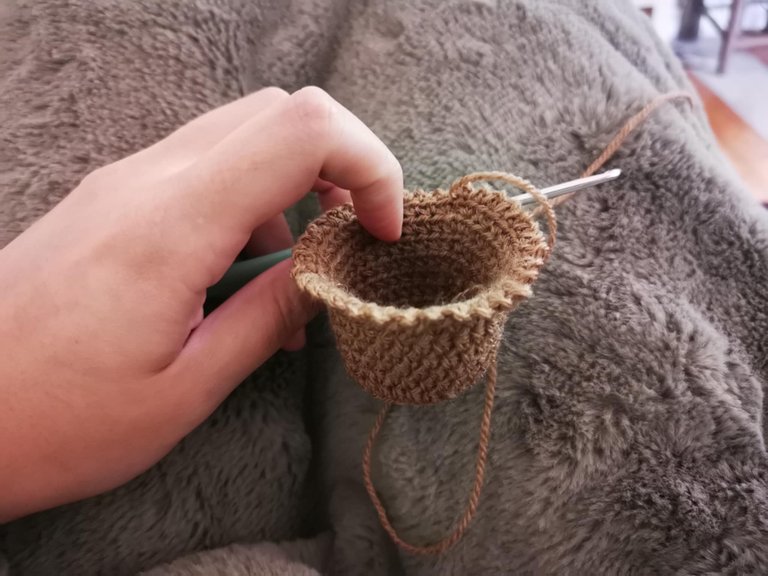
And at the end of the row, simply make a chain stitch and cut the yarn.
The pot is finished!
Now it's time to move on to the soil 👇
To begin, make a magic circle in which you'll work 10 half double crochets, before closing the circle by pulling the yarn and making a slip stitch in the first stitch of the row.
For the second row, start with a chain stitch, then make an increase row: 2 half double crochets in each stitch. Finish by closing the row with a slip stitch in the first stitch.

For the third row, start with a chain stitch, then alternate 1 half double crochet and 1 increase, so 1 half double crochet in one stitch and 2 half double crochets in the same next stitch. And do this throughout the row.
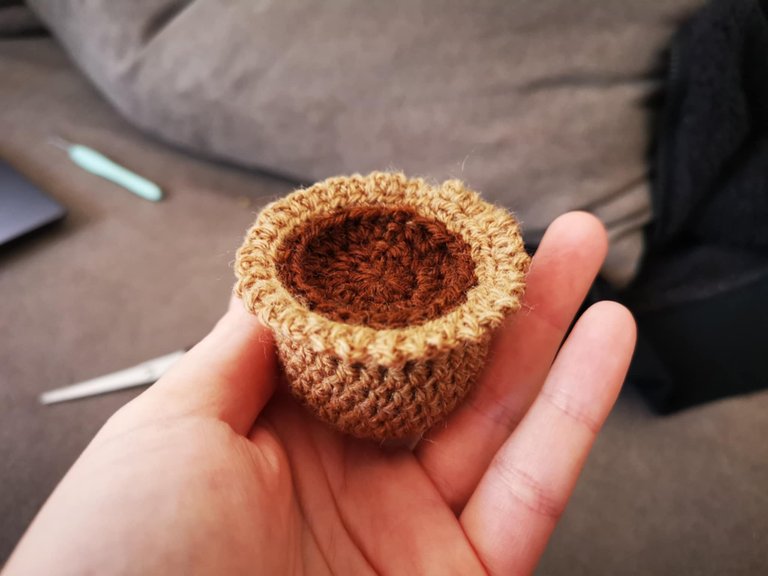
The soil is ready!
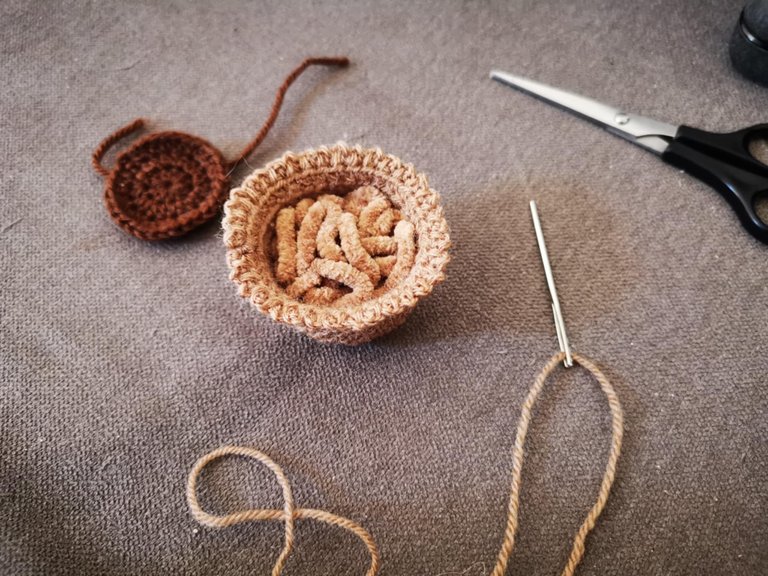
Now, assemble the pot and the soil 👇
To do this, take a yarn needle and the ball of yarn that matches the color of the pot. Sew at the desired height.

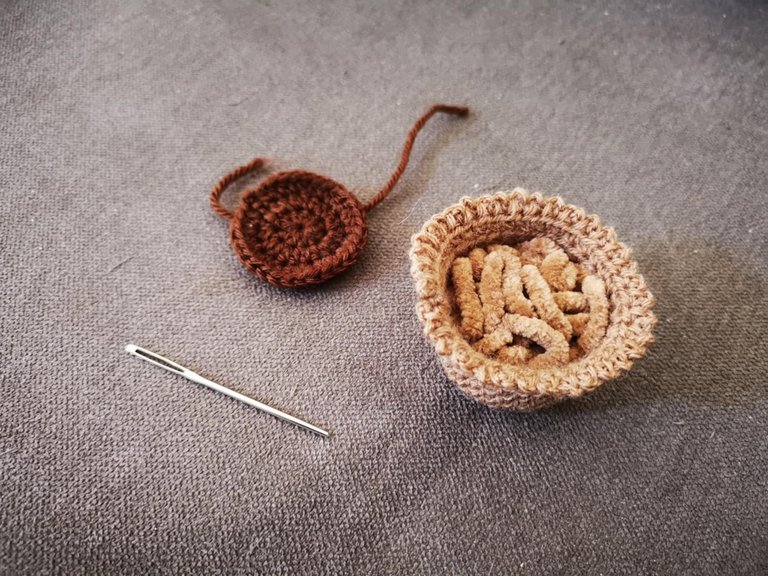
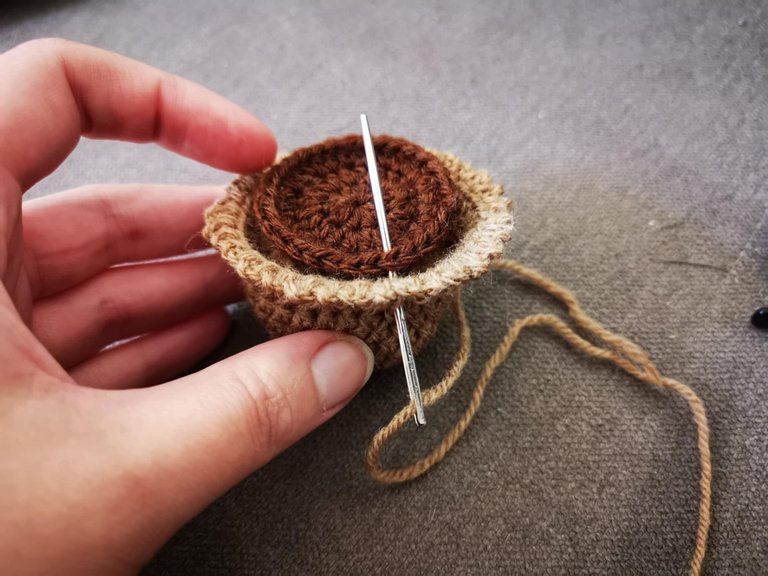
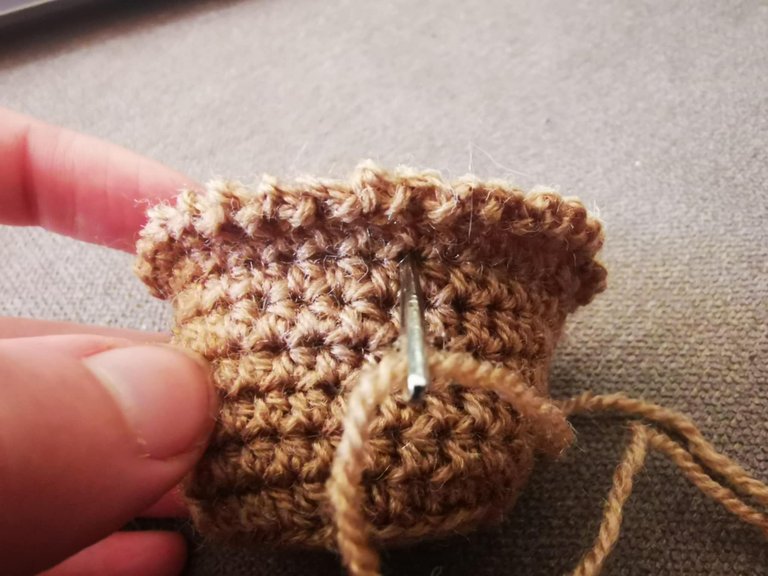
Before finishing sewing, you need to add some stuffing to the inside of the pot (or any leftover yarn you have; mine was chenille yarn).
Then you can finish sewing.
Now, you need to make the flowers 👇
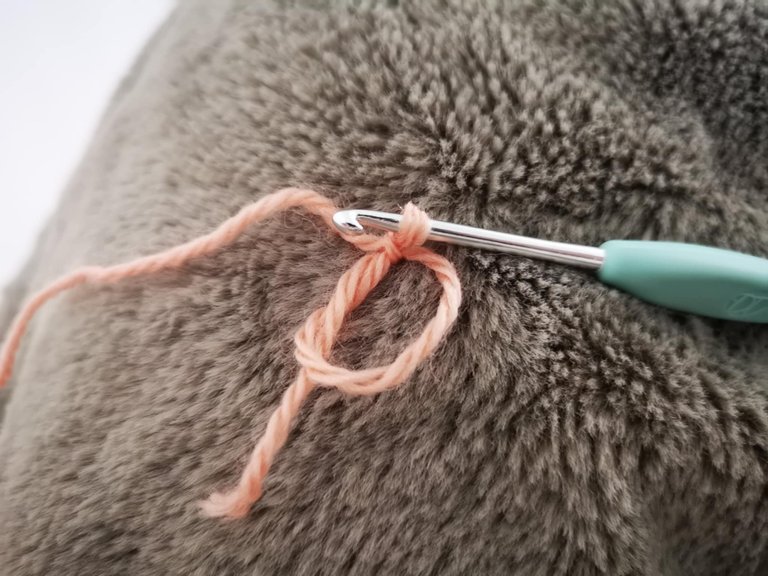
Start with a magic ring:
Then, cast on 4 chain stitches:

And make 2 double crochets in the ring:
Then cast on 4 chain stitches and make a slip stitch in the ring.

And repeat until you have 5 petals.

I made 3 flowers: 1 light pink flower, 1 white flower, and 1 dark pink flower.
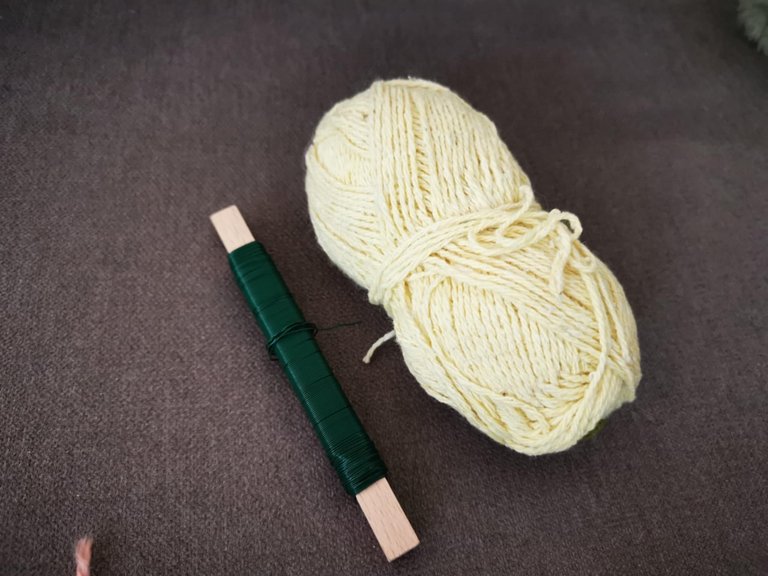
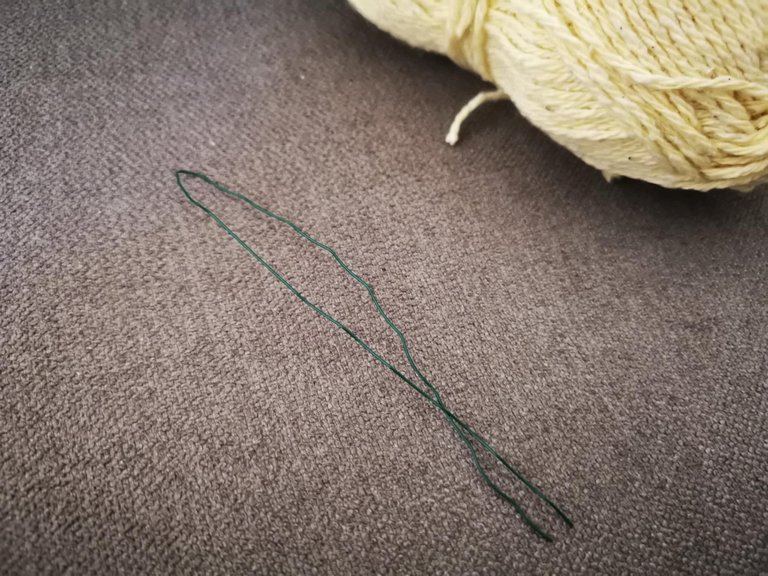
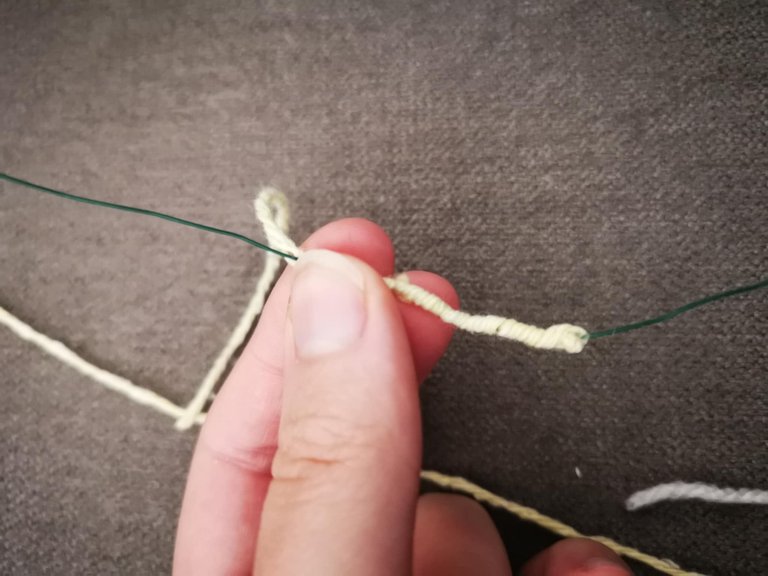
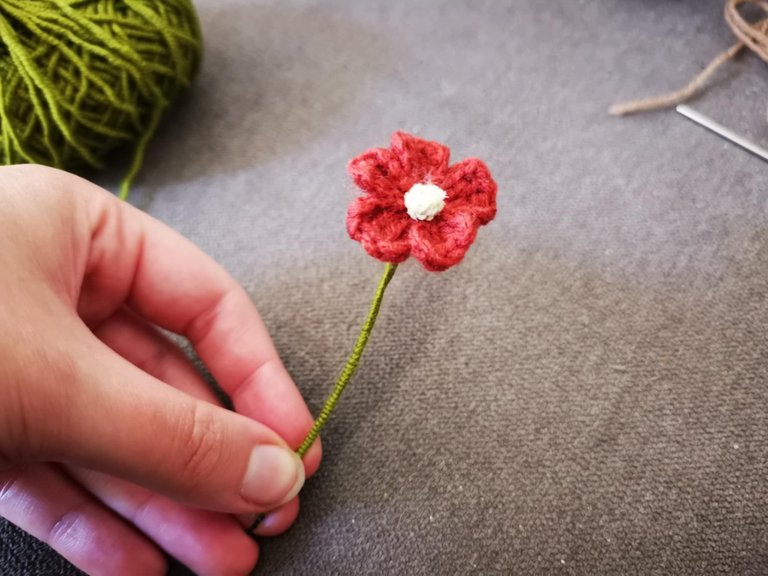
Next, I needed to create the pistil 👇
To do this, I took three 15-20 cm pieces of wire. I wrapped 2 or 3 cm of yellow wire around them and then twisted the wire to form a small ball.


Next, I inserted the pistils into the center of the flowers.
Then, I wrapped green wire (for the stem) around the wire and secured it.
Finally, I planted the flowers in the pot. I cut some of the wire to position my flowers at the desired height.
And here's the final result:


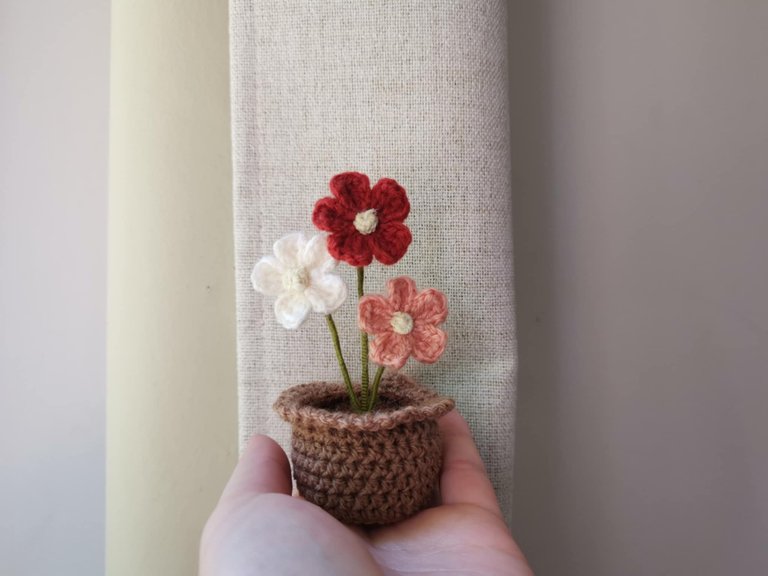
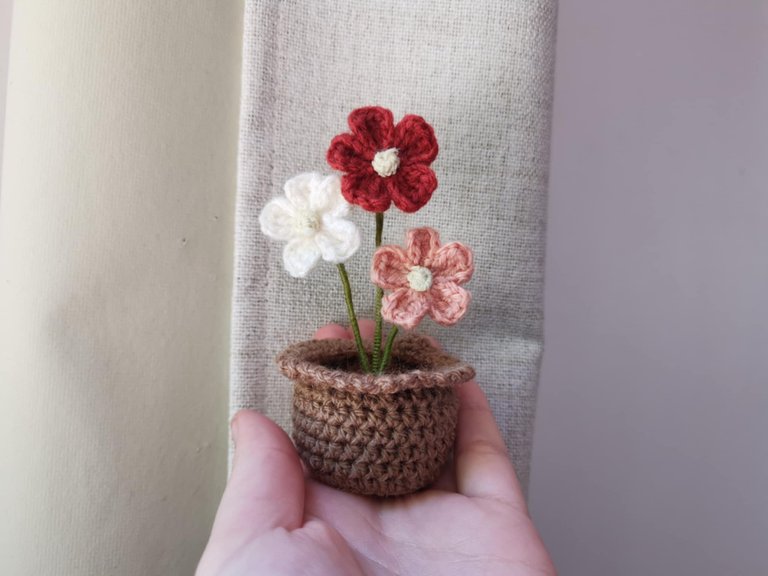
I'm quite satisfied; I think it makes a very cute little decoration! It's a great little gift idea that doesn't take long to make and adds a touch of color. 🌸
I'm planning on making another flower pot, but this time a slightly larger version with more flowers inside 😁
Anyway, I hope this little tutorial has inspired you to make this mini crochet flower pot! If the instructions aren't clear enough, feel free to ask me any questions in the comments. 😊
See you soon,
Johanna
PS: I used Google Translate to translate the English part.
Hello les amis et les crochet lovers ! J’espère que tout se passe bien dans votre vie. 😁
Cette semaine, nous sommes partis en vadrouille pour rendre visite aux grands-parents de @genesisledger ! Et pour l’occasion, j’avais envie d’offrir une petite création au crochet à sa mamie. J’ai cherché un peu d’inspiration sur Pinterest et je suis tombé sur un mini pot de fleurs au crochet 🌸
Alors, j’ai suivi un tutoriel pour réaliser le petit pot avec la terre, et ensuite j’ai créé des fleurs un peu comme je les imaginais !
J’adore le résultat ! Cela fait une petite décoration assez sympa, fleurie et colorée ! 😊
C’est une création qui est assez simple lorsque l’on sait crocheter en rond et qui est assez rapide. C’est assez satisfaisant à faire, j’adore voir le pot prendre forme et ajouter les fleurs.
Voici le tutoriel pour réaliser ce mini pot de fleurs au crochet 👇
Le matériel
- 1 pelote pour le pot ;
- 1 pelote pour la terre ;
- Plusieurs couleurs pour les fleurs (au choix) ;
- 1 pelote pour les tiges des fleurs (verte) ;
- 1 pelote pour le pistil (jaune)
- Un crochet 3mm pour le pot ;
- Un crochet 2,5 mm pour les fleurs ;
- Du rembourrage (ou des restants de laine) ;
- Une aiguille à laine ;
- Du fil de fer (3 morceaux de 15 / 20 cm).
Les étapes de fabrication
J’ai commencé par réaliser le pot, voici les étapes à suivre 👇
Il faut commencer par un cercle magique dans lequel il faut faire 10 demi-brides.
Puis, il faut fermer le cercle en tirant sur le fil et faire une maille coulée dans la première maille du rang.
Pour le deuxième rang, il faut commencer par une maille en l’air, puis faire un rang d’augmentation. Cela veut dire qu’il faut faire 2 demi-brides dans chaque maille. Une fois que vous avez atteint la fin du rang, il faut faire une maille coulée dans la première maille du rang.
Pour le troisième rang, il faut commencer par une maille en l’air, puis faire 1 demi-bride, puis 1 augmentation tout au long du rang. Donc, dans une maille, vous faites 1 demi-bride, puis dans la suivante, vous faites 2 demi-brides, puis dans la suivante, vous faites 1 seule demi-bride, et dans la suivante, vous faites 2 demi-brides et ainsi de suite…
Arrivé à la fin du rang, il faut le fermer en faisant une maille coulée dans la première maille du rang.
Pour le quatrième rang, il faut faire 1 demi-bride dans chaque maille du rang, mais il faut la faire uniquement dans le brin arrière. Et à la fin du rang, il faut faire une maille coulée dans la première maille pour fermer le rang.
Ensuite, il faut retourner le pot, et commencer à monter les côtés.
Il faut simplement faire 5 rangs de demi-brides dans les deux brins (1 demi-bride dans chaque maille) en commençant à chaque fois par 1 maille en l’air et en terminant le tour par une maille coulée dans la première maille. Le pot va se former ainsi :
Et pour le dernier rang, il faut commencer par deux mailles en l’air, puis, il faut faire une maille coulée + 2 mailles en l’air pendant tout le rang. Donc : 1 maille coulée, 2 mailles en l’air, 1 maille coulée dans la maille suivante + 2 mailles en l’air, puis 1 maille coulée dans la maille suivante + 2 mailles en l’air, etc.
Et arrivé à la fin du rang, il suffit de faire une maille en l’air et de couper le fil.
Le pot est terminé !
Il faut maintenant passer à la terre 👇
Pour commencer, il faut faire un cercle magique dans lequel on va faire 10 demi-brides, avant de fermer le cercle en tirant sur le fil et en faisant une maille coulée dans la première maille du rang.
Pour le deuxième rang, il faut commencer par une maille en l’air, puis faire un rang d’augmentation : 2 demi-brides dans chaque maille. Il faut finir par fermer le rang avec une maille coulée dans la première maille.
Pour le troisième rang, il faut commencer par une maille en l’air, puis il faut alterner 1 demi-bride et 1 augmentation, donc 1 demi-bride dans une maille et 2 demi-brides dans la même maille suivante. Et cela, tout au long du rang.
La terre est prête !
Maintenant, il faut assembler le pot et la terre 👇
Pour cela, il faut prendre une aiguille à laine et la pelote de la couleur du pot. Et il faut coudre à la hauteur que vous souhaitez.
Avant de terminer la couture, il faut ajouter du rembourrage à l’intérieur du pot (ou bien tous les restes de pelotes que vous avez, moi, c’était des restes de fil chenille).
Ensuite, vous pouvez terminer la couture.
Maintenant, il faut faire les fleurs 👇
Il faut commencer par un cercle magique :
Puis, monter 4 mailles en l’air :
Et faire 2 brides dans le cercle :
Puis monter 4 mailles en l’air et faire une maille coulée dans le cercle.
Et répéter l’opération jusqu’à obtenir 5 pétales.
J’ai réalisé 3 fleurs : 1 fleur rose clair, 1 fleur blanche et 1 fleur rose foncé.
Il faut ensuite créer le pistil 👇
Pour cela, j’ai pris 3 morceaux de 15 / 20 cm de fil de fer. J’ai enroulé de du fil jaune sur 2 ou 3 cm et ensuite, j’ai enroulé le fil de fer pour fermer une petite boule.
Ensuite, j’ai inséré les pistils dans le centre des fleurs.
Puis, j’ai enroulé du fil vert (pour la tige) autour du fil de fer et je l’ai bloqué.
Et j’ai fini par planter les fleurs dans le pot. J’ai coupé certains fils de fer pour bien placer mes fleurs à la hauteur souhaitée.
Et voici le résultat final :
Je suis plutôt satisfaite, je trouve que cela fait une petite décoration très mignonne ! C’est une petite idée de cadeau qui prend pas longtemps à réaliser et qui apporte une petite touche de couleur. 🌸
Je compte refaire un pot de fleurs, mais cette fois-ci une version un peu plus grande avec d’autres fleurs à l’intérieur 😁
Bref, j’espère que ce petit tutoriel vous a donné envie de réaliser ce mini pot de fleurs au crochet ! Si jamais les explications ne sont pas assez claires, n’hésitez pas à me poser vos questions en commentaires. 😊
À bientôt,
Johanna
PS : J’ai utilisé Google Traduction pour traduire la partie en anglais.
Lovely work.
Thank you 🙏🙏
I loved the details of the work.
Thank you so much 😁
Really beautiful 😍
Thank you! 🙏
Your knitting skills are beyond doubt, the results are very beautiful. Not only beautiful but full of character, the color choices are also right and pleasing to the eye at all times.
Thank you so much, my friend! Your compliments warm my heart. My crochet creations are almost as beautiful as your wonderful nature photos. I wish you a wonderful day ☀️
Yes, you're welcome, keep up the enthusiasm for your work. I hope you have a nice day too dear💞
This is really neat and beautiful
I love the colour combination
Thank you so much for your compliments. Have a nice day 😁
It looks simple and beautiful. It can draw anyone's attention. Love it. You did a great job! It shows your creativity and talent. Well done!
selected by @rezoanulvibes
That's very kind, thank you for all the compliments! I'm glad you like this creation 😊
!PIZZA
Your post has been manually reviewed for curation by the Principality of Bastion.
Principality of Bastion - Our Leit Motiv? Let's Grow Together.
Principality's site | Minava NFT Market | Discord | Our Twitch Channel
You may TRAIL this account (or @hive-143869) if you like the curation we do, or join our discord to know more about what we do.
🙏🙏🙏
!BBH
$PIZZA slices delivered:
@itharagaian(3/10) tipped @altheana
Come get MOONed!
https://www.reddit.com/r/Brochet/comments/1lai728/a_mini_crocheted_flower_pot/
This post has been shared on Reddit by @arqyanedesings through the HivePosh initiative.