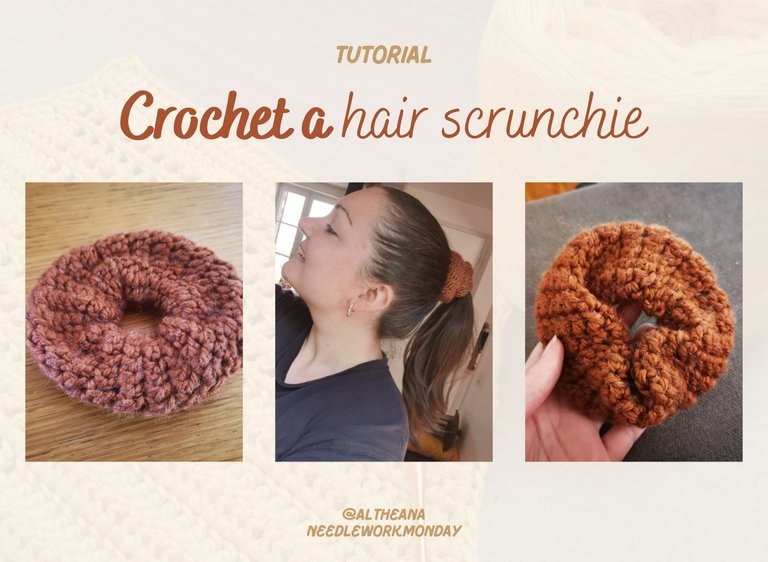
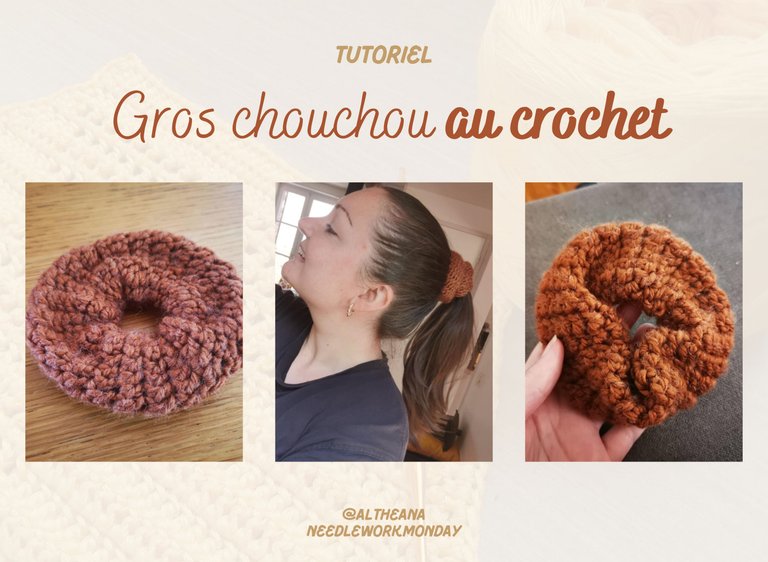
A big crochet hair scrunchie // Un gros chouchou pour les cheveux au crochet [EN/FR]
Hello friends and crochet lovers! I hope you're all doing well today 😁
I made a new hair accessory: a big (very big) scrunchie!
A little over a year ago, I already made hair scrunchies, but in a different shape. I made several, in several different colors, and I loved making them. And by the way, I still love wearing them!
The tutorial is still available in my old posts if you're interested 😊
But this time, I wanted to try a new scrunchie shape, and above all, a much larger one 😁
It's a super quick project to make and completely accessible to beginners.
Here's the link to the YouTube tutorial:
And here's my written version of this tutorial 👇
Materials
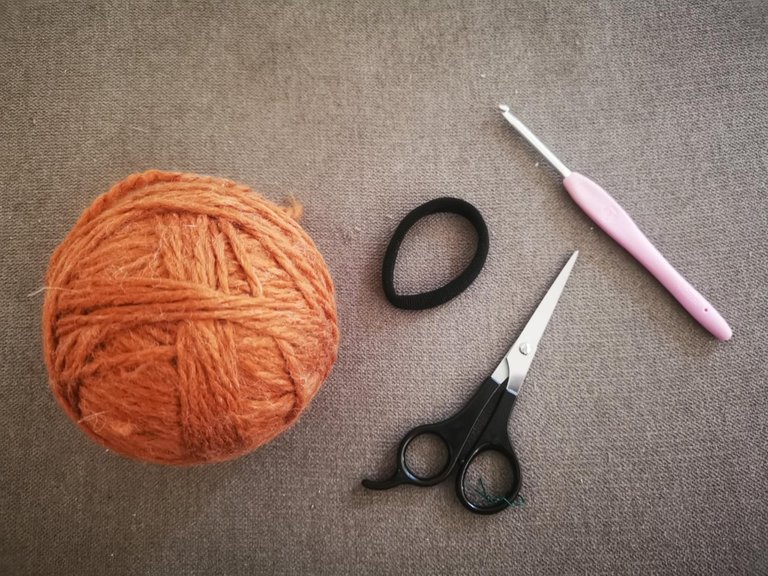
I used:
- An elastic band;
- A ball of yarn;
- A 4mm crochet hook;
- Scissors;
- A yarn needle.
Steps to make it
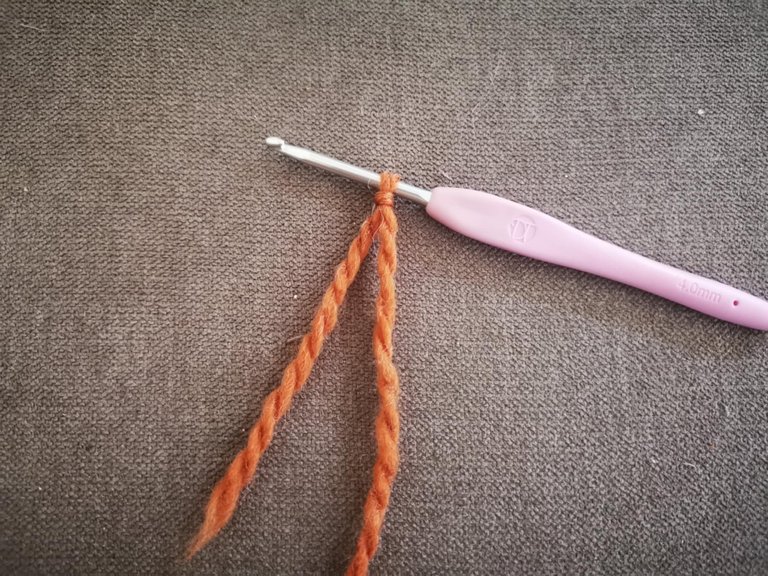
To begin, you need to make a slip knot:
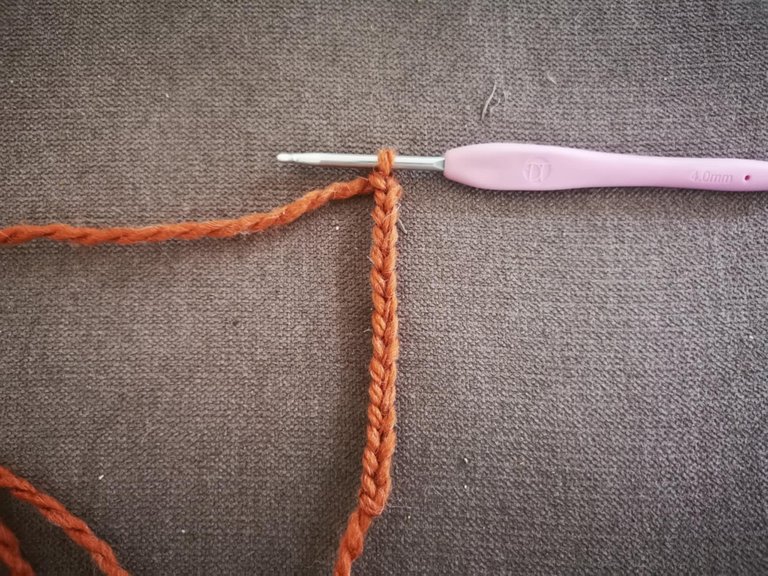
Then, cast on a chain about 8 centimeters long. The number of stitches depends on your yarn; I chained 15:
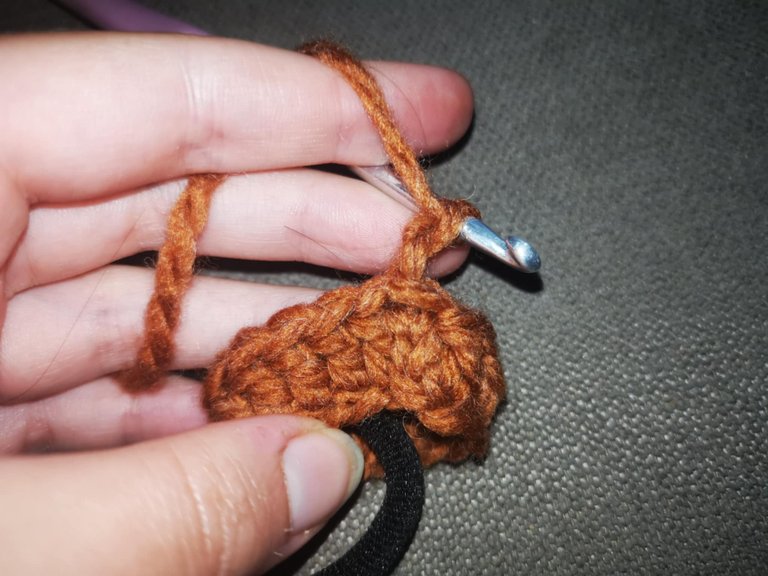
Next, I placed the chain inside the elastic band:
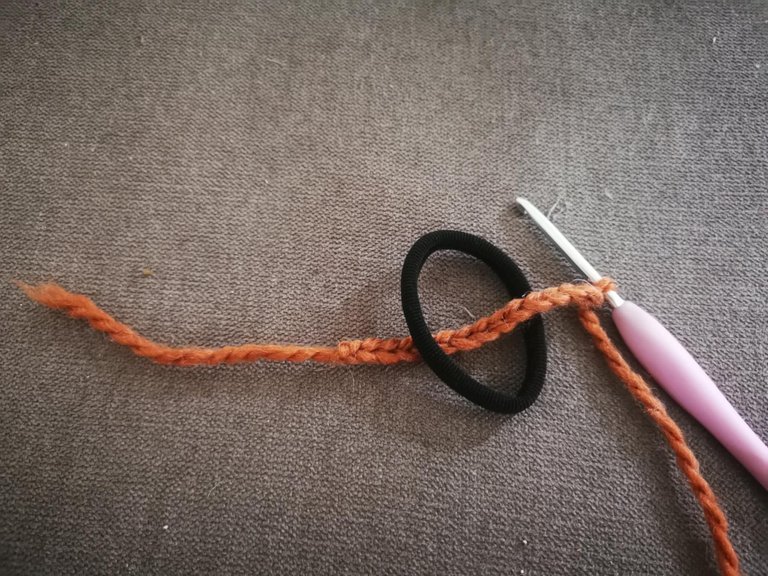
Then, I closed the chain. To do this, I folded the chain and made a slip stitch in the first stitch of the chain. Here's what it looks like:

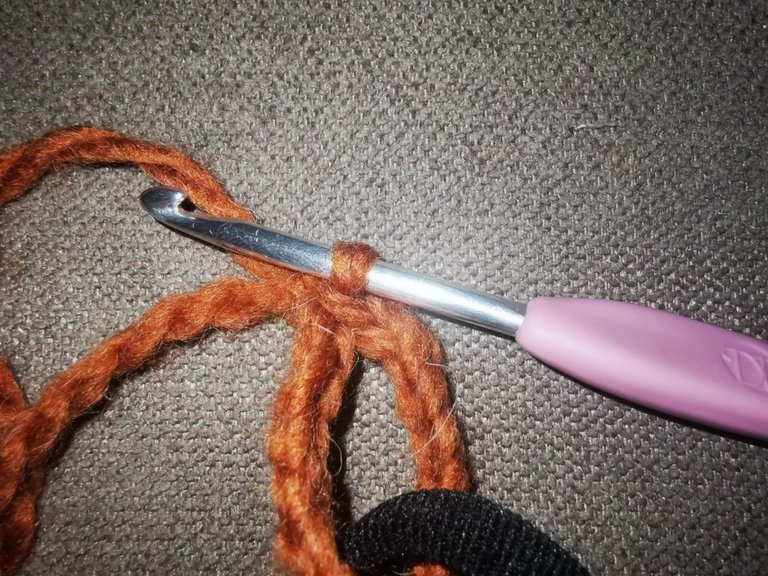
Next, I started by casting on 2 chain stitches:
Then, I made a first double crochet in the same space as the two chain stitches:

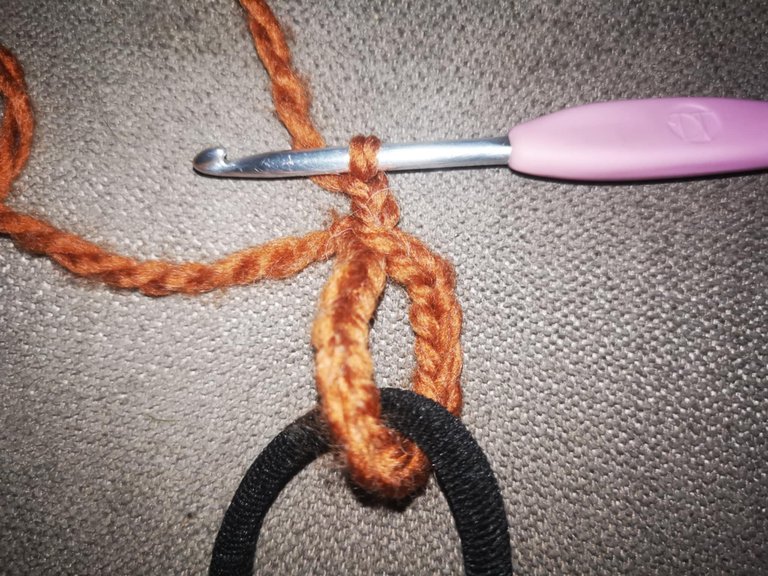
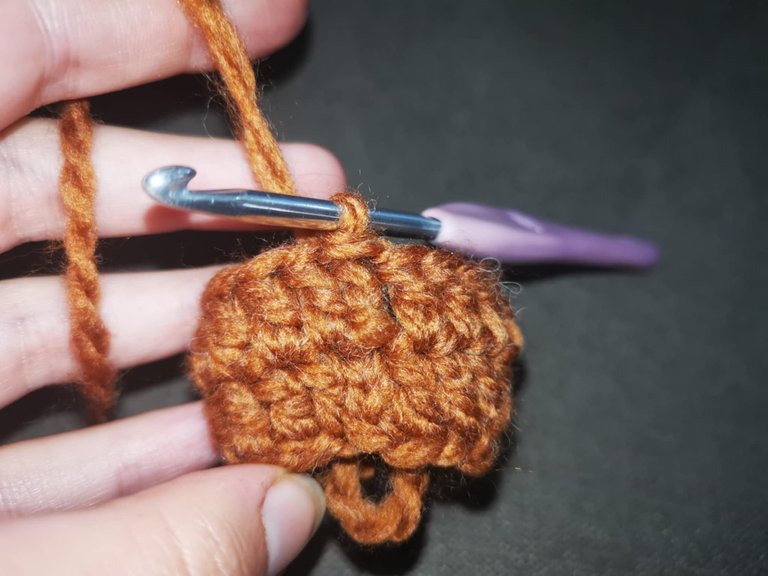
And I continued by making a double crochet in each stitch all the way around.
When I reached the end, I made a slip stitch in the V created by the first double crochet.

Then, I cast on 2 chain stitches to start a new row.
And I made a second row of a double crochet in each stitch, starting the first double crochet in the space between the chain stitches.

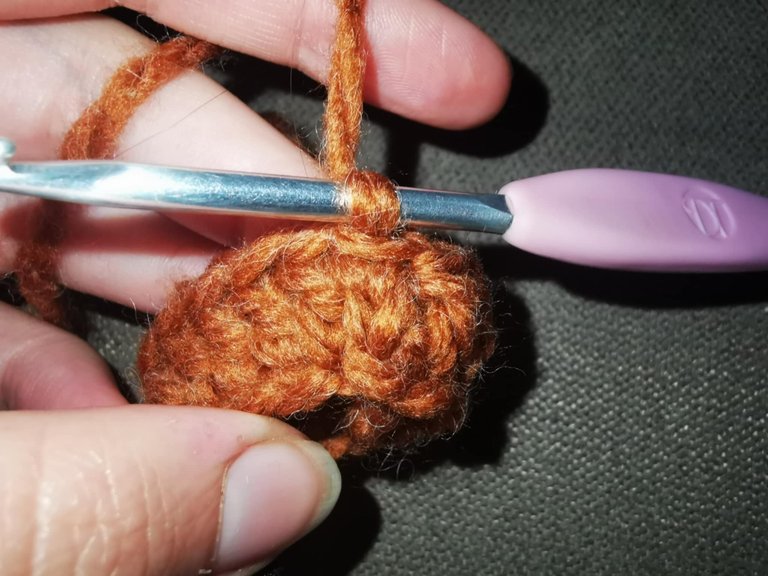
Then continue making identical rows of double crochets. The number of rows depends on your yarn and the look you want to achieve.
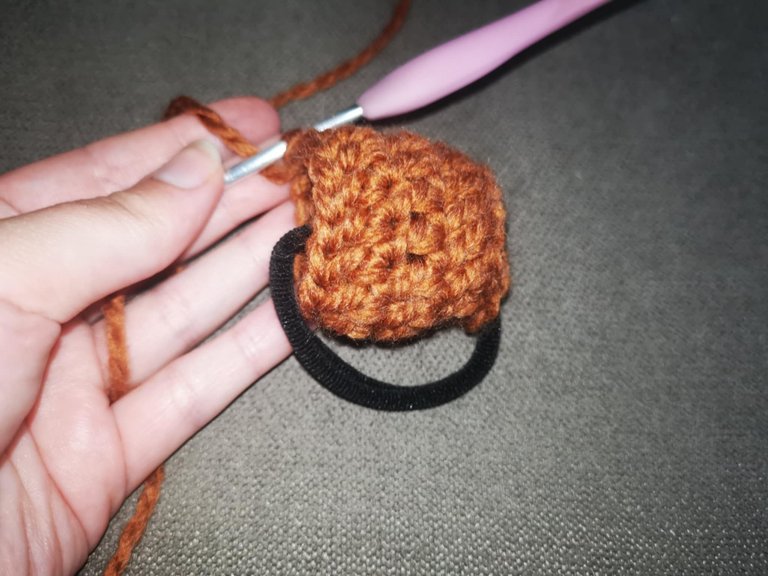

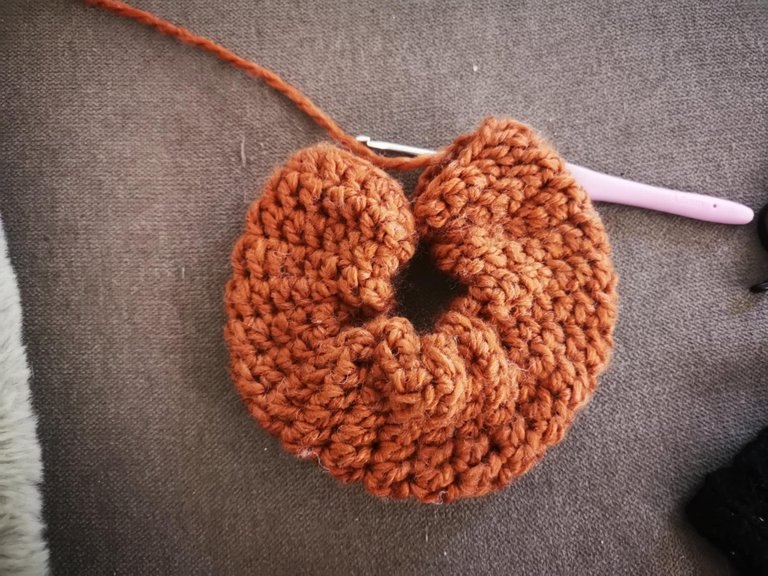
For my part, I made 25 rows.
Once you're happy with the number of rows, you can chain stitch and cut the yarn (keeping 10 or 15 cm for sewing).
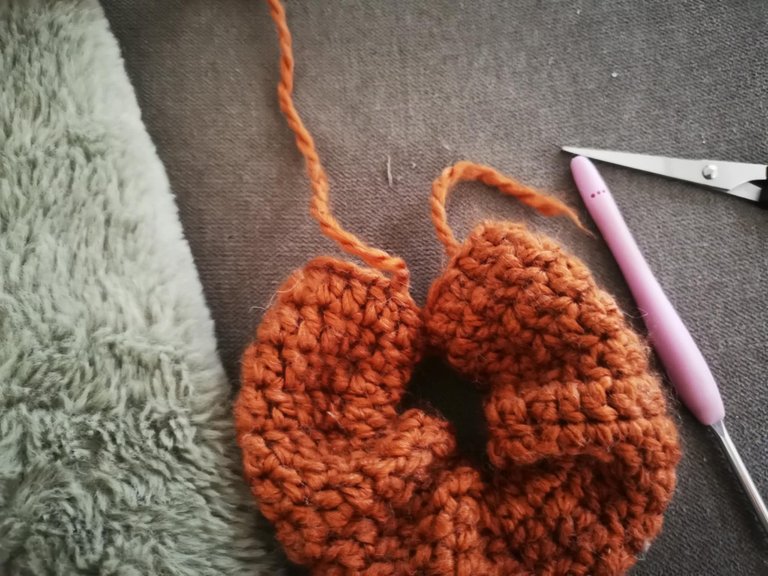
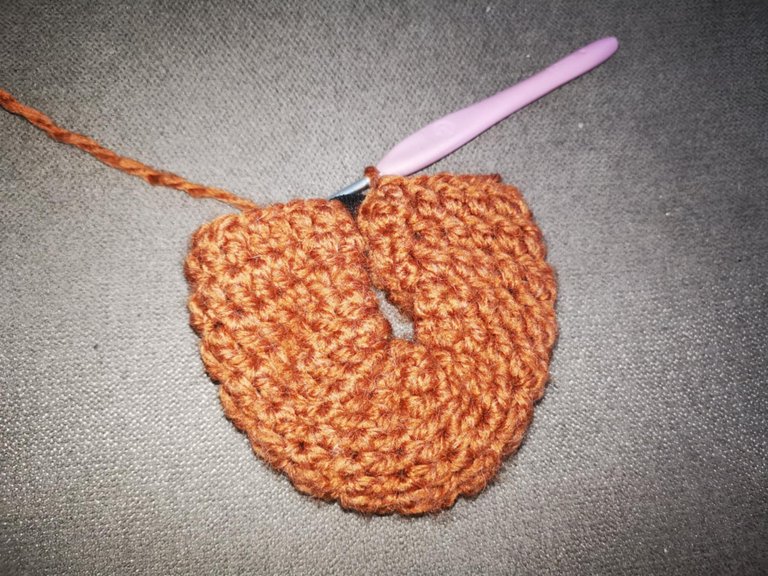
Now it's time to sew. I used a yarn needle and simply sewed the two stitches that were facing each other. I repeated the same movement, always in the same direction. When I reached the end, I tied a knot and weaved in the ends.
And here's the result:
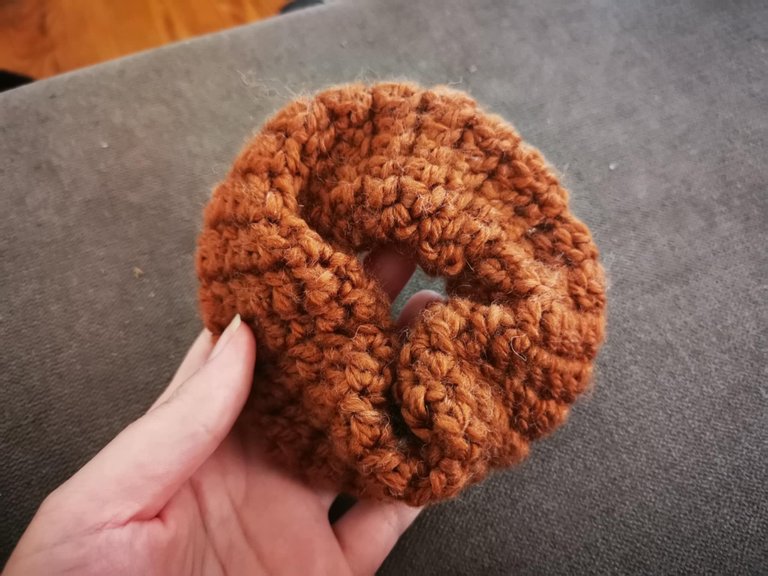
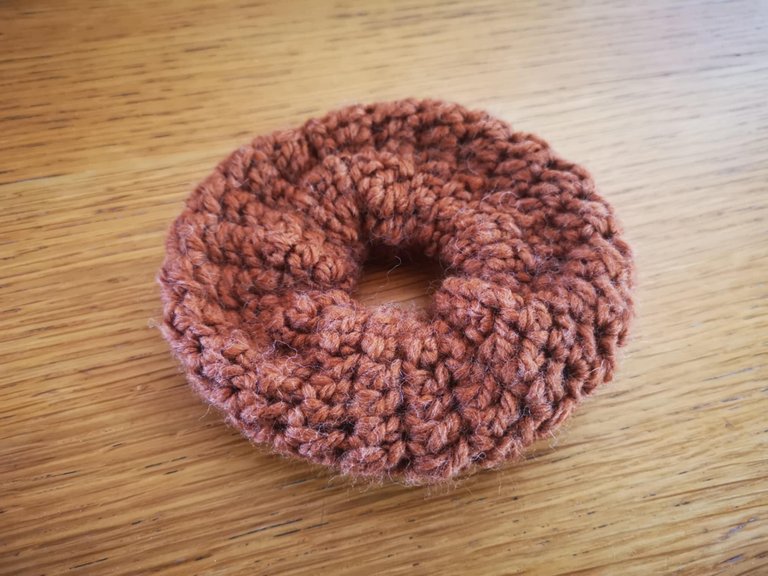
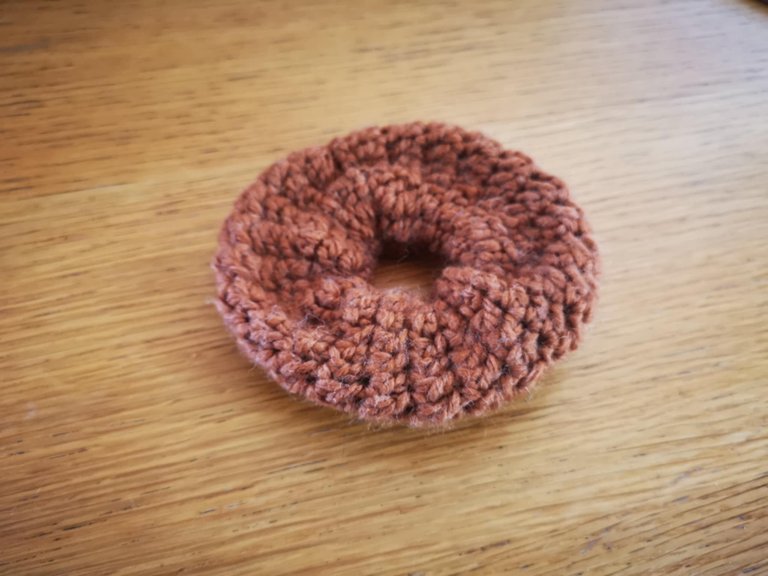

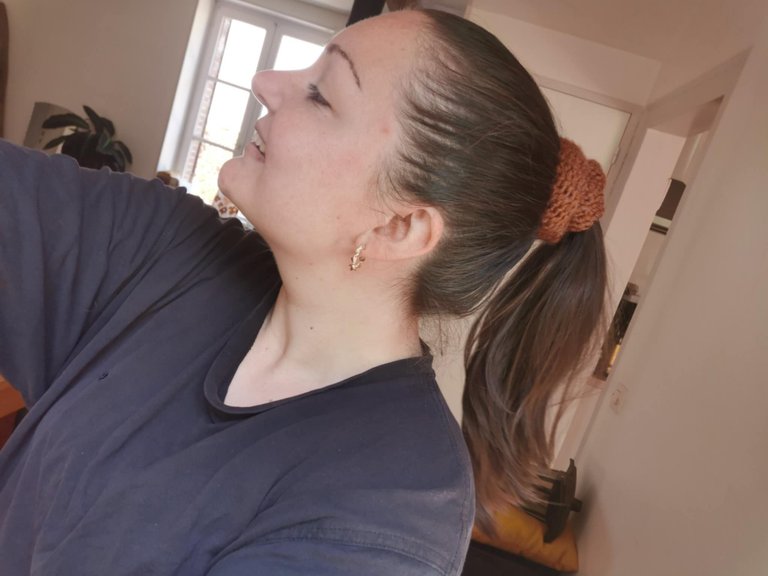
The scrunchie is very big and comfortable to wear! I really like it 😊
I think I'll make some more in other colors.
I hope you enjoyed this little tutorial and that it inspired you to make your own accessories 😁
See you soon,
Johanna
PS: I used Google Translate to translate the English part.
Hello les amis et les crochet lovers ! J’espère que vous allez tous très bien aujourd’hui 😁
J’ai réalisé un nouvel accessoire pour cheveux : un gros (très gros) chouchou !
Il y a un peu plus d’un an, j’avais déjà réalisé des chouchous pour cheveux, mais dans une autre forme. J’en avais fait plusieurs, de plusieurs couleurs différentes et j’avais adoré les réaliser. Et d’ailleurs, j’adore toujours autant les porter !
Le tutoriel est toujours disponible dans mes anciens posts si jamais ça vous intéresse 😊
Mais cette fois-ci, j’ai eu envie de tester une nouvelle forme de chouchou, et surtout, un modèle beaucoup plus imposant 😁
C’est un projet super rapide à réaliser et qui est totalement accessible aux débutants.
Voici le lien du tutoriel Youtube :
Et voici ma version écrite de ce tutoriel 👇
Le matériel
J’ai utilisé :
- Un élastique ;
- Une pelote de laine ;
- Un crochet 4mm ;
- Des ciseaux ;
- Une aiguille à laine.
Les étapes de fabrication
Pour commencer, il faut faire un noeud coulant :
Puis, monter une chaînette d’environ 8 centimètres. Le nombre de mailles dépend de votre fil, moi j’ai fait 15 mailles en l’air :
Ensuite, j’ai placé la chaînette à l’intérieur de l’élastique :
Puis, j’ai fermé la chaînette. Pour cela, j’ai plié la chaînette et j’ai fait une maille coulée dans la première maille de celle-ci. Voici ce que ça donne :
Ensuite, j’ai commencé par monter 2 mailles en l’air :
Puis, j’ai réalisé une première bride dans le même espace que les deux mailles en l’air :
Et j’ai continué en faisant une bride dans chaque maille tout autour.
Arrivé au bout, j’ai réalisé une maille coulée dans le V créé par la première bride.
Puis, j’ai monté 2 mailles en l’air pour commencer un nouveau rang.
Et j’ai réalisé un deuxième rang d’une bride dans chaque maille, en commençant la première bride dans l’espace des mailles en l’air.
Il faut ensuite continuer de faire des rangs identiques de brides classiques. Le nombre de rangs à réaliser dépend de votre fil et du rendu que vous souhaitez avoir.
Pour ma part, j’ai réalisé 25 rangs.
Une fois que le nombre de rangs vous convient, vous pouvez faire une maille en l’air et couper le fil (en gardant 10 ou 15 cm pour la couture).
Et il faut maintenant passer à la couture. J'ai utilisé une aiguille à laine et j’ai simplement cousu en prenant les deux mailles qui étaient l’une en face de l’autre. J’ai répété le même geste, toujours dans le même sens. Et arrivé au bout, j’ai fait un nœud et j’ai rentré les fils.
Et voici le résultat :
Le chouchou est bien gros et agréable à porter ! J’aime beaucoup 😊
Je pense que j’en referais dans d’autres coloris.
J’espère que ce petit tutoriel vous a plu et que cela vous a donné envie de réaliser vos propres accessoires 😁
À très vite,
Johanna
PS : J’ai utilisé Google Traduction pour traduire la partie en anglais.
Your crochet hair scrunchie turned out beautifully. The size and texture make it look very stylish and perfect. Well done.
selected by @stevenson7
Thank you so much for all your compliments 🙏
!BBH
Your post has been manually reviewed for curation by the Principality of Bastion.
Principality of Bastion - Our Leit Motiv? Let's Grow Together.
Principality's site | Minava NFT Market | Discord | Our Twitch Channel
You may TRAIL this account (or @hive-143869) if you like the curation we do, or join our discord to know more about what we do.
!BBH
That's really creative and the scrunchie turned out really great! It's fun to see the step by step images of getting through the loops (since I'm really bad at all this😆)
Thanks for sharing!!
Thank you so much! I could have gone into even more detail to make it even easier to follow haha 😁 You should try crocheting, it's a really relaxing and creative activity!
Can we really wear these kind of crochet hair scrunchies?
I am really amazed by your skills and unique.
Absolutely, I wear them almost every day because I've made them in several colors. Right now, as I write this comment, I'm wearing a big white crochet scrunchie 😂
That's so kind, thank you very much! 🙏
My goodness!! Good to hear that your are in love with them. 🤭
the scrunchie is very practical, it looks good in any occasion, I like the color.