Parrot wings for carnival
Good evening Hive Diy!
As some of you already know carnival is coming, it is not one of my favorite festivities but of course having a child everything is different, at school they usually have parties and carnival parades and of course this year was no exception, for this week that is coming soon, specifically on February 7 the children must wear a costume, I like this very much but at the same time it bothers me that the children can not dress up in whatever they like, because at school they practically demand a specific theme, this time the teacher gave us very little information only said "fantasy costume that has feathers and sequins" a theme that sounds simple enough for girls but not so much for boys.
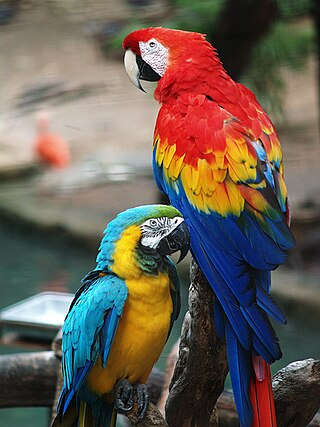
Honestly I spent days tormenting myself thinking about what I should make my son to wear that day, but I reached a point where my head almost exploded, I could only think of the same theme as last year where we were also forced to dress him up as a specific bird, I really didn't want to make a bird because the experience I had making wings last year was horrible and exhausting, but after so much thinking and not getting a solution I opted again for this idea, changing a little bit the whole way to make it so it would be easier for me and also choosing a bird that had colors that we liked, I chose to make a tricolor parrot.
Papel crepe rojo, azul, verde, amarillo
Un metro de tela POP
Un metro de cinta elastica gruesa
Tijeras
Silicon caliente
Red, blue, green, yellow crepe paper
One meter of POP fabric
One meter of thick elastic tape
Scissors
Hot silicon

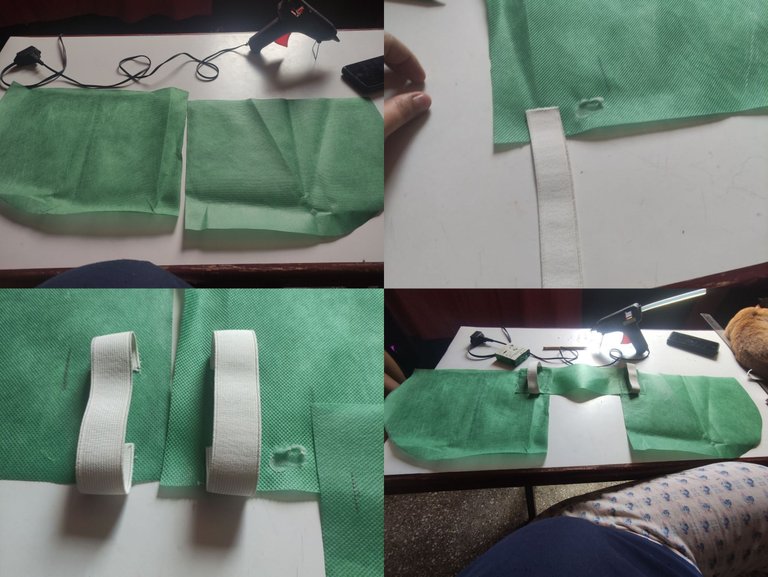
En fin, el primer paso para hacer estas alas fue tomar la tela POP verde medirlo en la espalda de mi hijo y mas o menos calcular el ancho y largo en la que debía cortarla, la corte en una forma recta arriba pero curva en las esquinas para poder darle esa forma de alas, después de recortar el primer pedazo, calqué su forma en la otra tela para sacar la segunda ala, igualmente la recorte y luego recorte un rectángulo el cual tendría la función de unir estas dos alas, también lo hice midiendo en el cuerpo de mi hijo pues, debía ser un rectángulo que no fuese tan ancho pero tampoco tan fino.
Después de tener todas las piezas listas, empecé a ubicar las cintas elásticas que ayudarían a sostener estas alas en los brazos de mi hijo, compre unas cintas gruesas para que fuese mas resistente las medí en sus brazos y luego las pegue casi en el borde del centro de las alas, estaba muy asustada porque no sabia si le iba a quedar bien, medir a ojo no es para nada fácil todo puede salir mal, incluso una de las cintas al principio la pegue mal pero por suerte pude sacarla, luego tome el rectángulo que había recortado anteriormente y lo pegue entre cada ala pasando entre las cintas, pegue muy bien para asi reforzar mucho más las cintas elásticas.
I actually watched several tutorials to avoid having to make the wings like the ones I did last year in which I used cardboard and it seemed very uncomfortable for my son to carry that huge cardboard thing on his back, then I saw another way where it was done with felt fabric, however, it was too expensive that fabric and I needed several meters of all the colors I used, I really looked for a way to do it with something else and I got nothing, literally all the videos I saw were with felt, then I decided to sit down and think, I remembered that I had a meter of a fabric called POP green and I thought I could try with that fabric and also with crepe paper which is one of the cheapest papers I get around here, so I practically had to improvise and pray for everything to go well, also if you have a tape measure it would be much better, I did everything by eye, just measuring on the body of my son and calculating more or less how it would be.
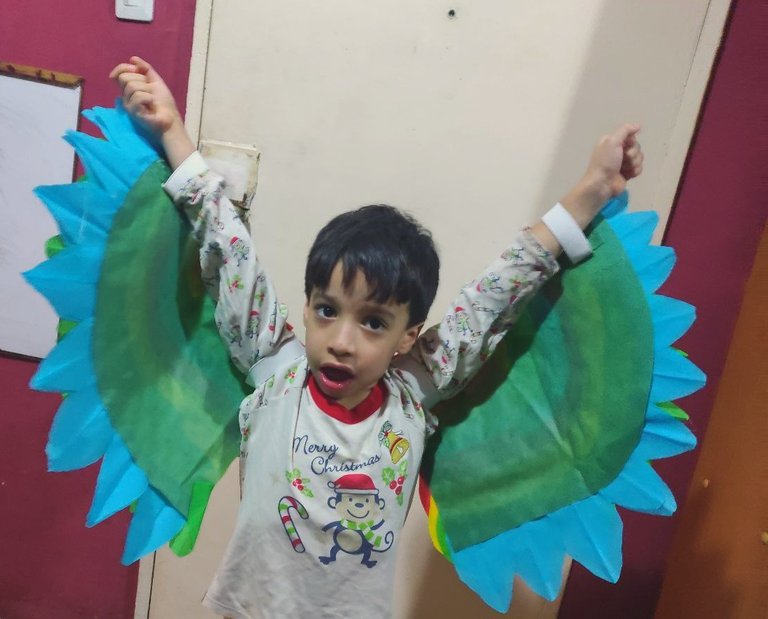
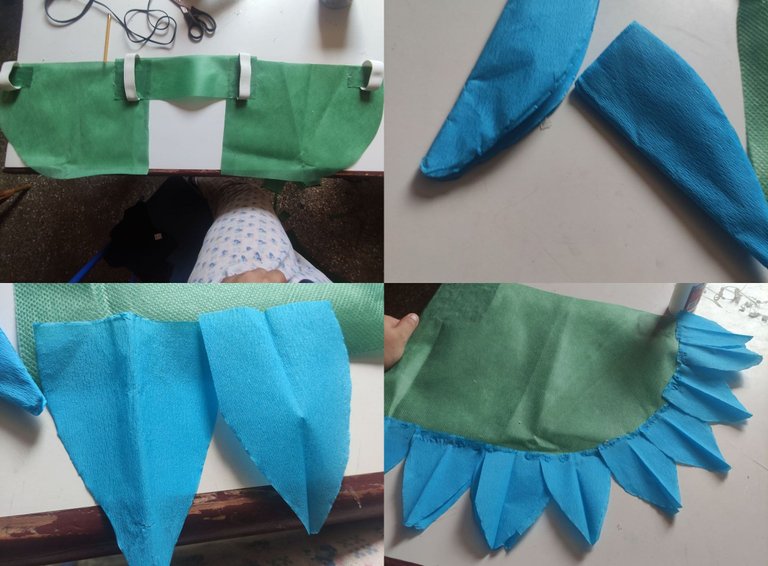
Anyway, the first step to make these wings was to take the green POP fabric and measure it on my son's back and more or less calculate the width and length in which I had to cut it, I cut it in a straight shape at the top but curved at the corners to give it that shape of wings, after cutting the first piece, I traced its shape on the other fabric to get the second wing, I also cut it and then cut a rectangle which would have the function of joining these two wings, I also did it measuring on the body of my son because it had to be a rectangle that was not so wide but not so thin.
After having all the pieces ready, I started to place the thick elastic tape that would help to hold these wings on my son's arms, I bought thick elastic tape to make it more resistant, I measured them on his arms and then I glued them almost on the edge of the center of the wings, I was very scared because I didn't know if it was going to fit him well, measuring by eye is not easy at all, everything can go wrong, even one of the tape at the beginning I glued it wrong but luckily I could take it off, then I took the rectangle that I had previously cut out and glued it between each wing passing between the elastic tape, I glued it very well to reinforce the elastic tape much more.
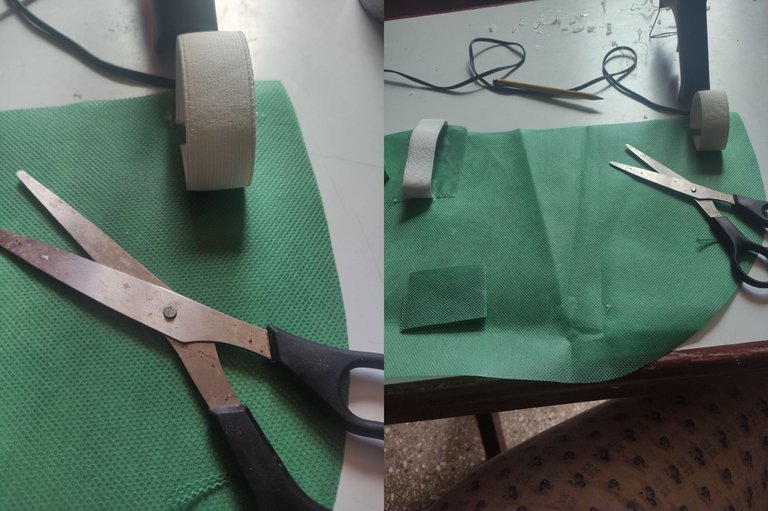
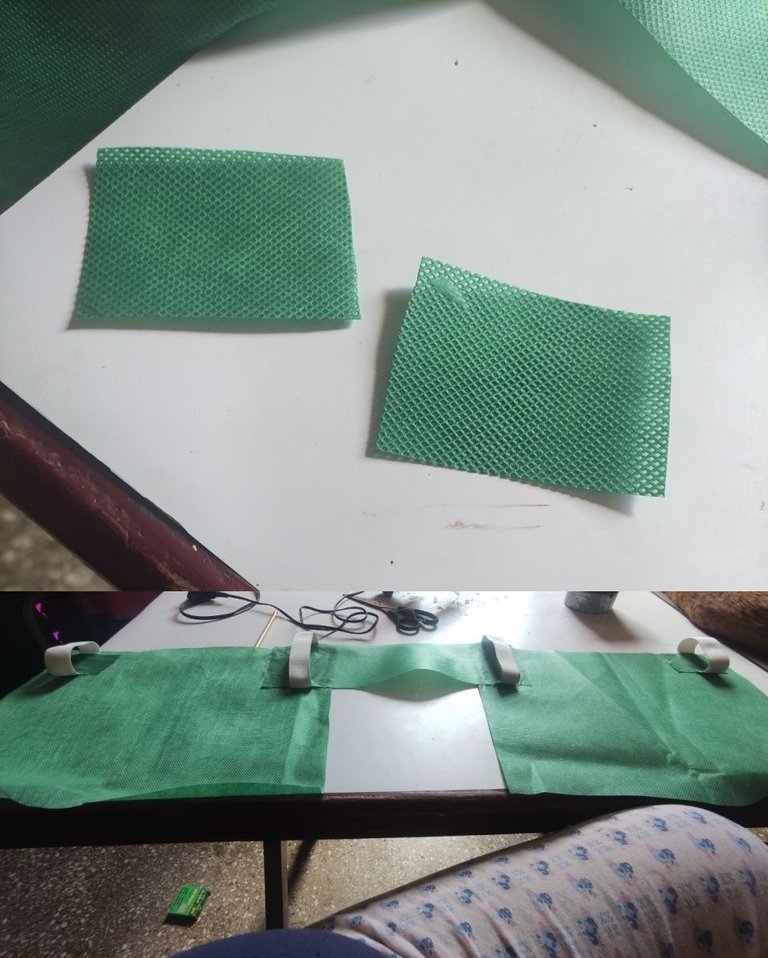
Then I had to glue two more elastic bands on the part where my son's wrists are supposed to go, so he would have more support when holding his wings.
Cut out two squares of POP fabric to cover the bands that go on the wrists and of course to make it more secure so it won't come off.
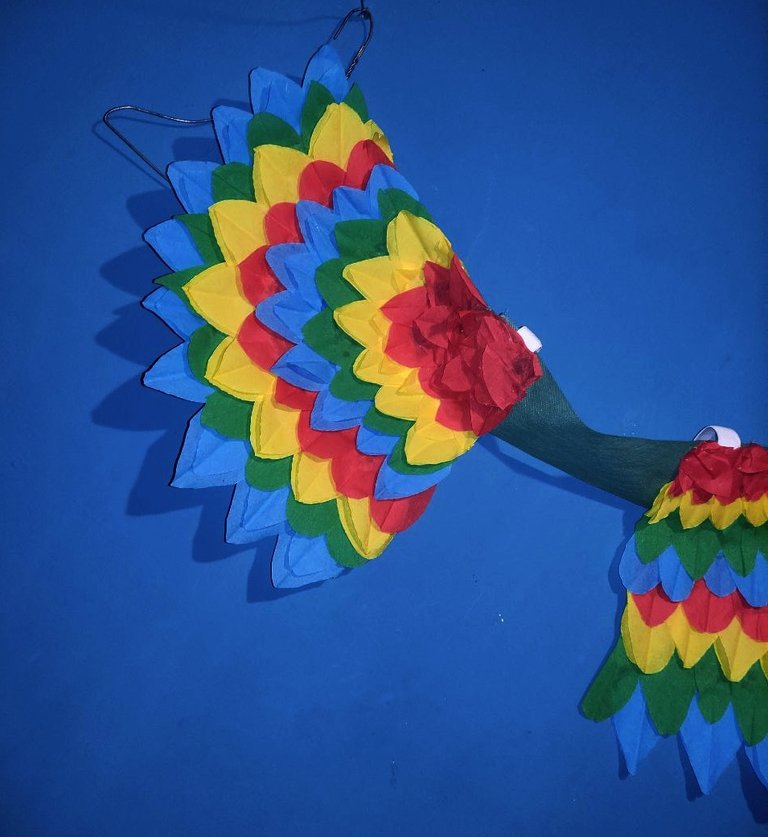
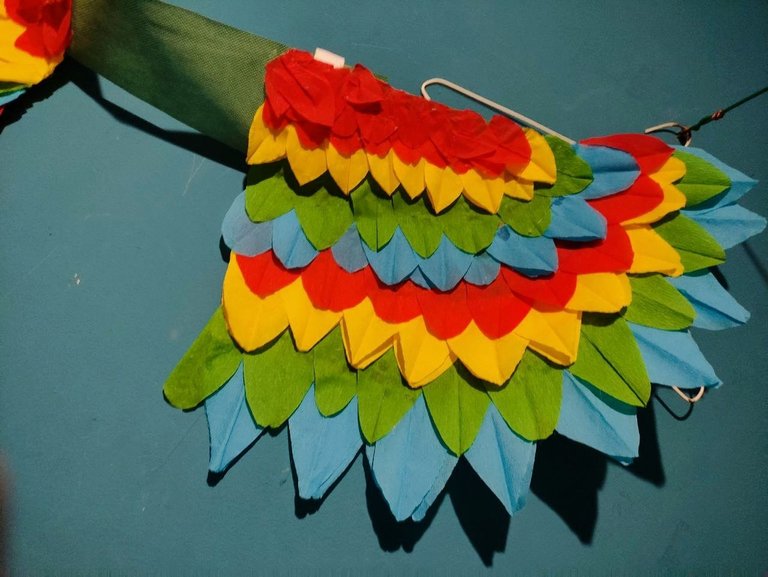
Ya tenía lista toda la base de las alas, asi que era hora de comenzar a recortar las plumas, tome el papel crepe doblado en varias capas y recorte la forma de las plumas con todos los colores que tenía, algunas más grandes que otras, comencé a pegarlas desde abajo empezando con el azul, las pegue con silicón caliente y como este azul era muy clarito y se veía medio trasparente, coloque dos capas de plumas azules para darle una mejor intensidad al color de las plumas.
I had the whole base of the wings ready, so it was time to start cutting the feathers, I took the crepe paper folded in several layers and cut out the shape of the feathers with all the colors I had, some bigger than others, I started gluing them from the bottom starting with the blue, I glued them with hot silicone and as this blue was very light and looked half transparent, I put two layers of blue feathers to give a better intensity to the color of the feathers.
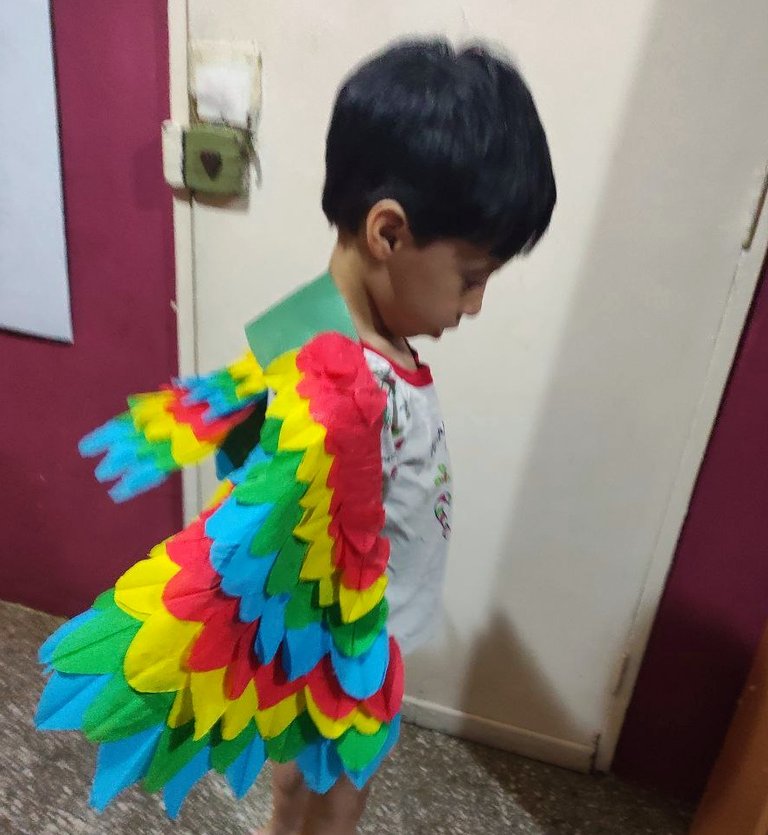
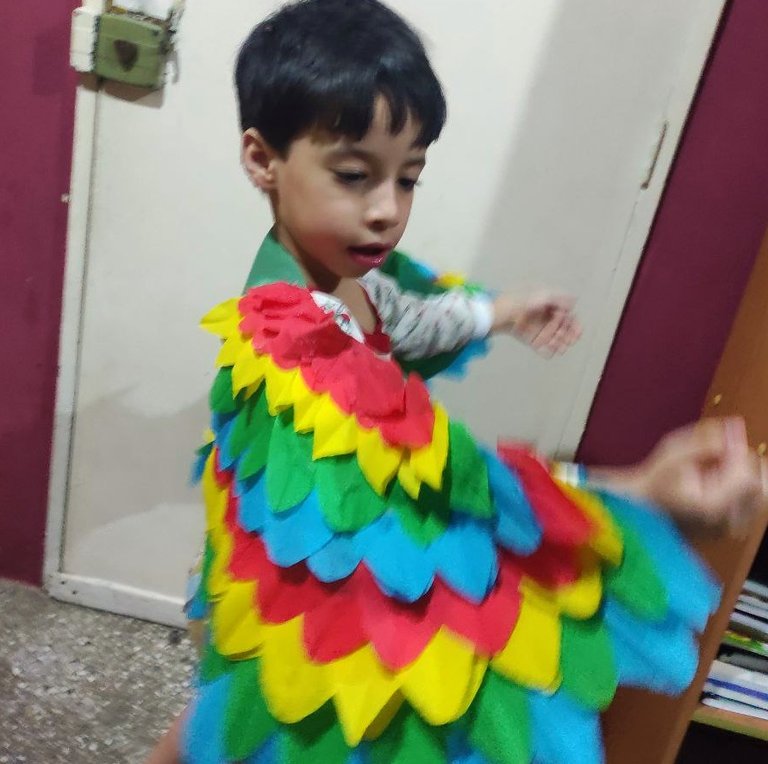
Then I glued the green feathers, followed by the yellow and red, then there was still a lot of space to cover so I had to follow the pattern starting again with the blue, so far so good but in this first wing, when I was almost finished I didn't know how to glue the feathers very well and I realized that when I made the second wing hahaha, the second one was perfect, the position of the feathers was more symmetrical and realistic compared to the first one, it was quite unequal in design each wing but I'm still happy with the result because it was something easier to do and very entertaining, besides that when I started I had no faith in these wings, luckily everything turned out well despite not being perfect.

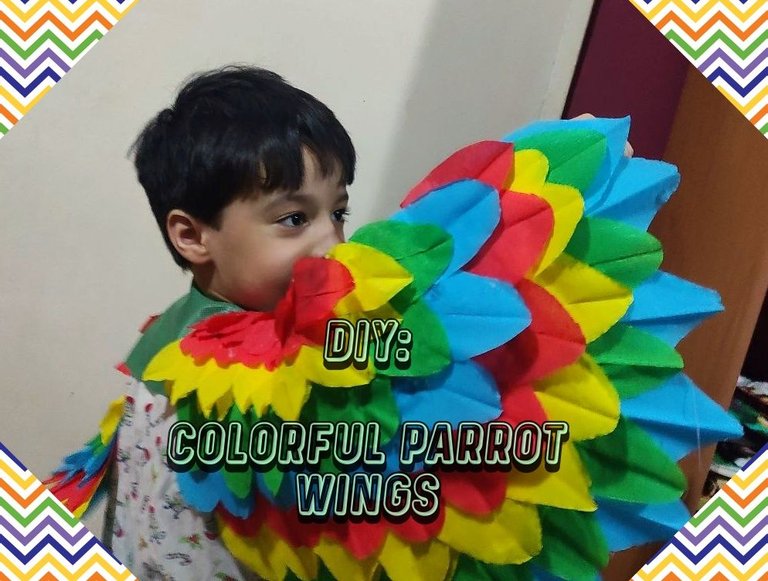
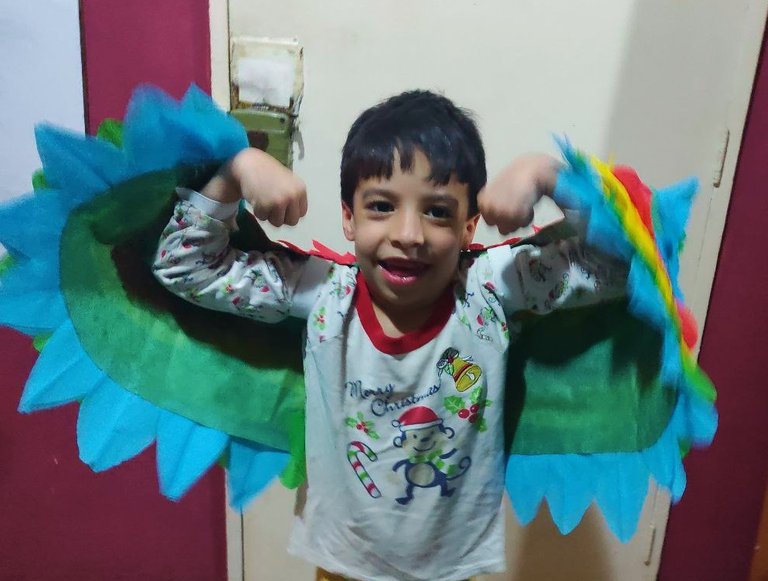
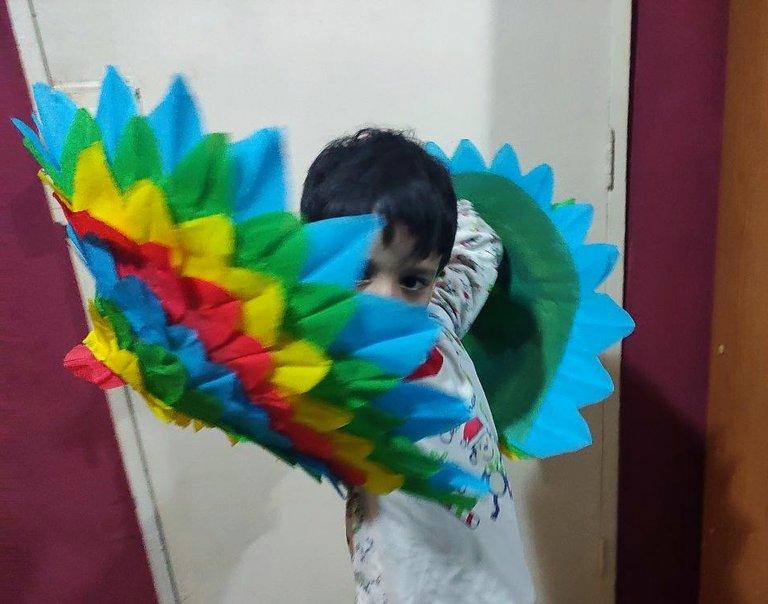
When I put them on my son I was very happy, I really thought it was going to be horrible, but it was quite nice even though the feathers are not symmetrical, I just need to make a hat or mask so we can completely see the whole costume, but I have not yet bought the materials I need to do it, soon I will be working on it, I hope you liked it and sorry for so much text, I'm not very good at explaining lol.

The wings turned out great! They look lightweight and easy to wear, plus super festive. Your son is lucky to have you for a mom!! 🥰
Aww thank u so much dear 😍
ooooh. Me encanto 😎!!! Felicidades 💛!!
Muchas gracias!
Incredible! Awesome work!
Thanks!
Hey Alexa! Just wanted to let you know that you won the Monthly MVP Medal for January over at gFam : https://gfam.live/blog/gfam-monthly-progress-report-january-2024. Your post did so so well!
omgg wait, what?
This is amazing, thank youuuu so much! i didn't even know about this 😁😁
Hahaha, surprise!!!!
I haven't publicized the report yet, I wanted you to know first.
@alexa.art - if you don't mind me asking... was there anything special that you did with your gfam post? Did you post the link to another website or social media or anything?
It looks like Google is sending traffic to that specific post, which is amazing... I'm just not really sure how that happened.
Hey @aussieninja I haven't really done anything, I just uploaded that post a month ago because I was pretty inactive at the time but I didn't even have any idea about this traffic thing 😅
I would also like to know what I did lol
Hahaha, that's what I assumed... I guess Google just picked it up and ran with it. Guess we were just weirdly lucky, haha. Thank you!
Que hermoso trabajo y a la vez complicado, me hace recordar mis tiempos cuando mi madre me hacía los disfraces 😍😍
Que lindo tu hijo le quedará hermoso ese traje de loro
Hola @maykit55 muchas gracias me alegra que te haya gustado, saludos😁
Hola amiga, un trabajo muy bonito y Perfecto para esta gran fecha de carnaval, eso de que pidan algo para el colegio, siempre ha existido y también pase por eso y mi mamá tenía que buscar algo para poder llevar. Sin duda esta manualidad es fascinante, donde cada detalle y la combinación de colores permite que sea muy llamativo, además le luce muy bien y todo ese trabajo de diseñar, cortar y medir, valió la pena. Éxitos.
Muchas gracias @davidpena21 en mis tiempos solo nos decian que fueramos disfrazados y se compraba o se hacia cualquier cosa jajaja ahorita ya exigen una tematica exacta pero igual es bueno por que uno aprende a hacer cosas diferentes
Saludos 🤗
https://twitter.com/hivediy47901/status/1755295439920697630