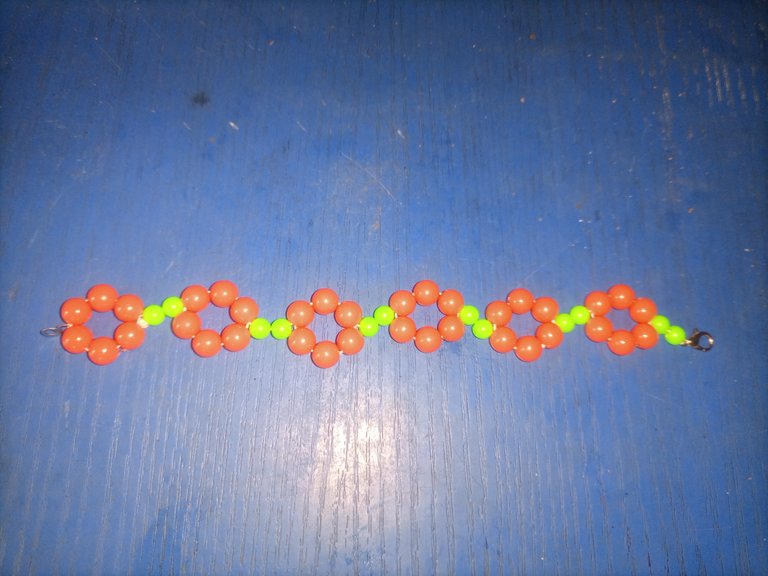
Improvement: My New Style of Bracelet Making (EGN-ESP) Mejora: mi nuevo estilo de fabricación de pulseras
If I tell you that I have not missed this community since this month, maybe I'm a liar. The creative 👍 people of the #jewelry community that I do meet here makes me more confident to keep creating new things. I tell you that I missed you all and I pray 🙏 to our God to give us long life to keep witnessing new ideas in the community and of course Hive in general.
From the day I started to make bracelets and other jewelry works was the day I understood that creativity never ends. What this implies is that the more I creat new jewelry works is the more I keep improving. No one started to make professional work in his or her skill in one day without improving from the scratch to the top. If I tell you that I'm not envy of those who make quality bracelets into the community, maybe I'll be a liar. This is why I'll have to put it to you that I want to be like other good authors and I have chosen to do that. Like I do say in my past posts, greetings to my friend and my jewelry mentor who in her own goodwill introduced me to have such skill. From the day my friend introduced me into bracelet making was the day I begin to have good motivation for creativity and i tell you, no regrets at all.
The bracelets we are going to be looking into today was made after I came back from the bush market. I do go into the bush market of other village location and buy food items from them and then bring them home for resale. I tell you that the sun 🌞 was much from today's market and it was the brain behind the bracelet. When I came back from the bush market which the sun bit me, I was lonely in the house as all my five children has been sent to school. I feel that the way forward for me to get busy in the house was to find a new idea to make a bracelet with. I tell you that's is how the idea of this bracelet was discovered.
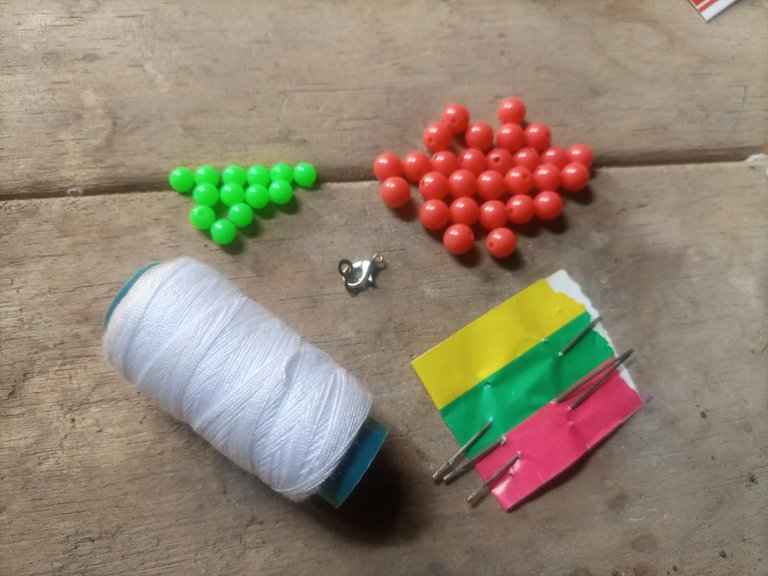
Materials
White thread 🧵.
Sewing pin 📌.
36 5mm orange ball bead.
12 2.5mm green ball bead.
Hook fo beads.
Methods
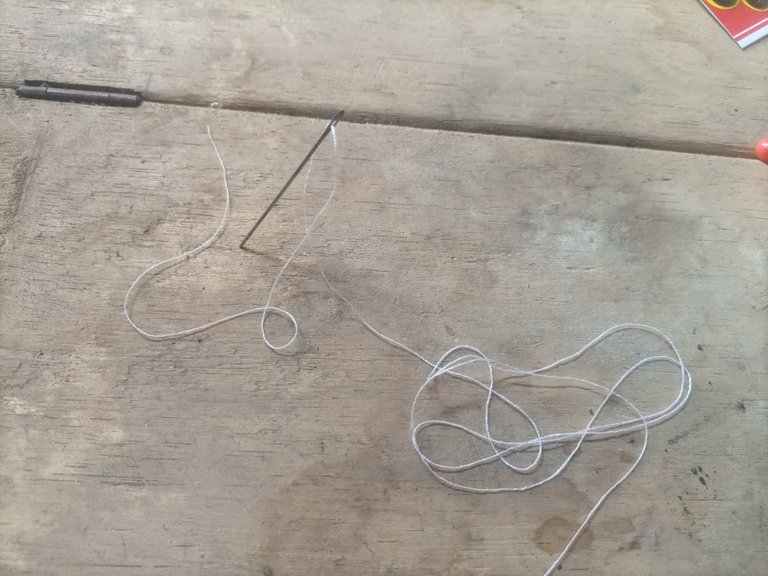
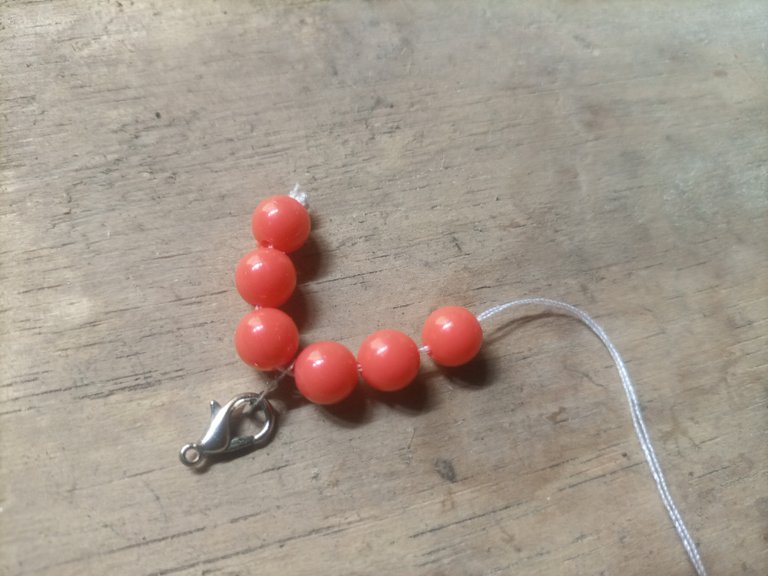
We may not be needing to spend much time with the bracelet making but go straight with the business of the day. I tell you that we have to bring out first white thread. We have to put the white thread through sewing pin 📌. Then what we have to do now is to join the white thread and tie it where it'll not lose from the sewing pin. We are to ensure that the white thread is tied very tight to make the beads not to unfold.
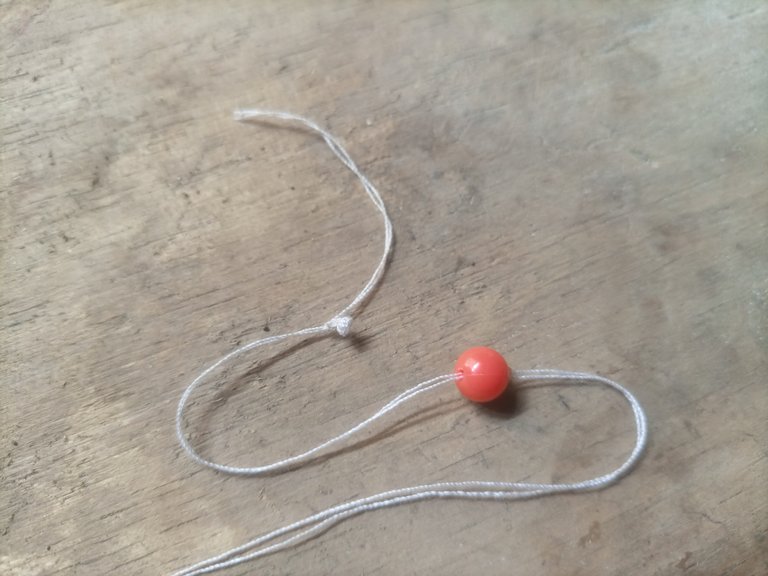

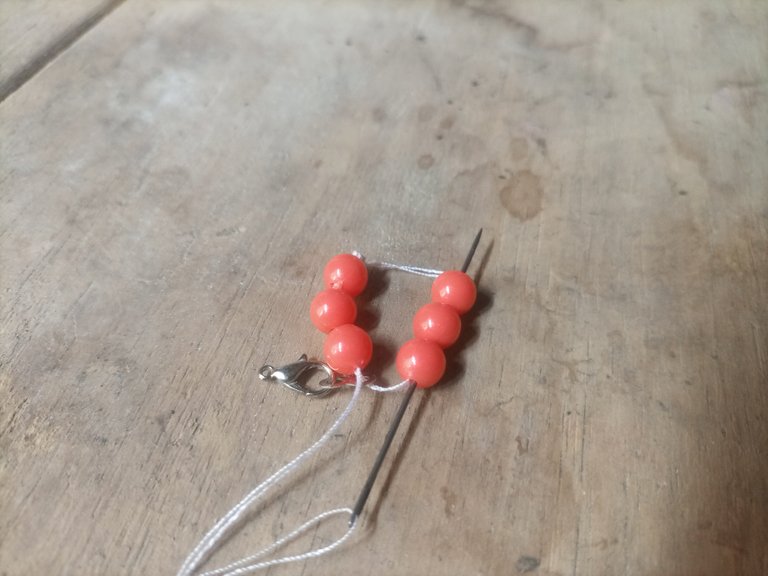
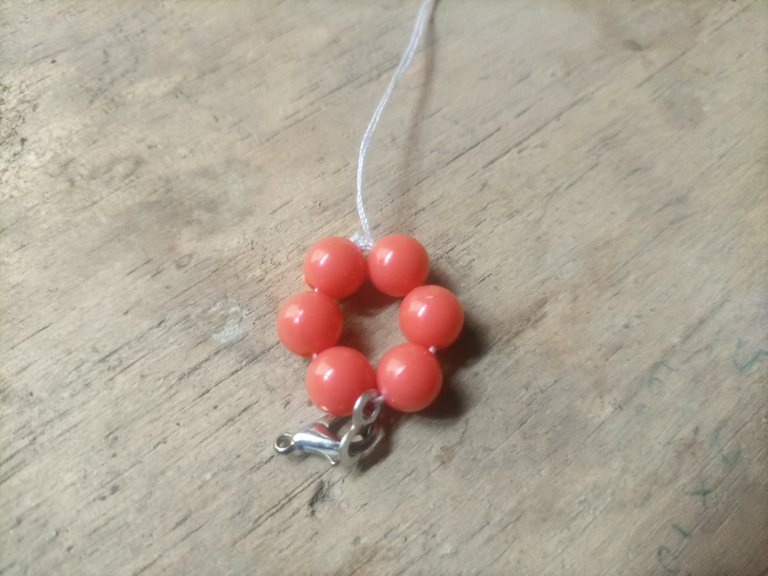
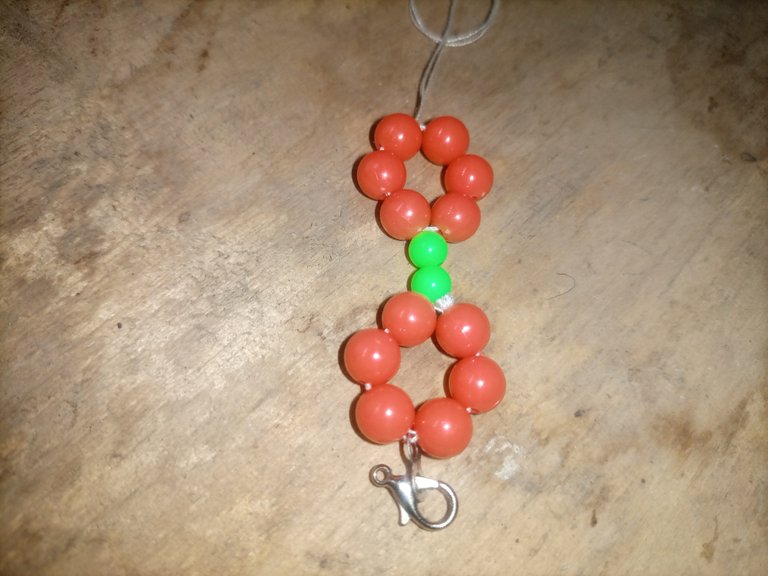
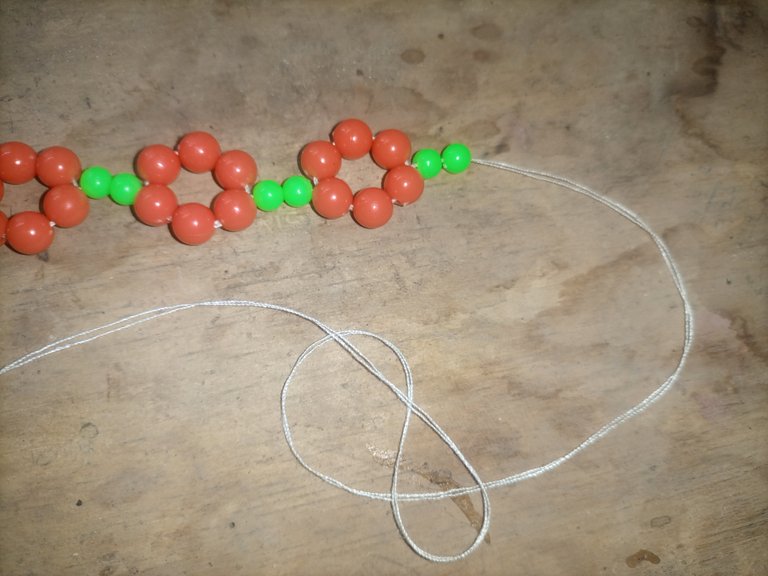
We are going to enter three orange ball bead to the white thread through the sewing pin 📌, enter bead hook, then enter another three orange ball bead. What we'll do now is to use the sewing pin to pass through the first orange ball bead we entered. Draw the thread using the sewing pin. When we succeeded in drawing the white thread we entered orange ball bead, it'll give us a round shape. We'll have to pass the pin again through three out of the six orange ball bead. This will make the thread to be at the center of the six orange ball bead.

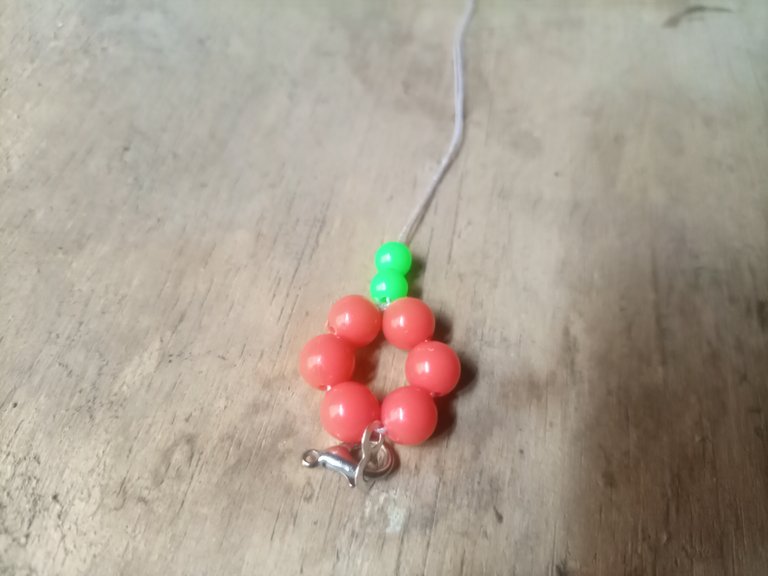
What we'll do now is to enter two green ball bead to the white thread. Count and enter another six orange ball bead. With the six orange ball bead entered, we'll have to repeat the above method we applied to keep the work going.
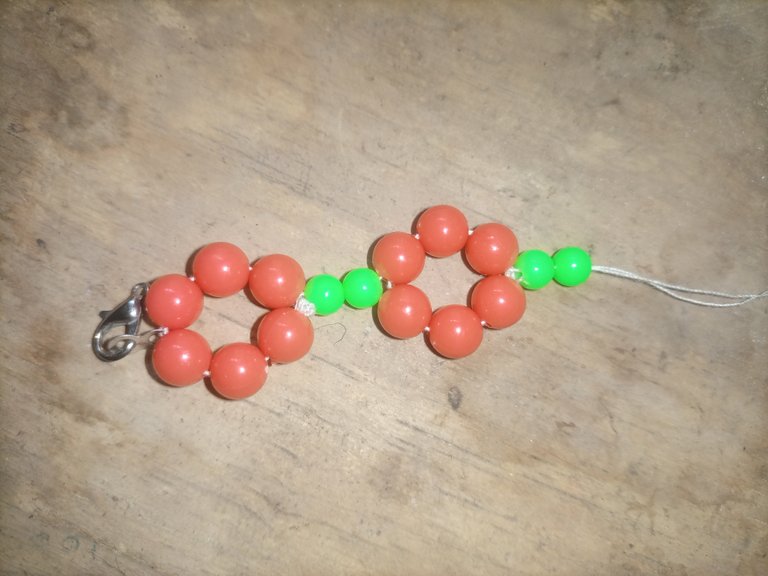
We move by counting and entering another two green ball bead to the white thread. Continue with the work by entering six orange ball bead to the white thread 🧵. Remember that the six orange ball bead will keep being in round shape like others.
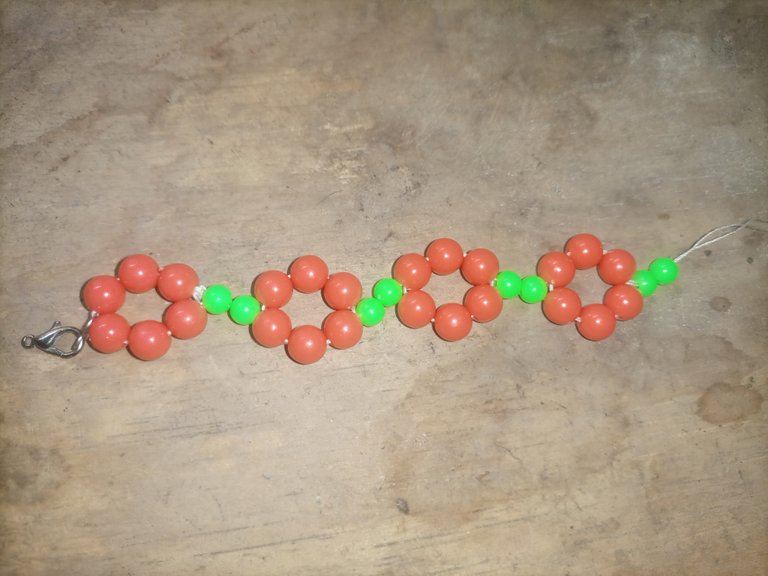
Keep moving by entering another two green ball bead to the white thread through the sewing pin 📌. Enter six orange ball bead to the white thread. Use the sewing pin and do what we have been doing by turning them into round shape.
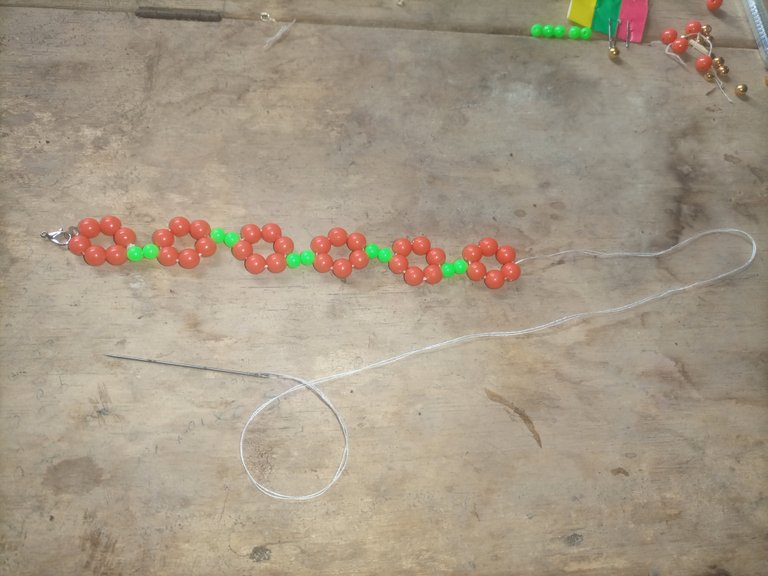
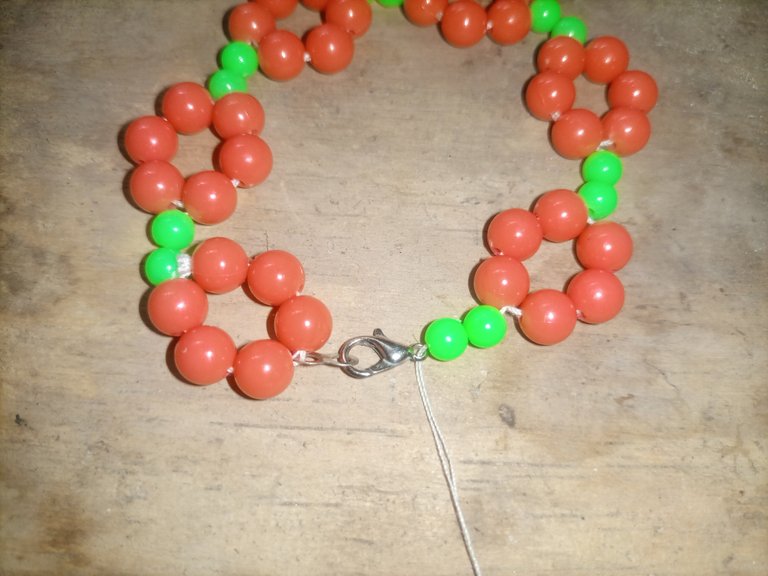
In total, we are to get at least six rounded shaped orange ball beads to the white thread and have six straight line row of green ball beads. As we have been able to succeed with the bracelet making, what we have to do is to enter the bead hook second holder through the last two green ball bead entered. Use the white thread to hold the bead hook.
SPANISH LANGUAGE TRANSLATION
Si te digo que no echo de menos esta comunidad desde este mes, tal vez te miento. Las personas creativas 👍 de la comunidad de #jewelry que conozco aquí me dan más confianza para seguir creando cosas nuevas. Les cuento que los extrañé a todos y pido 🙏 a nuestro Dios que nos de larga vida para seguir siendo testigos de nuevas ideas en la comunidad y por supuesto Hive en general.
Desde el día que comencé a hacer pulseras y otros trabajos de joyería fue el día que entendí que la creatividad nunca termina. Lo que esto implica es que cuanto más creo nuevos trabajos de joyería, más sigo mejorando. Nadie comenzó a hacer un trabajo profesional en su habilidad en un día sin mejorar desde cero hasta la cima. Si te digo que no envidio a los que hacen pulseras de calidad en la comunidad, tal vez sea una mentira. Por eso tendré que decirte que quiero ser como otros buenos autores y he elegido hacer eso. Como digo en mis publicaciones anteriores, saludos a mi amiga y mi mentora de joyería, quien en su propia buena voluntad me enseñó a tener tal habilidad. Desde el día en que mi amigo me introdujo en la fabricación de pulseras fue el día en que comencé a tener una buena motivación para la creatividad y les digo que no me arrepiento en absoluto.
Las pulseras que vamos a ver hoy se hicieron después de que regresé del mercado de arbustos. Voy al mercado de arbustos de otra ubicación del pueblo y les compro alimentos y luego los llevo a casa para revenderlos. Les cuento que el sol 🌞 estaba mucho del mercado de hoy y era el cerebro detrás de la pulsera. Cuando regresé del mercado de arbustos en el que me picaba el sol, estaba solo en la casa ya que todos mis cinco hijos habían sido enviados a la escuela. Siento que el camino a seguir para ocuparme de la casa era encontrar una nueva idea para hacer una pulsera. Te cuento que así se descubrió la idea de esta pulsera.
Materiales
Hilo blanco 🧵.
Alfiler de costura 📌.
Bola naranja de 36 5 mm.
12 bolas verdes de 2,5 mm.
Gancho para cuentas.
Métodos
Es posible que no necesitemos dedicar mucho tiempo a la fabricación de pulseras, sino que vayamos directamente al negocio del día. Te digo que primero tenemos que sacar el hilo blanco. Tenemos que pasar el hilo blanco por el alfiler 📌. Entonces lo que tenemos que hacer ahora es unir el hilo blanco y atarlo donde no se suelta del alfiler. Debemos asegurarnos de que el hilo blanco esté muy apretado para que las cuentas no se desprendan.
Vamos a introducir tres bolitas naranjas al hilo blanco a través del alfiler 📌, introducir el gancho de bolitas, luego introducir otras tres bolitas naranjas. Lo que haremos ahora es usar el alfiler para pasar a través de la primera bola naranja que ingresamos. Dibuja el hilo usando el alfiler de costura. Cuando logramos dibujar el hilo blanco, ingresamos la cuenta de bola naranja, nos dará una forma redonda. Tendremos que volver a pasar el alfiler por tres de las seis bolas naranjas. Esto hará que el hilo esté en el centro de la cuenta de seis bolas naranjas.
Lo que haremos ahora es introducir dos bolas verdes en el hilo blanco. Cuente e ingrese otra cuenta de seis bolas naranjas. Con la cuenta de seis bolas naranjas ingresada, tendremos que repetir el método anterior que aplicamos para continuar con el trabajo.
Avanzamos contando e introduciendo otras dos bolas verdes de talón al hilo blanco. Continuar con el trabajo introduciendo seis bolitas naranjas al hilo blanco 🧵. Recuerde que la cuenta de seis bolas naranjas seguirá estando en forma redonda como otras.
Sigue moviéndote introduciendo otras dos bolitas verdes al hilo blanco a través del alfiler 📌. Introduce seis bolas naranjas en el hilo blanco. Usa el alfiler y haz lo que hemos estado haciendo dándoles forma redonda.
En total, debemos obtener al menos seis cuentas de bolas naranjas de forma redondeada en el hilo blanco y tener seis filas rectas de cuentas de bolas verdes. Como hemos podido acertar con la confección de la pulsera, lo que tenemos que hacer es introducir el segundo soporte del gancho de la cuenta a través de las dos últimas bolas verdes introducidas. Use el hilo blanco para sostener el gancho de cuentas.
Step by step we will always learn new things @agbogo, since you came to the community your progress has been noticed! and that's the most beautiful thing we are together to learn, grow and move forward ....
Thank you very much. I'm solidly behind learning new things.
Yay! 🤗
Your content has been boosted with Ecency Points, by @agbogo.
Use Ecency daily to boost your growth on platform!
Support Ecency
Vote for new Proposal
Delegate HP and earn more